9
3.
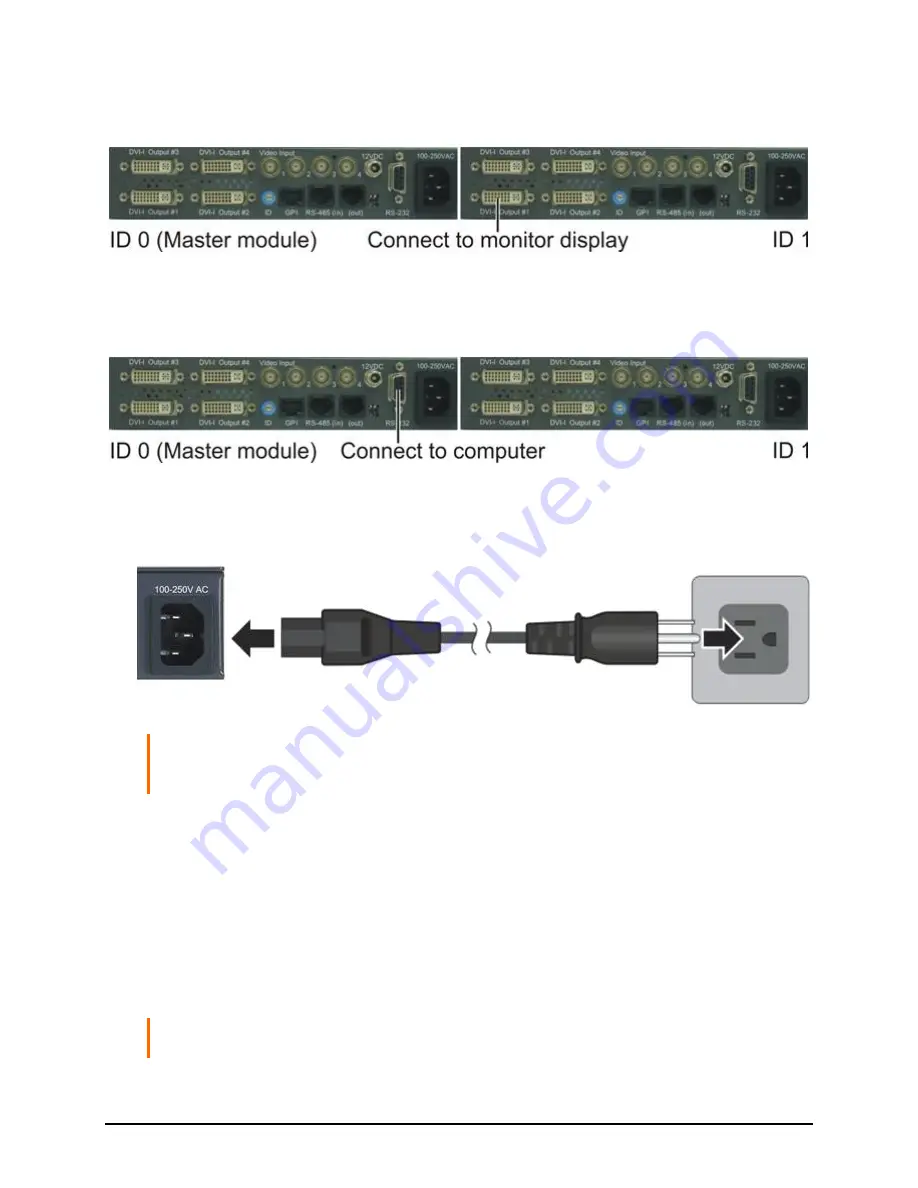
Connect one end of the DVI cable to the
DVI-I Output #1
/
2
/
3
/
4
port of the
last cascaded MCC-8001U and the other end to the monitor display.
4.
Connect one end of the RS-232 cable to the computer’s RS-232 port and the
other end to the
RS-232
port of MCC-8001U ID 0 (Master module).
5.
Connect the power cables to the Avitech multiviewer modules and make
sure that power is available.
IMPORTANT:
When cascading with MCC-8004 module, the MCC-8001U becomes slave
to the MCC-8004 so make sure to set the baud rate of the MCC-8001U to 57600 bps before
cascading (see the later section for instructions on setting the baud rate).
1.6
Using the Phoenix-G Software
The Phoenix-G configuration software is designed for all Avitech multiviewer
modules. This program requires no installation, and should not be run from a
“read-only” device, such as an optical disc. This section introduces the
Phoenix-G software for setting up your system.
NOTE:
Make sure the MCC-8001U is powered on and connected properly to your
computer (see previous section) before launching the Phoenix-G software.
Summary of Contents for MCC-8001U
Page 1: ...User s Manual MCC 8001U Revision 1 3 2 May 2012 ...
Page 12: ......
Page 28: ...16 Settings Menu ...
Page 60: ...48 Click Save The next screen shows the text file opened using Notepad Help Menu ...
Page 74: ...62 To save to flash perform the following steps 1 Click Save File in the Option window ...
Page 76: ...64 2 Click Save File in the Option window ...
Page 78: ...66 Loading File 1 In the Option menu click Load File ...
Page 79: ...67 2 Select a saved file and then click OK to load the preset ...
Page 80: ...68 Making Adjustments 1 In the Option menu click Adjustment ...


