Avid S6 Installation Guide
70
4
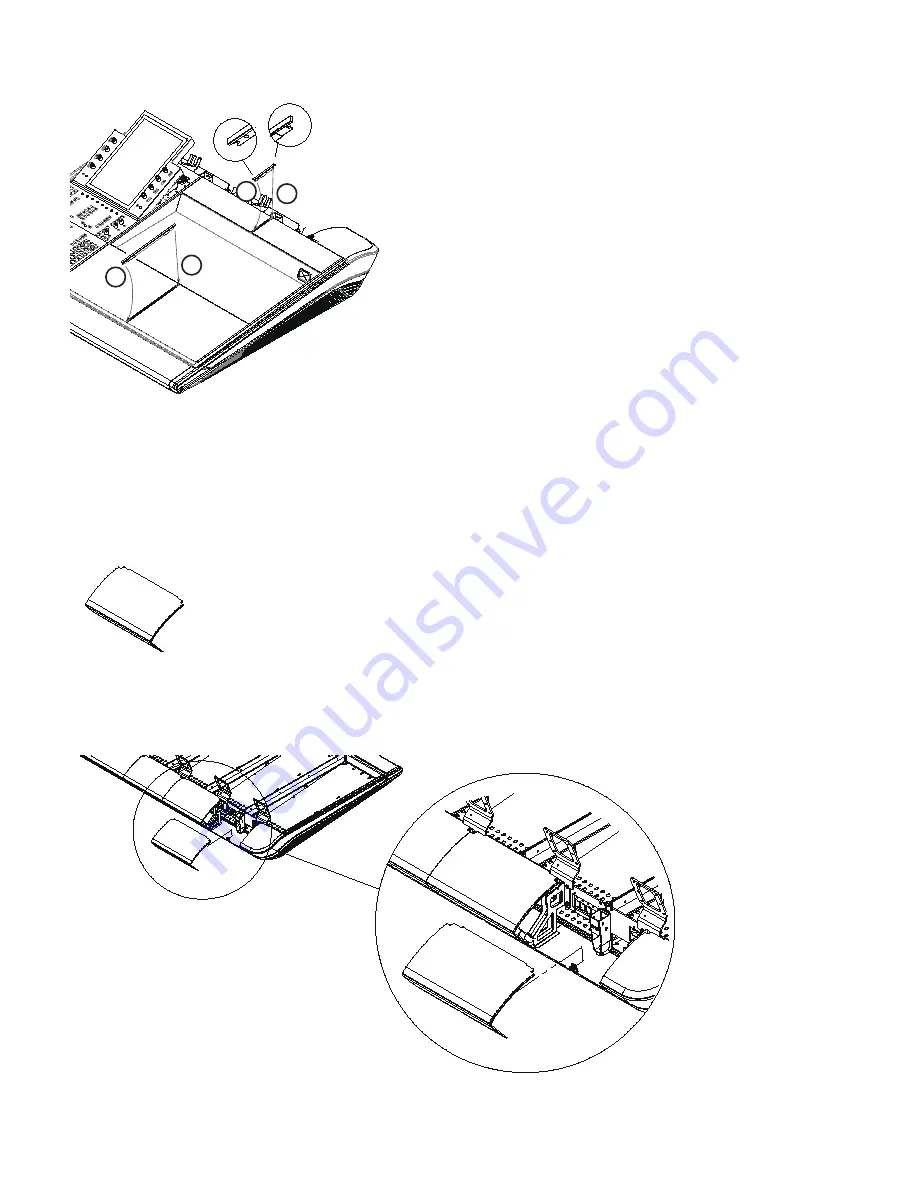
If your system includes a Producers Desk, install its two-piece T-strip as shown in Figure 50.
5
If you need to remove T-strips, start at the top (back) and use a small flat-head screwdriver or similar tool to push down on the
tab that holds the T-strip in place, then lift the strip out.
Attaching the Upper Rear Covers
The upper Rear Covers have open corners to guide power and Ethernet for Display Modules (if your system includes Display Mod-
ules), and cutouts to support S6 Options (such as the VESA monitor mount).
To install the upper Rear Covers:
1
Take one of the upper Rear Covers and, starting at the far left of the frame, lower it into place so that its mounting screw lines
up with the receiver on the bracket, then secure its thumb-screw into the threaded receiver on the Rear Cover Mounting Bracket.
Figure 50. Installing T-strips in the Producers Desk
Figure 51. Upper Rear Covers
Figure 52. Attaching the Upper Rear Cover (Display Module cables not shown)
1
2
1
2
Summary of Contents for Pro Tools S6 Master Post Module
Page 1: ...Avid S6 Installation Guide ...
Page 4: ......
Page 7: ...Part I Introduction ...
Page 8: ......
Page 19: ...Part II Frames ...
Page 20: ......
Page 39: ...Part III Modules ...
Page 40: ......
Page 58: ...Avid S6 Installation Guide 50 ...
Page 74: ...Avid S6 Installation Guide 66 ...
Page 80: ...Avid S6 Installation Guide 72 ...
Page 81: ...Part IV Appendices ...
Page 82: ......
Page 91: ......


