Chapter 5: Installing Power and Connectivity
41
4
Locate the power cables included in each PSU box and set them aside.
5
Locate the special (C14) cables included in the Bolster package.
6
Connect the appropriate end of the power cables from the Bolster package to the PSU (repeat for all PSUs).
7
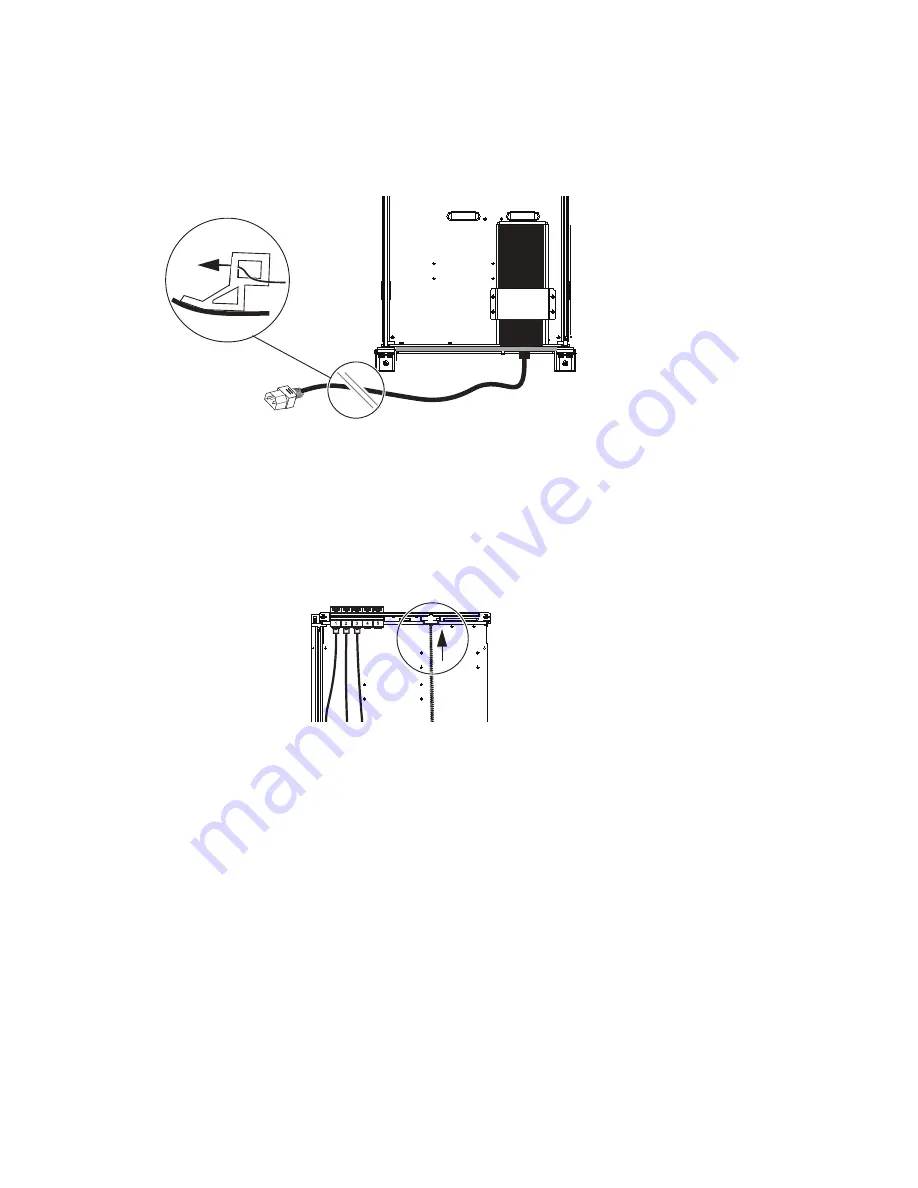
Feed the other end of the AC cables through the opening in each Back Tie Plate and run them through the upper (square) cable
guide openings in the Rear Panel as shown in Figure 18.
8
Plug each PSUs AC cable into an available socket on the Power Strip you installed at the beginning of this chapter.
Reconnect the Power Cable Harness to Each Chassis
After all Ethernet and PSU power cables are installed, reconnect each power harness to its chassis power terminals as shown in
Figure 19.
Figure 18. Feeding the cable through the Back Tie Plate and connecting it to the PSU (Ethernet switch not shown)
Figure 19. Reconnecting Power harness (switch and PSUs not shown)
Summary of Contents for Pro Tools S6 Master Post Module
Page 1: ...Avid S6 Installation Guide ...
Page 4: ......
Page 7: ...Part I Introduction ...
Page 8: ......
Page 19: ...Part II Frames ...
Page 20: ......
Page 39: ...Part III Modules ...
Page 40: ......
Page 58: ...Avid S6 Installation Guide 50 ...
Page 74: ...Avid S6 Installation Guide 66 ...
Page 80: ...Avid S6 Installation Guide 72 ...
Page 81: ...Part IV Appendices ...
Page 82: ......
Page 91: ......


