Chapter 3: Removing Modules and Disconnecting Cabling
11
Chapter 3: Removing Modules and Disconnecting
Cabling
This section explains how to remove modules and cables.
It is recommended that you remove all modules and Cable Sets from the system before disassembling a frame to move it or to ex-
pand it. Chassis cannot be detached without removing modules from at least one chassis, but it is safer to remove all modules. Do-
ing so makes it easier and safer to move the disassembled frame sections, and protects modules and cables from risk of damage.
Removing Modules
After removing upper Rear Covers, T-strips and compression panels as described in
Chapter 2, “Initial Disassembly”
, you can
remove modules.
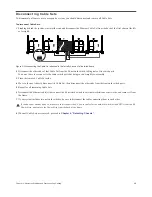
Remove modules by doing the following:
1
Make sure you have a padded tabletop or other flat surface to place each module as it is removed. Try to arrange removed mod-
ules in the same order and relative positions as they are in the assembled system to simplify reinstalling them later.
2
If your system includes Display Modules, remove them first (see
“Removing Display Modules” on page 9
) and place them
on the table face down.
3
Beginning with the top module (usually a Knob Module), remove each by lifting them out of their chassis. Be careful not to
strain the power or Ethernet cables.
4
Disconnect power, Ethernet and any other cables connected to the module (such as Talkback and KVM). A Master Module has
two Ethernet and two power connections.
5
Set each module aside.
6
Repeat for all other modules.
When removing a Master Module, note which back panel Ethernet port (1 or 2) it is connected to, unless it will be connected in
a different network configuration after reassembly.
Summary of Contents for Pro Tools S6 Master Post Module
Page 1: ...Expanding an S6 System ...
Page 4: ...Part I Introduction ...
Page 9: ...Part II Disassembly ...
Page 30: ...Part III Appendix ...
Page 33: ......


