


H323 Telephone Installation
Page 36
Issue 23e (Friday, February 15, 2019)
IP Office™ Platform 11.0
Comments on this document? [email protected]
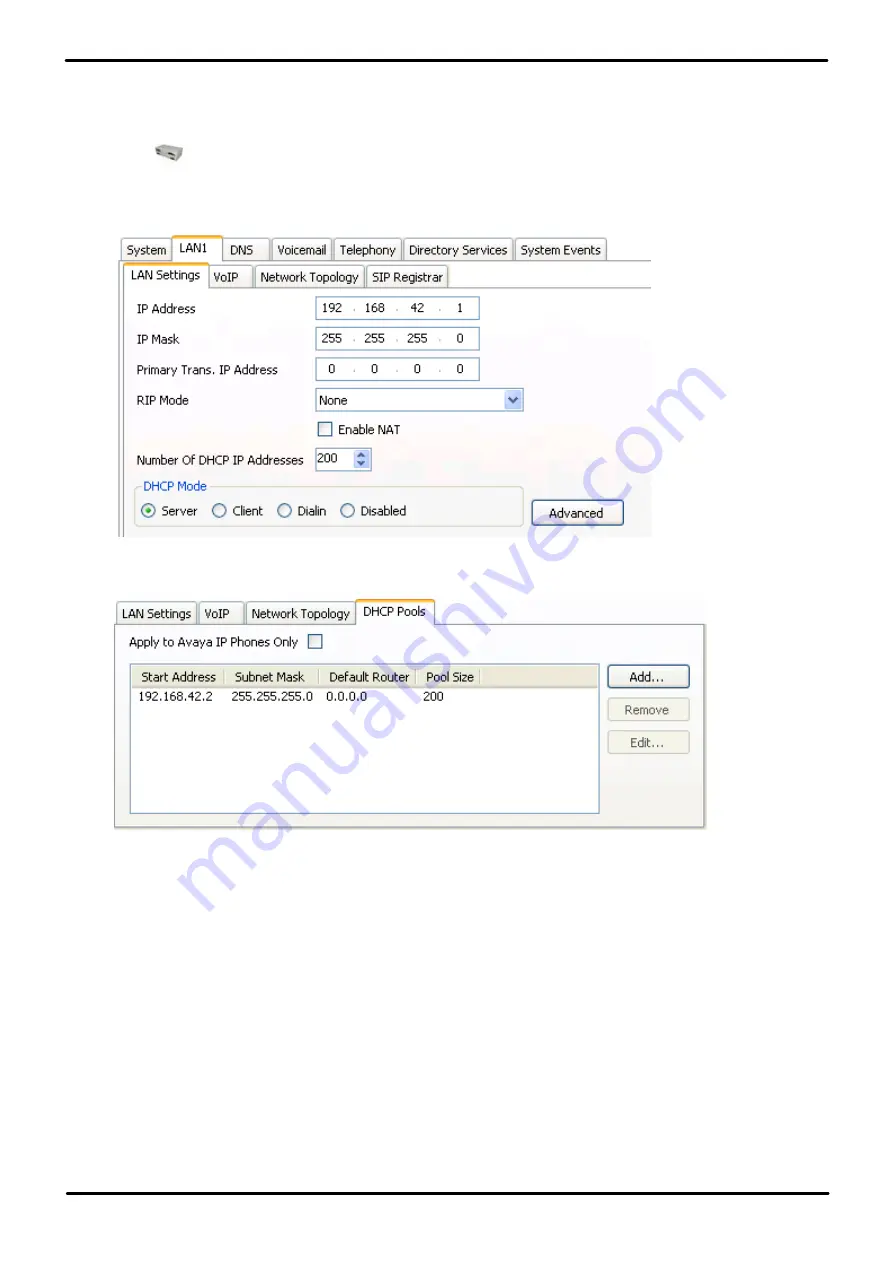
2.3.1 System DHCP Support
To change the system's DHCP settings:
1. Using IP Office Manager, retrieve the configuration from the system.
2. Select
System
.
3. Select the
LAN1
or
LAN2
tab depending on which of the system's LAN interfaces you want to use to support
H.323 extensions.
4. Select the
LAN Settings
tab.
5. If the
DHCP Mode
is set to
Server
, the
Number of DHCP IP Addresses
value set how many IP addresses the
system can issue. Those addresses use the IP Address of the system as the starting point.
6. Click the
Advanced
button or select the
DHCP Pools
tab if already visible.
a. The settings on this tab allow adjustment of the DHCP setting including adding multiple ranges of DHCP
numbers that the IP Office system can support. Note that address ranges outside those of the IP Office
systems own subnet may also require the creation of appropriate IP routes to ensure traffic routing between
the subnets.
·
Note: Changes to the DHCP pools do not require a reboot of the IP Office system. However, they will
cause a reboot of Avaya H323 and SIP telephones connected to the system. Non-Avaya IP phones are not
rebooted but may need to be manually restarted in order to obtain a valid address from the new pools
configuration.
b. If the
Apply to Avaya IP Phone Only
option is selected, the IP Office will act as a DHCP server for Avaya
phones only. This option cannot be used if also supporting 1100 Series and 1200 Series phones.
7. If the settings have been changed, save the configuration back to the system.