


INSTALLATION
Avaya 9130 1000–3000 VA UPS Site Preparation, Installation and Operator’s Manual
S
164201765 Rev 1
30
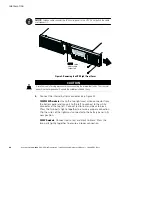
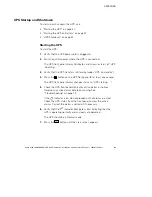
9.
Check the UPS front panel display for active alarms or notices.
Resolve any active alarms before continuing. See
“Troubleshooting” on page 79.
If the
indicator is on, do not proceed until all alarms are clear.
Check the UPS status from the front panel to view the active
alarms. Correct the alarms and restart if necessary.
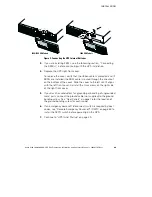
10.
Verify that the
indicator illuminates solid, indicating that the
UPS is operating normally and any loads are powered.
The UPS should be in Normal mode.
11.
Press the
ESC
button until the start screen appears.
12.
If optional EBMs are installed, see “Configuring the UPS for EBMs”
on page 46 to set the number of installed EBMs.
13.
To change any other factory-set defaults, see “Operation” on
page 33.
NOTE
Avaya recommends setting the date and time.
NOTE
At initial startup, the UPS sets system frequency according to input line frequency
(input frequency auto-sensing is enabled by default). After initial startup, auto-sensing is
disabled until manually re-enabled by output frequency setting.
NOTE
At initial startup, input voltage auto-sensing is disabled by default. When manually
enabled by output voltage setting, at the next AC startup the UPS sets output voltage
according to input line voltage. After the subsequent startup, auto-sensing is disabled until
manually re-enabled by output voltage setting.
14.
If you installed an optional REPO, test the REPO function:
Activate the external REPO switch. Verify the status change on the
UPS display.
Deactivate the external REPO switch and restart the UPS.