


AS-1585 SH
Installation Guide
P. 23
Note:
Installation of the Starter Kill system requires an external relay.
(Not included!)
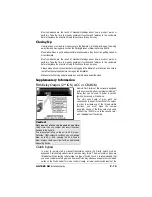
Passive or Active Arming
(Passive arming by default.)
The Remote Car Starter can be set to:
x
Active Arming
: the Starter Kill will
not
arm automatically. Press the
LOCK
button to
arm and the
UNLOCK
button to disarm it.
x
Passive Arming:
the Starter Kill will arm automatically if it is not armed by remote
within a 60-sec. delay. Press
UNLOCK
to disarm.
x
Passive Arming
with 3-minute timeout: the Starter Kill will arm automatically after
3 minutes.
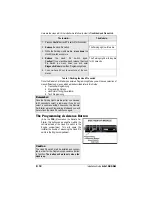
Resetting the Remote Car Starter
The Remote Car Starter is equipped with a reset function that allows the installer to erase all
Transmitter codes from memory and return all the Programming Options to the factory
default values.
Resetting the Remote Car Starter is not a required process. Most of the time, you can avoid
resetting by fixing the issue directly at the root of the cause.
1.
Flash the Hood Pin switch (see Table 1)
– Once inside Programming Mode, you have 10 seconds to complete the next step.
2. Press and release the Break Pedal 6 times (within 10 seconds from entering
Programming Mode).
3. The
Parking Lights will flash 8 times
to confirm resetting.
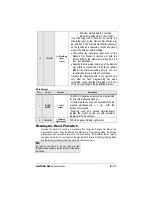
Table 10: Resetting without a Valet Button
On some vehicles (such as BMW and certain Volkswagen vehicles), resetting will not work if
the Brake Pedal is pressed while the Ignition Key is
not
in the
IGNITION ON (RUN)
position: you
will need therefore to hot-wire the Brake Pedal by manually jumping 12 V with a fused test
lead at the Brake Pedal switch.
1.
Flash the Hood Pin switch (see Table 1)
– Once inside Programming Mode, you have 10 seconds to complete the next step.
2. Press and release the Valet Button 6 times or more until the Parking Lights start to
flash.
3. The
Parking Lights will flash 8 times
to confirm resetting.
Table 11: Resetting with the Valet Button
Events Logging
With this feature, the Remote Car Starter will play back the last 4 Start Failure Events
Codes and the last Intrusion Code via the Parking Lights or L.E.D.
Events playback
Ensure that the Hood is up, that the vehicle is not in Valet Mode and that the Ignition is
OFF
.
x
Hold down the Hood Pin-switch for 4 seconds.
x
Release the Pin-switch.
The Parking Lights will come on.
x
While the Parking Lights are on, immediately push the Pin-switch 3 more times
(
down-up / down-up / down-up
).
The Parking Lights and L.E.D. will flash the five events stored in memory.
Table 12: Events playback


