background image

P. 18


Installation 

Guide

 AS-1585 SH

4. Remove the key: the Engine will go on running. 

5. Exit the vehicle and close the Door. 

6. Press and hold either: 

a.

LOCK

 to lock the Doors and shut down the Engine or enter Turbo Mode ; 

b.

UNLOCK

 to unlock the Doors and shut down the Engine or enter Turbo Mode ; 

c.

STOP

 to shut down the Engine without affecting the Doors. 

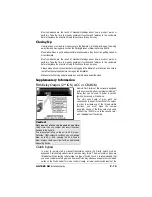
Table 7: entering Ready Mode 

Remaining in ready Mode 

Once the vehicle is in Ready Mode, you can start and stop the vehicle at wish. 
However, should any one of the following occur, the vehicle will exit Ready Mode, thus 
disabling remote start capabilities until Ready Mode is restored: 

x

Door opened, 

x

Hood opened, 

x

Brake pedal pressed, 

x

Parking Brake disengaged, 

x

Ignition Key turned to the 

IGNITION ON (IGNITION ON / RUN)

 position. 

Should any of the above occur, Ready Mode will be cancelled. 

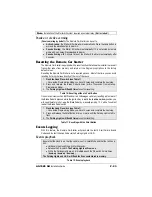
Table 8: remaining in Ready Mode 

‰

Remote-start the Engine and listen for Starter drag. 

If the Starter cranks for too long, 

carry out another Tach Programming procedure. 

‰

Hood Switch shutdown.

 with the vehicle running under the Remote Car Starter, open 

the Hood; the vehicle should shut down. If it does not shut down, check the Hood Pin-
switch and its connector. 

‰

Brake shutdown circuit.

 With the vehicle running under the Remote Car Starter, press 

and release the Brake Pedal. The Engine should shut down immediately. If the Engine 
continues to run, check the Brake Switch connection. 

‰

Parking Brake shutdown circuit.

 With the vehicle running under the Remote Car 

Starter, disengage the Parking Brake. The Engine should shut down immediately. If the 
Engine continues to run, check the Parking Brake Switch connection. 

‰

Door Pin shutdown circuit. 

Make sure the Remote Car Starter 

exits Ready Mode

when each Door is opened while the vehicle is running under a Remote Start. (Test 
each door.) 

‰

OEM Alarm Control.

 Make sure the Module is able to arm and disarm the OEM Alarm 

(if applicable). 

‰

Door Locks and Trunk Testing. 

Make sure each of these options respond to the 

Transmitter (if installed).

‰

Starter Kill option.

 Sit inside the vehicle with all Doors closed. Arm the vehicle, then try 

to start the Engine with the Key. They Engine should not start. If the Engine starts, 
rewire the Starter Kill to reach proper operation.

‰

Valet Mode.

 Make sure the Remote Car Starter is able to properly enter and exit Valet 

Mode. When setting the Remote Car Starter  into Valet Mode, pressing the Lock button 
will lock the Doors without activating the Starter Kill. (Refer to the User Guide for further 
information on Valet Mode.)  

‰

Idle Mode.

 Make sure the Vehicle properly enters and exits Idle Mode.

Summary of Contents for AS-1585 SH

Page 1: ...lease note that this guide has been written for properly trained Autostart technicians a certain level of skills and knowledge is therefore assumed Please review the Installation Guide carefully befor...

Page 2: ...ight Flash Table 25 Introduction This Guide contains all the information relevant and necessary for the installation of the Remote Car Starter Most of the features of this product are explained in the...

Page 3: ...leave a window open Never leave the keys in the car Leave them on a workbench with a window rolled down If possible remove courtesy light fuse to prevent battery drain The PROGRAMMING ASSISTANCE BUTTO...

Page 4: ...nections Should the Unit be powered up before being grounded there could be serious damage to internal components of the Unit Be careful not to power up a Remote Car Starter before it is properly grou...

Page 5: ...h of certain vehicles there may be more than one Ignition wire for powering the Heater Blower Motor Use the 5th relay Pin F and extra relays to power up any extra Ignition wires if necessary Do not ju...

Page 6: ...This wire must have 12 V only when the Brake Pedal is down This input will shut down the Remote Starter if the Brake Pedal is pressed This wire provides a 12 V output and must be connected on the vehi...

Page 7: ...ltaneously It is essential that the Remote Car Starter be connected in such a way as will allow each one of the Doors to turn off Ready Mode the driver side Door Pin does not constitute by itself a su...

Page 8: ...s enabled UNLOCK pulse s will be sent with DISARM a LOCK pulse and a REARM pulse will be sent when the Trunk is closed or if the Trunk was left closed Option 2 Default Engine Start Stop The first Grou...

Page 9: ...s essential that the Remote Car Starter be connected in such a way as will allow each one of the Doors to turn off Ready Mode the driver side Door Pin does not constitute by itself a sufficient connec...

Page 10: ...The Remote Car Starter will only accept positive Glow plug input signals therefore negative Glow Plugs should only be connected using relays to invert the polarity A diode must be added between the n...

Page 11: ...the very last steps in the installation process 2 Pin Harness Wire Colour Function Description 1 BLUE WHITE AUX 2 output This 500 mA negative output can be programmed for one of the following Options...

Page 12: ...fferent sub menus which will be described later in this Guide a Transmitter Programming b Programming Options c Honk Horn Timing if available d Tach Programming Remember Once the Parking Lights are ON...

Page 13: ...es quickly The Remote Car Starter has stored the code of the Transmitter into memory 3 To exit close the Hood Table 2 Programming a Transmitter To program a Transmitter on the second vehicle for Multi...

Page 14: ...e selected Option Please note that the different Functions within any particular Mode can only be accessed sequentially the Programming Centre will move from Function 1 to Function 2 then to Function...

Page 15: ...h 4 minute Run Time in Cold Weather Mode OPTION 3 Diesel Mode with 9 minute Run Time in Cold Weather Mode FUNCTION 5 Ignition Valet OPTION 1 Ignition Valet DISABLED OPTION 2 Ignition Valet ENABLED OPT...

Page 16: ...e Tach signals of certain Ignition systems are sometimes too low or too high for the Remote Car Starter causing failed start ups at various temperatures 1 Flash the Hood Pin switch see Table 1 The Par...

Page 17: ...the pulse by 10 ms press the TRUNK button 5 To save the new settings press LOCK and UNLOCK If 3 honks are returned the new settings have been saved Table 9 Adjusting Honk Duration Otherwise close the...

Page 18: ...Brake shutdown circuit With the vehicle running under the Remote Car Starter press and release the Brake Pedal The Engine should shut down immediately If the Engine continues to run check the Brake Sw...

Page 19: ...ers of this series are equipped with an on board high current programmable 5th Relay that can be used to power a second Ignition Accessory or Crank wire The Unit uses 3 sets of pins each set correspon...

Page 20: ...lutch switch to the starter motor When the key is turned to the START position without pressing the pedal you will test 12 V only on one of the wires at the clutch switch this is the key side When the...

Page 21: ...wo examples the clutch was bypassed by engaging the clutch relay In an N C system a relay is also used to interrupt the starter wire In order to bypass an N C Clutch one must prevent the Clutch relay...

Page 22: ...ill start the Engine and arm the Starter Kill but the Doors will not be locked or unlocked at any moment of the sequence Lock Pulse Duration The duration of the Lock and Unlock pulses can be configure...

Page 23: ...ntering Programming Mode 3 The Parking Lights will flash 8 times to confirm resetting Table 10 Resetting without a Valet Button On some vehicles such as BMW and certain Volkswagen vehicles resetting w...

Page 24: ...the most recent event first then the second one and so on If there is no event at all to report the Parking Lights will give one long flash Start Failure Codes through the Parking Lights 1 x No Start...

Page 25: ...Valet Mode 2 pause 2 x There was an attempt to start the vehicle while the Remote Car Starter was in Home Valet Mode 4 pause 3 x The vehicle went out of Ready Mode 12 V detected on the Brake Line 10 p...

Reviews: