background image


10


SCREENS 
 

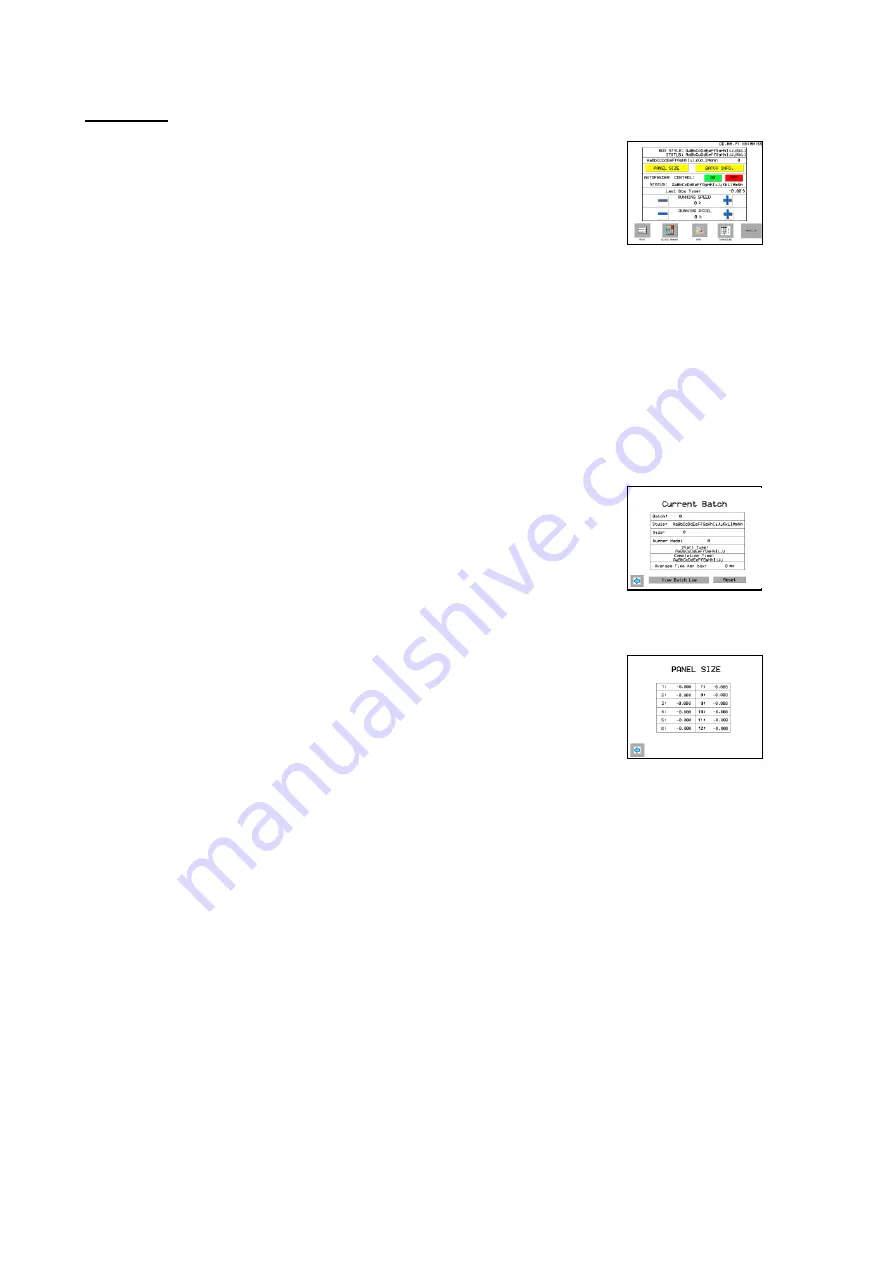
The ‘Run’ screen is displayed while making boxes. It displays the 
time and date, the box style being made and the number made. 
It also allows the operator to select several options including;  
save the current box to memory, check the dimensions entered, 
adjust the throughput speed or return to the ‘Main Menu’. 


‘Running Speed’ and ‘Running Accel’ allows the operator to select the ideal throughput 
speed  and  acceleration  rate  for  making  each  box  accurately  and  comfortably.  Some 
large, heavy  boxes will  need to be run at a slower speed  just  as very small  boxes  will 
also need to be run slowly to prevent ‘snatching’. For best results, always select a slow 
speed, say 20%, and then increase if possible. 
 
‘Last Box Time’ shows the time taken for the previous box to pass through the machine. 
This may be useful for batch costing or calculating accurate production times. 


Selecting  ‘Batch  info’  allows  the  operator  to  enter  the  size  of  a  batch  to  be  run.  The 
‘Number Made’ will then count down from that number  
until the batch is completed at ‘0’.  
The start and finish times will then be recorded in the Batch Log. 
To run a batch, first touch ‘Reset’ to clear the previous data, then  
touch the ‘size’ to enter the number of boxes to be run.  
Touching the ‘back arrow’ will return to the ‘Run’ screen. 
When  a  batch  is  cleared,  set  up  and  completed  in  this  way,  it  will  be  automatically 
recorded in the ‘Batch Log’. This can be viewed at any time for a record of productivity. 


‘Panel Size’ shows a list of the actual measurements of the box 
panels. These include allowances based on the board thickness  
entered by the operator.  
To check the size of the box, measure the flat box from leading 
edge to centre of first slot, then from centre of slot to centre of slot 
to check subsequent panels. 


‘Dimensions’ will return to the box dimensions that have been entered for confirmation 
or to make changes. 


‘Base/Lid’ is used when making 0300 and 0301 boxes to switch from the base to the lid 
and  back.  The  machine  will  always  default  to  ‘base’  when  entering  the  dimensions. 
Switching  to  ‘Lid’  will  increase  the  dimensions  by  the  appropriate  amount  to  fit  over 
the base. Note that the lid will require a larger board blank than the base. 


Summary of Contents for HIPAK 2670

Page 1: ...L 2008 version with Rubber Roller and Servo Blade Drive Updated December 2007 KJP Autobox Ltd Unit S1 Cherrycourt Way Leighton Buzzard Beds LU7 4UH U K Tel 44 0 1525 379 359 Fax 44 0 1525 382 353 e mail info autobox co uk website www autobox co uk ...

Page 2: ...Making Base Lid Boxes 12 Making 0933 Divisions 12 Making Flip Top Boxes 13 The Self Design 12 Slot Program 13 Using the Auto Feeder 14 Calibration 15 17 Error Messages 17 Trouble Shooting 18 Maintenance 19 Sensors 20 Wiring Schematic 21 25 Service Spares 26 27 Replace Compact Flashcard 28 Warranty 29 CE Conformity Certificate 30 3 Phase wiring 31 ...

Page 3: ...A double wall The Boxmaker utilises a powerful PC with colour touch screen to reduce the effort of calculation and set up time to a minimum Most styles of box may be made and many are pre programmed requiring only the dimensions to be entered Read this manual carefully before using the Boxmaker and ensure that all personnel required to use the machine are familiar with its contents are given acces...

Page 4: ...to ease handling of large blanks This is positioned behind the machine and in front of the catcher table A competent qualified engineer must make all connections to the machine Electrical connections to the conveyor from the Boxmaker are via plug and socket ELECTRICAL SUPPLY CONNECTIONS The HIPAK requires a 415V 3 phase and neutral 50Hz supply at 10A per phase Connections are made via the isolator...

Page 5: ...upply as some components retain current after the machine is powered down If maintenance requires removal of guarding whilst the electrical supply is still connected please refer to the maintenance section at the back of this manual and always ensure that only qualified personnel carry out the procedures Remember that powered components and high voltages can be very dangerous when exposed SAFE USA...

Page 6: ...6 Box Styles Programmed into the HIPAK 2675 Boxmaker SC ...

Page 7: ...or adjusting the board guides and blade When a box program has been selected the display will show a blank size and two settings The first setting relates to the smaller orange dial on the end of the machine It is the slot depth in millimetres and is set using the crank handle The second setting is the distance between the slots and this dimension is set on the larger counter by pushing the switch...

Page 8: ...e boot up screen will show for several seconds during the start process and this includes a message indicating the number of boxes to be produced before the recommended service It should be noted that the servo unit that drives the blade will go through a homing sequence to park the blade at Top Dead Centre when it is first switched on If the blade is already at the TDC position then there may be ...

Page 9: ...or to cancel When required dimensions are correct touch Enter to continue Set back guide and blade to Blade Settings cut blanks to size and touch continue Set crease lever according to board thickness at lowest point for thin board and approximately horizontal for double wall board This will vary according to paper grade humidity board thickness and the preferred depth of crease Machine is now rea...

Page 10: ...number until the batch is completed at 0 The start and finish times will then be recorded in the Batch Log To run a batch first touch Reset to clear the previous data then touch the size to enter the number of boxes to be run Touching the back arrow will return to the Run screen When a batch is cleared set up and completed in this way it will be automatically recorded in the Batch Log This can be ...

Page 11: ... a month and day to recall the number of boxes made on that day ARCHIVE PRODUCTION DATA At the beginning of each year the previous year s production can Be recorded into the permanent memory The total number of boxes produced to date is also displayed SYSTEM CONFIGURATION Touch Configure System on main menu This screen allows the operator to set the time and date change from inches to millimetres ...

Page 12: ... a 100mm lid but the machine will automatically calculate the lid to be the same height as the base To change this first make the number of bases required then touch the Base Lid button followed by the Dimensions button The height dimension can then be altered The blanks may now be cut to size and the lids will be made to fit over the bases but the depth will be reduced 0933 DIVISIONS A different ...

Page 13: ...al boxes or fittings or it can be used to make standard boxes if all the dimensions are already known Up to twelve dimensions can be entered The first dimension entered will be from the front edge of the board to the centre of the first slot Subsequent entries are from the centre of the previous slot to the centre of the next slot Only one blank dimension is displayed and this is the total of the ...

Page 14: ... gates the end of the stack rests on the lower edge of the angled support For larger blanks an adjustable roller is provided to support the stack and prevent the blanks from bending If needed this should be set so that it is just barely supporting the stack but not taking all the weight When this is done and the display shows the Ready screen the Auto Feeder Start button should be pressed to start...

Page 15: ...t will change the length of the first panel of each box Nominal setting is 75mm A larger offset will give a longer first panel Number of Boxes to Service This is set to remind the operator when a service is due When the system boots up the screen will show Service Due at The set number will reduce by the number of boxes made until at zero the screen will show Service Due Nominal setting is 500 000...

Page 16: ...Accel Decel rate and Board Speed Nominal 50 Touch Start Move to check distance moved Burn In This is a repetitive cycle to bed in the motor drive and the blades knives When started the roller will turn for one second then stop the blades will chop and the cycle will repeat until the Stop button is touched Cutter Setup Blade Drive Select 1 for All Electric or 2 for pneumatic Cut Pre Time This is th...

Page 17: ...echanism or by the blanks jamming in the machine ERROR MESSAGES Current Drive Error This indicates an error in the drive system and is normally seen when the blade drive motor has not been switched on If a lag error message is also shown while making a box this indicates that the box has not moved through the machine as calculated by the computer This may be because the crease wheels are set too l...

Page 18: ...d available at the end of the blank which may be caused by the blank being cut too short or the preceding panels being too long Check that the blank length corresponds to that on the Final Setup screen and check that there is sufficient creasing pressure to grip the blank and pull it through the machine without slipping ADJUSTABLE GUIDE NOISY OR SLOW The adjustable back guides and blade may from t...

Page 19: ...e board is fed into the machine The sensors can just be seen emitting a red light This area must be kept clean and free from dust and scraps of paper Clear all slotting material and debris away from the outlet chute on the lower front of the machine Never allow the outlet to become obstructed Clean the tabletops and guides with a good quality silicone based polish This helps reduce friction and ma...

Page 20: ...y reads rESo high resolution Press the mode button SEVEN 7 times display will scroll through toFF diFF oFF Eco oFF rE Hold L on rESo until red and green numbers show again as above It is very important that the display should show the modes listed above If any of the modes are incorrect press the up or down arrow to change When all modes are correct and the red and green numbers are displayed the ...

Page 21: ...der Stack Switch White P Wire I D tag To Blade Drive Unit To Servo Drives To Touch Screen To V1016 Roller drive unit Neon Rocker Switch X Blue Red Purple Sensor 2 Sensor 1 Black Black Brown Brown Blue Blue Red Blue Red Red Red Blue Brown Brown Blue Blue Brown Purple White Blue Blue Grey Yellow Pink Cable Screen Cable Screen Connections viewed from rear N L Brown Brown A L L N N N L Blue To Transfo...

Page 22: ...om PSU E L3 L2 L1 415Vac 3 phase supply from Primary Isolator B B T T U V W E White Blue White Green White White Red Blue Brown Black Green Motor Power Cable AC122 Card Resolver Cable 1 2 3 4 5 6 7 8 9 10 11 12 13 14 15 15 way D type plug to AC123 card Green Yellow Grey Pink Blue Red White Brown Fitted 10 core cable Blue Red Green Red Blue Red Green Blue Cable screen Blue Red Green EX270 I O Unit ...

Page 23: ...ade Adjust Motor Transformer 240Vac from 5A fused supply 0V 24Vac Live Brown Neutral Blue Relay 1 Yellow Yellow Black Grey White Brown Blue Capacitor Black Brown Blue Relay 2 T7 C6 T8 C6 Black Brown R F 21 21 Front limit switch Brown Brown Blue Brown Blue White T7 T T8 R R R F F F N T C6 Brown N L ...

Page 24: ... Contactor 2 4 6 14 2 4 6 95 96 97 98 240V 13A Supply to Electrical Cabinet P Wire I D tag Overload Relay A2 96 L L 96 Black L Brown Blue N 415V 3 Phase Supply to ACOPOS Roller Drive Servo Brown Black Black A2 415V 3 Phase Supply to Lexium Blade Drive Servo L1 L1 L2 L2 L3 L3 L1A L2A L3A Brown Black Grey Fuse Bank of 6 x 8A Fuses 13A Fused Terminal Brown Black Grey ...

Page 25: ... 5 6 7 8 9 10 11 12 13 14 1 2 3 4 5 1 2 3 4 5 X8 X1 6 5 4 3 2 1 X9 X4 X3 Primary Earth Braking Resistor Blade Drive Servo Motor Orange Green L3B L2B L1B Grey White Blade Proximity Sensor Brown Black Blue Engineer Connection Point on frame For inching Trigger from I O unit Terminal X2 3 C From PSU 24dc 0Vdc White Brown ...

Page 26: ...de Adjustment Rear Top Cover Removed Front Sensor Fibre Optic Unit Blade Tail 2600 045B Blade Edge 2600 045C Rear Sensor Fibre Optic Unit Crease Wheel Rubber Roller Blade Drive Motor Ballast Resistor 230VAC Guide Adjust Motor P8 226980 Encoder Servo Unit Limit Switch Belt and Pulleys Blade Sensor and Bracket ...

Page 27: ...ontrol Card for Conveyor Input Output Unit I O Power Supply Unit PSU Relays 24V Transformer Earth Terminal Belt Gearbox Servo Motor ACOPOS Servo Drive 8Amp Fuses for 3 phase Supply Linear Shaft Linear Bearing Connecting Link Low Inertia Crank on Crank Shaft Division Lever Hipak Foot Fused Terminal Connectors ...

Page 28: ...ure to fall Lift the panel forward to expose the side of the unit Locate the clip that is across the slot and slide this to one side then press the black button next to the Flashcard to release it Take note of the orientation of the card and ensure that the new one is fitted the same way it is made to only fit the correct way so do not force it in After replacing the flashcard re assembly is a rev...

Page 29: ...time of purchase providing that a The equipment has not been subjected to any form of abuse misuse or damage howsoever caused b The equipment has not been repaired or a repair attempted by any person not previously authorised by Autobox Limited c The equipment has been maintained in accordance with the basic maintenance instructions contained herein ...

Page 30: ... EN292 parts 1 and 2 1991 Safety of Machinery Basic concepts general principles for design EN294 1992 Safety of Machinery Safety distances to prevent danger zones being reached by the upper limbs EN349 1993 Safety of Machinery Minimum gaps to avoid crushing parts of the human body EN418 1992 Safety of Machinery Emergency stop equipment functional aspects Principles of design EN60204 part 1 1993 Sa...

Page 31: ... 2 FEED 3 PHASE CABLE THROUGH GLAND 3 CONNECT EARTH WIRE TO BLOCK ON SIDE 4 CONNECT 3 LIVES AND NEUTRAL AS SHOWN NOTE MUST BE 415V 3 PHASE NEUTRAL AND EARTH 10 AMPS PER PHASE 50 60Hz VOLTAGE Phase to Neutral 220 240V Phase to Phase 380 420V 3 PHASE ISOLATOR STARTER L1 L2 L3 N EARTH ...

Reviews: