5
Preparação para uso
Colocação do prato
Este produto necessita de montagem antes de ser usado pela primeira
vez.
Não ligue o adaptador CA até a montagem estar concluída.
1. Instale o prato no eixo.
• Para evitar danificar a agulha ao assentar o prato, alinhe as posições do
eixo e do orifício do prato e assente o prato lentamente.
• Certifique-se de que o prato esteja bem encaixado no eixo.
2. Prenda a correia primeiro no prato e, em seguida, à polia do
motor.
• Certifique que o cinto não está torcido.
Instalação do toca-discos
• Posicione o produto sobre uma superfície nivelada.
• Para evitar os efeitos de vibrações e pressão acústica, não instale o
produto perto de alto-falantes.
• O produto poderá captar estática se for instalado perto de um rádio.
Por isso, tente manter o produto afastado de rádios.
• O produto poderá captar ruídos se estiver perto de equipamentos
(telefones celulares etc.) que emitam ondas de rádio intensas.
Nivelando o toca-discos
1. Depois de posicionar o produto onde você deseja usá-lo, ajuste
os pés para que o produto fique nivelado.
• Use um nivelador (vendido separadamente) conforme necessário para
assegurar o nivelamento do produto.
Montar o braço
1. No momento da entrega, remova a braçadeira para cabo usada
para fixar o braço.
• Use a presilha para prender o braço temporariamente no suporte.
2. Insira a cabeça no braço reprodutor.
• Segure as bordas direita e esquerda da cabeça para não danificar a agulha
nem cortar os fios da cápsula.
3. Depois de inserir a cabeça, gire o anel de bloqueio no sentido
anti-horário (para a esquerda).
4. Com o anel de ajuste da força de rastreamento voltado para a
frente, instale o contrapeso na parte traseira do braço e gire-o
lentamente no sentido anti-horário (para a esquerda).
Não torcida
Torcida
Eixo
Prato
Correia
Polia do motor
Anel de bloqueio
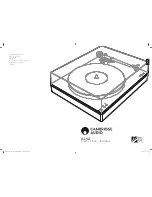
Summary of Contents for AT-LP7
Page 15: ...14 E N Memo ...
Page 29: ...14 F R Memo ...
Page 43: ...14 D E Memo ...
Page 57: ...14 I T Memo ...
Page 71: ...14 E S Memo ...
Page 85: ...14 Memo P T ...
Page 99: ...14 R U Memo ...
Page 100: ...Memo ...
Page 101: ......