E 01 4
E_1.
0_01_
US.fm. 4-10
2.4
Mounting extension parts
-
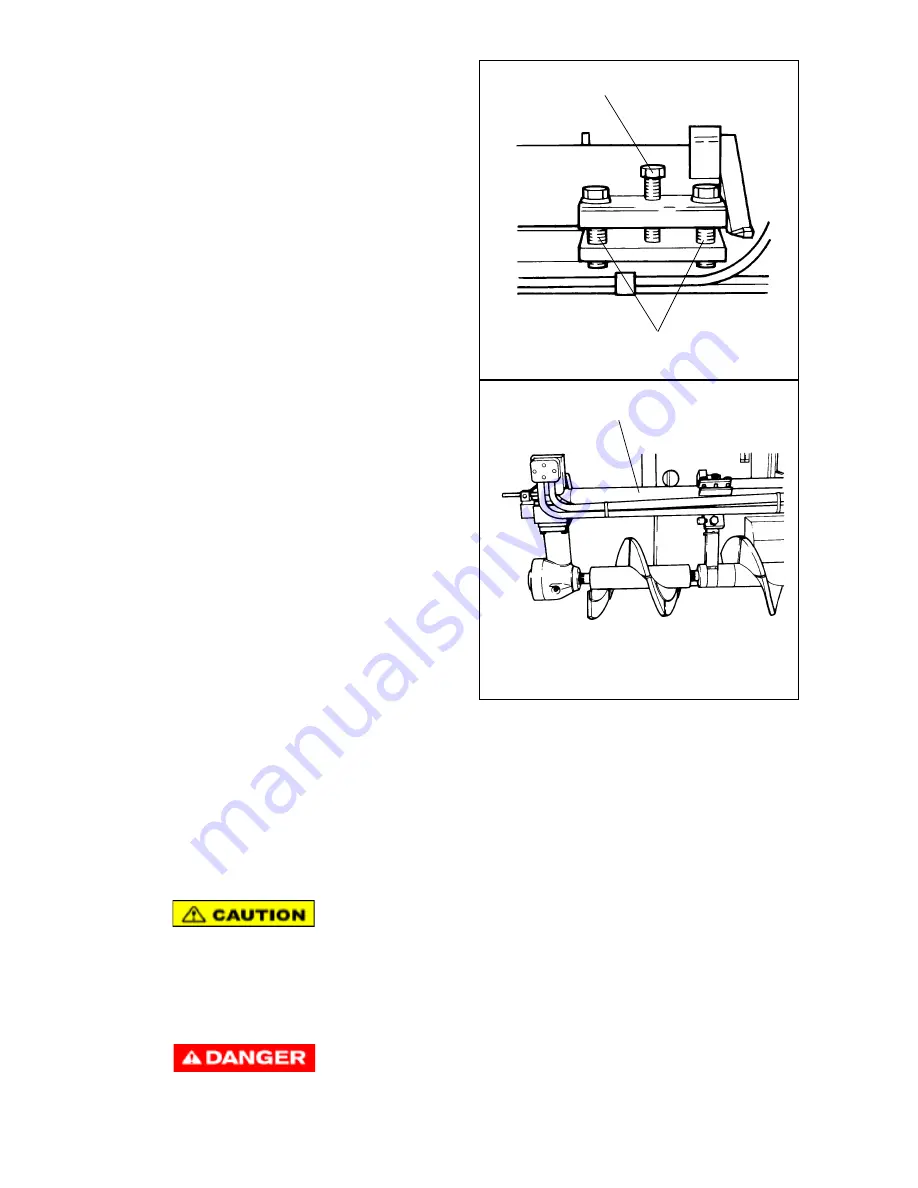
Loosen the clamping screws (6) on
the support tube. Then turn in the
center expanding screw (5) to expand
the clamping joint.
-
Pull the telescopic tube out of the sup-
port tube (7)
.
-
Mount the required extension parts.
NOTE:
Observe the guide groove of the spline!
Make sure that the shaft end is clean!
-
Install auger so pick end of auger is
“IN TIME” with the discharge of the
main auger. This is called “IN TIME” or
“NORMAL” set up and is used to pre-
vent segregation (or separation) of
material. The auger pickup can be
mounted 180 degrees away from the
discharge. This called “OUT OF TIME”
and is used with large or rounded stone to prevent segregation. If already mounted and segregation
occurs in the mat at extension to main connection, move the auger pickup 180 degrees from the
current position.
-
Slide in the telescopic tube. When doing so, make sure that the drive of the auger
gear is slid all the way over the shaft end of the auger extension part and that the
threads of the augers match.
-
Remove the expansion screw (5). Then tighten the clamping screws (6). Finally
tighten the expansion screw by hand.
Before the clamping screws (6) can be tightened again, the expansion screw (5) must
be sufficiently turned back!
Otherwise, the telescopic tube cannot be safely clamped and the splined shaft ends
break.
When clamped insufficiently, the telescopic tube can slide out of the support tube and
can cause severe injury or death as well as damage to the machine!
5
6
7
Summary of Contents for Dynapac F1000W T4i
Page 2: ...www atlascopco com...
Page 18: ...V 10 V_01_US fm...
Page 20: ......
Page 42: ...4 C_1 1_01_US fm 4 16 Transport on Low Bed Trailers 1 7 10 4 11 5 8 2 9 12...
Page 47: ...9 C_1 1_01_US fm 9 16 Transport Preparation 7 4 5 11 9 2 8 10 1 12...
Page 49: ...11 C_1 1_01_US fm 11 16 3 2 Driving mode 3 1 2...
Page 66: ...D 1 1 12 D_1 1_01_US fm 12 44 PANEL C 46 45 47 48 43 44 41 42 40 49...
Page 68: ...D 1 1 14 D_1 1_01_US fm 14 44 PANEL C 46 45 47 48 43 44 41 42 40 49...
Page 70: ...D 1 1 16 D_1 1_01_US fm 16 44 PANEL C 46 45 47 48 43 44 41 42 40 49...
Page 72: ...D 1 1 18 D_1 1_01_US fm 18 44 PANEL D 53 54 55 51 50 52 53 52 51 50...
Page 74: ...D 1 1 20 D_1 1_01_US fm 20 44 PANEL D 53 54 55 51 50 52 53 52 51 50...
Page 76: ...D 1 1 22 D_1 1_01_US fm 22 44 PANEL D 53 54 55 51 50 52 53 52 51 50...
Page 78: ...D 1 1 24 D_1 1_01_US fm 24 44 PANEL E 56 57 58...
Page 80: ...D 1 1 26 D_1 1_01_US fm 26 44 PANEL E 56 57 58...
Page 82: ...D 1 1 28 D_1 1_01_US fm 28 44 3 Auxiliary functions 60 61 63 62...
Page 95: ...D 1 1 41 D_1 1_01_US fm 41 44 Left right handset 100 102 104 106 101 103 105 107...
Page 97: ...D 1 1 43 D_1 1_01_US fm 43 44 100 102 104 106 101 103 105 107...
Page 116: ...D 2 0 18 D_2 0_01_US fm 18 24 1 2 Engine Error messages...
Page 117: ...D 2 0 19 D_2 0_01_US fm 19 24...
Page 118: ...D 2 0 20 D_2 0_01_US fm 20 24...
Page 119: ...D 2 0 21 D_2 0_01_US fm 21 24...
Page 120: ...D 2 0 22 D_2 0_01_US fm 22 24...
Page 121: ...D 2 0 23 D_2 0_01_US fm 23 24 1 3 FMI codes...
Page 122: ...D 2 0 24 D_2 0_01_US fm 24 24...
Page 134: ...D 4 0 4 D_4 1_01_US fm 4 26 40 20 21 10 12 40 20 21 12...
Page 136: ...D 4 0 6 D_4 1_01_US fm 6 26 40 20 21 10 12 40 20 21 12...
Page 138: ...D 4 0 8 D_4 1_01_US fm 8 26 40 20 21 10 12 40 20 21 12...
Page 140: ...D 4 0 10 D_4 1_01_US fm 10 26 40 47 48 52 54 55 20 21 10 12 40 47 48 52 20 21 12...
Page 143: ...D 4 0 13 D_4 1_01_US fm 13 26 46 45 21 15 45 45 20 21 15 20...
Page 145: ...D 4 0 15 D_4 1_01_US fm 15 26 46 45 53 27 28 20 21 12 46 45 20 21 12 53 24...
Page 148: ...D 4 0 18 D_4 1_01_US fm 18 26 45 27 24 20 25 21 28 10 12 45 20 21 12...
Page 166: ...E 01 10 E_1 0_01_US fm 10 10 4 6 Auger Chart...
Page 168: ...F 1 0 2 F_1 0_01_US fm 2 2...
Page 179: ...F 4 0 1 F_4 0_01_US fm 1 6 F 4 0 Maintenance Auger 1 Maintenance Auger sub unit I 1 2 3 4 5...
Page 198: ...F 5 0 14 F_5 1_01_US fm 14 14...
Page 210: ...F 6 0 12 F_6 0_01_US fm 12 12...
Page 219: ...1 F_8 1_01_US fm 1 8 F 8 1 Maintenance Electronic System 1 Maintenance Electronic system 1 3...
Page 226: ...8 F_8 1_01_US fm 8 8...
Page 230: ......
Page 231: ...F10 0 1 F_10 0_01_US fm 1 6 F10 0 Checks Decommissioning 1 Tests check up cleaning stopping...
Page 240: ...www atlascopco com...


