Chapter 1. Introduction
9
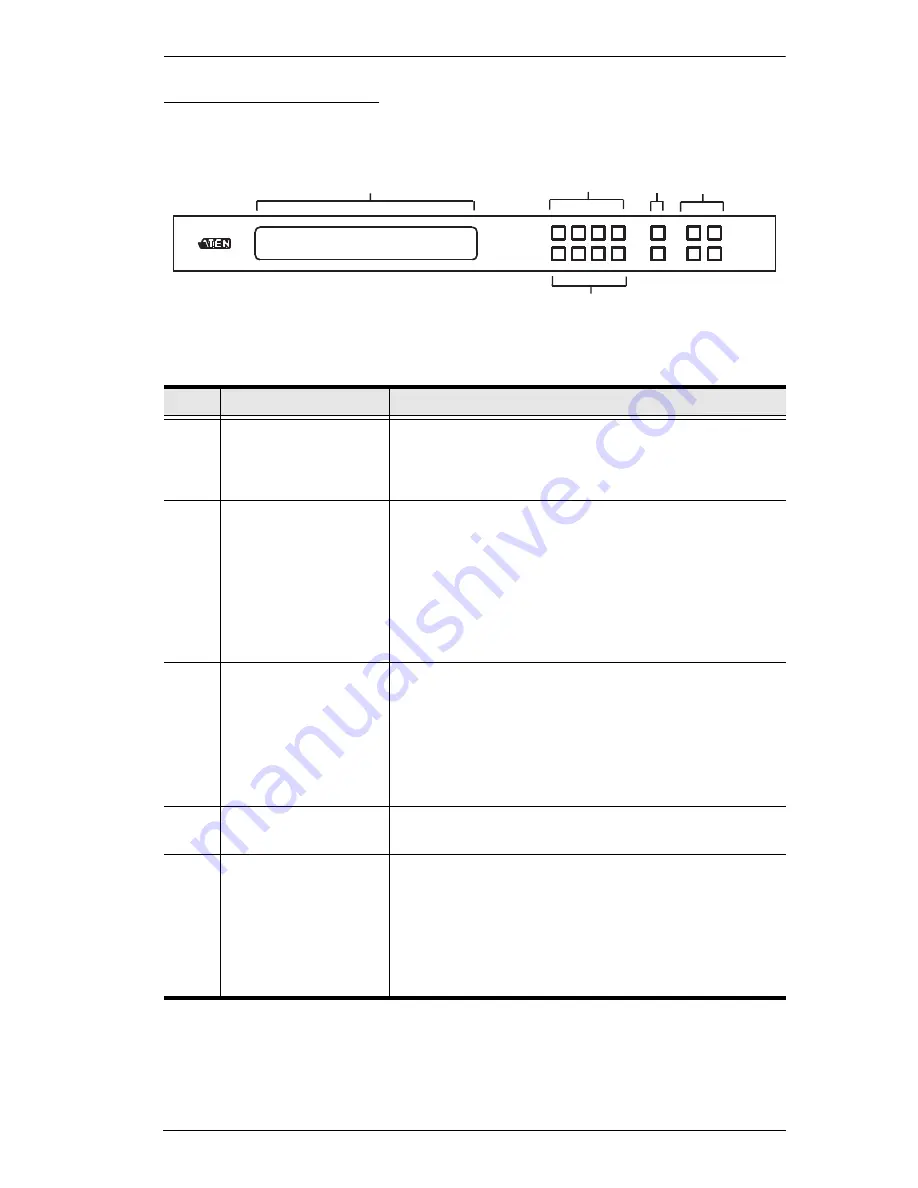
VM3909H Front View
No.
Component
Description
1
LCD Display
The LCD Display gives a quick view of all port
connections, and shows the various options for
configuring and operating the VM3909H. For full
details, see
Main Screen
, page 19.
2
Input Pushbuttons
These pushbuttons refer to the HDMI/HDBaseT Input
ports found on the VM3909H rear panel. Press to
select the Input port. These pushbuttons may also
correspond to menu options, connection profiles (P1–
P9) and so on.
Note:
The
INPUT
(1–9) front panel pushbuttons have
built-in LEDs that light to indicate they have been
selected.
3
Output Pushbuttons
These pushbuttons refer to the HDMI Output ports
found on the VM3909H rear panel. Press to select the
Output port. These pushbuttons may also correspond
to connection profiles (P10–P18).
Note:
The
OUTPUT
(1–9) front panel pushbuttons
have built-in LEDs that light to indicate they have been
selected.
4
Prev / Next
Pushbuttons
These pushbuttons allow you to cycle through the
menu options on the LCD display.
5
Function Pushbuttons The function pushbuttons (
MENU
,
PROFILE
,
ENTER
and
CANCEL
) are for
navigating the LCD built-in
configuration utility. For full details, see
Front Panel
Pushbuttons, page 17
.
Note:
The
MENU
and
PROFILE
front panel
pushbuttons have built-in LEDs that light to indicate
they have been selected.
1
2
3
4
5
Summary of Contents for VM3404H
Page 1: ...4 x 4 9 x 9 HDMI HDBaseT Lite Matrix Switch VM3404H VM3909H User Manual www aten com ...
Page 25: ...Chapter 2 Hardware Setup 15 Installation Diagram 6 7 1 4 2 9 8 3 2 5 3 1 ...
Page 26: ...VM3404H VM3909H User Manual 16 This Page Intentionally Left Blank ...
Page 48: ...VM3404H VM3909H User Manual 38 This Page Intentionally Left Blank ...
Page 94: ...VM3404H VM3909H User Manual 84 This Page Intentionally Left Blank ...
Page 118: ...VM3404H VM3909H User Manual 108 This Page Intentionally Left Blank ...


