


ASUS RS520-E8-RS8 V2, RS520-E8-RS12-EV2
5-3
3.
Press <Tab> to switch to the
Drive
field.
4.
Press the Up/Down arrow keys to find the USB flash disk that contains the latest BIOS,
then press <Enter>.
5.
Press <Tab> to switch to the
Folder Info
field.
6.
Press the Up/Down arrow keys to find the BIOS file, and then press <Enter> to perform
the BIOS update process. Reboot the system when the update process is done.
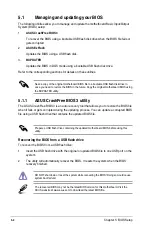
5.1.2
ASUS EZ Flash 2 Utility
The ASUS EZ Flash 2 Utility feature allows you to update the BIOS without having to use a
DOS‑based utility.
Before you start using this utility, download the latest BIOS from the ASUS website at www.
asus.com.
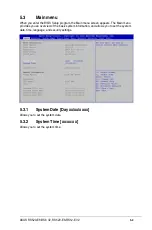
To update the BIOS using EZ Flash 2 Utility
1.
Insert the USB flash disk that contains the latest BIOS file into the USB port.
2.
Enter the BIOS setup program. Go to the
Tool
menu then select
ASUS
EZ Flash 2
Utility
. Press <Enter>.
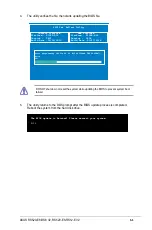
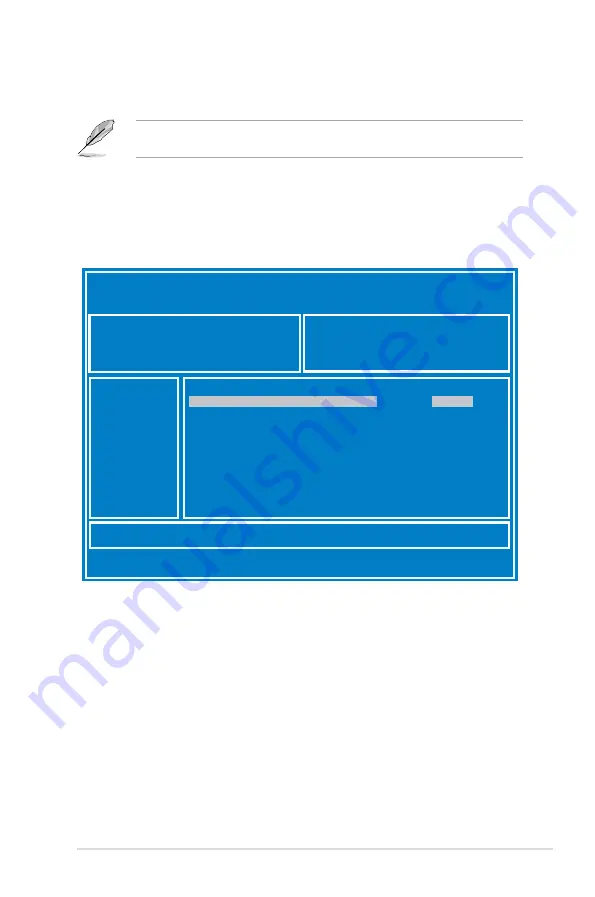
ASUS Tek. EzFlash Utility
[Up/Down/Left/Right]:Switch [Enter]:Choose [q]:Exit
FS0
System Volume Information
<DIR>
Windows
<DIR>
Z10PR-D16 BIOS
<DIR>
Current Platform
Platform : Z10PR-D16
Version : 0020
Build Date :04/25/2014
New Platform
Platform : Z10PR-D16
Version : 0022
Build Date :05/05/2014
Summary of Contents for RS520-E8-RS12-EV2
Page 1: ...Server User Guide RS520 E8 RS8 V2 RS520 E8 RS12 EV2 ...
Page 12: ...xii ...
Page 56: ...Chapter 2 Hardware Information 2 32 ...
Page 82: ...Chapter 4 Motherboard Information 4 22 ...
Page 106: ...5 24 Chapter 5 BIOS Setup 5 5 IntelRCSetup menu ...
Page 136: ...5 54 Chapter 5 BIOS Setup ...
Page 174: ...6 38 Chapter 6 RAID Configuration ...
Page 202: ...7 28 Chapter 7 Driver Installation ...
Page 203: ...A Contact Information Appendices ...


