background image

8

Left features

Right features

12

13

14

15

16

17

Top features

Bottom features

18

19

20

21

Summary of Contents for P552

Page 1: ...P552w User Manual ...

Page 2: ...ANTABILITY OR FITNESS FOR A PARTICULAR PURPOSE IN NO EVENT SHALL ASUS ITS DIRECTORS OFFICERS EMPLOYEES OR AGENTS BE LIABLE FOR ANY INDIRECT SPECIAL INCIDENTAL OR CONSEQUENTIAL DAMAGES INCLUDING DAMAGES FOR LOSS OF PROFITS LOSS OF BUSINESS LOSS OF USE OR DATA INTERRUPTION OF BUSINESS AND THE LIKE EVEN IF ASUS HAS BEEN ADVISED OF THE POSSIBILITY OF SUCH DAMAGES ARISING FROM ANY DEFECT OR ERROR IN TH...

Page 3: ...fications 23 Package contents 24 Chapter 1 Getting started Getting to know your device 26 Layout 26 Getting your device ready 30 Installing the SIM card and battery 30 Charging the battery 32 Installing and removing a microSD card 33 Starting up 34 Powering your device 34 Using the stylus 34 ...

Page 4: ...Using MultiHome 49 AnyTime Launcher 50 Searching for information 52 Getting Help 52 Chapter 2 Entering data Using the Input Panel 54 Using the Block Recognizer 54 Using the onscreen keyboard 55 Using the Letter Recognizer 56 Using the Transcriber 56 Writing and drawing on the screen 57 Recording voice 59 ...

Page 5: ...Bluetooth 64 Synchronizing with an Exchange Server 65 Chapter 4 Phone features Using the phone 68 Phone pad 68 Turning off the phone function 68 Adjusting the volume 69 Making a call 70 Making a voice call 70 Making emergency calls 76 Making international calls 76 Receiving a call 76 Options during a call 77 Managing multiple calls 78 ...

Page 6: ... list 81 Chapter 5 Messaging E mail messaging 83 Setting up an e mail account 83 Sending an e mail message 85 Threaded SMS 89 Sending a threaded SMS 89 MMS messaging 90 Accessing MMS 90 Editing MMS settings 90 Sending an MMS message 91 Windows Live 93 Using Hotmail 93 Using Windows Live Messenger 94 ...

Page 7: ...nt 103 Viewing your schedule 103 Using Tasks 104 The Tasks list 104 Chapter 7 Customizing your device Customizing the Start menu 106 Using the Profile Manager 106 Customizing the Today screen 108 Entering your contact information 109 Setting up sounds and notifications 110 Setting the date time and alarm 110 Setting the ringtone 112 Adding ringtone to selection 112 ...

Page 8: ...ng disabling the wireless connections 115 Using your PDA phone as an external modem 116 Using Direct Push 117 Using Bluetooth 118 Activating Bluetooth in your device 118 Adding Bluetooth devices 119 Using Wi Fi 119 Turning on Wi Fi 119 Configuring wireless networks 120 Adding a wireless network 121 Setting a GPRS connection 122 Connecting GPRS 123 ...

Page 9: ... the network 125 Setting your preferred networks 125 GSM 3G Networks 126 Chapter 9 GPS features GPS Catcher 128 Updating GPS data 128 Setting GPS Catcher 128 External GPS 129 Chapter 10 Multimedia features Using the camera 131 Launching the camera 131 Camera mode 132 Taking photos 134 ...

Page 10: ... 137 Editing pictures and photos 137 Streaming Player 139 Playing a streaming file 140 Connecting with bookmarks 140 EziMusic 142 EziPhoto 143 YouTube Flickr 144 Using YouTube 144 Using Flickr 145 Chapter 11 Business features Ur Time 148 Setting time 148 Setting alarm 148 Setting the World Cock 149 ...

Page 11: ... Remote Calendar 151 Meeting Time Planner 152 Chapter 12 ASUS Special features Gester 154 Enabling Gester 154 Using Gester gestures 155 ASUS Zip 156 Backup 157 Backing up files 157 Restoring files 158 Newstation 159 Using Newstation 159 Using Newstation menus 161 ...

Page 12: ...Mobile 164 OneNote Mobile 165 Word Mobile 167 PowerPoint Mobile 169 ClearVue PDF 171 Auto Cleaner 172 Restoring default factory settings 173 System information 173 Task Manager 174 Removing programs 175 Google Search 175 Google Maps Mobile 176 SMS Location Link 178 ...

Page 13: ...13 Appendices Notices 180 Replaceable batteries 180 Operator access with a tool 180 Specific Absorption Rate SAR 181 Bodyworn operation 181 Exposure to radio waves 181 ASUS Contact information 184 ...

Page 14: ...ssible damage If you pack your phone in your suitcase during travel beware of damage Cramming a suitcase may crack the LCD display Remember to switch off your wireless connections during air travel As with all other radio devices touching the built in antenna area during telephone conversation may impair the quality and lead to shorter standby time due to increased power consumption The battery Yo...

Page 15: ...ellery and other metal objects Never dispose of the battery in fire It could explode and release harmful substances into the environment Never dispose of the battery with your regular household waste Take it to a hazardous material collection point Do not touch the battery terminals The charger Avoid using the phone while charging Use only the charger supplied with your phone Never pull the charge...

Page 16: ... do not expose it to excessive heat or strong magnetic fields Cleaning and storing Your phone should always be handled with care and protected from dirt dust and dampness To avoid scratches never place your phone face down If cleaning is necessary switch the phone off and wipe carefully with a soft slightly damp not wet cloth Use a cotton swab to clean the camera lens Allow the phone to dry comple...

Page 17: ...ll text message or any other data related mobile communication Use of fully installed car kits are still permitted as are the use of alternate handsfree accessories In the interest of safety we would recommend the use of a cradle while using any form of handsfree accessory While driving we recommend that you use voicemail wherever possible and that you listen to your messages when you are not in t...

Page 18: ...pendent research by and recommendations of Wireless Technology Research If you have a pacemaker Always keep your phone more than six inches 15cm from your pacemaker when turned on Do not carry your phone in your breast pocket Use the ear opposite the pacemaker to minimize the potential for interference If you have any reason to suspect that interference is taking place turn your phone off immediat...

Page 19: ...xternal RF energy Vehicles RF signals may affect improperly installed or inadequately shielded electronic systems in motor vehicles Check with the manufacturer or its representative regarding your vehicle You should also consult the manufacturer of any equipment added to your vehicle Posted facilities Turn your phone off where posted notices so require Magnetic media Magnetic fields generated by m...

Page 20: ...bey all signs and instructions Sparks in such areas could cause an explosion or fire resulting in bodily injury or even death Areas with a potentially explosive environment are often but not always clearly marked They include fuelling areas such as gas stations below decks on boats fuel or chemical transfer or storage facilities vehicles using liquified petroleum gas such as propane or butane area...

Page 21: ...bient temperature of 0 40 C Do not abuse the device Avoid striking shaking or giving it a shock When not using the unit lay it down to avoid possible damage due to instability Do not expose this device to rain or other liquid Do not use unauthorized accessories Do not disassemble the phone or its accessories If service or repair is required return the unit to an authorized service center If the un...

Page 22: ...ing shopping banking waiting in line or conducting other personal business Avoid using annoying ringtones Avoid taking a call on your mobile phone during business meetings appointments or interviews Look for a private place to take a call and keep your phone conversations brief Talk on your mobile phone quietly and do not shout Put your mobile phone on silent or vibrator mode to avoid disturbing o...

Page 23: ...Class B Multi slot Class 10 Camera 2 0 megapixel fixed focus camera Connectivity Bluetooth V2 0 EDR USB USB 1 1 FS WLAN 802 11b g Battery capacity 1100 mAh Lithium Ion Model SBP 18 Expansion slot MicroSD card slot Supports Secure Digital High Capacity SDHC storage card Audio Mini USB audio port Built in microphone and output speaker Weight 105g with battery Dimension 10 2 x 6 05 x 1 45 cm Talk tim...

Page 24: ...damaged or missing contact your retailer Standard items ASUS P552w PDA phone Battery AC Adapter Mini USB cable Wired headset Stylus Protection case Bonus CD with User Manual electronic file Getting Started CD Quick Start Guide Warranty Card microSD Card Car charger Car Kit PDA holder and windshield suction pedestal ...

Page 25: ...25 Getting started Chapter 1 Getting to know your device Getting your device ready Starting up The Home screen Using MultiHome AnyTime Launcher Searching for information Getting Help ...

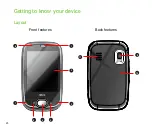
Page 26: ...26 Getting to know your device Layout 1 2 3 4 5 6 7 8 9 10 11 Front features Back features ...

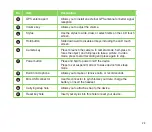
Page 27: ...ss down to confirm a command 6 AnyTime Launcher key Press to launch the AnyTime Launcher application 7 Call key Press to receive an incoming call or to make a call 8 Notification LED This multi color LED notifies the following Green Phone fully charged Flashing green Network detected Red Phone is charging Flashing red Event notification Flashing blue Bluetooth Wi Fi or GPS is ON 9 Camera lens This...

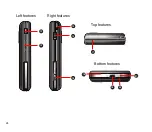
Page 28: ...28 Left features Right features 12 13 14 15 16 17 Top features Bottom features 18 19 20 21 ...

Page 29: ...a mode half press to focus the object and full press to take a picture In video mode press to start recording and press again to stop 17 Power button Press and hold to power on off the device Press to set suspend mode or to wake device from sleep mode 18 Built in microphone Allows you to make or receive calls or record sounds 19 Mini USB connector Use this connector to synchronize your data charge...

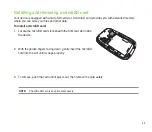
Page 30: ...our phone number subscriber details phonebook and additional phone memory Your device comes with a rechargeable Lithium Ion Li Ion battery New batteries come partially discharged and should be fully charged for about four hours before using them 1 Press down and push upward to remove the battery compartment cover CAUTION Use only an ASUS qualified battery SBP 18 To install a SIM card and battery ...

Page 31: ...t corner of the slot as shown 3 Install the battery into the compartment with its copper contacts properly aligned to the copper conductor on the device 4 Replace the battery compartment cover NOTE To avoid losing your customized settings replace the battery within five minutes of removing it from your device ...

Page 32: ...lug into the mini USB connector at the bottom of the device 2 Connect the AC power plug into a grounded wall socket or power strip NOTES The notification LED turns red and the charging battery icon appears on the status bar indicating that the battery is charging If your battery gets totally discharged you need to recharge it for at least twenty minutes before you can turn it back on ...

Page 33: ...ore your files and other data To install a microSD card 1 Locate the microSD card slot beneath the SIM card slot inside the device 2 With the golden fingers facing down gently insert the microSD card into the slot until it snaps properly 3 To remove push the card until it ejects out then remove the card safely NOTE The microSD card is an optional accessory ...

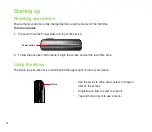
Page 34: ...ton on top of the device Using the stylus The stylus is a pen like device found behind the upper right corner of your device Use the stylus to write draw select or drag an item on the screen Single tap an item to select or open it Tap and hold an item to see a menu 2 Follow the onscreen instructions to align the screen and set the local time zone Power button Stylus ...

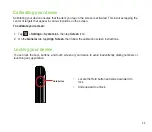
Page 35: ...evice ensures that the item you tap on the screen is activated This involves tapping the center of targets that appear in various locations on the screen To calibrate your screen 1 Tap Settings System tab then tap Screen icon 2 On the General tab tap Align Screen then follow the calibration screen instructions Locate the Hold button and slide downward to lock Slide upward to unlock Hold button ...

Page 36: ...36 The Home screen The Home screen on your device displays two parts the ASUS Today and the Today screens ASUS Today screen Today screen ...

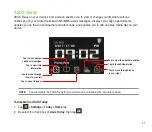
Page 37: ... you to add and play media files on your device Tap to open missed calls new messages Tap to launch Newstation Tap to view the weather updates Tap to view time information Tap to open Calendar Tap to move through icons to your left Tap to move through icons to your right NOTE You can disable the ASUS Today from your Home screen following the instructions below To disable the ASUS Today 1 Tap Setti...

Page 38: ...u on your missed calls Alerts you on your new SMS messages Alerts you on your new MMS messages Alerts you on your new e mail messages Calendar icon Displays your appointment for the day Date time icon Displays your date time settings Media icon Enables you to add and play media files News icon Displays the latest news Weather icon Displays the current weather ...

Page 39: ...tion that you want to view Tap to view your missed calls Tap to view read your new SMS messages Tap to view read your new MMS messages Tap to view read your new e mail messages NOTE To read your e mail messages ensure that you are connected to the Internet via Wi Fi or GPRS connection Refer to the Wi Fi or GPRS sections in this user guide for more details ...

Page 40: ... appointments You will be notified of your appointment on the day itself Obtaining the current weather data ASUS Today enables you to obtain and view the latest weather data of any place around the world NOTES Ensure that you are connected to the Internet via Wi Fi or GPRS connection Refer to the Wi Fi or GPRS sections in this user guide for more details Before using this feature ensure that you h...

Page 41: ...en done To configure the network settings 1 Tap Settings Connections Network Setting 2 Select the Country and Operator from the dropdown lists If your mobile service operator is not on the list tap the Auto Detect button 3 When done tap To obtain the current weather data From the ASUS Today screen tap then tap the display screen to retrieve the latest weather updates from the server ...

Page 42: ...en tap the display screen The Newstation screen is displayed 2 From the Categories list select the channel that you want to obtain the latest news updates from NOTE Ensure that you are connected to the Internet to get the latest news updates 3 Tap Menu Update Your news downloads are stored as RSS news feeds on your device and displayed on the ASUS Today screen NOTE You may read these stored RSS ne...

Page 43: ...a files through the speaker of your device or through a headset NOTE Your device may run low on memory and slow down if you store files on your device We recommend that you store audio and video files in a storage card To play media files Tap then tap the display screen The EziMusic is launched Refer to the section of EziMusic in this user guide for more details on how to play media files ...

Page 44: ...on Customizing the Today screen in Chapter 7 of this user guide Tap to open the Start menu Status bar Indicates the battery status Tap to adjust volume Tap to launch MultiHome Tap to view connectivity status Tap to launch the phone function Tap to launch Contacts list ASUS Today screen Refer to section ASUS Today in this User Guide Displays the signal status The icon shows no SIM card and no signa...

Page 45: ...s This icon depends on your location and mobile service provider GPRS available Connecting via GPRS Connected via GPRS 3rd Generation 3G service available Messaging status New Short Messaging Service SMS message New voice mail New Multimedia Messaging Service MMS message Status indicators Refer to the table below for the status indicators ...

Page 46: ...charging Battery low Signal status No cellular phone service No signal Searching for cellular phone service Indicates signal strength Phone off ActiveSync connection status ActiveSync synchronization in progress Connecting with ActiveSync ActiveSync connection not active Synchronization error ...

Page 47: ...Bluetooth stereo headset connected Hands free on Roaming service Roaming service This icon appears if you have international roaming feature Mode status Vibrate or Meeting mode on Speakerphone status Speakerphone on Alarm status Appears when you set the alarm SIM card status No SIM card installed Notification status Notice indicator ...

Page 48: ... viewing longer text files To change the screen orientation tap Settings System tab Screen then select the orientation you want Start menu The Start menu contains various programs and applications that you commonly use Tap to display the Start menu items You can also customize the items that appear in the Start menu To customize the Start menu 1 Tap Settings Personal tab Menus 2 Select the check b...

Page 49: ...he ASUS Today screen to launch MultiHome 2 To navigate through the Original Business and Life themes push the navigation key leftward or rightward or draw a horizontal line on the screen with the stylus 3 Tap the screen to apply your selected theme Tap the screen to apply the theme to the ASUS Today screen Life theme Tap the screen to apply the theme to the ASUS Today screen Business theme ...

Page 50: ...nd change device settings To run the AnyTime Launcher Press the AnyTime Launcher key Tap to open an application Use the navigation key to select Tap to add an application to the Favorite Programs list Tap to remove an application from the Favorite Programs list Tap to launch the selected application Tap to view all applications on the device ...

Page 51: ...d your favorite programs Recent Programs Displays the recent opened programs Favorite Contacts Allows you to add your favorite contacts Message Center Allows you to access Messaging function and view missed calls Internet Allows you to use Internet related applications Multimedia Allows you to use multimedia applications My Settings Allows you to configure your device settings ...

Page 52: ... MicroSD card You can search by file name or by words located in various applications including the Calendar Contacts Excel Mobile Word Mobile Help Messages Notes and Tasks You can also filter your search to files larger than 64 KB To search for a file or an item 1 Tap Programs Search 2 In Search for field enter the file name word or other information you want to search 3 In Type field select the ...

Page 53: ...53 Entering data Chapter 2 Using the Input Panel Writing and drawing on the screen Recording voice ...

Page 54: ...oke to write letters numbers symbols or punctuations which are converted into typed text To use the Block Recognizer 1 In an application that accepts user input tap the Input Panel arrow then tap Block Recognizer 2 Write letters numbers symbols or punctuations in the designated writing area Write letters on the abc left area of the box Write numbers on the 123 right area of the box Tap the space b...

Page 55: ...rs To input text using the onscreen keyboard 1 In an application that accepts user input tap the Input Panel arrow then tap Keyboard 2 Tap the keys on the onscreen keyboard to enter To enlarge the onscreen keyboard 1 Tap the Input Panel arrow then tap Options 2 Select Keyboard from the Input Method list 3 Tap Large Keys ...

Page 56: ...etters on the abc middle area of the box Write numbers on the 123 right area of the box Tap the space button to input a space Tap the special symbols button to input symbols punctuations and other special characters Tap Help button for help on how to write characters Using the Transcriber Transcriber is a handwriting recognition program that allows you to write in cursive print or mixed styles It ...

Page 57: ...om the screen To edit text 1 Tap the text you want to edit to position the cursor 2 You can now rewrite the text or use the Transcriber gestures to edit your selected text See Help for more details about the Transcriber gestures Writing and drawing on the screen You can write or draw directly on the screen and save notes in your own handwriting If you prefer to use your own handwriting or use draw...

Page 58: ...reference 5 Tap when finished To write draw in a note 1 Tap Programs Notes 2 From the Notes list tap New If you set the Default mode to Typing a blank page appears for typed text If you set the Default mode to Writing a page with horizontal lines appears for handwritten text You can also tap Menu and then select deselect Draw option to switch between typing and writing mode 3 Write Draw on the scr...

Page 59: ... near your mouth or source of sound 6 Tap when finished recording A voice record icon appears on the note You can tap to play the voice record 7 Tap To add a recording to a saved note 1 Tap Programs Notes 2 From the Notes list tap a saved note to open it 3 If you do not see the recording toolbar tap Menu View Recording Toolbar 4 Tap the record button to begin recording 5 Place the receiver near yo...

Page 60: ...60 Device Synchronization Chapter 3 Synchronizing your device Microsoft ActiveSync ...

Page 61: ...Microsoft ActiveSync ActiveSync allows you to synchronize data in your device with data in your computer ActiveSync can also synchronize over a wireless or mobile network with Microsoft Exchange Server provided that your mobile phone service or company is running Microsoft Exchange Server with Exchange ActiveSync When synchronized directly with Exchange Server you can stay up to date even when you...

Page 62: ...ers the synchronization settings you have in your device If you wish to synchronize your device with Exchange Server through your company or service provider obtain the name of the Exchange Server user name password and domain name from your network administrator before starting the Sync Setup Wizard To install and configure ActiveSync in your computer NOTE Ensure that you install Microsoft Active...

Page 63: ...cally synchronized with your computer ActiveSync synchronizes everytime you make a change on either the device or computer You cannot use WLAN to synchronize database Refer to your Windows Mobile Help for more information about ActiveSync synchronization Wireless connection may require separately purchased equipment eg Wireless router or Access Point Synchronizing via mini USB You can connect to y...

Page 64: ...our computer using Bluetooth NOTE Refer to the section Using Bluetooth in this user guide for more details 3 From the list of connected devices tap the name of the computer you want to synchronize with 4 Select ActiveSync then tap Save 5 Tap to exit the Bluetooth settings 6 From your device tap Programs ActiveSync Menu Connect via Bluetooth The devices starts to connect to your computer 7 When con...

Page 65: ... the check box 3 In the Server Address field key in the name of the server running Exchange Server then tap Next If necessary tap the check box This server requires an encrypted SSL connection 4 Enter user name password and domain then tap Next 5 Tap the check boxes to select the data items that you want to synchronize with Exchange Server To change the available synchronization settings select a ...

Page 66: ...he schedule according to your preference Refer to the table for input details Volume Recommended setup High Select a shorter interval in the Peak times list Low Select As items arrive option or a longer interval in the Off peak times list While roaming Check Use above settings when roaming Sending messages Check Send receive when I click Send ...

Page 67: ...67 Phone features Chapter 4 Using the phone Making a call Receiving a call Options during a call ASUS CallFilter ...

Page 68: ...ata from an installed SIM card to your device Phone pad The phone pad allows you to easily dial and access the Contacts Call History and Phone settings To launch the phone pad do any of the following Tap Programs Phone Press Turning off the phone function You may use other functions even when your device s phone function is turned off To turn off the phone function 1 Tap the signal icon or tap Set...

Page 69: ...m the volume menu you can Move the slider to adjust device or phone volume Tap On Vibrate or Off to change the mode and ringer volume settings NOTE You can also press the volume button at the left side of the device to adjust the volume Press up to increase volume Press down to decrease volume ...

Page 70: ...aking a voice call Calling using the phone pad To make calls using the phone pad 1 Tap Programs Phone or press to launch the phone pad 2 Tap the number or choose a contact or a recently dialed number from the list above the phone pad If you tapped the wrong number tap to erase number to the left 3 Press to make the call 4 When finished press to end the call ...

Page 71: ...Tap to launch Menu Displays the current call status Tap to mute unmute a call Tap to launch the Contacts list Tap to switch between keypad and call status screen Tap to turn the speaker on off Tap to take notes Back arrow Contacts Tap to show hide the keypad Tap to launch Menu ...

Page 72: ...t and from the shortcut menu tap Call Work Call Home or Call Mobile Tap Enter a name then enter the name or number you want to call from Contacts Press to dial the highlighted item Calling from Call History Your device enables you to check your call logs such as your missed incoming or outgoing calls To make a call from the Call History list 1 Launch Call History To do this do any of the following...

Page 73: ...ct information to your Contacts list or send a text message to a caller 3 Press to end the call Calling using Smart dialer The Smart dialer feature in your device enables you to find a contact more quickly Just key in the first letters of the contact you want to call Your device smartly matches it with your Contacts list and displays the possible matches To use Smart dialer 1 On the phone pad key ...

Page 74: ... Tap the contact number that you want to add to speed dial list Then tap Menu Add to Speed Dial 4 Edit the name and number and select a numeric key for this contact 5 Tap when finished To call a Speed Dial number 1 Tap Programs Phone Tap and hold the numeric key assigned to the contact you want to call 2 To end the call press To delete a Speed Dial entry 1 Tap Programs Phone Menu View Speed Dial 2...

Page 75: ... to the Voice Commander menu 5 Say Goodbye or tap to exit Voice Commander NOTES To use Voice Commander while using a headset press the answer button on the headset then follow given instructions Answer button may not be available in some headset models Some languages may not support the Voice Commander function To personalize the voice commander 1 Tap Settings Personal tab Voice Commander Settings...

Page 76: ...ational call 1 Tap and hold on the keypad to enter a plus sign 2 Enter the full phone number with the country code area code and phone number and then press Receiving a call When you receive a call a message prompts and allows you to answer or reject the incoming call To answer or reject an incoming call To answer a call tap Answer or press To reject an incoming call tap Ignore or press TIP Press ...

Page 77: ...nnot hear you Unmute Turns the microphone for the active call back on Speakerphone On Off Activates deactivates the speakerphone Turn Hands free On Off Turns on the hands free function You can also press and hold to turn on off the hands free function Conference Joins together all existing calls if you have subscribed to this service Paste Pastes the phone number you copied from your messages note...

Page 78: ...ond call and return to the first call press To hold a call to make a second call Tap to place the first call on hold and call a second number Press to end the second call and go back to the first call To switch between calls To switch between two calls tap To set up a multiple call With multiple calls in progress tap Menu Conference ...

Page 79: ...a list of telephone numbers from your Contacts list call log message log or any unlisted telephone number that you want to accept or reject Launching the shortcut menu The shortcut menu allows you to conveniently activate either the Accept or Reject list To launch the shortcut menu Tap Programs Call Filter ASUS CallFilter ...

Page 80: ...list 1 Tap Programs Call Filter 2 Select Accept List from Edit List box 3 Select source of data You can get data from your Contacts Call log Message sender number or you can add anonymous number and key in new numbers 4 From the list e g Contacts select an item then tap Add or to add a new Accept list item 5 Click to exit To remove items from the Accept list select a contact from the Accept list t...

Page 81: ...ams Call Filter 2 Select Reject List from Edit List box 3 Select source of data You can get data from your Contacts Call log Message sender number or you can add anonymous number and key in new numbers 4 From the list e g Contacts select an item then tap Add or to add a new Reject list item 5 Click to exit To remove items from the Reject list select a contact from the Reject list then tap Remove o...

Page 82: ...82 Messaging Chapter 5 E mail messaging Threaded SMS MMS messaging Windows Live ...

Page 83: ...n e mail address on your device you must have an Internet or an e mail account To set up an e mail account 1 Tap Messaging Setup E mail 2 Key in your E mail address and Password then tap Next NOTE By default your device automatically attempts to obtain your e mail settings from the Internet particularly for Internet e mail accounts such as Yahoo or Hotmail accounts 3 If you want to manually enter ...

Page 84: ... in parenthesis Send receive Internet e mail messages Tap Messaging Select the Internet e mail account for which you want to send and receive messages and tap Menu Send Receive To stop this process tap Menu Stop Send Receive Delete an account Tap Messaging Select an account and tap Menu Delete Switch between accounts With an account open tap Menu Go To then tap an account you want to switch to Or ...

Page 85: ...ich you want to send the message or tap Menu Add Recipient to select from your Contacts list NOTE If you are sending a message to more than one recipient separate them with a semicolon 5 Key in your message in the message field 6 When finished tap Send NOTE If you are working offline e mail messages are saved to the Outbox folder and sent the next time you connect ...

Page 86: ...cted tap Delete Move a message to another folder With the message you want to move selected tap Menu Move Tap the new folder and tap Select Sort messages On any account screen tap Menu Tools Sort By and select your desired sort method Insert a signature On any account screen tap Menu Tools Options Signatures Change message options On any account screen tap Menu Tools Options Downloading e mail mes...

Page 87: ...mail synchronization see the ActiveSync online help on your computer On Windows Vista platform you can synchronize your e mail messages via the Windows Mobile Device Center NOTES For synchronizing on Windows Vista platform refer to the Windows Mobile Device Center s website at http www microsoft com windowsmobile devicecenter mspx To connect directly to an e mail server see Synchronizing with an E...

Page 88: ... a different folder within the same account TO DO THIS View message folder contents Tap Messaging Select the account that you want to view Tap Menu Go To Folders and select the folder that you want to view Moving a message to a different folder Tap Messaging Select the account with the message that you want to move Select the message you want to move and tap Menu Move Select the folder into which ...

Page 89: ...nd a threaded SMS message 1 Tap Messaging Text Messages Menu New 2 Key in your recipient s phone number or tap To to select a recipient from the Contacts list Separate multiple recipients with a semicolon 3 Key in your message 4 When finished tap Send to send out the message NOTE Once your recipient replies to your message your device displays the message thread making it easier for you to follow ...

Page 90: ...re you can send and receive MMS messages Ask your mobile service operator on how to activate the MMS feature Only mobile phones with MMS feature can send receive MMS messages Depending on the service that you subscribe to you may not be able to send and receive MMS messages to users using a different mobile phone network Accessing MMS To access MMS do any of the following Tap Messaging MMS After c...

Page 91: ...nt to select from your Contacts If you have more than one recipient separate them with semicolon 3 In the Subject field key in a subject for the message 4 Tap the Insert Picture Video field All of your pictures and video clips will be displayed in thumbnail view 5 Tap a picture or video clip to insert it to the message 6 Tap the Insert Audio field All of your available audio clips will be displaye...

Page 92: ...acts list Hide sender information Tap Menu Options Send Options Select the Hide Sender check box Create an MMS message from a template Press Menu Template New from Template to compose a message using a predefined template Create an MMS message template Create a message or open an existing message and tap Menu Template Save as Templates Add preset or frequently used text strings to a message In a te...

Page 93: ...mail or an MSN account you already have a Passport Once you have obtained either a Microsoft Passport or Microsoft Exchange Server account you are ready to set up your account NOTE You need a Microsoft Passport account to use Windows Live application If you do not have a passport account go to www passport com to obtain one Using Hotmail Use the Windows Live application to access your Hotmail mail...

Page 94: ... in to Windows Live your username and password is displayed Using Windows Live Messenger To sign in and out of Windows Live Messenger 1 Set e mail address and password in Windows Live 2 When the setting is finished tap Programs Messenger 3 On the Windows LiveMessenger main screen tap Signing In 4 To sign out press Menu Sign Out NOTE If you do not sign out of the Windows Live Messenger application ...

Page 95: ...nt then select a contact and tap Add Switch to another chat session In the list of ongoing chats displayed at the bottom of screen Tap the name of a contact you want to chat Return to the contacts list Tap at the bottom of the screen End a chat session From a chat session tap Menu End Conversation See all who are chatting From a chat session tap Menu Options View participants Block someone on your...

Page 96: ... description Send a voice clip Tap Voice clip from a chat session to record then tap Send NOTES If your Internet service provider ISP only allows one Access Point Name APN connection at a time you may meet some problems when using Windows Live Messenger concurrently with other Internet related applications We recommend that you close Windows Live Messenger before activating any applications that r...

Page 97: ...97 Organizing your life Chapter 6 Using Contacts Using Calendar Using Tasks ...

Page 98: ...lphabetically Beside each name in the contact list is an abbreviation for the default communication method such as the person s work phone number w mobile phone number m or home phone number h Your device automatically sets a contact s mobile phone number as the contact s default number If there are phone numbers stored in your SIM card the entries display with a SIM card icon before the name TO D...

Page 99: ...rmation to another device On the Today screen tap Contacts Tap the contact to beam and scroll to the number Tap Menu Send Contact Beam Tap the device name to send Find a contact by name On the Today screen tap Contacts If you are not in Name view tap Menu View By Name Enter the first few letters of the contact s name until the contact is displayed Find a contact by company On the Today screen tap ...

Page 100: ...picture to contacts stored in your Outlook Contact list Send your approximate location From the Today screen tap Contacts Tap the contact that you want to send your location to then tap Menu Send My Location Locate a contact in the Google Maps From the Today screen tap Contacts Tap the contact whose location you want to locate then tap Menu Locate in Google Maps NOTE For more details on Google Map...

Page 101: ...ntacts tap Menu Deselect All Copy a contact from the SIM card to the Contacts list on the device Select the contact entry that you want to copy Tap Menu Copy to Contacts then tap Copy Copy or retrieve a contact from the Contacts list to the SIM card Tap Menu Retrieve from Contacts The contacts stored on your device is displayed Select the contact entry that you want to copy or retrieve from your d...

Page 102: ...g Tap Calendar On the ASUS Today screen tap Scheduling an appointment To schedule an appointment 1 Tap Calendar 2 Tap Menu New Appointment 3 Enter information about the appointment To schedule an all day event in All Day select Yes 4 Tap TO DO THIS Make a recurring appointment Tap the appointment and tap Menu Edit Tap Occurs and select one of the recurrence options Delete an appointment Tap the ap...

Page 103: ...day View your agenda for a specific date From any Calendar view tap Menu Go to Date Tap the date to view Show week numbers From any Calendar view tap Menu Tools Options Select the Show week numbers check box Change the display of the work week In any Calendar view tap Menu Tools Options and do the following To specify the first day of the week in 1st day of week select Sunday or Monday To specify ...

Page 104: ...d red NOTE You can synchronize information on your phone with your computer to keep your task list up to date in both locations TO DO THIS Create a task Tap Programs Tasks Menu New Task Enter the task name and details then tap Mark a task as completed Tap Programs Tasks Select the task to mark complete then tap Complete Delete a task Tap Programs Tasks Select the task to delete then tap Menu Delet...

Page 105: ...hapter 7 Customizing the Start menu Using the Profile Manager Customizing the Today screen Entering your contact information Setting up sounds and notifications Setting the date time and alarm Setting the ringtone Wake up settings ...

Page 106: ...ngs of your device to suit different scenarios There are four profile modes that you can choose from Normal This mode allows you to customize the ringtone for incoming calls messages and alert notifications Meeting In this mode the volume is turned off and your phone vibrates to alert you about an incoming call Silent This mode puts both the volume and ringing tone of your device on mute mode Auto...

Page 107: ... or Name tabs and make the necessary changes 4 When done tap To change to Meeting mode 1 Tap Settings Profile Manager 2 Select Meeting 3 If you want to change the settings tap Edit 4 Tap the slider to adjust the speech volume setting 5 When done tap To change to Silent mode 1 Tap Settings Profile Manager 2 Select Silent 3 If you want to change the settings tap Edit 4 Tap the slider to adjust the s...

Page 108: ...ur device automatically switch from Normal to Meeting mode 3 When done tap Customizing the Today screen To change the theme of your device 1 Tap Settings Today 2 From Appearance tab select a theme for your device 3 Tap when finished To customize the items displayed on the Today screen 1 Tap Settings Today 2 From Items tab check the items you want to show on the Today screen 4 Tap when finished ...

Page 109: ...ished Entering your contact information The Owner Information feature allows you to enter and display your personal contact information such as your name alternative contact numbers and e mail address on your device NOTE We recommend that you enter your contact information so you can easily be contacted in case of loss To enter owner information 1 Tap Settings Owner Information 2 Key in your detai...

Page 110: ...ttings Personal tab Sounds Notifications 2 From the Sounds tab check boxes before the items you want to enable sounds for 3 When done tap To change the notifications 1 Tap Settings Personal tab Sounds Notifications 2 From the Notifications tab select an event from the dropdown list and change the settings 3 When done tap Setting the date time and alarm To set the date and time 1 Tap Settings Syste...

Page 111: ...nc the time on your device with your mobile service provider NOTES If you deselect this option the time on your device is synchronized when you sync the device with your PC If you select this option the time on your device keeps unchanged when you sync the device with your PC 4 Tap To set the alarm 1 Tap Settings System tab Clock and Alarms 2 On the Alarm tab enter the necessary alarm settings 3 T...

Page 112: ...led ringtones in the list box Setting the ringtone With your device you can add and configure your favorite music as your phone ringtone You can easily configure your favorite song or sound as your ringtone with the following compatible audio formats aac amr mp3 wav wma and mid Adding ringtone to selection To add ringtone to the selection category under phone setting 1 Tap Settings Ring tones 2 Se...

Page 113: ...ons whenever your device is in sleep mode To set the wake up action 1 Tap Settings Wakeup Source 2 Select from the available wake up actions Tap Select All to select all actions or tap Select None to deselect all available actions 3 Tap when finished ...

Page 114: ...114 Getting connected Chapter 8 Using the Wireless Manager Using Bluetooth Using Wi Fi Setting a GPRS connection Setting the network GSM 3G Networks ...

Page 115: ...s you to use its basic functions such as listen to music and play games while onboard You cannot send SMS or make calls while flight mode is enabled To enable disable flight mode 1 Tap Settings Connections tab Wireless Manager 2 Tap the Flight Mode icon When enabled the icon turns blue To disable the flight mode function tap the Flight Mode icon The icon turns gray when disabled Enabling disabling...

Page 116: ... To connect your device to your PC you can use a USB Bluetooth dongle NOTE Ensure that you have Internet connection via Wi Fi or GPRS connection Refer to the Wi Fi or GRPS sections in this user guide for more details Using a USB cable to connect your device to your PC NOTE Ensure that you have installed Microsoft ActiveSync 4 5 or later on your PC To use a USB cable to connect your device to your ...

Page 117: ...econds for your device to establish the Internet connection Using Direct Push Direct Push is a technology that allows you continuously retrieve e mail messages even without synchronising your device with your PC To use Direct Push 1 Tap Settings Connections tab Wireless Manager 2 Tap the Direct Push icon to enable the Direct Push function When enabled the icon turns blue To disable Direct Push tap...

Page 118: ... device or computer using Bluetooth you can use the services available on that device NOTE The real distance will be variant by the environment and block Activating Bluetooth in your device Use the Wireless Manager to enable or disable Bluetooth in your device To activate Bluetooth in your device 1 Launch the Wireless Manager To do this you can either Tap Settings Connections tab Wireless Manager ...

Page 119: ...nect then tap Next or press the Right Soft key You can find the passcode in the documentation that came with the target device 6 Enter the display name for this connection 7 Repeat steps 3 6 to connect to more devices Using Wi Fi Turning on Wi Fi To turn on Wi Fi 1 Tap Settings Connections tab Wi Fi Menu Turn On Wi Fi The Device then automatically scans for all available wireless networks within t...

Page 120: ...ings Connections tab Wi Fi Tap from the status bar and then tap Settings Wi Fi 2 On the Configure Wireless Networks screen tap an available wireless network then make the necessary changes If the wireless network you want to connect to is not on the list tap Add New Refer to the succeeding sections for details on how to add new wireless networks Tap the Network Adapters tab and select an adapter T...

Page 121: ... tab Wi Fi Tap from the status bar then tap Settings Wi Fi Then tap Add New from the Wireless tab 2 Enter a name for the network and select an item from the Connects to drop down menu Then tap Next 3 Set authentication data encryption and network key Ask your network administrator for these information Then tap Next NOTE Obtain the authentication data encryption and network key from your network a...

Page 122: ...Connections 2 From the Connections screen tap Add a new modem connection 3 Enter a unique name for the connection then select Cellular Line GPRS from the modem list 4 Enter the Access point name Consult your network service provider for the access point 5 Enter your user name password and domain then tap Finish Contact your network administrator for assistance NOTES The network connection may vary...

Page 123: ...GPRS the GPRS will get signal priority We recommend not to use WLAN and GPRS at the same time If you have set a default GPRS connection it automatically connects when you launch an application that connects to the Internet 1 Launch any application that connects to the Internet such as Internet Explorer The device will automatically connect to your default GPRS connection A pop up callout appears t...

Page 124: ...ill automatically reconnect everytime you launch an application that requires GPRS connection such as Internet Explorer or Windows Live Messenger Using the GPRS Tool The GPRS Tool allows you to conveniently select and connect to your GPRS service provider To connect via GPRS Tool 1 Tap Settings Connections tab Network Setting You can also tap on the status bar then tap Settings from the popup call...

Page 125: ... on the list tap the Auto Detect button 3 When done tap Setting your preferred networks Your device enables you to set multiple networks in the order that you want your device to access them If your primary network is not accessible your device will automatically try to access an available network in your network list To set preferred network 1 From the phone pad tap Menu Options Network tab 2 Tap...

Page 126: ...oper service automatically To choose network type 1 Tap Settings Connections tab GSM 3G Networks 2 Select a proper network type then tap If you prefer to use the service your SIM card automatically detected select Automatic 3 When prompted tap to restart your device and apply changes NOTES Network type varies with different service providers Ensure that you choose the right network type for your S...

Page 127: ...127 GPS features Chapter 9 GPS Catcher External GPS ...

Page 128: ... GPS Catcher 2 Then tap Update to start update 3 Tap when finished NOTES To make a successful update ensure that your device is connected to the Internet The expiration of GPS data is three days You need to update it again when it is expired You can also set GPS Catcher to update automatically refer to the Setting GPS Catcher section for details Setting GPS Catcher To set GPS Catcher 1 From the GP...

Page 129: ... From the Programs tab select a program port NOTE By default the port is set to GPD1 We recommend that you DO NOT change the default setting 3 From the Hardware tab specify a hardware port and baud rate for your external GPS device to use NOTE By default the hardware port is set to COM2 and the baud rate is set to 57600 Refer to the user guide of your external GPS device for details 4 From the Acc...

Page 130: ...130 Multimedia features Chapter 10 Using the camera Viewing pictures and videos Streaming Player EziMusic EziPhoto YouTube Flickr ...

Page 131: ...e following Tap Programs Pictures Videos Camera icon Press the Camera button on the right side of your device To exit the Camera tap the exit icon on the camera screen Supported formats Using the camera mode or video mode the images or video clip captured are stored in the following formats Still image Camera mode JPEG jpg Video Video mode 3GP 3gp MPEG 4 mp4 ...

Page 132: ...In camera mode the camera button functions as shutter button Tap to launch menu Capture mode Tap to zoom in Tap to zoom out Tap to close camera Tap to preview in EziPhoto Number of available shots Tap to switch mode Timer Burst mode Picture size Tap to launch MMS camera mode Tap to switch to Camera mode Tap to switch to Video mode Tap to launch Frame mode Tap to launch Panorama mode Tap to launch ...

Page 133: ...riate for a night scene or sports event Select Auto to use best setting for any scene Self Timer Sets the delay of shutter release to 5 or 10 seconds after you have pressed the camera shutter button Burst Allows you to take 4 or 9 pictures in succession with one press of the camera shutter button Picture Size Allows you to set the frame size of the picture Advanced This option allows you to set th...

Page 134: ...ing the camera video mode icon on the screen To take photos 1 Full press the camera button When the icon appears ensure that the device is stable and not shaking 2 Tap Camera and then repeat steps 1 to 2 to take more photos NOTE The image is automatically saved to the default storage location and can be viewed using the Pictures Videos application ...

Page 135: ...enu from the video screen 2 From the shortcut menu tap an icon to display contents Video Size Allows you to set the frame size of video Advanced This option allows you to set the following settings Camera Video Color Adjustment and General Tap to zoom out Tap to zoom in Video size Video mode Tap to launch menu Recording indicator Green Ready Red Recording Tap to close camera Tap to launch Pictures...

Page 136: ...n recording The record indicator turns from green to red while video is recording 3 Press the camera button again to stop recording NOTES The video clip is automatically saved to the default storage location Use Windows Media Player Mobile to playback video clip in your device Use Apple QuickTime player if you wish to play video clips in your computer You can download QuickTime installer from www ...

Page 137: ...e Card To view pictures stored in My Pictures folder on your device tap My Pictures then tap a picture thumbnail To playback video clips in My Pictures folder on your device tap My Pictures then tap a video Editing pictures and photos To edit pictures and photos 1 Tap Programs Pictures Videos Tap a picture or a photo thumbnail to open 2 Tap Menu Image Editor 3 Edit the image Draw add stamp and typ...

Page 138: ...he picture Tap to exit editing Tap to add text Tool bar 4 Tap to save the picture Then tap Yes to confirm NOTE In this option the original picture is replaced by the edited file You can also tap in the Tool bar and choose Save as to save the edited picture as another file name NOTES This image editor function can only be applied to the pictures or photos with 320 x 240 resolution The image bigger ...

Page 139: ...Fi or GPRS connection Refer to the sections on Wi Fi or GPRS in this user guide for activating any of these connections on your device Tap to play or stop a file Tap to maximize the screen Tap to browse the internet Tap to open and connect to an rtsp URL website Tap to increase the volume Tap to launch the Menu list Tap to decrease the volume NOTE A Real Time Streaming Protocol RTSP website provid...

Page 140: ...r only recognizes an rstp URL web address 4 Tap to play a streaming file from your preferred rtsp website NOTE You may bookmark your favorite rtsp URL website Refer to the next section for more details Connecting with bookmarks Your device enables you to store and play streaming files from your favorite rtsp websites NOTE Before you can connect to a favorite rtsp website you must first add the web...

Page 141: ...g history or manual input of URL 3 Key in the rtsp URL web address then tap Connect 4 Tap to play a streaming file from your preferred rtsp website While a streaming file is playing tap Menu Add to My Bookmark 5 Assign a specific name for the streaming file that you want to save 6 Select the folder in your Bookmark list where you want to save the file To play a bookmarked streaming file 1 Tap Prog...

Page 142: ...c profile on your device Tap to play the next file Tap to play the selected file Tap to open the menu list Tap to adjust the volume Tap to enter the Library Tap to select the file Tap to change shuffle repeat modes Tap to enter the Library Tap to play the previous file Displays the time elapsed Displays the total playing time Drag the slider to change the playing process NOTE For more details refe...

Page 143: ...s the AnyTime Launcher key then tap EziPhoto The following describes the EziPhoto profile on your device Tap to open the Calendar Tap to view all photos Tap to open the menu list Tap to open Albums Tap a photo to view in full screen mode Tap to switch among Album Calendar and All Photos view NOTE For more details refer to the Feature Highlights Guide ...

Page 144: ...s or pictures via e mail messages Refer to the Setting up accounts section in Chapter 5 Messaging for details Using YouTube You are allowed to upload videos directly to the YouTube website from your device via MMS and e mail messages IMPORTANT Before using YouTube register for a YouTube account and set up your Mobile Profile at the YouTube website at http www youtube com YouTube provides you with ...

Page 145: ...thin the limit 5 Key in a title and description for your video clip 6 Tap Send to upload the video clip to YouTube website Using Flickr You are allowed to upload photos directly to the Flickr website from your device via MMS and e mail messages IMPORTANT Before using Flickr register a Flickr account at the Flickr website at http www flickr com To upload photos to Flickr 1 Tap Programs YouTube Flic...

Page 146: ...p a photo from the list NOTE Consult your mobile service provider for the size limit of an MMS message You are allowed to upload several photos at a time within the limit 6 Key in a title description and tag for your picture 7 Tap Send to upload the picture to the Flickr website ...

Page 147: ...147 Business features Chapter 11 Ur Time Remote Calendar Meeting Time Planner ...

Page 148: ...p Programs Ur Time 2 Tap Menu Time Set the local time at your current location 3 Tap when finished Setting alarm To set the alarm 1 Tap Programs Ur Time 2 Tap Menu Alarm then tap New to add a new alarm or select an existing alarm and tap Edit 3 Set alarm details To activate anti snooze feature check the Snooze box and set snooze interval 4 Tap when finished ...

Page 149: ...ndar from your device From your device you can either view the calendar or synchronize events and agenda with your Google Calendar in bi directional way Download events from Google calendar or upload events to Google Calendar with your device IMPORTANT Obtain a Google account before you use this function Visit www google com calendar for details on account register Ensure that your device is conne...

Page 150: ...ame and Password then tap Sync to start synchronizing 3 When the calendar is synchronized successfully a pop up message appears Tap Yes to open the calendar or tap No to exit Uploading events to Google Calendar To upload new events or modified events to your Google Calendar 1 Tap Calendar 2 Select the event you want to upload to Google Calendar then tap Menu Upload to Google ...

Page 151: ... Programs Remote Calendar Option Setting 2 Set your desired synchronization mode then tap OK to apply changes or tap Cancel to quit Tap to select sync mode Tap to select sync direction Tap to select sync interval This item is inactive when the sync mode is set to Manual Tap to select priority when event conflict happens ...

Page 152: ... hour timetable of the chosen cities appear allowing you to identify the best time for the meeting Dark blue is late night early morning light blue is off peak hour and white is peak daytime hour You can also change the time interval shown by tapping Interval on the lower right corner of the screen 3 Select the time for your meeting and tap New Date 4 Fill in the meeting information and tap to add...

Page 153: ...153 ASUS Special features Chapter 12 Gester ASUS Zip Backup Newstation ...

Page 154: ...ling panning and zooming Enabling Gester To enable the Gester feature 1 Tap Settings System tab Gester 2 Select the check box of Enable Gester Function 3 Select the Enable Sound Effects to activate the sound effects for the Gester functions NOTE The sounds are for some of the gestures only 4 Tap when finished ...

Page 155: ...een and then stop at your destination Pan left right Slide your finger leftward rightward on the screen and then stop at your destination Pan top left bottom right Slide your finger in a left slanted upward right slanted bottom direction on the screen and then stop at your destination Zoom Zoom in in Internet Explorer and EziPhoto Slide your finger in a right slanted upward direction on the screen...

Page 156: ...want to set password for the file Tap Next 5 Tap Done to exit Check the Exit and open folder box if you want to open the folder where the compressed files are stored To add files to an existing compressed file 1 Tap Programs ASUS Zip 2 Select the radio button before Add file to existing compressed file then tap Next 3 Select a compressed file then tap Next 4 Select files or folders you want to add...

Page 157: ...on allows you to backup as well as restore your files and data to your device and storage card Backing up files To back up files 1 Tap Programs Backup Backup 2 Select the location and the items you want to backup Then tap Next 3 Rename the file and select the storage location for the backup Then tap Next 4 Enter four digits as your password to encrypt the backup file Then tap Next 5 Tap Start to b...

Page 158: ... the items you want to restore then tap Next 3 Rename the file and select the storage location for the backup then tap Next 4 Enter the password to decrypt the backup file then tap Next 5 Select the items you want to restore from the backed up files then tap Next 6 Tap Start to begin restore Or tap Back to return to the last screen NOTE The system will turn off all processing applications when res...

Page 159: ... that your device is connected to Internet when using Newstation Using Newstation To read RSS news 1 Tap Programs Newstation 2 Tap a category folder to open 3 Tap a channel name to open 4 Browse your favorite subjects To create a new category folder 1 Tap Programs Newstation 2 Tap Menu New Category then edit the category name ...

Page 160: ...lect the radio button of Input from URL and enter the URL address Then tap Next Select a category where you want to add the channel Then tap Finish Import from a file Select the radio button of Import from a file then tap Next Select a folder and choose a file from the list Choose channels from the list then tap Next Select a category where you want to add the channel then tap Finish ...

Page 161: ...ption that you need Channel Menu To use the channel menu 1 Tap Programs Newstation 2 Tap a category folder then select a channel and tap Menu 3 Tap an option that you need Subject Menu To use the subject menu 1 Tap Programs Newstation 2 Tap a category folder Then tap a channel to open Select a subject and tap Menu The menu list pops up 3 Tap an option that you need ...

Page 162: ...er features Chapter 13 Microsoft Office Mobile ClearVue PDF Auto Cleaner Restoring default factory settings System information Task Manager Removing programs Google Search Google Maps Mobile SMS Location Link ...

Page 163: ...ike you would normally use the Office applications on your computer To access these applications tap Office Mobile Select the appropriate application to use ICON DESCRIPTION Excel Mobile allows you to view create and edit an Excel spreadsheet OneNote Mobile allows you to view create and edit an OneNote file Powerpoint Mobile allows you to view a powerpoint presentation Word Mobile allows you to vi...

Page 164: ...ou want to clear Tap Menu Edit Clear Tap Contents to clear the contents in the highlighted cell or cells tap Format to clear the formats applied to the cells rows or columns and tap All to clear both the contents and formats applied to the cells rows or columns Format cells rows or columns Tap Menu Format Make the necessary formats for the cells rows or columns Modify the sheets Tap Menu Format Mo...

Page 165: ... send the file to then tap Tap to Send Delete a file Tap Menu File Delete Tap Yes in the confirmation message OneNote Mobile OneNote Mobile is a note taking application It allows you to capture information in multiple ways and organize it according to your needs Besides text you can also insert audio recording and pictures to your notes To launch OneNote Mobile tap Office Mobile OneNote Mobile TO ...

Page 166: ...ting picture into your note Tap Menu Insert Picture From the existing pictures that are displayed tap the picture that you want to insert into your note Insert recording to your note Tap Menu Insert Recording Create your recording then tap OK when done Delete a note From the list of existing notes tap Menu Delete Tap Yes to confirm deletion Rename a note From the list of existing notes tap Menu Re...

Page 167: ...er and location for the file Tap Save Rename or move a file Tap Menu File Rename Move Enter the new name in the Name field To move the file to another location select the folder or location where you want to move the file Send a file via an e mail message Tap Menu File Send via E mail Outlook E mail A new e mail template is displayed with the word file attached Key in the recipient s e mail addres...

Page 168: ...Tools Insert Date Find or replace text Tap Menu Edit Find Replace Cut copy or paste text Tap Cut Copy or Paste from Menu Clear the contents Tap Menu Edit Clear Select all contents Tap Menu Edit Select All Create a duplicate file From the list of existing files tap and hold the file that you want to create a duplicate The file menu list appears Tap Create Copy ...

Page 169: ...ng the slideshow presentation tap and hold the device s screen From the menu list that appears tap on any menu item Copy an existing file From the list of existing files tap and hold the file that you want to copy The file menu list appears Tap Create Copy Delete a file From the list of existing files tap and hold the file that you want to delete The file menu list appears Tap Delete Rename or mov...

Page 170: ... Tap Create Copy Send a file via an e mail message Tap Menu File Send via E mail Outlook E mail A new e mail template is displayed with the Excel file attached Key in the recipient s e mail address the subject and your message Tap Send Beam a file Tap Menu File Beam From the list of devices tap the device you want to send the file to then tap Tap to Send ...

Page 171: ...he ClearVue PDF application Tap File Exit TO DO THIS Open a PDF file Tap File Open Tap a file to open Close an open file Tap File Close Open a recently viewed file Tap File Recent Files A list of recently viewed files appears Tap the file you want to open Zoom the content of an open file Tap Zoom Select the scale you want to use or tap Custom to customize the scale ...

Page 172: ...applications that you are not using To set Auto Cleaner 1 Tap Settings System tab Auto Cleaner 2 Select the check box to activate the Auto Cleaner function then select either Short or Long press X to close the program 3 Tap Setting button to set the Exception and the Forced 4 Tap when finished ...

Page 173: ...red in your device Back up your important data to your storage card or computer before restoring to the default settings Before proceeding with restoring to the default settings ensure that you remove the microSD card from the device System information The System Information contains important device information including the current device settings and version To launch the System Information 1 T...

Page 174: ...e programs easily You can also switch to any of the listed programs from the Task Manager screen To launch Task Manager Tap Programs Task Manager To end a program Select the program you want to end and tap End Task To end all tasks tap Menu End All Tasks To switch to a program Select a program and press down the Navigation key or tap Menu Switch To ...

Page 175: ...ograms 2 Select a program you want to remove then tap Remove 3 A warning message pops up Tap Yes to confirm Google Search Google Search enables you to do web searches on your device as you would on Google search engine on your computer To display the Google Search bar on the Today screen 1 Tap Settings Personal tab Today 2 From the list on the Items tab select Google Search 3 Tap when done The Goo...

Page 176: ...aps Mobile is provided by Google Google has no direct or indirect relationship with ASUS Google may produce Google Maps Mobile updates on its website at http mobile google com To launch Google Maps Mobile tap Google Maps TO DO THIS Get directions Tap Menu Directions In the Start point field key in the area where you are coming from and in the End point field key in the area where you are going to ...

Page 177: ... your approximate current location If the GPS signal is weak a flashing blue dot surrounded by a light blue circle appears NOTE For a better signal reception use an external GPS device with your mobile device NOTE You may also send your location to a contact or find the location of a contact in the Google Maps For more details refer to page 100 ...

Page 178: ...ion link through SMS 1 Tap Messaging tap Text Message then tap Menu Send My Location 2 Key in the recipient s number or tap To area to add recipients from your contact list 3 Key in your message and tap Send when finished You may also send your location directly to one of your contacts in your contacts list To do this Tap Contacts from the ASUS Today screen select a contact from the list and tap M...

Page 179: ...179 Appendices Notices Specific Absorption Rate SAR ASUS contact information ...

Page 180: ... to the battery or a statement in the servicing instructions The marking or statement shall include the following or similar text CAUTION RISK OF EXPLOSION IF BATTERY IS REPLACED BY AN INCORRECT TYPE DISPOSE OF USED BATTERIES ACCORDING TO THE INSTRUCTIONS Operator access with a tool If a TOOL is necessary to gain access to an OPERATOR ACCESS AREA either all other compartments within that area cont...

Page 181: ...he handset a minimum of 1 5 cm from the body Use of other enhancements may not ensure compliance with FCC RF exposure guidelines If you do no t use a body worn accessory and are not holding the device at the ear position the handset a minimum of 1 5 cm from your body when the device is switched on Exposure to radio waves THIS MODEL MEETS INTERNATIONAL GUIDELINES FOR EXPOSURE TO RADIO WAVES Your mo...

Page 182: ...to this product model could cause differences in the SAR value for later products in all cases products are designed to be within the guidelines The World Health Organization has stated that present scientific information does not indicate the need for any special precautions for the use of mobile devices They note that if you want to reduce your exposure then you can do so by limiting the length ...

Page 183: ...gned to this model The IMEI of each unit is factory set and cannot be altered by the user and that it complies with the relevant IMEI integrity related requirements expressed in the GSM standards Should you have any questions or comments regarding this matter please contact us Sincerely yours ASUSTeK COMPUTER INC Tel 886228943447 Fax 886228907698 Email http vip asus com eservice techserv aspx ...

Page 184: ... CA 94538 USA Telephone 15029550883 Fax 15029338713 Website usa asus com Software download support asus com ASUS COMPUTER GmbH Germany and Austria Address Harkort Str 21 23 D40880 Ratingen Germany Telephone 49210295990 Fax 492102959911 Online contact www asus com de sales Technical Support Telephone 49180595990 Fax 492102959911 Online support www asus com de support Website www asus com de news Av...

Page 185: ...ces Radio equip ment to be used in the 1 GHZ to 40 GHZ frequency range Part2 Harmonized EN under article 3 2 of the R TTE Directive 7 7 7 7 EN 301489 1 EN 301489 7 EN 301489 17 EN 301489 24 Electromagnetic compatibility and Radio spectrum Matters ERM Electromagnetic compatibility EMC standard for radio equipment and services Part 1 Common technical requirements Part 7 Specific conditions for mobil...

Page 186: ...ation Protection 1998 Guidelines for limiting exposure in time varying electric magnetic and electromagnetic fields EN 61000 3 2 2000 A2 2005 Disturbances in supply systems caused EN 61000 3 3 1995 A1 2001 Disturbances in supply systems caused EN 55013 Limits and methods of measurement of radio disturbance characteristics of broadcast receivers and associated equipment EN 55020 Immunity from radio...

Reviews: