2-16
Chapter 2: Hardware information
6. Repeat steps 1 to 5 to install the other heatsink and fan assembly if you
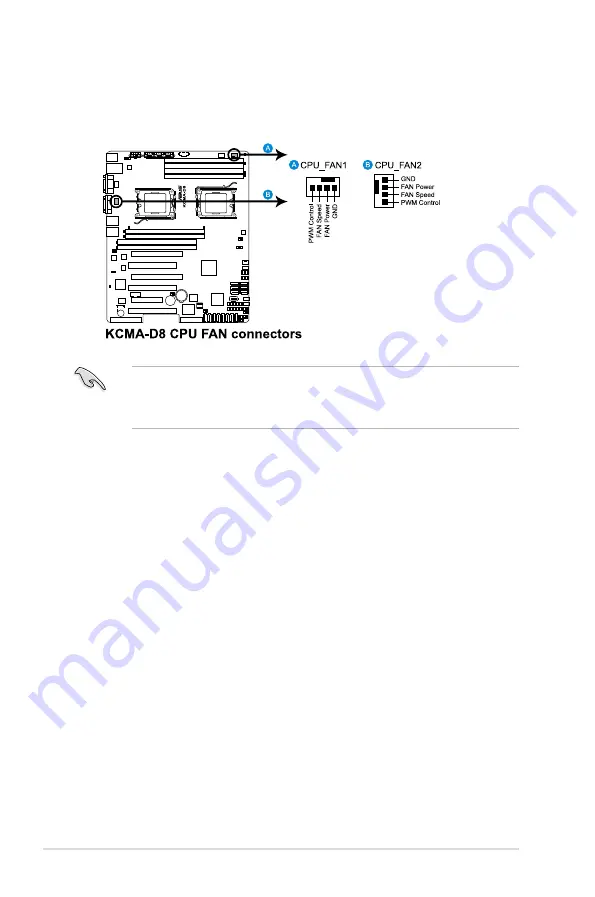
have installed a second CPU, then connect the fan cable to the other 4-pin
connector.
5. When the heatsink and fan assembly is in place, connect the CPU fan cable
to the connector on the motherboard labeled CPU_FAN.
• Do not forget to connect the CPU fan connector! Hardware monitoring
errors can occur if you fail to plug this connector.
• This connector is backward compatible with old 3-pin CPU fan.
Summary of Contents for KCMA-D8
Page 1: ...Motherboard KCMA D8 ...
Page 25: ...ASUS KCMA D8 2 7 2 2 3 Motherboard layouts ...
Page 60: ...2 42 Chapter 2 Hardware information ...
Page 106: ...4 42 Chapter 4 BIOS setup ...
Page 108: ...ASUS KCMA D8 Chapter summary 5 5 1 Setting up RAID 5 3 5 2 FastBuild Utility 5 5 ...
Page 122: ...5 16 Chapter 5 RAID configuration ...
Page 148: ...6 26 Chapter 6 Driver installation ...
Page 150: ...Appendix summary A ASUS KCMA D8 A 1 KCMA D8 block diagram A 3 ...


