


28
AUTO POWER OFF
To
conserve
battery
life, the DC3810 shuts
off automatically
after three minutes of inactivity.
To
restart
the camera, slide the power switch to
the right.
•
Under battery power
, the auto
matic
power
-
off function can be
reset
to
1, 5
, 10, or 30 minutes.
(
See page 117.
)
•
Under
AC adapter
power
,
the automatic power-off function
is set and fixed at 30 minutes.
U
sing the
AC adapter
6V 1A
(
s
old
s
eparately)
We recommend
taking advantage of
the AC adapter when
ever
possible. Taking pictures indoors or
downloading photos to your computer provides the perfect opportunity to conserve battery life
by using
an AC adapter.
Be sure the camera
is shut off
when changing the power
source
from batter
y
to
AC adapter or from
AC adapter to battery.
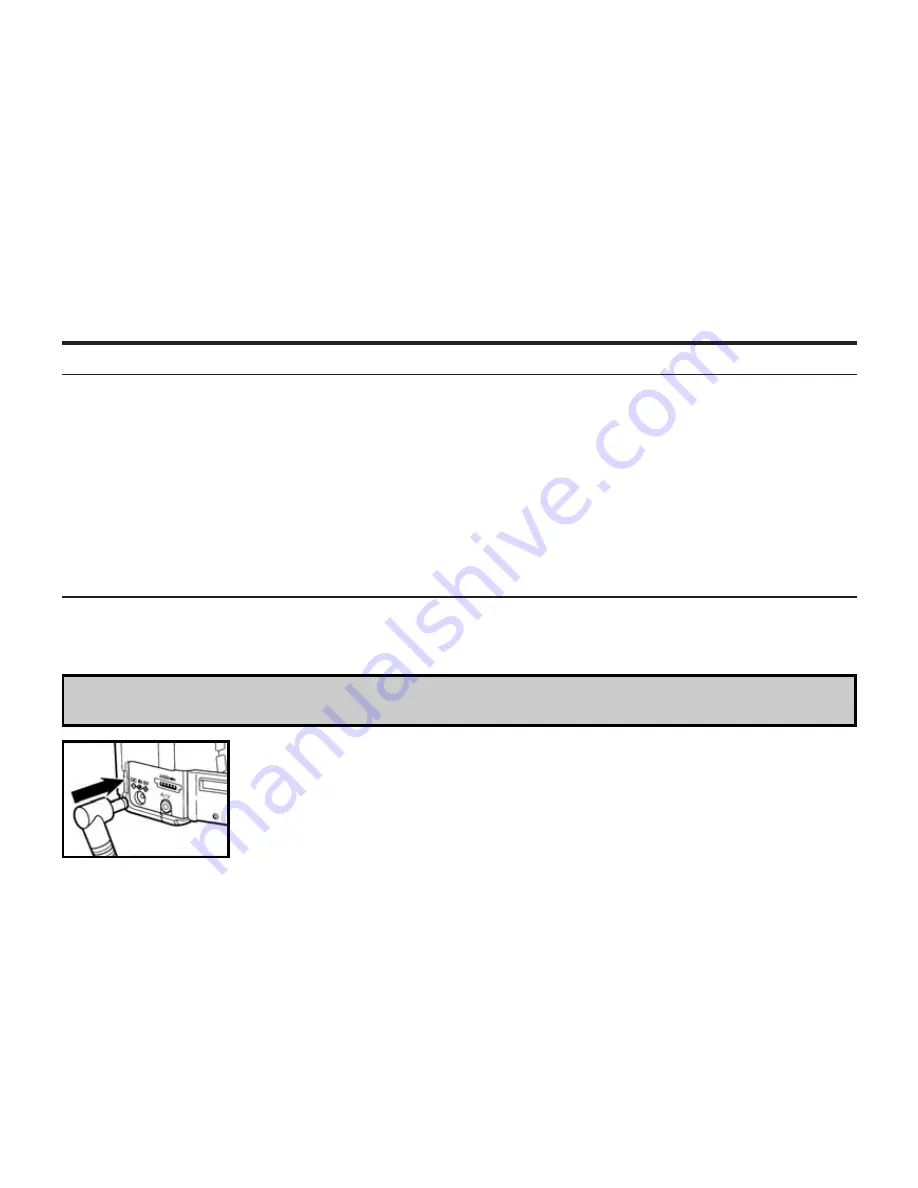
1 Connect the mini plug of the AC adapter to the DC terminal
of the camera.
• The Shape of the mini plug may vary depending on the AC adapter.
2 Connect the power plug of the AC adapter to an AC outlet.
Summary of Contents for DC3810
Page 12: ...12 NAMES OF PARTS CAMERA BODY Do not touch lens with fingers ...
Page 13: ...13 AF CAMERA BODY ...
Page 23: ...23 PREPARATION ...
Page 32: ...32 TAKING PICTURES ...
Page 36: ...36 THE DISPLAY OF THE CAMERA SETTINGS For details see the pages in parentheses ...
Page 47: ...47 ADVANCED OPERATIONS ...
Page 55: ...Notes ...
Page 63: ...63 SPECIFYING THE RECORDING MODE ...
Page 79: ...79 PALYBACK MODE ...
Page 91: ...91 DELETING IMAGES ...
Page 100: ...100 SPECIFYING THE PLAYBACK MODE ...
Page 113: ...113 NOTES ...
Page 114: ...114 SETUP ...
Page 136: ...136 INSTALLATION PHOTOIMPRESSION 5 Click Next 6 Click Next 7 Click Next ...
Page 137: ...137 INSTALLATION PHOTOIMPRESSION 8 Starting set up 9 Click Finish to complete installation ...
Page 143: ...143 For Apple Macintosh OS9 OS10 7 Click Install to start installation ...
Page 145: ...145 INSTALLATION VIDEOIMPRESSION1 6 4 Click Accept 5 Click Install to start installation ...
Page 147: ...147 See previous page CAUTIONS WHEN CONNECTING TO THE PERSONAL COMPUTER ...
Page 149: ...149 APPENDIX ...
Page 164: ...164 ...


