17
4. Install the left-side engine cover and seat making
sure the seat locks securely in place.
Frame/Welds/Racks
The frame, welds, and racks should be checked periodi-
cally for damage, bends, cracks, deterioration, broken
components, and missing components. If replacement or
repair constitutes removal, see Steering/Frame/Controls.
Hydraulic Brake Systems
CHECKING/BLEEDING
The hydraulic brake systems have been filled and bled at
the factory. To check and/or bleed a hydraulic brake sys-
tem, use the following procedure.
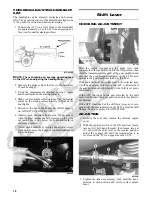
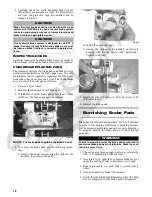
1. With the master cylinder in a level position, check
the fluid level in the reservoir. On the hand brake if
the level in the reservoir is adequate, the sight glass
will appear dark. If the level is low, the sight glass
will appear clear. On the auxiliary brake the level
must be between the MIN and MAX lines on the res-
ervoir.
CF295A
AL681
2. Compress the brake lever/pedal several times to
check for a firm brake. If the brake is not firm, the
system must be bled.
3. To bleed the brake system, use the following proce-
dure.
A. Remove the cover and fill the reservoir with DOT
4 Brake Fluid.
B. Install and secure the cover; then slowly compress
the brake lever/pedal several times.
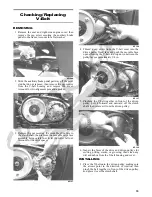
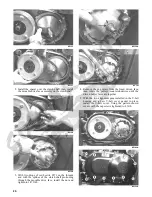
C. Remove the protective cap, install one end of a
clear hose onto one REAR bleeder screw, and
direct the other end into a container; then while
holding slight pressure on the brake lever/pedal,
open the bleeder screw and watch for air bubbles.
Close the bleeder screw before releasing the brake
lever/pedal. Repeat this procedure until no air
bubbles are present.
AF637D
PR377C
NOTE: During the bleeding procedure, watch the
appropriate reservoir very closely to make sure there
is always a sufficient amount of brake fluid. If low,
refill the reservoir before the bleeding procedure is
continued. Failure to maintain a sufficient amount of
fluid in the reservoir will result in air in the system.
D. Repeat step C until the brake lever/pedal is firm.
E. At this point, perform step B, C, and D on the
FRONT RIGHT bleeder screw; then move to the
FRONT LEFT bleeder screw and follow the same
procedure.


