Smartlog
- 43 -
8.5 GENERAL SETTINGS AND COMMUNICATIONS MANAGEMENT
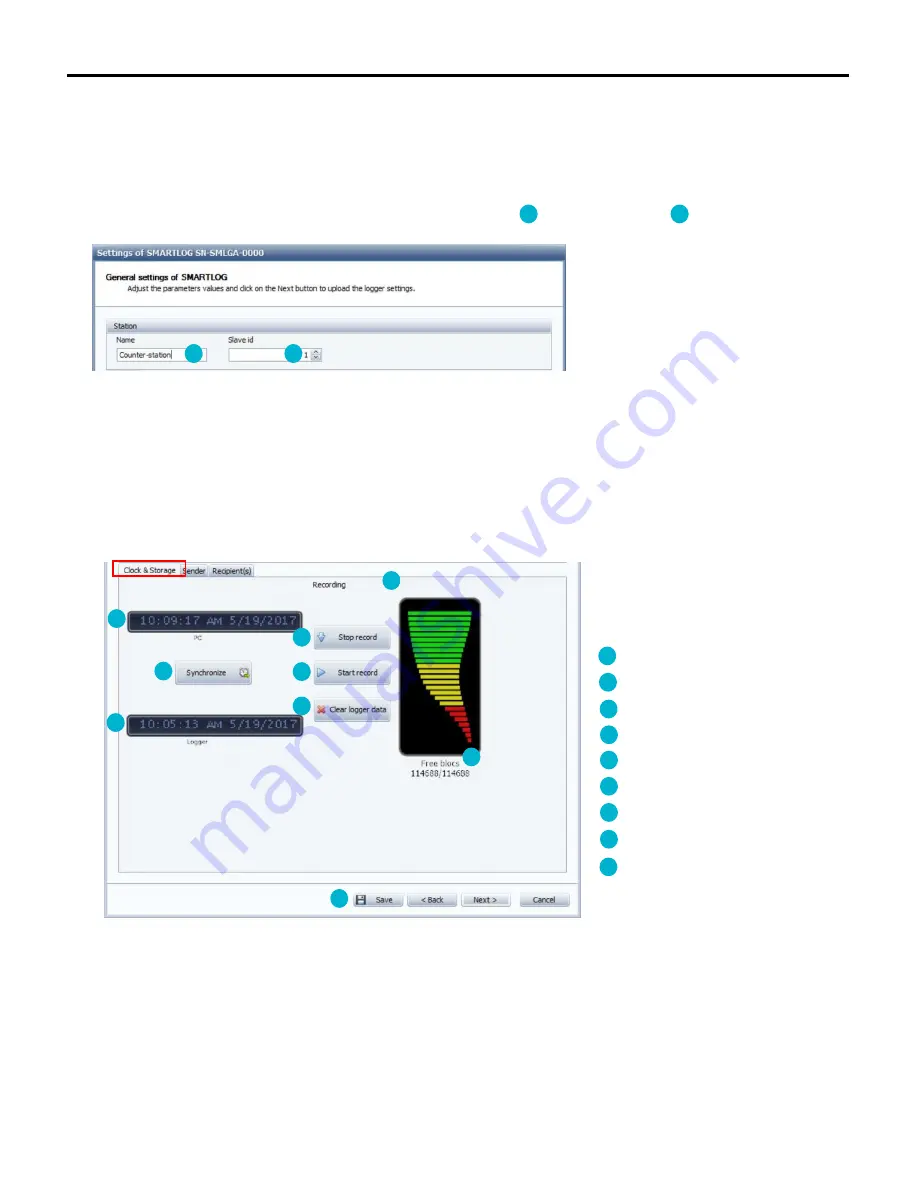
Regardless of the chosen configuration, once the communications have been set, the wizard displays the Smartlog general settings screen.
This is divided into two areas, the first allows you to configure the station name as well as its slave code . The slave code allows you to
assign a number to your Smartlog to more easily identify it among other Smartlogs.
- If you select “Configure logger” to start your Smartlog set-up.
The second part has three tabs
- If you chose “Edit configuration” from one of your measuring points or "New Smartlog" to start the set-up.
The screen has only two tabs (as the Clock & Storage tab is available only when you are connected to the Smartlog). In this case, this screen will be
available when exporting the configuration to the Smartlog (see 8.6 Backing up and Exporting the set-up).
“Clock & Storage" tab:
This tab allows you, when connected to the
Smartlog, to synchronize the Smartlog clock with
that of the computer. It also informs you of the
Smartlog memory occupation and offers you the
option to delete the data it contains.
Current time on the computer
Current time on the Smartlog
Clock synchronization button
Measurement campaign stop button
Campaign start-up button
Campaign current status
Data delete button
Current memory occupation
“Save” allows you to save your set-up directly
(creation of a study and a measuring point
containing the Smartlog if they do not already
exist)
1
2
3
4
5
6
7
8
9
10
11
1
2
11
3
5
4
9
6
7
8
10
Summary of Contents for SMARTLOG
Page 1: ...SMARTLOG User manual Version 1 0 ...
Page 2: ...Smartlog 2 ...


