92
5-2-2020
APQS.com
Daily Maintenance
With both motor brushes removed, use compressed air to blow out the motor. Blow the air through one of the brush
holder openings, and at the same time use a vacuum hose positioned over the other brush holder opening. Turn on
the vacuum while you blow out the motor dust. This will help prevent the carbon dust that has accumulated in the
motor from getting blown into the air. If you don’t have a vacuum available, cover the other opening with a damp
paper towel to catch the carbon dust.
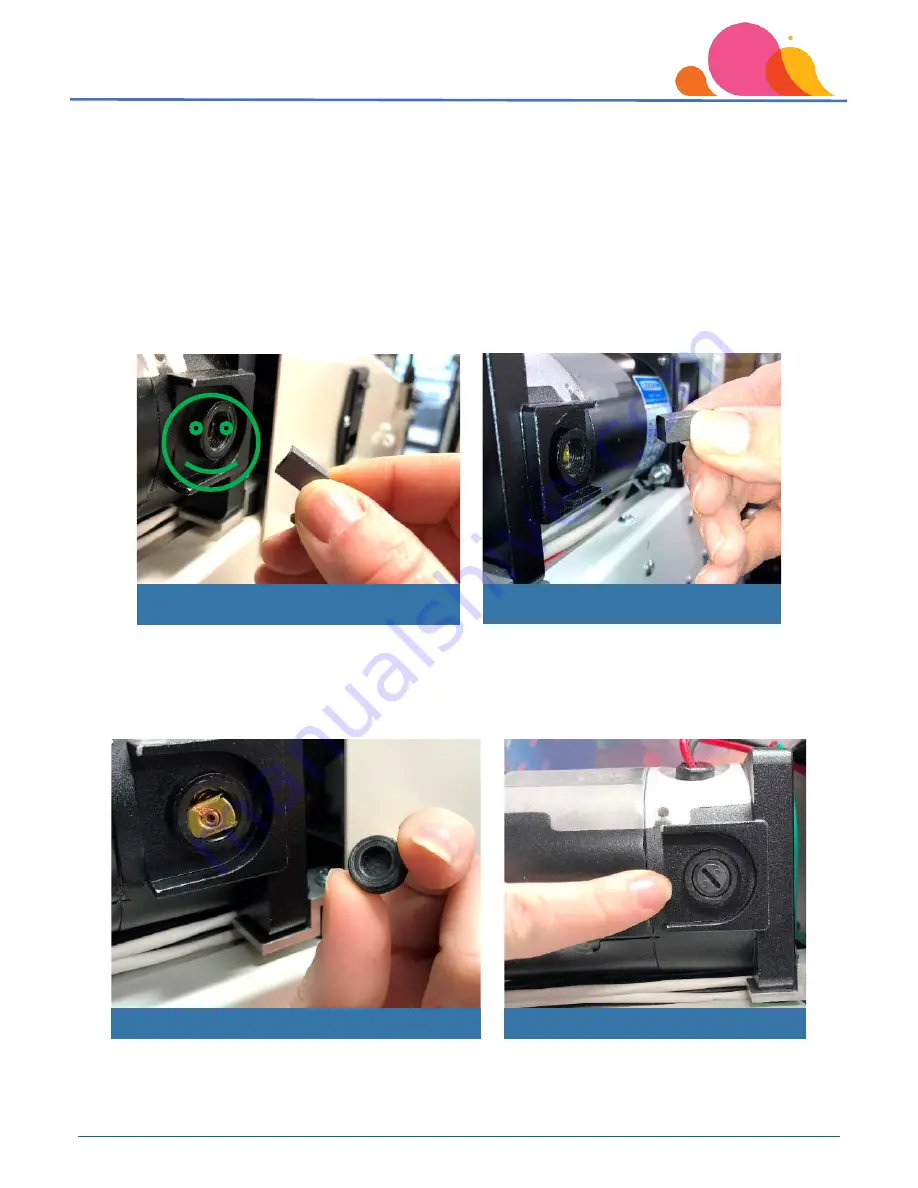
Place new brushes into the brush holders on the motor, making sure to insert them with the curvature of the brush
matching the curvature of the motor. The gold colored piece on the end of the brush will fit into the indentations
on the inside of the brush holder either vertically or horizontally.
Replace the two plastic caps over the motor brushes, making sure that the groove for the screwdriver is facing
outwards. When replacing the plastic caps, do not over-tighten them – just tighten them until you feel resistance. The
caps are made from plastic, and they can get brittle over time – over-tightening them will cause breakage of the
brush cap.
Replace the top motor cover. Tighten each screw securely.
Correct motor brush alignment
Incorrect motor brush alignment
Correct brush cap position
This side of brush cap goes inside the motor


