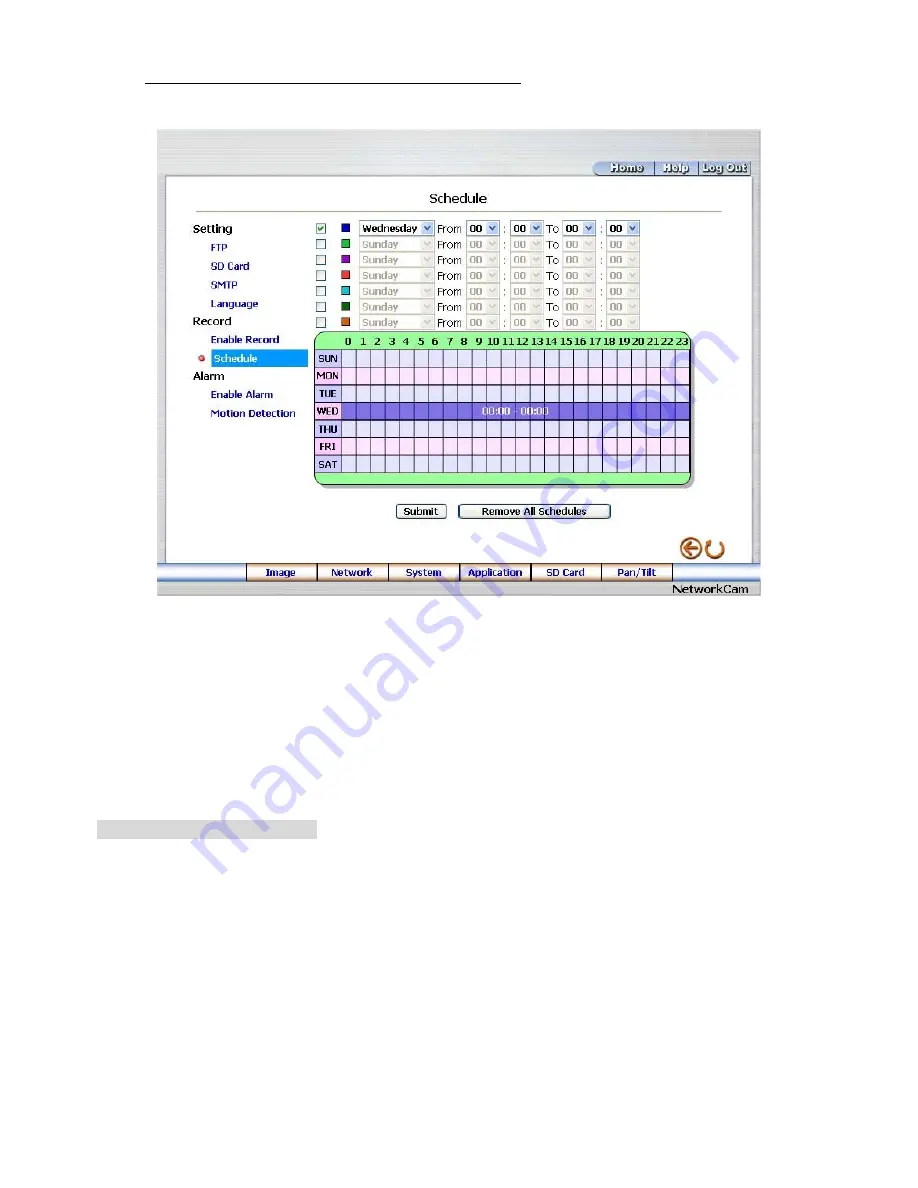
Change the Application Setting —Record - Schedule.
1. Click
the
Application
button on the home page to enter the “Schedule” page.
2.
Check/uncheck any/all of the first seven boxes set vertically in the upper half of the “Schedul
page to en
e”
able/disable the programmed recording function, and vary the setting of the targeted
setting.
. Click
the
Remove All Schedules
button to clear out all the data of the schedule setting.
item while it is enabled.
3. Click
the
Submit
button to submit the new schedule
4
Description of function keys:
Schedule:
Check / uncheck the first seven boxes in a vertical row on the left to enable/disable the
programmed scheduled recording function if necessary. Vary any of the schedules of the
recording setting if necessary (please refer to the above description).
Chart:
Schedule list.
Submit:
Click to submit the new setting to the Network camera.
Remove All Schedules:
Click to clear out all the data of the schedule setting.
53
Summary of Contents for LC-7224EP
Page 2: ......
Page 109: ...Figure 6 107 ...


