Unpacking
Preparation
Installation
Warranty
Operation
Appendix
Overview
REV-3.0 [3-17-11]
7
ComCenter-II ‘Outdoor’
Product Manual
Pre-Use Testing of Components and Connectivity
Before spending the time to fully install the Comcenter in its new home, its best to test the components and
connectivity while all of the parts are still easily accessible.
Preparation
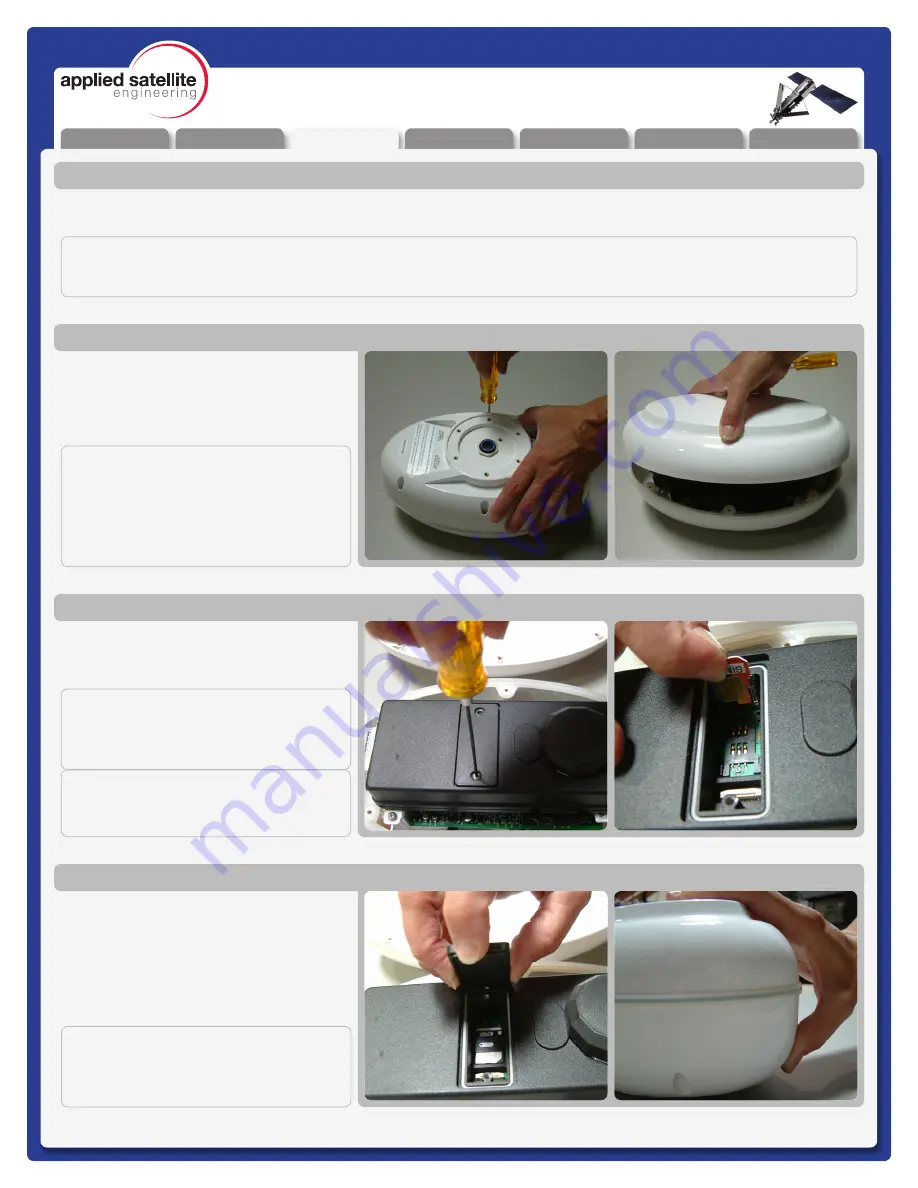
Open the Top cover from the ComCenter by
removing the screws in the body as shown.
Lightly squeezing the top shell will break the
seal with the waterproof gasket and allow
access to the interior.
Accessing Internal SIM Slot
Remove the SIM door using a screwdriver;
and then place the unlocked SIM card into
the slot as shown.
Installing SIM Card
Once the SIM card has been installed, close
the SIM door and lock it with the provided
screws. Next re-attach the top shell taking
care that the waterproof gasket seals
properly as shown. Screw down the casing
fasteners only once the gasket is properly
seated.
Re-Assembling ComCenter Casing
IMPORTANT:
Be sure that the rubber seal is properly
seated before re-tightening the Casing
Screws.
NOTE:
This device will be shipped to the distribu-
tor WITHOUT the screws installed. The
screws can be found inside a plastic bag.
After installing the SIM card, it is very im-
portant that the screws are located and
installed.
IMPORTANT:
THE FOLLOWING STEPS ARE NOT TYPICALLY AN END USER REQUIREMENT, THE SIM CARD SHOULD BE
PRE-CONFIGURED (UNLOCKED) AND INSTALLED BY YOUR SERVICE PROVIDER.
IMPORTANT:
Make sure to “lock” the SIM holder by
gently pushing it in the direction indicated
by the arrow.
IMPORTANT:
The modem in your ComCenter may not
be identical to that pictured here


