Operating Manual
32
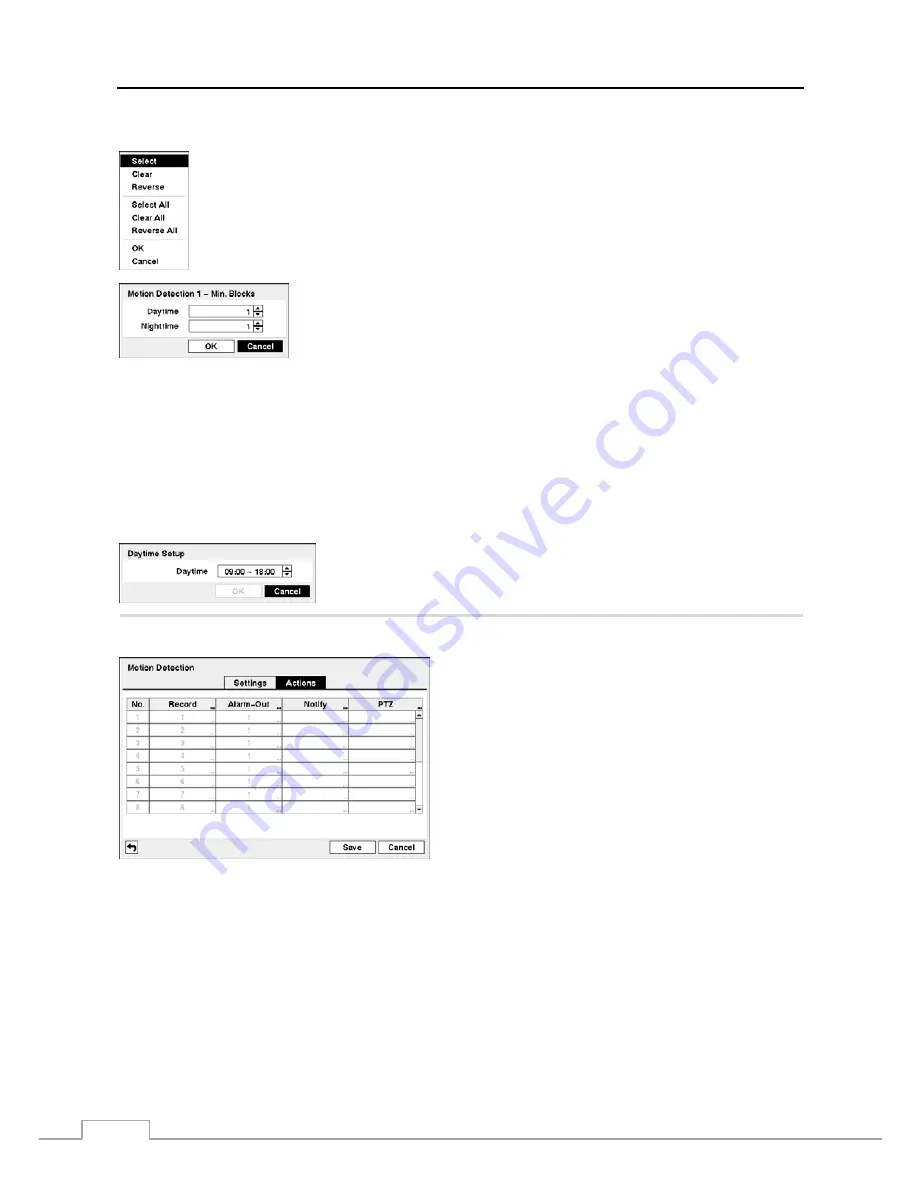
Click the right mouse button to display the menu screen. The menu on the setup screen has the following functions:
Select
— Activates selected blocks to detect motion.
Clear
— Deactivates selected blocks so that they will not detect motion.
Reverse
— Activates inactive selected blocks and deactivates active selected blocks.
Select All
— Activates all blocks to detect motion.
Clear All
— Deactivates all blocks so that they will not detect motion.
Reverse All
— Activates inactive blocks and deactivates active blocks.
OK
— Accepts changes and closes Zone setup.
Cancel
— Exits Zone setup without saving changes.
You can adjust the minimum number of detection blocks that must be activated to
trigger a motion alarm. Selecting the box under the
Min. Blocks
heading allows
you to adjust the minimum number of detection blocks for Daytime and Nighttime
independently. Smaller numbers provide greater sensitivity because fewer detection
blocks must be activated.
Turning
Zone View
On will allow you to observe how the DVR is reacting to motion. When in the motion viewing
mode, the detection zone of video will be displayed. Any detected motion within the zone will be displayed in red.
You can control excessive event logging and remote notification of motions detected after the motion dwell time by
adjusting the motion ignoring dwell intervals. Select the box beside
Motion Ignoring Interval
, and a list of intervals
ranging from 1 to 5 seconds or
Never
appears. The DVR will not log and notify motion events occurred during the
preset interval range.
NOTE: The record action for motion events will not be affected by the Motion Ignoring function.
Selecting
Daytime Setup
allows you to set up the Daytime range.
Select the box beside
Daytime
and set the Daytime range by using the Up and
Down arrows. The DVR will consider the remaining time range as the Nighttime.
PATH: Event menu > Motion Detection > Actions tab
The DVR can be set to react to motion detection differently
for each camera. Each camera can be associated with another
camera, trigger an Alarm-Out connector, notify a number of
different devices, and/or move PTZ cameras to preset positions.
NOTE: You can associate multiple cameras with a camera
that detects motion.
Select the box under the
Record
heading, and a list of cameras
appears. You can associate as many cameras with that camera
as you wish. If the DVR detects motion on the selected camera,
it starts recording video from all the associated cameras.
NOTE: For the Record action, the camera you select should
be set to the Event or Time & Event recording mode
in the Record Schedule setup screen.
Figure 44 — Motion Detection Actions 1 screen.
Select the box under the
Alarm-Out
heading, and a list of Alarm Outputs appears. You can associate as many Alarm-Outs
with that camera as you wish. When the DVR detects motion on the selected camera’s input, it triggers output signals
on all the associated Alarm-Out connectors.
NOTE: For the Alarm-Out action, the alarm output and beep you select should be set to the Event mode in the
Alarm-Out setup screen (Schedule tab).
Select the box under the
Notify
heading. You can toggle the entire list On and Off by selecting
Notification
. You can
toggle the individual items On and Off by selecting that item. Select
OK
to accept your changes.
Summary of Contents for RoadRunner MRH16
Page 1: ......
Page 2: ......
Page 16: ...Operating Manual 8...
Page 62: ...Operating Manual 54...


