35
Remote View
Gain remote access to the DVR Server by installing the Remote Client (available in the CD
Installer) on the PC that you wish to have remote connection to the DVR.
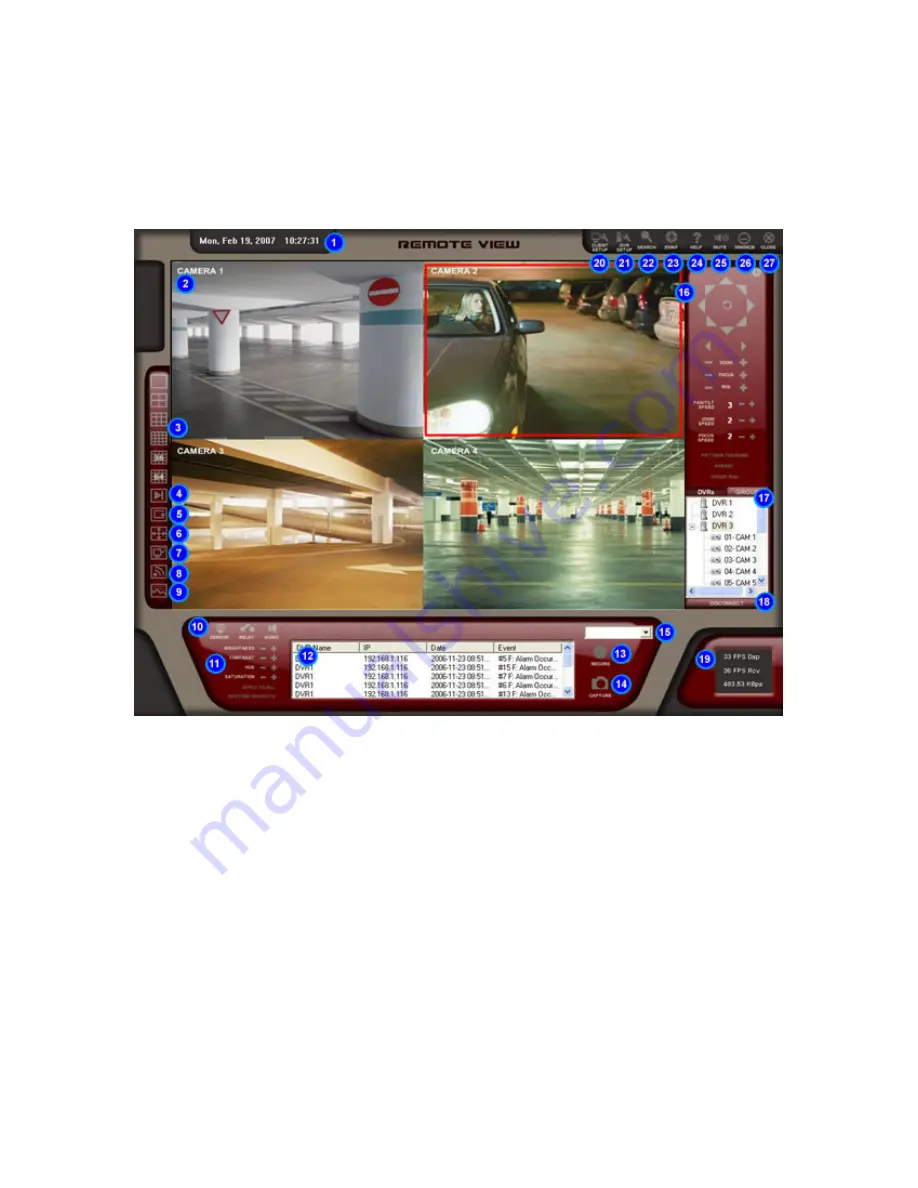
1. Date and Time - Displays date and time of DVR Server
2. Remote View - Displays the remote live view.
3. Screen Layout – Changes the screen layout of the live view.
4. Next Camera – Displays video of next camera or cameras. (For instance, if screen layout is at
4-camera layout, the next 4 cameras will be displayed upon pressing this button.)
5. Cyclic Screen – Displays videos in sequence. The cycle will follow the layout currently
displayed and will skip those layouts that only show disabled cameras.
6. Full screen – Displays current layout of cameras in full screen.
7. Frame Limit – Limits the number of frames sent from the server. This is useful if there is a
bandwidth or CPU limitation for the remote user.
8. Talk – Click and hold to enable 2-way communication with server. A microphone must be
attached and the MIC boost option turned off. To talk, click and hold the button. Audio playback
will be paused during this period. Once released, audio playback will be continued. To hear
the audio from the server, the appropriate audio channel must be selected.
9. Live View Streaming – Displays the video stream of what is currently being displayed on the
DVR server. This is similar to the JPEG stream connection except that the video format is
MPEG4. It also follows some of the limitations of the JPEG streaming but a configurable frame
rate, picture quality and resolution makes the live view streaming more flexible in meeting the
demands of users with low bandwidth. This feature is only available for servers with at least
dual core processors.


