background image

3

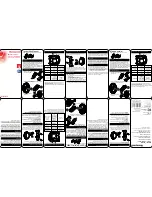
Insert lockcase into slot in edge of door. Fasten the lockcase 
to the door with two (2) #8 x 1/2” screws.

Insert key cylinder through slot of interior trim plate with the 
thumbturn on the interior of the door.  Fasten key cylinder in 
place using #10 x 1-1/2” machine screw.

Place nylon washers over the interior and exterior handles. 
Insert the square spindle of the exterior handle through the up-
per hole in the exterior trim plate, through lockcase and push 
until square spindle is visible from interior of door.

Slide interior handle onto square spindle. Using the 
hex wrench provided, tighten the set screw on the 
interior handle. Do not squeeze the handles together 
too tightly when tightening the set screw. Tighten 
trim plate screws at this time. Test operation for the 
handle set with the door standing open.

A.

B.

C.

D.

3. INSTALL LOCk CASE, kEY CYLINDER AND HANDLES:

STEP 3a

inTEriOr ViEw

EDgE OF DOOr

inTEriOr 

TriM PLaTE

#8 X 1/2” 

SCrEw

LOCkCaSE

STEP 3B

inTEriOr ViEw

DOOr

inTEriOr 

TriM PLaTE

#10 X 1 1/2” SCrEw

kEY CYLinDEr

THuMBTurn

STEP 3C-D

inTEriOr ViEw

DOOr

EXTEriOr 

HanDLE wiTH 

SQuarE 
SPinDLE

nYLOn 

waSHEr

inTEriOr HanDLE

nYLOn 

waSHEr

SLOT

SLOT

LOCkCaSE

uPPEr TriM 

PLaTE HOLE

TriM PLaTE 

SCrEw

    w a r n i n g

Do no insert finger into holes drilled in door.  Holes have a sharp 

edge. Inserting fingers into holes could result in injury.

SET 

SCrEw

4. INSTALL LATCH STRIkER:

Extend the deadbolt.  Mark the top and bottom of the 
deadbolt and latch bolt on the handle side Z-bar. 

Open the door and place the striker on the handle 
side Z-bar. Center the bottom striker opening vertically 
on the deadbolt marks on the handle side Z-bar. 
Center the openings in the striker horizontally over the 
openings in the handle side Z-bar. Mark the center 
of the two (2) slotted mounting holes and remove 
the striker. Center punch and drill 3/32” hole at each 
location marked.

Place the striker on the handle side Z-bar and fasten it 
with two (2) #6 x 1/2” screws.

Check the latch and deadbolt for proper function. If 
necessary, adjust the striker forward or back until 
the door latches properly. With the striker screws 
tightened, center punch and drill two (2) 3/32” holes 
through the two (2) center mounting holes in the 
striker.  Fasten in place with two (2) #6 x 1/2” screws. 

Close the door to check for deadbolt clearance.  
Slowly extend the deadbolt by turning the thumbturn 
knob. If the deadbolt makes contact with the door 
jamb, even slightly, chisel a recess into the door jamb. 
Chisel the recess deep and wide enough to provide 
adequate clearance for the deadbolt.

A.

B.

C.

D.

E.

#6 X 1/2” 

SCrEw

STEP 4a-C

EXTEriOr 

ViEw

DOOr 

jaMB

HanDLE 

SiDE

z-Bar

SLOTTED 

HOLE

#6 X 1/2” 

SCrEw

STEP 4B-D

EXTEriOr 

ViEw

DOOr 

jaMB

HanDLE 

SiDE

z-Bar

PEnCiL 
MarkS 

FOr LaTCH 

BOLT anD  

DEaDBOLT

STrikEr

STrikEr

STEP 4E

TOP ViEw

DOOr 

jaMB

HanDLE SiDE

z-Bar

STrikEr

DOOr

EXTEriOr 

HanDLE

inTEriOr 

HanDLE

C A U T I O N

Chisel the recess deep and wide enough to provide adequate clearance for the deadbolt. Failure to do so may result in the 
deadbolt becoming lodged in the door jamb. If deadbolt becomes lodged it can prevent the door from unlocking.

iF DEaDBOLT 

COnTaCTS 

DOOr jaMB, 

CHiSEL rECESS 

inTO jaMB

CEnTEr 

MOunTing 

HOLE

Summary of Contents for Andersen 1000

Page 1: ...ge Follow equipment manufacturer s instruc tions for safe operation Always wear safety glasses recommended tools Safety Glasses Phillips Head Screwdriver Hammer Pencil 3 32 5 32 Drill Bits Drill Chise...

Page 2: ...ded portion of the latch bolt needs to be facing the handle side Z bar If latch bolt is in correct position proceed to Step 3 Rotate the latch bolt to correct position for a left hinge or right hinge...

Page 3: ...door and place the striker on the handle side Z bar Center the bottom striker opening vertically on the deadbolt marks on the handle side Z bar Center the openings in the striker horizontally over th...

Page 4: ...oser with long pin CLOSE STORM DOOR Swing closer assembly so door bracket touches door frame and level Center the holes of the door bracket on the line drawn on the door frame and mark Drill a 5 32 pi...

Page 5: ...t closing speed Use Phillips head screwdriver to adjust closer to desired speed For faster closing speed turn adjustment screw to the left counter clockwise For slower closing speed turn adjustment sc...

Page 6: ...s de seguridad herramientas recomendadas Antiparras de seguridad Destornillador Phillips Martillo L piz Broca de taladro de 3 32 5 32 Taladro Cincel Punz n para centrar EMCO Enterprises Inc PO Box 853...

Page 7: ...cerradura est en la posici n correcta siga con el Paso 3 Rote el pestillo de la cerradura hasta la posici n correcta para una puerta con bisagra a la izquierda o a la derecha Ubique la caja de la cer...

Page 8: ...del lado de la manija Centre las aberturas del tope superior verticalmente en las marcas del cerrojo muerto en el perfil en Z del lado de la manija Centre las aberturas en el tope horizontalmente sobr...

Page 9: ...oporte de la puerta hacia el orificio exterior del cierrapuertas con el pasador largo CIERRE LA PUERTA CONTRA INTEMPERIE Ubique el montaje del cierrapuertas de modo que el soporte de la puerta toque e...

Page 10: ...estornillador Phillips para ajustar el cierrapuertas a la velocidad deseada Para una velocidad de cierre m s r pida gire el tornillo de ajuste hacia la izquierda en sentido antihorario Para una veloci...

Page 11: ...r des blessures et des dommages aux produits Pour votre s curit suivez les directives du fabricant de mat riel Portez toujours des lunettes de s curit outils recommand s Lunettes de s curit Tournevis...

Page 12: ...uche ou droite La partie arrondie du p ne demi tour doit faire face au montant en Z c t poign e Si le p ne demi tour se trouve dans la position appropri e passez l tape 3 Faites tourner le p ne demi t...

Page 13: ...ure par la fente sur la plaque de garniture int rieure en vous assurant que la barrette tournante se trouve l int rieur de la porte Fixez le barillet de serrure l aide d une vis m taux n 10 x 1 1 2 po...

Page 14: ...e dans le trou ext rieur du ferme porte l aide du goujon long FERMEZ LA CONTRE PORTE Faites pivoter le ferme porte de fa on ce que l attache de porte touche le cadre de porte et soit de niveau Centrez...

Page 15: ...tesse de fermeture l aide d un tournevis lame Phillips r glez la vitesse de fermeture Pour qu elle se ferme plus rapidement tournez la vis de r glage vers la gauche sens antihoraire Pour qu elle se fe...

Reviews: