Upgrading Modero Firmware
81
10" Modero Touch Panels
8.
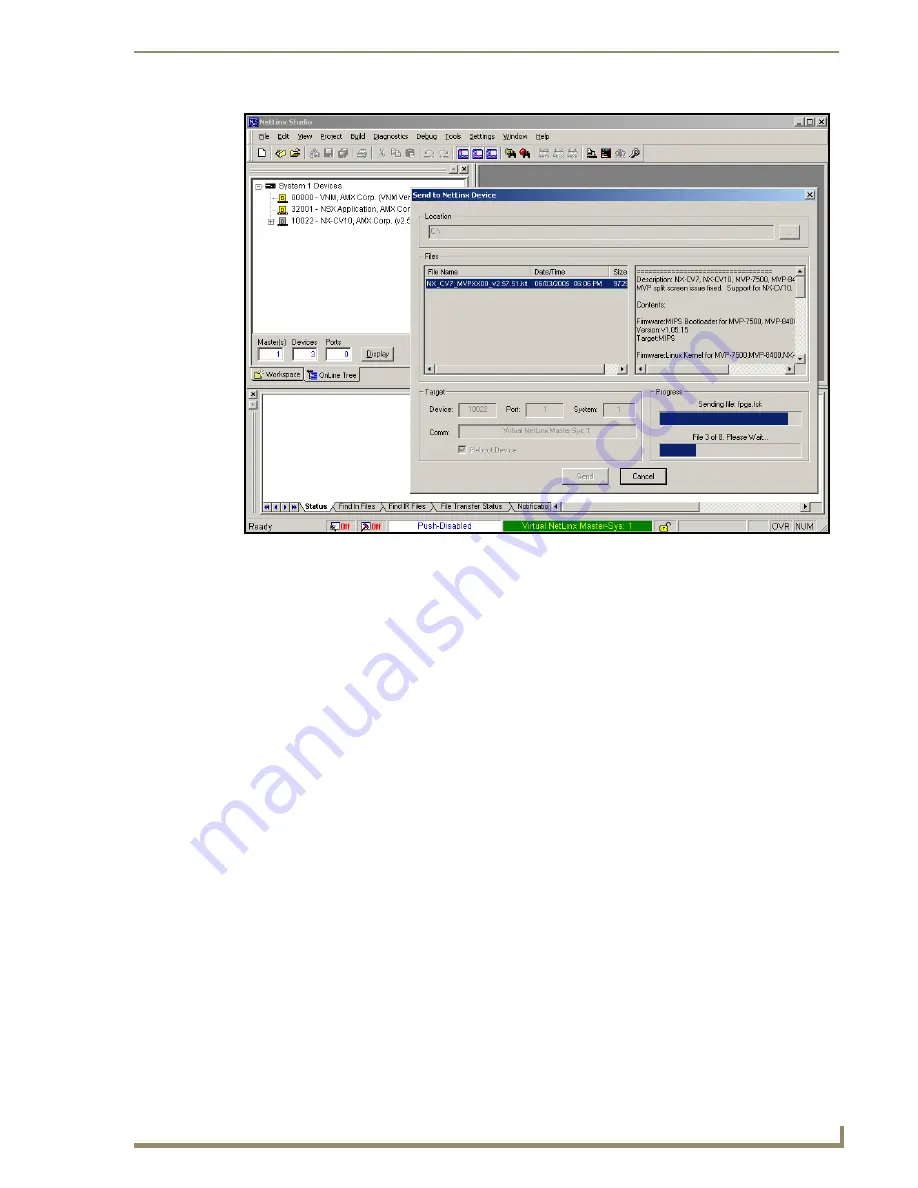
Select the panel’s Kit file from the
Files
section.
9.
Enter the
Device
value associated with the panel and the
System
number associated with the Master
(
listed
in the OnLine Tree tab of the Workspace window
).
The Port field is greyed-out.
10.
Click the
Reboot Device
checkbox. This causes the touch panel to reboot after the firmware update
process is complete.
The reboot of the panel can take up 30 seconds after the firmware process has
finished.
11.
Click
Send
to begin the transfer. The file transfer progress is indicated on the bottom-right of the
dialog (
B
in FIG. 81).
12.
As the panel is rebooting, temporarily unplug the USB connector on the panel until the panel has
completely restarted.
13.
Once the first panel page has been displayed, reconnect the USB connector to the panel.
14.
Right-click the associated System number and select
Refresh System
. This causes a refresh of all
project systems, establishes a new connection to the Master, and populates the System list with
devices on your particular system.
15.
Confirm the panel has been properly updated to the correct firmware version.
FIG. 81
Using USB for a Virtual Master transfer
A
B
Summary of Contents for modero NXD-CV10
Page 1: ...Operation Reference Guide Touch Panels NXT D CV10 10 Modero Touch Panel Last Revised 7 2 2012 ...
Page 44: ...CV10 Touch Panel Accessories 32 10 Modero Touch Panels ...
Page 58: ...Installation 46 10 Modero Touch Panels ...
Page 88: ...Configuring Communication 76 10 Modero Touch Panels ...
Page 98: ...Upgrading Modero Firmware 86 10 Modero Touch Panels ...
Page 192: ...Appendix A 180 10 Modero Touch Panels ...
Page 206: ...Troubleshooting 194 10 Modero Touch Panels ...