


Configuring Communication
61
10" Modero Touch Panels
6.
Enter the SSID information by either:
Automatically
having it filled in by pressing the Site Survey button and from the Site Survey page,
choosing an
Open
WAP from within the Site Survey page and then pressing the
Connec
t button.
Manually
entering the SSID information into their appropriate fields by following steps
7 thru 9.
7.
From within the Wireless Security section, press the
Open (Clear Text)
button to open the Open (Clear
Text) Settings dialog (FIG. 64). An Open security method does not utilize any encryption methodology
but does require that an SSID (alpha-numeric) be entered. Using this method causes network packets to
be sent out as unencrypted text.
8.
Press the red
SSID
field (FIG. 64) to display an on-screen
Network Name (SSID)
keyboard.
9.
In this
keyboard, enter the SSID name used on your target Wireless Access Point (
case sensitive
).
The card should be given the SSID used by the target WAP. If this field is left blank, the unit will
attempt to connect to the first available WAP. By default, all WAP200Gs use
AMX
as their
assigned SSID value.
One of the most common problems associated with connection to a WAP arise because the SSID
was not entered properly. You must maintain the same case when entering the SSID information.
ABC is not the same as Abc.
10.
Click
Done
when you’ve completed typing in the information.
11.
From the Open (Clear Text) Settings page (FIG. 64), press the
Save
button to incorporate your new
information into the panel and begin the communication process.
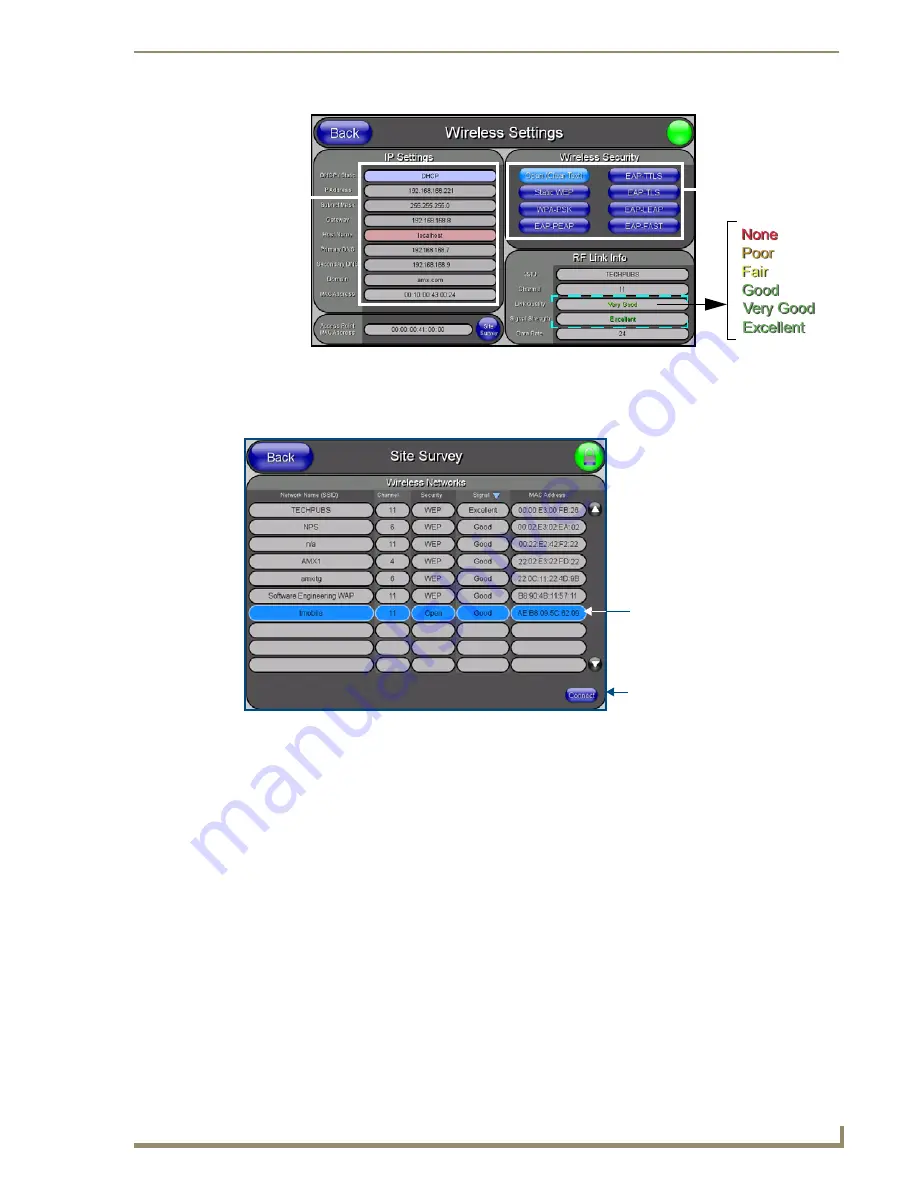
FIG. 62
Wireless Settings page (showing a sample unsecured configuration)
FIG. 63
Site Survey of available WAPS (Unsecured WAP shown selected)
MVP
connection
IP info.
Wireless
card security settings
Select an OPEN
(unsecured) WAP
Connecting to the
WAP begins the
communication
Summary of Contents for modero NXD-CV10
Page 1: ...Operation Reference Guide Touch Panels NXT D CV10 10 Modero Touch Panel Last Revised 7 2 2012 ...
Page 44: ...CV10 Touch Panel Accessories 32 10 Modero Touch Panels ...
Page 58: ...Installation 46 10 Modero Touch Panels ...
Page 88: ...Configuring Communication 76 10 Modero Touch Panels ...
Page 98: ...Upgrading Modero Firmware 86 10 Modero Touch Panels ...
Page 192: ...Appendix A 180 10 Modero Touch Panels ...
Page 206: ...Troubleshooting 194 10 Modero Touch Panels ...


