O p e r a t i o n / R e f e r e n c e G u i d e
N e t L i n x C o n t r o l l e r s
NI-3101-SIG
Signature Series NetLinx
®
Integrated Controller
L a t e s t R e l e a s e : 4 / 1 4 / 2 0 0 8
Page 1: ...Operation Reference Guide NetLinx Controllers NI 3101 SIG Signature Series NetLinx Integrated Controller Latest Release 4 14 2008...
Page 2: ...r after the RMA is cancelled will be refused AMX is not responsible for products returned without a valid RMA number AMX is not liable for any damages caused by its products or for the failure of its...
Page 3: ...4 pin mini Phoenix connector for data with external power 14 DB9 Device Port Connections and Wiring 15 Relay Port Connections and Wiring 15 Relay connections 16 Input Output I O Port Connections and...
Page 4: ...a new Group 56 Modifying the properties of an existing Group 56 Deleting an existing Group 57 Security User Level Security page 58 Adding a new User 60 Modifying the properties of an existing User 61...
Page 5: ...Manage Other Devices Dynamic Device Discovery Pages 97 What is Dynamic Device Discovery 101 What is the difference between Program and Run time defined binding 102 Manage Other Devices Manage Device B...
Page 6: ...iguration 131 Help menu 132 Logging Into a Session 134 Logout 135 Help Security 135 Setup Security 135 Programming 137 Converting Axcess Code to NetLinx Code 137 Master Send_Commands 137 Master IP Loc...
Page 7: ...ogramming of a system that includes third party devices by standardizing device and function definitions defaulting touch panel button assignments and controlling feedback methods Dynamic Device Disco...
Page 8: ...le refer to the Other AMX Equipment section for more information Weight 6 95 lbs 3 15 kg Enclosure Metal with black matte finish and translucent polycarbonate faceplate Certifications FCC Part 15 Clas...
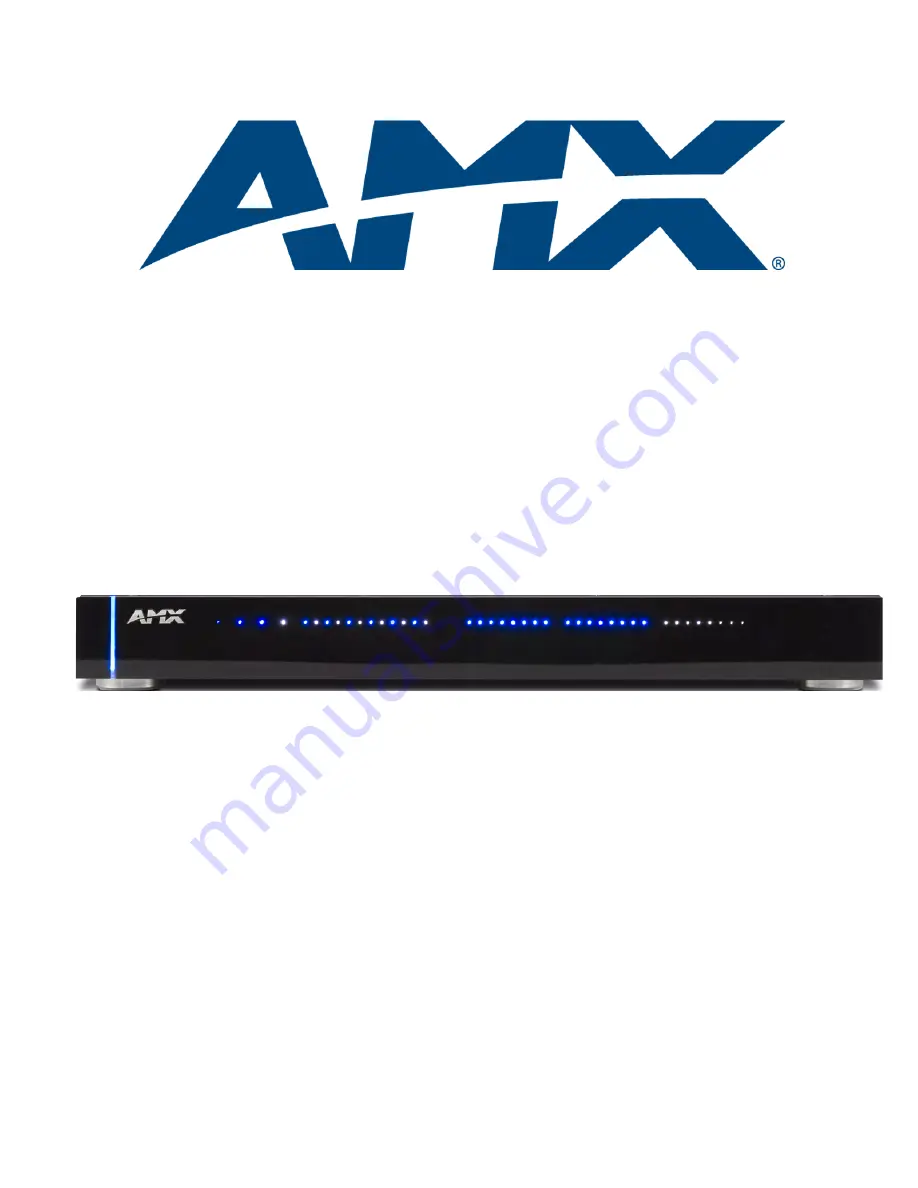
Page 9: ...he rear IR Serial channels 1 8 are transmitting control data on Ports 9 16 LED indictor for each IR port remains lit for the length of time that IR Serial data is being generated I O LEDs Eight white...
Page 10: ...ltaneously Channel range 1 32 767 Channels 1 128 output IR commands Channels 129 253 used as reference channels Channel 254 feedback Power Fail used with PON and POF commands Channel 255 feedback Powe...
Page 11: ...nix male connector Included Accessories 2 pin 3 5 mm mini Phoenix female PWR connector 41 5025 4 pin 3 5 mm mini Phoenix female AXlink connector 41 5047 10 pin 3 5 mm mini Phoenix female I O connector...
Page 12: ...Introduction 6 NI 3101 SIG Signature Series NetLinx Integrated Controller...
Page 13: ...ce belongs to The D P S notation is used to explicitly represent a device number port and system For example 128 1 0 represents the first port on device 128 on this system If a device is declared in a...
Page 14: ...to the rack until the attachment holes along both sides align to their corresponding locations on the mounting ears 6 Secure the device to the rack by using the four flat head Phillips screws supplied...
Page 15: ...ing inadvertent communication and or control problems If necessary place the on board Master in PRD mode and use the NetLinx Studio v 2 x program to resolve the communication and or control problems w...
Page 16: ...terns are not evident until after the unit is powered Modes and LED Blink Patterns LEDs and Blink Patterns Mode Description STATUS blue OUTPUT white INPUT white OS Start Starting the operating system...
Page 17: ...blink per second Normal operation 3 blinks per second AXlink bus error Check all AXlink bus connections The AXlink port can be used to supply power to downstream AXlink compatible devices so long as b...
Page 18: ...a wire stripper and flat blade screwdriver to prepare and connect the captive wires 1 Strip 0 25 inch 6 35 mm of insulation off all wires 2 Insert each wire into the appropriate opening on the connect...
Page 19: ...p to secure the two wires Do not tighten the screws excessively doing so may strip the threads and damage the connector 3 Verify the connection of the 2 pin 3 5 mm mini Phoenix to the external 12 VDC...
Page 20: ...ctor when using a separate 12 VDC power supply Do not connect the PWR wire to the AXlink connector s PWR opening FIG 6 4 pin mini Phoenix connector wiring diagram using external power source PWR GND L...
Page 21: ...ected to the Relay connectors on the device Connectors labeled A are for common B are for output Each relay is isolated and normally open A metal commoning strip is supplied with each device to connec...
Page 22: ...e I O port detects a low signal 0 1 5 VDC as a Push and a high signal 3 5 5 VDC as a Release this IO port uses 5V logic but can handle up to 12V without harm When used for outputs the I O port acts as...
Page 23: ...IR Serial connector wiring specifications are listed in the following table I O Port Wiring Specifications NI 3101 SIG Pin Signal Function 1 GND Signal GND 2 I O 1 Input Output 3 I O 2 Input Output 4...
Page 24: ...Signals Pin Signals Connection s Pairing Color 1 TX 1 1 1 2 Orange White 2 TX 2 2 Orange 3 RX 3 3 3 6 Green White 4 no connection 4 4 Blue 5 no connection 5 5 Blue White 6 RX 6 6 Green 7 no connectio...
Page 25: ...he required features of HTTP v1 1 This port is used for unsecure HTTP Internet communication between the web browser s UI and the target Master 80 TCP HTTPS SSL This port is used by a web browser for...
Page 26: ...tery 1 Discharge the static electricity from your body by touching a grounded metal object 2 Unplug all the connectors from the device 3 Remove the rear panel from the device and then disconnect the N...
Page 27: ...e connects the Controller to the PC being used for programming or to a network on the same subnet as the PC 4 The low speed USB connection is not recommended for firmware updates 5 Verify that the Net...
Page 28: ...tions Settings button to open the Communications Settings dialog FIG 14 4 Click the NetLinx Master radio button from the Platform Selection section to choose a NetLinx Master such as the NI 3101 SIG 5...
Page 29: ...on any System item listed such as the NI Master entry in the OnLine Tree tab of the Workspace and select Device Addressing from the popup list Select Diagnostics Device Addressing from the Main menu...
Page 30: ...s Using multiple NetLinx Masters When using more than one Master each unit must be assigned to a separate System value A Master s System value can be changed but its device Address must always be set...
Page 31: ...OUTPUT LEDs should begin to alternately blink during the incorporation Wait until the STATUS LED is the only LED to blink 7 Press Done once until the Master Reboot Status field reads Reboot of System...
Page 32: ...arget NI 1 255 Axcess Devices use Axcess standards 301 3072 NetLinx CardFrames start at frame number 25 frame 12 Card 5001 5999 ICSNet NetLinx devices NXI NXM COM2 NXM IRS4 etc 6001 6999 ICSNet Landma...
Page 33: ...eshes and then displays the new information 3 Click Done to close the Device Addressing dialog 4 Click Reboot from the Tools Reboot the Master Controller dialog and wait for the System Master to reboo...
Page 34: ...to retain the IP Address from the DHCP server and assign it to the on board Master A popup window then appears to notify you that Setting the IP information was successful and it is recommended that t...
Page 35: ...ernately during the incorporation Wait until the STATUS LED is the only LED blinking 11 Press Done once until the Master Reboot Status field reads Reboot of System Complete 12 Complete the communicati...
Page 36: ...r 8 Click OK to accept the change to the new IP DNS information 9 Click the Reboot Master button and select Yes to close the Network Addresses dialog 10 Click Reboot from the Tools Reboot the Master C...
Page 37: ...e IP Address of the Master from the System Administrator If you still do not have an IP Address follow the steps outlined in either the Obtaining the Master s IP Address using DHCP section on page 28...
Page 38: ...to their respective fields 8 Place a checkmark within the Automatically Ping the Master Controller to ensure availability radio box to make sure the Master is initially responding online before establ...
Page 39: ...he STATUS LED is the only LED to blink 16 Press Done once until the Master Reboot Status field reads Reboot of System Complete 17 Click the OnLine Tree tab in the Workspace window to view the devices...
Page 40: ...s the list with devices on that system The communication method is highlighted in green on the bottom of the NetLinx Studio window 3 After the Communication Verification dialog window indicates active...
Page 41: ...the NetLinx Studio window 4 After the Communication Verification dialog window verifies active communication between the PC and the Master verify the NetLinx Master 00000 NI Master appears in the OnLi...
Page 42: ...tall click Done 13 Click Reboot from the Tools Reboot the Master Controller dialog and wait for the System Master to reboot The STATUS and OUTPUT LEDs should begin to alternately blink during the inco...
Page 43: ...with devices on that system The communication method is highlighted in green on the bottom of the NetLinx Studio window 4 After the Communication Verification dialog window verifies active communicati...
Page 44: ...nsfer progress is indicated on the bottom right of the dialog FIG 29 12 Click Close once the download process is complete 13 Right click the System number and select Refresh System This establishes a...
Page 45: ...If the connection fails to establish a Connection Failed dialog appears Try selecting a different IP Address if communication fails Press the Retry button to reconnect using the same communication par...
Page 46: ...Configuration and Firmware Update 40 NI 3101 SIG Signature Series NetLinx Integrated Controller...
Page 47: ...n If an option is enabled within the System Security page a user is prompted to enter a valid username and password before gaining access to the corresponding feature This access is only granted if th...
Page 48: ...ministrator An administrator has privileges to modify existing NetLinx Master access groups users and their rights The administrator can also assign NetLinx communication access rights for different u...
Page 49: ...s the Enter key on your keyboard to begin the communication process between the target Master and your computer Initially the Master Security option is disabled from within the System Security page an...
Page 50: ...TTP Access allows an authorized user to view these web pages by first requiring the entry of a username and password at the beginning of every connection session with the target Master If Master Secur...
Page 51: ...all 50 devices use for access By default the NetLinx Master creates the following accounts access rights directory associations and security options Security Options FTP Security Enabled Admin Change...
Page 52: ...ecurity Configuration Terminal RS232 USB Configuration port security HTTP Web Server Security allows for access via a secure HTTP connection if enabled by requiring a username and password Telnet Secu...
Page 53: ...unning G4 WebControl To establish a secure connection between the touch panel and the target Master the panel must be using a valid username and password that can be matched to a previously configured...
Page 54: ...ong two compression options These compression settings are most useful when working either over a bandwidth restricted network or over the Internet Use Compression allows the user to specify that the...
Page 55: ...ng a current Master security setting Master Security and Configuration must be enabled Security Features Feature Description System Level Provides an authorized user with the ability to alter the curr...
Page 56: ...s of their rights Terminal RS232 USB Access This selection determines if a username and password is required for Terminal communication through the USB connector If Terminal Security is enabled a user...
Page 57: ...meters If security Configuration is enabled a user group must have sufficient access rights to access the Main Security Menu Any time a configuration operation is performed the Master verifies the cur...
Page 58: ...Address of the target Master into the Address URL field within the web browser Initially the connection is unsecured and communication can be made via an HTTP connection Refer to theAccessing an Unse...
Page 59: ...er The ICSP Connectivity option is required to allow authenticated and or secure communication between the Master and other AMX hardware software To establish an authenticated ICSP connection where th...
Page 60: ...be allowed to modify the default administrator profile FIG 37 Group Level Security Manage Groups Security page Manage Group Page Feature Description Manage Groups page This page allows a user to eithe...
Page 61: ...nector FTP Access This selection enables or disables FTP Access for the target group HTTP Access This selection enables or disables Web Server access for the target group Telnet Access This selection...
Page 62: ...f an existing Group 1 Click the Group Level link from within the Security section of the Navigation frame to open the Manage Groups page 2 Click the Select button next to the selected Group name to op...
Page 63: ...button to remove the selected group and return to the Manage Groups page If you are not logged into the Master you receive a reminder message You must login before Security Settings can be changed Log...
Page 64: ...sers Page Feature Description Manage Users page This page allows a user to either modify the rights for an existing user available from the displayed list or use the New button to access a secondary w...
Page 65: ...ts then are transferred to the user by placing a checkmark next to those rights which are available to the associated group Any properties possessed by groups ex access rights directory associations e...
Page 66: ...8 Click the Update button to save the changes to the target Master A User added successfully notice is displayed at the top of the page if the page parameters have no errors Configure Users Propertie...
Page 67: ...any folder prohibits that user from accessing any files contained therein via the Web Server 5 Enter the same password for the user into both the Password and Password Confirm fields if you want to ch...
Page 68: ...he Delete button to remove the selected user and return to the Manage Users page System Settings This section of the Navigation frame FIG 40 provides the ability to both manage existing and pending li...
Page 69: ...he Tree view begins fully collapsed The online devices are organized according to the System they belong to Double click any System icon FIG 42 to display a list of devices that are currently online w...
Page 70: ...date and time on the target Master System Number Allows a user to change the current system number value Reboot Allows a user to reboot the target Master Control Emulate Allows a user to both control...
Page 71: ...ne by allowing the user to control a device s channels levels and send both send commands and strings to the target device This button is available from within all Management menus Log Allows a user t...
Page 72: ...button to open the Modify System Date Time dialog FIG 43 This dialog shows the current Date and Time settings for the target Master 4 Alter any of these values by selecting the appropriate field and e...
Page 73: ...Master System Menu Rebooting the Master 1 Click the Manage System link from within the System Settings section of the Navigation frame 2 Click on the purple System icon from within the Online Tree to...
Page 74: ...to have come from the Master The options in this frame specify the D P S combination for the device to be controlled To Emulate a device means that the program generates messages which appear to the M...
Page 75: ...you can enter any number of messages that can be sent as either a String or Command 12 To Emulate sending a String or Command type a String or Command within the corresponding field and press the Sen...
Page 76: ...sented by a column in the table All messages are displayed in the Notifications tab of the Output Display window within NetLinx Studio v 2 4 1 Click the Manage System link from within the System Setti...
Page 77: ...opup field labeled Explorer User Prompt Preset Name intended for entering the name associated with this new Preset Press OK to return to the previous Device Configuration popup dialog Click Cancel to...
Page 78: ...m Use these fields to enter a device port system D P S combination for the device that you want to enable notifications for The specified device then appear in the Device field within the Diagnostic C...
Page 79: ...rmation such as System Device Port Navigate to an empty Diagnostic filter slot and click the Modify button below the filter Select a previously unused Preset and store it with a new name Click the Rem...
Page 80: ...an be either enabled disabled via the adjacent checkbox The port number values can also be modified except the FTP port The default port for each service is listed to the right Create SSL Certificate...
Page 81: ...s what method of communication is used with each FIG 48 Port Communication Settings Telnet Port ICSP Port HTTP Port HTTP SSL Port SSH Port FTP Port NetLinx Master HTTP Access option Telnet Access opti...
Page 82: ...the various AMX product for communication amongst themselves Some examples would be NetLinx Studio communicating with a Master for firmware or file information updates and TPDesign4 communicating wit...
Page 83: ...ection between a client and a server over which any amount of data can be sent securely HTTPS is designed to transmit individual messages securely Therefore both HTTPS and SSL can be seen as complemen...
Page 84: ...A certificate consists of two different Keys Master Key is generated by the Master and is incorporated into the text string sent to the CA during a certificate request It is unique to a particular re...
Page 85: ...alpha numeric string 1 50 characters in length City Location Name of the city where the certificate is used This is an alpha numeric string 1 50 characters in length State Province Name of the state...
Page 86: ...main name must be associated to a resolvable URL Address when creating a request for a purchased certificate The address does not need to be resolvable when obtaining a free certificate 4 Enter the na...
Page 87: ...rtificate to open the Server Certificate page 2 Click the down arrow from the Bit length field to open a drop down listing of available public key lengths The three available public key lengths are 51...
Page 88: ...ield This is an alpha numeric string 1 50 characters in length The state province name must be fully spelled out 8 Click the down arrow from the Country Name field to open a drop down listing of listi...
Page 89: ...y verify other certificates it is also necessary to import the CA key into the Web Server Refer to theServer Creating a Request for an SSL Certificate section on page 81 This is done as part of the pr...
Page 90: ...t into the Submit Request field on the CA s Retrieve Certificate web page 7 Choose to view the certificate response in raw DER format 8 Note the Authorization Code and Reference Number for use in the...
Page 91: ...tings Manage System Server Import SSL Certificate to open the Import Certificate page FIG 51 3 Place the cursor within the empty window and paste the raw text data in its entirety into the field 4 Cli...
Page 92: ...link from within the System Settings section of the Navigation frame 2 Click on a violet Device icon from within the Online Tree to open the Device menu buttons within the right frame 3 Click the Net...
Page 93: ...h macro from the browser s menu bar If no security is currently enabled on the target Master the browser is directed back to the Manage WebControl Connections page If security is enabled the browser i...
Page 94: ...ort field The default port provided in 1319 which is used for ICSP communication Refer to theManage System Server section on page 74 for more information on the default Ports used for communication 7...
Page 95: ...press the Refresh button Device Menu Changing the Device Number 1 Click the System Settings Manage System link from within the System Settings section of the Navigation frame 2 Click on a violet Devi...
Page 96: ...es on the Master section on page 67 for more information Device Menu Viewing the Log 1 Click on the System Settings Manage System link from within the System Settings section of the Navigation frame 2...
Page 97: ...example of this type of product is i Voting The Master confirms this registration information before running the module Adding a new license 1 Click on the System Settings Manage License link from wi...
Page 98: ...egistration Example AMX Meeting Manger and i Voting applications are examples of products that would require both a Product serial number and a Master specific key prior to usage 5 Press the Update bu...
Page 99: ...r List Clicking this button causes the entries to be temporarily deleted from the page until either the user chooses to refresh the entries using the Refresh List button or the Master begins to detect...
Page 100: ...ster or connected device and its current firmware version An example is NI Master v3 01 323 File Name Displays the program name and or file resident on the device Status Displays the Master or device...
Page 101: ...below the Status column which displays the Master or device state you can determine whether a device is Bound or Orphaned For more information refer to the section on page 100 A Bound device is one w...
Page 102: ...aster MAC Address in FIG 62 should match the MAC Address of the Master in FIG 61 In the above example the moused over device is bound to an NI Master on System 1 running firmware v3 01 320 The device...
Page 103: ...ild 323 or higher is used as the entry point for the management of all 3rd party Dynamically Discovered Devices Before beginning to manage any other devices the target Master must be loaded with the p...
Page 104: ...ystem After confirming the presence of those previously coded Dynamic Devices within the Manage Device Bindings page navigate to the View Discovered Devices page to continue the process of detecting D...
Page 105: ...matically disabled if the Master does not have Internet connectivity Upon enabling Internet connectivity the AMX License Agreement is displayed for acceptance FIG 64 The AMX License Agreement must be...
Page 106: ...file to the PC which the user is browsing from This option allows an administrator to archive those Duet Modules resident on a target Master back to a PC Select File to Upload This section allows a u...
Page 107: ...r level glue code Dynamic Device Discovery Concepts Feature Description Application Device A Duet Device 41000 42000 that is used as a control interface to a physical device This is also referred to a...
Page 108: ...within the NetLinx glue code would be inadequate due to the nature of the dynamically acquired DHCP IP Addresses Only actual NetLinx D P S values are allowed for static binding of physical ports With...
Page 109: ...D DYNAMIC_POLLED_PORT COM2 DYNAMIC_APPLICATION_DEVICE dvRECEIVER1 DUET_DEV_TYPE_RECEIVER My Receiver THE EVENTS GO BELOW DEFINE_EVENT DATA_EVENT dvRECEIVER1 Duet Virtual device data events go here Thi...
Page 110: ...either via auto binding or manual binding Application devices that have a bound physical device display their physical device ID within the Physical Device column If an associated Duet module has bee...
Page 111: ...application device and the physical device is then broken Dynamic application devices that have not been bound to a physical device display a Bind button When this button is selected a secondary displ...
Page 112: ...Devices page the search includes a query of the AMX online database for a compatible module based on the device s properties If the device specified a URL in its DDD beacon the file is retrieved from...
Page 113: ...ministrator can assign a Duet module to be associated with the physical device Clicking the Cancel button aborts the association of a Duet module with the physical device BUT it does not undo the proc...
Page 114: ...ociated with the physical target device IR IP Serial Relay Other 4 From within the SDK Class field use the drop down list to select the closest Device SDK class type match for the physical target devi...
Page 115: ...nage Device Bindings page and then navigate to the View Discovered Devices page to view the listing of all Dynamic Devices discovered in the system How do I write a program that uses Dynamic Device Di...
Page 116: ...to Step 3 To utilize Static binding execute step 2 then step 1 because the static bindings will try to bring up the Duet module as soon as the device is discovered The module should be already availa...
Page 117: ...bound which then causes an ONLINE event to be received by the NetLinx program for the Duet Virtual device Accessing an SSL Enabled Master via an IP Address Once the target Master has been fully confi...
Page 118: ...tes come defaulted with a 30 year window of validity FIG 71 The name on the security certificate site information doesn t match the domain name of the target Master 5 Click the View Certificate button...
Page 119: ...ertificate to the Root Store 12 Click OK from the Import was successful popup window 13 To close the still open Certificate popup window click OK 14 To close the still open Security Alert popup window...
Page 120: ...cess between the target Master and your computer Initially the Master Security option is disabled from within the System Security page and no username and password is required for access or configurat...
Page 121: ...Yes from the Security Alert popup window to agree to the installation of the G4 WebControl application on your computer This application contains the necessary Active X and VNC client applications ne...
Page 122: ...on the panel 13 Click OK to send the password to the panel and begin the session A confirmation message appears stating Please wait Initial screen loading The secondary window then becomes populated w...
Page 123: ...cal collection of users Any properties possessed by groups i e access rights directory associations etc are inherited by all the members of the group NetLinx Security Features NetLinx Master Security...
Page 124: ...used by the target Master Configure the remaining communication parameters as follows Data Bits 8 Parity None Stop bits 1 and Flow control None default is Hardware Click OK to complete the communicat...
Page 125: ...description of each option in the Main Security Menu refer to Main Security Menu section on page 130 Option 1 Set system security options for NetLinx Master Security Options Menu Type 1 and Enter at...
Page 126: ...er listed next to the option For example if selection 2 is selected from the Select to change current security option listing the security options for the Master are listed and HTTP Security becomes e...
Page 127: ...to login to a Terminal session 2 HTTP Security Enabled Disabled This selection enables disables HTTP Web Server Security If HTTP Security is enabled a user must have sufficient access rights to brows...
Page 128: ...e Security Setup prompt at the bottom of the Main Security Menu to edit an existing user account A sample session response is Select from the following list of enrolled users 1 administrator 2 NetLinx...
Page 129: ...is selection prompts you to enter the new password twice for the user Once the new password is entered the user must use the new password from that point forward 2 Change Inherits From Group This sele...
Page 130: ...P Server if this option is enabled 4 HTTP Access Enable Disable This selection enables disables HTTP Web Server Access The account has sufficient access rights to browse to the NetLinx Master with a W...
Page 131: ...nter to display the following Edit Group menu Edit Group Menu Please select from the following options 1 Add Directory Association 2 Delete Directory Association 3 List Directory Associations 4 Change...
Page 132: ...oup prompt type 2 to delete an existing directory association A sample session response is Select a directory association from the following 1 directory1 2 directory2 Select Directory 2 Select the dir...
Page 133: ...oup menu Display Access Rights 1 At the Edit Group prompt type 5 to view the current access rights for the selected group account A sample session response is Terminal RS232 Disabled Admin Password Ch...
Page 134: ...st of Authorized Groups 1 Type 10 and Enter at the Security Setup prompt at the bottom of the Main Security Menu to display a list of all authorized group accounts A sample session response is The fol...
Page 135: ...made to the security settings of the Master they are initially only changed in RAM and are not automatically saved permanently into flash This selection saved the current security settings into flash...
Page 136: ...user Once you have selected the user you want to edit it will take you to the Edit User Menu so you can edit the user s rights see theEdit User Menu section on page 123 for details 5 Delete user This...
Page 137: ...ermanent by saving to flash When changes are made to the security settings of the Master they are initially only changed in RAM and are not automatically saved permanently into flash This selection sa...
Page 138: ...DNS LIST D P S Displays the DNS configuration of a device DISK FREE Displays the amount of free space on the disk ECHO ON OFF Enables Disables echo of typed characters GET DEVICE HOLDOFF Displays the...
Page 139: ...T Sets the IP port listened to for ICSP connections SET ICSP TCP TIMEOUT Sets the timeout period for ICSP and i WebControl TCP connections SET IP D P S Setup the IP configuration of a device SET LOG C...
Page 140: ...e entered with the exact combination of upper and lower letters as was assigned to them by the security administrator The password must be at least 4 characters long and no more than 20 characters Any...
Page 141: ...users create and edit groups and setup directory associations for the Web Server A user must be given rights to access this command Any user that does not have rights to Security Configuration will se...
Page 142: ...NetLinx Security with a Terminal Connection 136 NI 3101 SIG Signature Series NetLinx Integrated Controller...
Page 143: ...amming Standards and Converting Axcess Code to NetLinx Code or Tech Notes TN numbers 186 249 261 and 310 Refer to the NetLinx Programming Instruction Manual for more detailed information on the differ...
Page 144: ...n the browser IP Address URL A string containing the IP Address of the G4 Web Control server or a URL to the G4 Web Control server IP Port A string containing the IP Port of the G4 Web Control Server...
Page 145: ...event from the Integrated Controller and assign new device and system numbers in NetLinx Studio Master IP Local Port Send_Commands Command Description UDPSENDTO Set the IP and port number of the UDP l...
Page 146: ...are omitted e g 128 system 0 indicating this system and port 1 the first port is assumed Here s the syntax NUMBER PORT SYSTEM where Configuration Port Commands The Configuration Port commands listed i...
Page 147: ...MaxStringLen 64 Types 8 bit MaxCommandLen 64 Types 8 bit The following input channels are on None The following output channels are on None The following feedback channels are on None Level 1 0 Suppo...
Page 148: ...ostName MLK_INSTRUCTOR Type DHCP IP Address 192 168 21 101 Subnet Mask 255 255 255 0 Gateway IP 192 168 21 2 MAC Address 00 60 9f 90 0d 39 HELP SECURITY Displays the related security commands Example...
Page 149: ...tring received by the device is displayed on the screen and anything typed is sent as a string to the device The device can be on any system the Master you are connected to can reach You can specify t...
Page 150: ...aster route metric 1 and indirectly connected masters route metric greater than 1 but less than 16 Direct mode allows communication only with masters that are directly connected route metric 1 Indirec...
Page 151: ...1 192 168 20 5 DNS Entry 2 12 18 110 8 DNS Entry 3 12 18 110 7 Is this correct Type Y or N and Enter Y Settings written Device must be rebooted to enable new settings SET DUET MEMORY Set the amount o...
Page 152: ...or the change to take affect SET ICSP TCP TIMEOUT Sets the timeout period for ICSP and i WebControl TCP connections Example SET ICSP TCP TIMEOUT This will set the timeout for TCP connections for both...
Page 153: ...CP Transmit Threads factory default 600 currently 200 8 IP Connection Manager factory default 800 currently 500 9 Message Dispatcher factory default 1000 currently 500 10 Axlink Transmit factory defau...
Page 154: ...time will be reflected on the system s Master and on all connected devices This will not update clocks on devices connected to another Master in Master to Master systems Example SET TIME Enter Date hh...
Page 155: ...of any combined devices Example SHOW COMBINE Combines Combined Device 33096 1 1 96 1 1 Combined Level 33096 1 1 1 128 1 1 1 10128 1 1 1 Combined Device 33128 1 1 128 1 1 10128 1 1 SHOW DEVICE D P S D...
Page 156: ...ailable 11528920 11512 4 11 01 2001 THU 14 10 21 TelnetSvr Accepted Telnet connection socket 14 addr 192 168 16 110 port 2979 5 11 01 2001 THU 14 05 51 Interpreter CIpEvent OnLine 10002 1 50 6 11 01 2...
Page 157: ...of devices requested by other Systems Device Port System Needs 00128 00001 00108 Channels Commands Strings Levels 33000 00001 00108 Channels Commands SHOW REMOTE Displays a list of the devices this s...
Page 158: ...000000000000 00096 00192 VOLUME 3 CONTROL BO 00001 AMX Corp 00000 v2 10 PID 0 OID 0 Serial 0000000000000000 Physical Address Axlink 00128 00188 COLOR LCD TOUCH PAN 00001 AMX Corp 32778 v5 01d PID 0 OI...
Page 159: ...at this time A null 00 character is sent after a carriage return If an ALT 255 is entered two 255 characters are sent per the Telnet RAFT If the code to go back to command mode is entered ALT 29 whic...
Page 160: ...e lit Issue this command to port 1 to disable all the LEDs on the Controller When activity occurs on a port s or Controller the LEDs will not illuminate Syntax SEND_COMMAND DEV LED DIS Example SEND_CO...
Page 161: ...te CHARD Set the delay time between all transmitted characters to the value specified in 100 Microsecond increments Syntax SEND_COMMAND DEV CHARD time Variable time 0 255 Measured in 100 microsecond i...
Page 162: ...AND DEV HSON Example SEND_COMMAND RS232_1 HSON Enables hardware handshaking on the RS232_1 device RXCLR Clear all characters in the receive buffer waiting to be sent to the Master Syntax SEND_COMMAND...
Page 163: ...except that the changes are not permanent and the previous values will be restored if the power is cycled on the device Syntax SEND_COMMAND DEV TSET BAUD baud parity data stop 485 Enable Disable Varia...
Page 164: ...haracter of 1 millisecond to the RS232_1 device 27 18 0 Clear the ninth data bit by setting it to 0 on all character transmissions Used in conjunction with the B9MON command Syntax SEND_STRING DEV 27...
Page 165: ...ample SEND_STRING RS232_1 27 20 1 Sets the RTS hardware handshake s output to low on the RS232_1 device IR Serial Ports Channels 00001 00229 IR commands 00229 00253 May be used for system call feedbac...
Page 166: ...to 100 then IR function 127 or 20 whichever exists is generated for the one hundred digit Uses CTON and CTOF times for pulse times Syntax SEND_COMMAND DEV CH channel number Variable channel number 0...
Page 167: ...n 1 10ths of a second Default is 5 0 5 seconds Example SEND_COMMAND IR_1 CTON 20 Sets the IR pulse duration to 2 seconds GET BAUD Get the IR port s current DATA mode communication parameters The port...
Page 168: ...ror You can only use the PON and POF commands when an IR device has a linked I O channel Channel 255 changes are disabled after receipt of this command You can only use the PON and POF commands when a...
Page 169: ...d Default is 5 0 5 seconds Example SEND_COMMAND IR_1 PTON 15 Sets the duration of the power pulse to 1 5 seconds for the IR_1 device SET BAUD Set the IR port s DATA mode communication parameters Only...
Page 170: ...MODE mode Variable mode IR SERIAL or DATA Example SEND_COMMAND IR_1 SET MODE IR Sets the IR_1 port to IR mode for IR control SP Generate a single IR pulse You can use the CTON to set pulse lengths an...
Page 171: ...343 Transmits the IR code as 3 4 3 enter Mode 1 Example x x x enter SEND_COMMAND IR_1 XCH 3 Transmits the IR code as 0 0 3 enter SEND_COMMAND IR_1 XCH 34 Transmits the IR code as 0 3 4 enter SEND_COMM...
Page 172: ...x SEND_COMMAND DEV GET INPUT channel Variable channel Input channel 1 8 Example SEND_COMMAND IO GET INPUT 1 Gets the I O port s active state The system could respond with INPUT1 ACTIVE HIGH SET INPUT...
Page 173: ...d press ENTER to send the information to the unit Type get ip to display the actual IP Address used by the unit Release the static fixed IP Addresses Recycle power to the device and retry obtaining a...
Page 174: ...can utilize all of the above Ethernet modes When plugging the Master into a fixed speed hub or switch i e 10 BaseT Hub or Switch the hub or switch acts erratically see above for resolution I m unable...
Page 175: ...Troubleshooting 169 NI 3101 SIG Signature Series NetLinx Integrated Controller...
Page 176: ...egistered trademarks of AMX AMX reserves the right to alter specifications without notice at any time It s Your World Take Control 3000 RESEARCH DRIVE RICHARDSON TX 75082 USA 800 222 0193 469 624 8000...