Amazone ZG-TS 10001Truck Operating Manual Download Page 12


General safety instructions 


12 

ZG-TS BAG0203.2  06.19 


2.2 

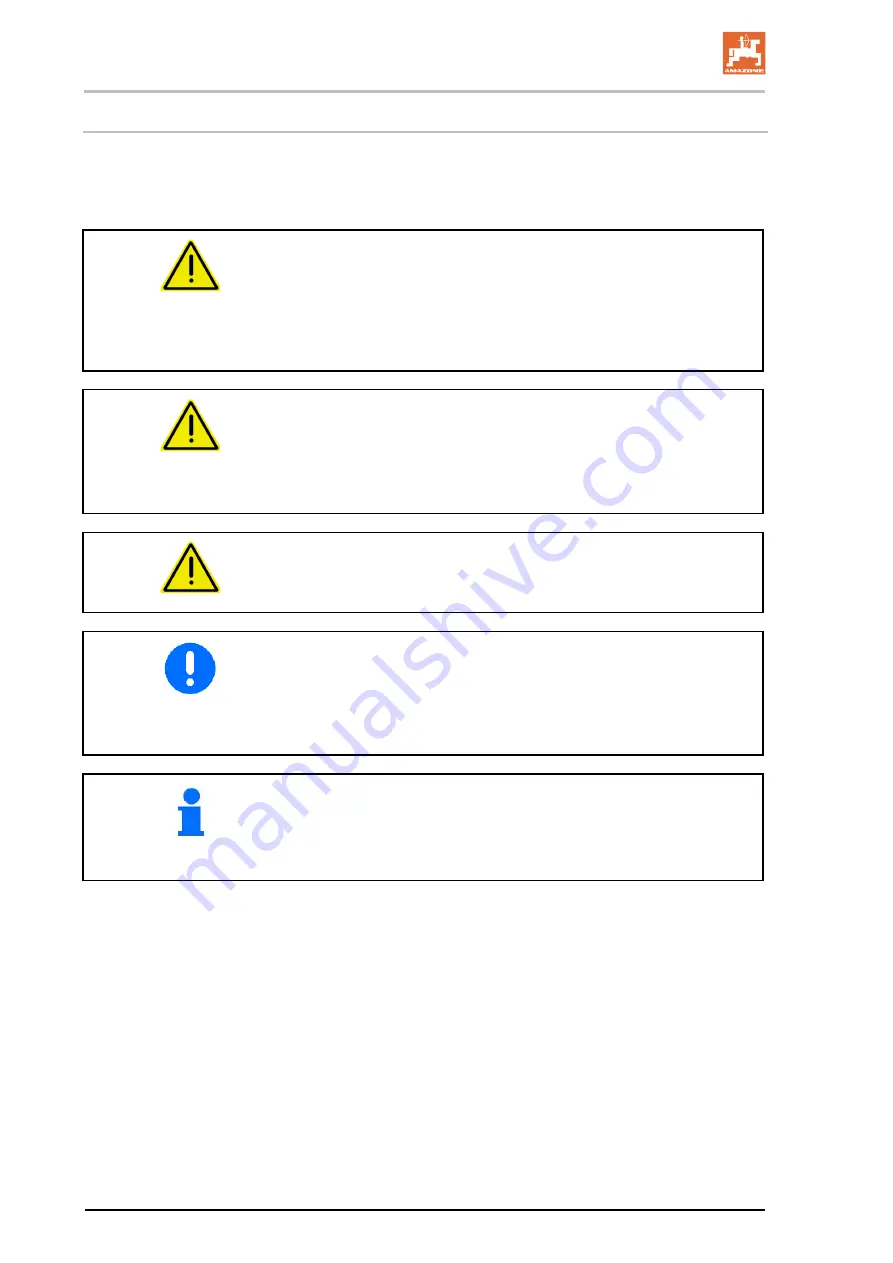
Representation of safety symbols 


Safety instructions are indicated by the triangular safety symbol and 
the highlighted signal word. The signal word (danger, warning, cau-
tion) describes the severity of the risk, and carries the following mean-
ing: 


DANGER 

Indicates an immediate high risk which will result in death or 
serious physical injury (loss of body parts or long term damage) 
if not avoided. 

If the instructions are not followed, then this will result in imme-
diate death or serious physical injury. 


WARNING


Indicates a medium risk, which could result in death or (serious) 
physical injury if not avoided. 

If the instructions are not followed, then this may result in death 
or serious physical injury. 


CAUTION 

Indicates a low risk which could cause minor or medium level 
physical injury or damage to property if not avoided. 


IMPORTANT 

Indicates an obligation to special behaviour or an activity re-
quired for proper machine handling. 

Non-compliance with these instructions can cause faults on the 
machine or in the environment. 


NOTE 

Indicates handling tips and particularly useful information. 

These instructions will help you to use all the functions of your 
machine to the optimum. 


Summary of Contents for ZG-TS 10001Truck

Page 1: ...Manual az ZG TS 7501 Truck ZG TS 10001 Truck Pack top spreader MG6416 BAG0203 2 06 19 Printed in Germany Please read this operating manual before first commis sioning Keep it in a safe place for futu...

Page 2: ...self The person in question would not only harm himself but also make the mistake of blaming the machine for pos sible failures instead of himself In order to ensure success one should enter the mind...

Page 3: ...cture Factory Basic weight kg Approved total weight kg Maximum load kg Manufacturer s address AMAZONEN WERKE H DREYER GmbH Co KG Postfach 51 D 49202 Tel E mail Hasbergen 49 0 5405 501 0 amazone amazon...

Page 4: ...he implement or is only available in certain markets The sales docu ments provide information on the equipment of your implement or consult your dealer for more detailed information All information in...

Page 5: ...ting man ual and particularly the safety information Only after careful reading will you be able to benefit from the full scope of your newly purchased machine Please ensure that all the machine opera...

Page 6: ...21 2 14 Safety conscious working 21 2 14 1 General safety and accident prevention information 21 2 14 2 Hydraulic system 23 2 14 3 Electrical system 23 2 14 4 Fertiliser spreader operation 24 2 14 5 U...

Page 7: ...6 7 Switch on point and switch off point 65 7 Transportation 67 8 Use of the machine 68 8 1 Filling the machine 69 8 2 Spreading operation 70 8 3 Notes for spreading slug pellets e g Mesurol 73 8 4 C...

Page 8: ...Table of Contents 8 ZG TS BAG0203 2 06 19 10 12 Calibrating the spreader 90 10 13 Screw tightening torques 91 11 Hydraulic diagram 92...

Page 9: ...in the operating manual are always seen from the direction of travel 1 3 Diagrams used Operator control action and responses Actions to be carried out by the operator are given as a numbered list It i...

Page 10: ...ulations Have been trained in working with on the machine Have read and understood this operating manual The operator is obliged To keep all the warning symbols on the machine in a legible state To re...

Page 11: ...icable These shall be available to the operator at the latest on the comple tion of the contract Guarantee and liability claims for damage to peo ple or goods will be excluded if they can be traced ba...

Page 12: ...diate death or serious physical injury WARNING Indicates a medium risk which could result in death or serious physical injury if not avoided If the instructions are not followed then this may result...

Page 13: ...the operator and mainte nance personnel Check all the available safety equipment regularly 2 4 Safety and protection equipment Before each commissioning of the machine all the safety and protec tion e...

Page 14: ...r behaviour have been trained if necessary and have been in formed about the necessary protective equipment and measures 3 People with specialist technical training shall be considered as a specialist...

Page 15: ...the maintenance work is completed check the function of the safety devices 2 9 1 Spare and wear parts and auxiliary materials Immediately replace any machine parts which are not in a perfect state On...

Page 16: ...l consists of two fields Field 1 is a symbol describing the danger surrounded by triangular safety symbol Field 2 is a symbol showing how to avoid the danger Warning symbols explanation The column Ord...

Page 17: ...General safety instructions ZG TS BAG0203 2 06 19 17 2 12 1 Positions of warning symbols and other labels The following diagrams show the arrangement of the warning symbols on the machine...

Page 18: ...079 Danger from materials or foreign objects that are thrown from or ejected by the machine at high speeds These dangers can cause extremely serious and potentially fatal injuries Stay at a safe dista...

Page 19: ...long as the tractor engine is running with the PTO shaft connected hydraulic drive engaged or as long as the tractor engine can be unin tentionally started with the PTO shaft con nected hydraulic dri...

Page 20: ...lation adjusting troubleshooting cleaning maintaining and repairing due to the tractor and the machine being started unintentionally and rolling These dangers can cause extremely serious and potential...

Page 21: ...vironment through leakage of hydraulic fluid 2 14 Safety conscious working Besides the safety information in this operating manual the national general workplace safety and accident prevention regulat...

Page 22: ...or this when the machine is already in opera tion Do not wear loose fitting clothing Loose clothing increases the risk over being caught by drive shafts Only start up the machine when all the safety e...

Page 23: ...rical system When working on the electrical system always disconnect the battery negative terminal Only use the prescribed fuses If fuses are used that are too highly rated the electrical system will...

Page 24: ...eader Do not walk or stand close to rotating spreading discs Do not place any foreign objects in the hopper While carrying out the spread rate check beware of danger points from rotating machine parts...

Page 25: ...ce and repairs Only carry out maintenance repair and cleaning work on the machine when The drive is switched off The ignition key has been removed The machine connector has been removed from the on bo...

Page 26: ...chment points respectively at the front 1 and rear 2 in the hopper DANGER When loading the implement with a lifting crane the marked attachment points for slings must be used Do not step into the area...

Page 27: ...e maximum load capacity of the frame is 12000 kg To mount the ZG Truck on the carrier vehicle use the mounting plates under the frame and the mounting straps at the front on the frame The bottom side...

Page 28: ...Mounting on a carrier vehicle 28 ZG TS BAG0203 2 06 19 3 2 Mounting dimensions Spreading disc height...

Page 29: ...Mounting on a carrier vehicle ZG TS BAG0203 2 06 19 29 1 Mounting plates for M24 10 9 bolted connection 2 Mounting straps for pins with 40 mm diameter...

Page 30: ...r or code letter have been applied to the gripping sections in order to assign the respective hydraulic function to the pressure line of a control unit Films are stuck on the implement for the marking...

Page 31: ...ing WARNING For the oil return use only DN16 lines and select short return paths Pressurise the hydraulic system only when the free return has been correctly coupled Install the coupling union supplie...

Page 32: ...rainage flap 5 Thread pack with implement documentation 6 Sieve grate 7 Weigh cell 1 Frame 2 Conveyor belt 3 Hopper 4 Deflector plate 5 Metering shutter 6 Spreading discs 7 Spray protection 8 Folding...

Page 33: ...the guard tube must be installed underneath the spreading disc 2 Hood with shutoff of the agitator shaft spreading disc drive when opening the rear flap Not illustrated Warning signs 4 3 Transportati...

Page 34: ...ng the contours Direction of travel to the left 15 Direction of travel to the right 15 Along the gradient Up the slope 15 Down the slope 15 The intended use also includes Compliance with all the instr...

Page 35: ...propriate section shall be valid No one may stand in the machine danger area as long as the engine is running with a connected hydraulic system The operating person may only move the machine or switch...

Page 36: ...issible speed 1000 rpm 4 7 1 Weights basic machine empty weight Basic machine 1600 kg 1750 kg Charging sieves 80 kg Swivelable hopper cover 434 kg 4 8 Noise production data The workplace related emiss...

Page 37: ...sported out of the hopper by the belt conveyor 1 by means of a flap controller 3 and delivered into the fertiliser antechamber From there the fertiliser is delivered to the spreading discs 5 via the h...

Page 38: ...the most current setting recom mendations Through the FertiliserService application for Android and iOS mobile devices From the online FertiliserService See www amazone de Service FertiliserService U...

Page 39: ...r calibration Throw distance parameter for WindControl If you cannot definitively assign the fertiliser to a kind listed in the setting chart the AMAZONE Fertiliser Service will assist you over the te...

Page 40: ...0 16 600 B 2 720 2 5 600 2 10 550 24 2 176 30 0 16 800 B 2 900 2 7 800 2 12 720 29 1 176 TS 3 36 0 18 720 C 2 800 2 20 720 2 25 600 36 0 216 40 0 25 800 C 3 900 3 15 800 3 20 720 39 2 246 48 0 36 800...

Page 41: ...stance Setting 1 2 or 3 on the telescope for boundary spreading 0 do not use the telescope for boundary spreading Quantity reduction for boundary spreading ditch spreading in for entry in the control...

Page 42: ...kTS and can be selected as desired for any spreading disc AutoTS is switched using the control terminal ClickTS is adjusted manually on the spreading disc 1 Long spreading vane for normal spreading 2...

Page 43: ...reader units TS 1 TS 2 TS 3 Selection of the telescopic boundary spreading vane A A B C D Adjustment range according to the setting chart 1 2 3 0 no telescope 5 2 3 Agitator Agitators in the tips of t...

Page 44: ...l In this case dosing sliders operated by setting motors release a range of different diameters at the outlet openings The brushing unit ensures a clean delivery onto the spreading disc without fertil...

Page 45: ...position of the drop point system influences the lateral distribu tion and must be adjusted as specified in the setting chart Using the operating terminal the feed system at both hopper tips can be e...

Page 46: ...unit and spreading disc speed Argus Twin compensates for irregularities in the fertiliser fertiliser deposits on the spreading vanes working on slopes starting and braking processes WARNING Health ha...

Page 47: ...for strong or uneven dirt accumulations Clean the radar sensors if necessary Simplified Declaration of Conformity AMAZONEN WERKE H Dreyer GmbH Co KG hereby declares that the radio communication unit t...

Page 48: ...ug gested Use the AMAZONE website to download the following EasyCheck app EasyCheck operating manual 5 2 8 Mobile test rig The mobile test rig serves to check the lateral distribution on the field The...

Page 49: ...eves cover the entire hopper and protect against foreign particles and fertiliser clods during filling The charging sieves can be trodden on in order to clean the inside of the hopper 5 3 3 Rollup cov...

Page 50: ...per is fed on the conveyor belt via the fertiliser pre chamber with shutter control to the spreaders 1 Conveyor belt 2 Adjustable scraper 3 Gearbox with hydraulic motor to drive the conveyor belt 5 4...

Page 51: ...pull the ladder with the plat form to the rear and fold down the ladder When not in use swivel the ladder up and push to the front with the platform Make sure that the pushed in ascent is locked in t...

Page 52: ...sy to control operate and monitor the machine The spread rate is set electronically AmaTron 3 AmaPad AmaTron 4 AmaPad 2 5 6 Camera system WARNING Risk of injury or even death If the camera display alo...

Page 53: ...nly LED floodlights with a total power of 48 W The work lights ensure good vision on the work ing field at night The work lights are located 1 in the hopper 2 under the hood in the pre chamber 3 on bo...

Page 54: ...a complete standstill Please note that the individual spreading properties of the spread material have a significant influence on the lateral distribution and spread rate For this reason the listed s...

Page 55: ...rol panel optional 4 Setting of the spreader vane speed via PTO shaft speed on the control terminal with a hydraulic drive 5 Setting for boundary and trench spreading see page 59 Excerpt from the sett...

Page 56: ...Fertiliser menu of the ISOBUS software Prerequisite Different methods for spread rate check Constant calibration while spreading calibration methods on the field Weighing spreader Online calibration...

Page 57: ...ertiliser to be spread The fertiliser calibration factor must always be re determined if devia tions occur between the theoretical and actual spread rate 6 3 Setting the spreading disc speed See the s...

Page 58: ...by a renowned manufacturer and also checking of the working width set ting using the mobile fertiliser test rig 6 4 1 Replacing the spreading discs 1 Undo the bolt and remove the screw and the bushing...

Page 59: ...ortant influential factors on the spreading properties are known to be the grain size the bulk density the surface properties and the moisture The setting values from the setting chart are therefore o...

Page 60: ...cifies the following No fertiliser must be spread within one me tre of the boundary with use of boundary spreading devices No fertiliser must be spread within three metres of the boundary without use...

Page 61: ...witched on with the operating terminal without TS Do not switch ClickTS to the boundary spreading position PTO shaft drive reduce r p m Hydro On the boundary side the quantity and spreading vane r p m...

Page 62: ...sprea ding Boundary sprea ding Ditch spreading TS 2 24 0 16 600 B 2 720 2 5 600 2 10 550 24 2 166 27 0 16 600 B 2 720 2 5 600 2 10 550 24 2 172 30 0 16 800 B 2 900 2 7 800 2 12 720 29 1 172 TS 3 36 0...

Page 63: ...m the setting chart 3 Set the telescopic part of the border spreading vane to the re quired value on the scale 4 Tighten the thumb nut Setting the boundary spreading vane TS to a higher value causes a...

Page 64: ...r to the outside Delimitation of the spreading range toward the field less fertiliser to the outside 1 Telescope of the boundary spreading vane to a larger ad justment value Telescope of the boundary...

Page 65: ...hart for the switch on point and switch off point and enter it in the Fertiliser menu of the ISOBUS software Implements without SectionControl Open shutters at the switch on point Close shutters at th...

Page 66: ...many cases as in particular with small negative switch off points the shutters close too late Read the switch off point from the setting chart Tramline optimised driving style With the tramline optim...

Page 67: ...t Switch off the control terminal before road transport WARNING Risk of accident due to incorrectly working brake system When the maintenance light is green the brakes must be checked immediately by a...

Page 68: ...eading vanes optional spreading vanes with enhanced wear resistance are available When spreading mixed fertilisers note the following Each variety may have different flight characteristics The individ...

Page 69: ...lled hopper WARNING Couple the bulk fertiliser spreader to the tractor before loading Remove residues or foreign bodies from the hopper before filling with fertiliser Make sure that the charging sieve...

Page 70: ...re thrown from or ejected by the machine at high speeds Make sure that uninvolved persons are kept well clear of the danger area of the machine in the following situations Before you switch on the pow...

Page 71: ...rate check or turn on the online cali bration at the beginning of the spreading process Observe the point for switching on and off in the setting chart The point for switching on and off is specified...

Page 72: ...telescope for the boundary spreading vanes In Positions 1 and 3 of the respective telescopes there may be vibra tions caused by technical reasons The vibrations do not affect the service life of the i...

Page 73: ...N When filling the spreader avoid inhaling product dust and direct skin contact wear protective gloves After use thoroughly clean hands and all affected parts of the skin with water and soap DANGER Sl...

Page 74: ...ny object through the protection grating and func tion screen when the agitator is running 1 Secure the tractor against unintentional start up and unintentional rolling 2 Turn the spreader disc by han...

Page 75: ...gitator malfunctions WARNING Danger from crushing shearing and or impact through uninten tional closing of the open unsecured guard and function screen Secure the open guard and function screen so tha...

Page 76: ...Contact the AMAZONE Fertiliser Service 05405 501 111 No hydraulic functions Fluid supply at the tractor is not switched on Switch on fluid supply at the trac tor Power supply to valve block inter rupt...

Page 77: ...ine parts that are in a raised position if such parts are secured with suitable positive fit locking devices against accidental lowering Regular and proper maintenance will keep the machine in good co...

Page 78: ...gear drilling through existing holes on the transport frame welding load bearing components Protective measures are necessary such as covering lines or extending lines in particularly critical locatio...

Page 79: ...gulations when working with pressure washers Clean machine with regular water jet oiled implements only at washbays with oil separators Give particular attention to cleaning discharge openings and sli...

Page 80: ...ts and grease gun before greasing so that no dirt enters the bearing Completely press out the soiled grease in the bearings and replace it with new grease Lubricants For lubrication use a lithium sapo...

Page 81: ...ponent Maintenance work see page Workshop work Angular gearbox Oil change 90 After the first working run Component Maintenance work see page Workshop work Hydraulic system Check for leak tightness Che...

Page 82: ...t When exchanging the spreading vanes use the assembly paste pro vided This is the only way to ensure that the specified tightening torque is sufficient Required tightening torque 19 3 Nm The technica...

Page 83: ...a one sided load the control rollers follow this move ment Consequently this causes the pulley to turn around the swivel axle As a result the dis tance between the pulley and the drive drum increases...

Page 84: ...Release lock button of hood 1 2 Open the hood 3 Check the butterfly valve 1 for ease of movement and adjust the adjustment rings if necessary 4 Loosen the bolt on the cover 1 of the in stallation ope...

Page 85: ...ydraulic hose lines using your hand or fingers Escaping high pressure fluid hydraulic fluid may pass through the skin and ingress into the body causing serious injuries If you are injured by hydraulic...

Page 86: ...ximum two years Even with proper storage and approved use hoses and hose connec tions are subject to natural ageing thus limiting the length of use However it may be possible to specify the length of...

Page 87: ...iteria Damage to the outer layer up to the ply e g scouring points cuts cracks Brittleness of the outer layer crack formation of the hose materi al Deformations which do not match the natural shape of...

Page 88: ...hydraulic hose lines using protective co vers Cover sharp edged components The approved bending radii may not be exceeded When connecting a hydraulic hose line to moving parts the hose length must be...

Page 89: ...in the contamination indicator 2 Continue working with the implement 3 Observe the contamination indicator Replacing the oil filter To dismantle the filter unscrew the filter lid and remove the filte...

Page 90: ...einstall the filler plug sensor Use a new o ring Protect the cylindrical part of the sen sor against moisture with a generous amount of grease 9 Reinstall the dismantled parts remove the retaining scr...

Page 91: ...25 315 380 M 18 27 290 405 485 M 18x1 5 325 460 550 M 20 30 410 580 690 M 20x1 5 460 640 770 M 22 32 550 780 930 M 22x1 5 610 860 1050 M 24 36 710 1000 1200 M 24x2 780 1100 1300 M 27 41 1050 1500 1800...

Page 92: ...Hydraulic diagram 92 ZG TS BAG0203 2 06 19 11 Hydraulic diagram...

Page 93: ...Hydraulic diagram ZG TS BAG0203 2 06 19 93...

Page 94: ......

Reviews: