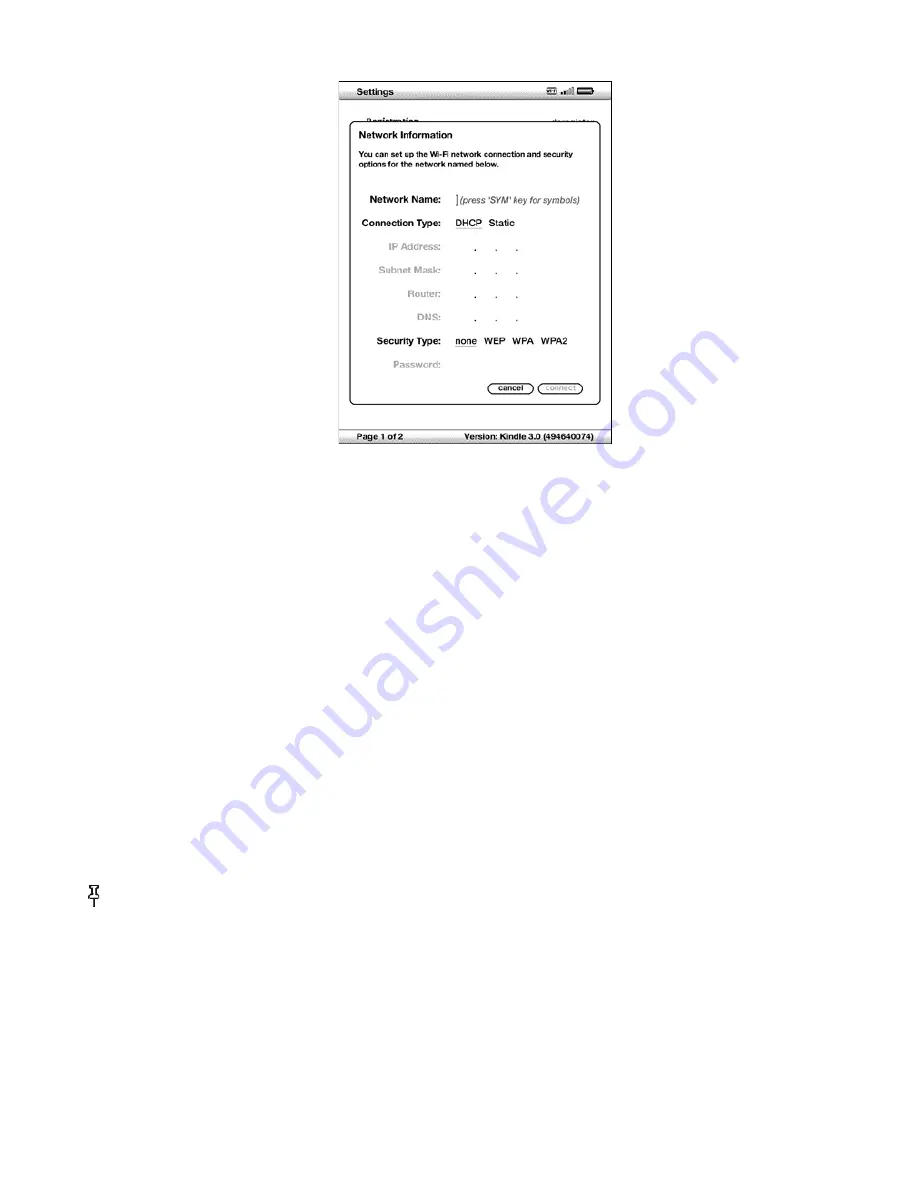
Enter the name of the network that you want to add.
7.
Choose the connection type. Kindle can connect to Wi-Fi networks that use either the DHCP (Dynamic Host
Configuration Protocol) or the Static protocol.
8.
If you chose the Static connection type, enter the network's IP Address, Subnet Mask, Router address, and DNS.
Otherwise, you can skip this step.
9.
Choose the network's security type.
10.
Enter the password used to access this network.
11.
Choose “connect”. Kindle connects to the new network.
12.
Personalizing Your Kindle
Your Kindle acquires a default name when it is first registered. This name is based on your Amazon account name, and is
displayed at the top of your Home screen. Before you edit this name on your Kindle, make sure that wireless is turned on.
If you want to edit this name from your Kindle, follow these steps:
If you are not already on the Home screen, press the Home button.
1.
Press the Menu button.
2.
Move the 5-way down until "Settings" is underlined and press to select.
3.
Press Next Page to navigate to the "Device Name" setting, underline "edit", and press to select.
4.
Use the keyboard to change the device name.
5.
When you have finished, move the 5-way down to highlight "save" and press the 5-way to submit the change.
6.
Tip:
To add any personal information such as your contact information, navigate with the 5-way so that "edit" next to
Personal Info is underlined, and then press the 5-way. Use the keyboard to add your information, then select "ok" when you
have finished.
Using Voice Guide
Voice Guide lets you navigate your Kindle with spoken menus, selectable items, and descriptions. For example, when you open
a book, Kindle speaks your current location and how far you've read.
To turn Voice Guide on or off, follow these steps:
70 of 99
Summary of Contents for KINDLE D00901 -
Page 1: ......