background image

7

EN

Battery Warnings

•  Always insert batteries correctly with regards 

to polarity (+ and –) marked on the battery and 
the product.

•  Exhausted batteries should be immediately 

removed from product and properly disposed.

•  Keep batteries out of the reach of children.

•  Do not dispose of batteries in fire.

•  Remove batteries from product if it is not to be 

used for an extended period of time.

•  If the battery leaks, avoid contact with skin and 

eyes. Rinse affected areas immediately with 
plenty of clean water, then consult a doctor.

Explanation of Symbols   


WARNING

The signal word that indicates 
a hazard with a medium level of 
risk which, if not avoided, could 
result in death or serious injury.


CAUTION 

The signal word that indicates a 
hazard that if not prevented could 
result in minor or moderate injury.

NOTICE

Indicates a practical tip, advice 
or practice not related to 
personal injury.

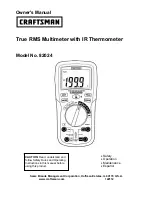
Summary of Contents for 6000 Count Compact

Page 1: ...er IP67 True rms CATIV 600V Mult metro Digital Compacto de 6000 Cuentas con Temperatura IP67 True RMS CAT IV 600 V Multim tre Num rique Compact Indice IP67 de Temp rature Valeur Efficace Vraie CAT IV...

Page 2: ...English 3 Espa ol 44 Fran ais 90...

Page 3: ...shock injury or death WARNING Risk of electric shock The safety features of this product may not protect the user if not used in accordance with this user manual WARNING Risk of electric shock Take s...

Page 4: ...jury The probe tips are sharp for accuracy Be careful when handling and reattach the probe tip shrouds after use This product is intended for origin of installation use and protected against and the u...

Page 5: ...xceeds 1000 V Do not measure current on a CAT IV circuitry whose voltage exceeds 600 V When measuring volts do not switch to current resistance modes Set the function switch to the appropriate positio...

Page 6: ...for checking socket outlets Use special equipment for checking socket outlets Do not use if the product seems to be damaged or if it is not working properly If in doubt replace the product Comply wit...

Page 7: ...to be used for an extended period of time If the battery leaks avoid contact with skin and eyes Rinse affected areas immediately with plenty of clean water then consult a doctor Explanation of Symbols...

Page 8: ...t DC Earth ground terminal potential Fuse IP67 Product is protected against the effects of temporary immersion in water CAT II 1000V Product is designed to protect the user during measurements perform...

Page 9: ...AT I locations This product may be used only under the conditions and for the purposes for which it was designed No liability will be accepted for damages resulting from improper use or non compliance...

Page 10: ...10 EN Product Description A B C D E F G H I J K L...

Page 11: ...shrouds D MODE button N Test probes with connector leads E Function switch O Rain caps F 10A input jack P Thermocouple probe adapter with caps G uA mA input jack Q Thermocouple probe H RELATIVE button...

Page 12: ...t duty cycle 11 Diode test 4 Low battery indicator 12 Minus sign 5 Auto power off 13 AC Alternating current voltage 6 Display reading 14 DC Direct current voltage 7 Auto Range indicator 15 VFD Variabl...

Page 13: ...cycle AC DC current mA frequency duty cycle AC DC current up to 10 A frequency duty cycle OFF AC voltage frequency duty cycle variable frequency drive mode DC voltage AC DC voltage mV frequency duty c...

Page 14: ...when the low battery indicator 4 is shown on the display A Open the tilt stand S Loosen the screw of the battery compartment cover R and remove it Insert a 9 V battery and attach it to the snap conne...

Page 15: ...in press any button When automatic power off is enabled the indicator 5 is shown on the display A To deactivate automatic power off press and hold the MODE button D while switching the product on The...

Page 16: ...ges its position If a reading is higher than the measurement range OL lights up on the display A Press and hold the RANGE button C for more than 1 second to exit manual mode and restore automatic rang...

Page 17: ...nt Resistance diode test continuity capacitance Frequency duty cycle Temperature Maximum minimum measurement Press the MAX MIN button B to switch between the maximum MAX minimum MIN and maximum to min...

Page 18: ...ting Check that the red connector lead N is on the correct terminal NOTICE Risk of damage Do not measure motors with unstable power Large voltage surges may occur that can damage the product Set the f...

Page 19: ...Contact point of measurement must be visible for a true reading NOTICE Doing voltage measurements while the connector lead N is left on the ampere input jacks F G will blow the product s internal fus...

Page 20: ...under test The stabilized value on the display A is read as the actual reading VFD mode Variable Frequency Drive In AC voltage measurement mode press and hold the MODE button D for 2 seconds The VFD...

Page 21: ...ltage measurement mode press the Hz button I Hz Hertz lights up Connect the test probes N in parallel to the circuit or component being measured The stabilized value on the display A is read as the ac...

Page 22: ...ured The stabilized value on the display A is read as the actual reading Voltage measurements mV Set the function switch E to the mV Hz position Press the MODE button D to switch between AC and DC mod...

Page 23: ...easured The stabilized value on the display A is read as the actual reading Duty Cycle mode mV In AC voltage measurement mode press the Hz button I twice percent lights up Connect the test probes N in...

Page 24: ...the A mA input jack G For current measurements of up to 600 mA set the function switch E to the mA Hz position and insert the red plug connector lead N into the A mA input jack G For current measureme...

Page 25: ...lized value on the display A is read as the actual reading Frequency mode AC In AC measurement mode press the Hz button I Hz Hertz lights up With the existing series connection in the AC circuit the f...

Page 26: ...rs before taking any resistance measurements Remove the batteries or unplug Resistance measurements are taken with no electricity running in the circuit NOTICE For best results disconnect one side of...

Page 27: ...e test probes N across the circuit or part under test The stabilized value on the display A is read as the actual reading Diode test Set the function switch E to the CAP position Insert the black conn...

Page 28: ...A shows OL Reverse the probes N position to get the correct polarity NOTICE Forward voltage typically indicates 0 4 to 0 7 V A shorted diode indicates near 0 V and an open diode indicates OL in both p...

Page 29: ...nder test The stabilized value on the display A is read as the actual reading If the resistance is less than approximately 50 an audible signal is emitted If the circuit is open OL lights up on the di...

Page 30: ...ead N into the positive input jack K Press the MODE button D 3 times to switch to capacitance measurement mode nF should light up as the unit 2 Place the test probes N across the capacitor under test...

Page 31: ...unction switch E to the Hz position Insert the black connector lead N into the negative COM input jack L Insert the red connector lead N into the positive input jack K Place the test probes N across t...

Page 32: ...ack L and with the red connector into the positive input jack K Connect the thermocouple probe Q to the thermocouple probe adapter P The polarity marking of the probe Q must correspond to the marking...

Page 33: ...efore changing to other electrical measurement mode Cleaning and Maintenance NOTICE Switch the product off and all the connector leads before cleaning NOTICE During cleaning do not immerse the product...

Page 34: ...ICE If the product does not work properly check the fuses and batteries to make sure that they are still good and that they are properly inserted NOTICE Always use a fuse of the proper size and value...

Page 35: ...ts f m This is the accuracy of the measurement circuit digits This is the accuracy of the analog to digital converter Accuracy is stated at 65 to 83 F 18 to 28 C and less than 75 RH NOTICE f m from me...

Page 36: ...V 600 V 0 1 V 0 8 f m 8 digits 1000V 1 V All AC voltage ranges are specified from 5 of range to 100 of range AC voltage bandwidth 45 Hz to 1 kHz sinusoidal 50 60 Hz all waves VFD Range Resolution Accu...

Page 37: ...rent 45 Hz to 1 kHz Range Resolution Accuracy 600 A 0 1 A 1 5 f m 3 digits 6000 A 1 A 60 mA 0 01 m A 600 mA 0 1 mA 6 000 A 0 001 A 2 0 f m 3 digits 10 A 0 01 A 10 A Max 30 seconds with reduced accurac...

Page 38: ...600 k 0 1 k 6 M 0 001 M 1 2 f m 2 digits 60 M 0 01 M 1 0 f m 5 digits Test current 0 35 mA Capacitance Range Resolution Accuracy 99 99 nF 0 01 nF 5 0 f m 20 digits 999 9 nF 0 1 nF 4 0 f m 5 digits 9...

Page 39: ...kHz 0 01 kHz 999 9 kHz 0 1 kHz 9 999 MHz 0 001 MHz Sensitivity 0 8 V rms minimum at 20 to 80 duty cycle and 100 kHz 5 V rms minimum at 20 to 80 duty cycle and 100 kHz Frequency electrical Range Resolu...

Page 40: ...surement Output Test current max 0 35 mA Beeping tone when resistance is less than 50 Diode Measurement Output Test A is max 0 9 mA open circuit voltage max 3 2 V Forward voltage drop of diode Tempera...

Page 41: ...rop test 6 5 2 m Crest factor 3 at full scale up to 500 V decreasing linearly to 1 5 at 1000 V Fuses Fuse 1 0 8 A 1000 V ceramic fast blow Fuse 2 10 A 1000 V ceramic fast blow Display 6000 counts back...

Page 42: ...31 C decreasing linearly to 50 at 104 F 40 C Storage humidity 80 Operating altitude max 7000 2000 m Auto power off After approx 15 minutes Dimensions 3 2 x 2 2 x 7 in 82 x 56 x 179 mm Net weight 1 lb...

Page 43: ...review AmazonCommercial is committed to delivering customer driven products that live up to your high standards We encourage you to write a review sharing your experiences with the product amazon com...

Page 44: ...amazon com AmazonCommercial V01 10 19 MADE IN CHINA HECHO EN CHINA FABRIQU EN CHINE...

Reviews: