GLD
Touch Screen Reference V1.2 – Issue 1 18
ALLEN
&
HEATH
4.3
Custom 1-4 Meters pages
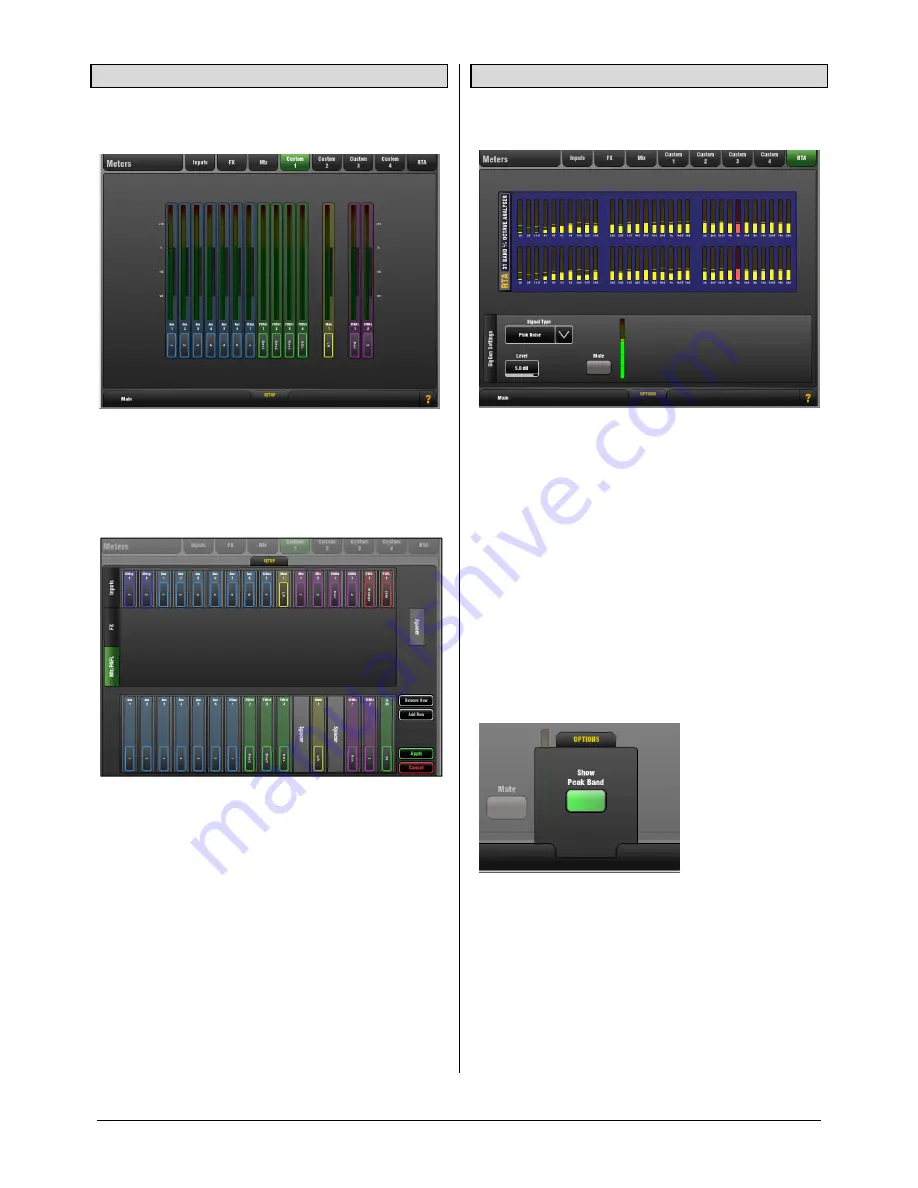
You can assign 4 Custom meter views.
These can be viewed in the
Home
or
Meters
screens.
Custom Meters let you organise the meters of channels and
mixes you are using into a single screen view, leaving off
those you are not using.
Assign up to 32 meters per page in two rows with up to 16
meters per row.
SETUP
pull-up window
Open the pull-up to assign meters to a Custom Meter page.
Use the tabs at the side to access available Inputs, FX
sends and returns, Mixes and PAFL monitor.
Touch items in the top window to drop them into available
empty slots below, or drag them into the position you
require. You can:
Add meters by touching or dragging
Insert meters by dragging between slots
Remove meters by dragging out of the window
Add spaces between meters
Add or remove the second row
Touch
Apply
to accept or
Cancel
to discard the changes.
Exit setup by closing the pull-up screen when you are
finished.
4.4
RTA
The RTA provides a 1/3 octave 'Real Time Analyser'
frequency display for the signal currently PAFL signal.
The RTA can be viewed in the
Home
or
Meters
screens. It
also displays on the strip meters when GEQ Fader Flip is
active. It separates the signal being listened to on the PAFL
monitor into 31 frequency bands and shows the relative
strength of each as a real time display.
When enabled, the RTA Peak Band option displays the
dominant frequency as a red bar in the RTA screen or by
lighting the red Pk indicator on the related strip meter while
in GEQ Fader Flip mode. Only one band will be lit red.
Note
The RTA follows the PAFL signal. Check that you
have selected PAFL for the signal you wish to analyse.
OPTIONS
pull-up window
Choose to hide or show the RTA Peak Band display on the
RTA screen or GEQ Fader Flip views.
Application
Use the RTA to help identify problem frequencies such as
instrument or room resonance or feedback.
With the Peak Band option enabled the RTA is a good tool
to help identify feedback frequencies while ringing out
stage monitors. Carefully raise the level of a vocal mic until
the monitor just begins to ‘ring’. That frequency will be
shown as the peak band and can be cut on the related Aux
mix Graphic EQ.


