9
www.Observint.com
© 2015 Observint Technologies. All rights reserved.
Wait for the confirmation (Attention) screen to appear, then click
OK
, and then click
Next
to continue with the Wizard setup.
8.
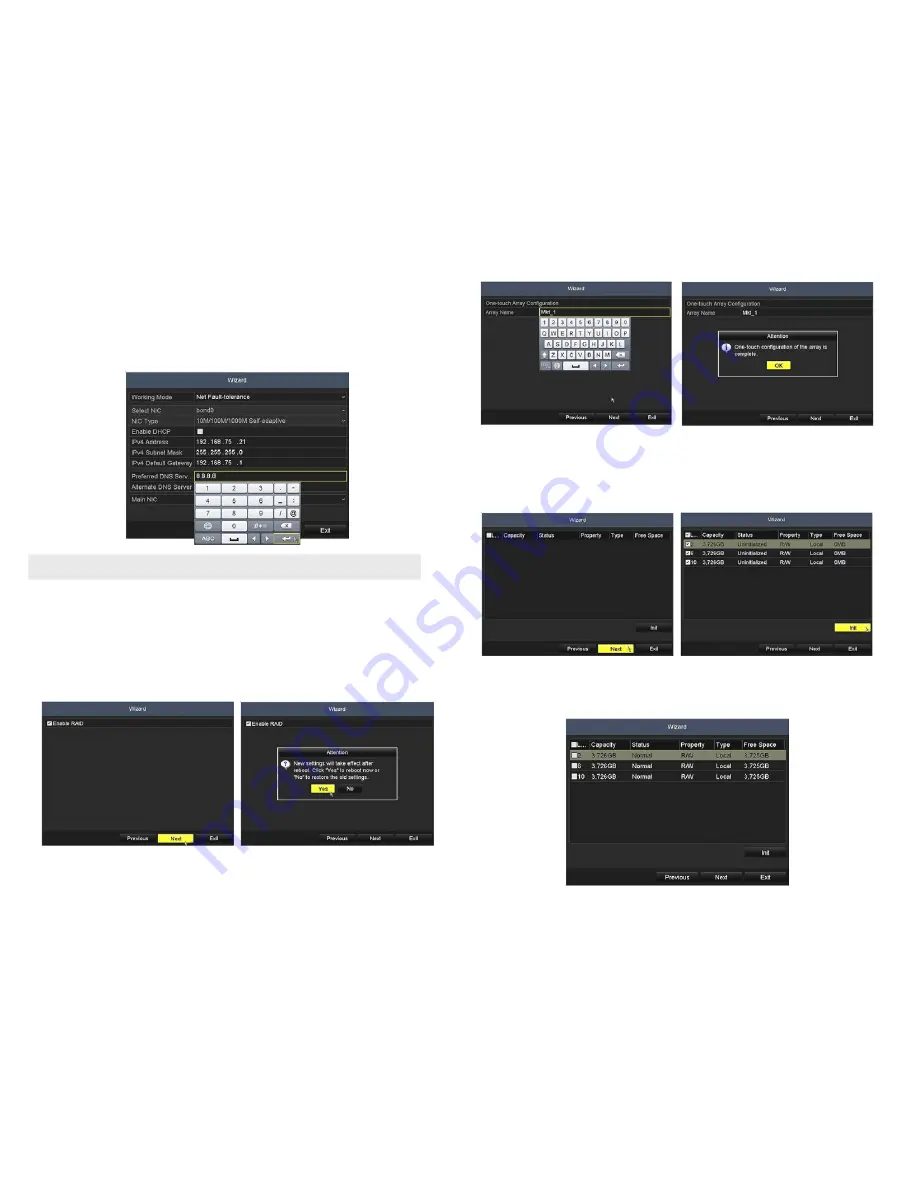
In the window shown below, additional disks attached to the system can be initialized at this time. In the example above, a single
RAID array was created with the three HDDs installed in the system, so no additional HDDs are shown here (see left image below). If
the RAID array wasn’t created, the disks installed in the system would be included on this screen (see right image below).
HDD Wizard after RAID setup
HDD Wizard without RAID setup
If you didn’t setup a RAID array with the Wizard (right screen above), check the select boxes for all HDDs you will use for recording,
click the
Init
button, and wait for the initialization to complete, and a Normal status is shown for each HDD (see below).
Click
Next
to continue with the Wizard setup.
—
IP Address
: Unique IP address for the network you are using
—
Subnet Mask
: Subnet Mask compatible with the network.
—
Default Gateway
: IP address of your Gateway. Typically the IP address of the router.
—
DNS Server
: The preferred and alternate Domain Name System (DNS) Server to be used with your DVR.
Click the field to open the virtual keyboard edit the fields as necessary.
NOTE
You can configure your network for IPv6 using the
Configuration Network
menu.
After you configured the network parameters, click
Next
.
7.
In the following Wizard setup window, you can enable RAID on the disk array. If you check the RAID select box, the disk array will be
configured as a single RAID 5 device, and a reboot of the NVR will be performed. If you don’t check this box, you can configure the
disk array to different RAID configurations (including multiple RAID arrays) through the NVR HDD Menus.
In this example, there are three 4TB drives installed in the NVR. For these, RAID (5) will be enabled, and the NVR will reboot. To do
this, check the Enable RAID box, then follow the on-screen instructions to reboot the NVR.
After the NVR reboots, advance through the Wizard past the Enable RAID screen shown above. The On-touch Array Configuration
entry screen will open. Click the
Array Name
field, and then enter a name for the array using the virtual keyboard. In the example
here, Mkt_1 was entered.


