8
www.Observint.com
© 2015 Observint Technologies. All rights reserved.
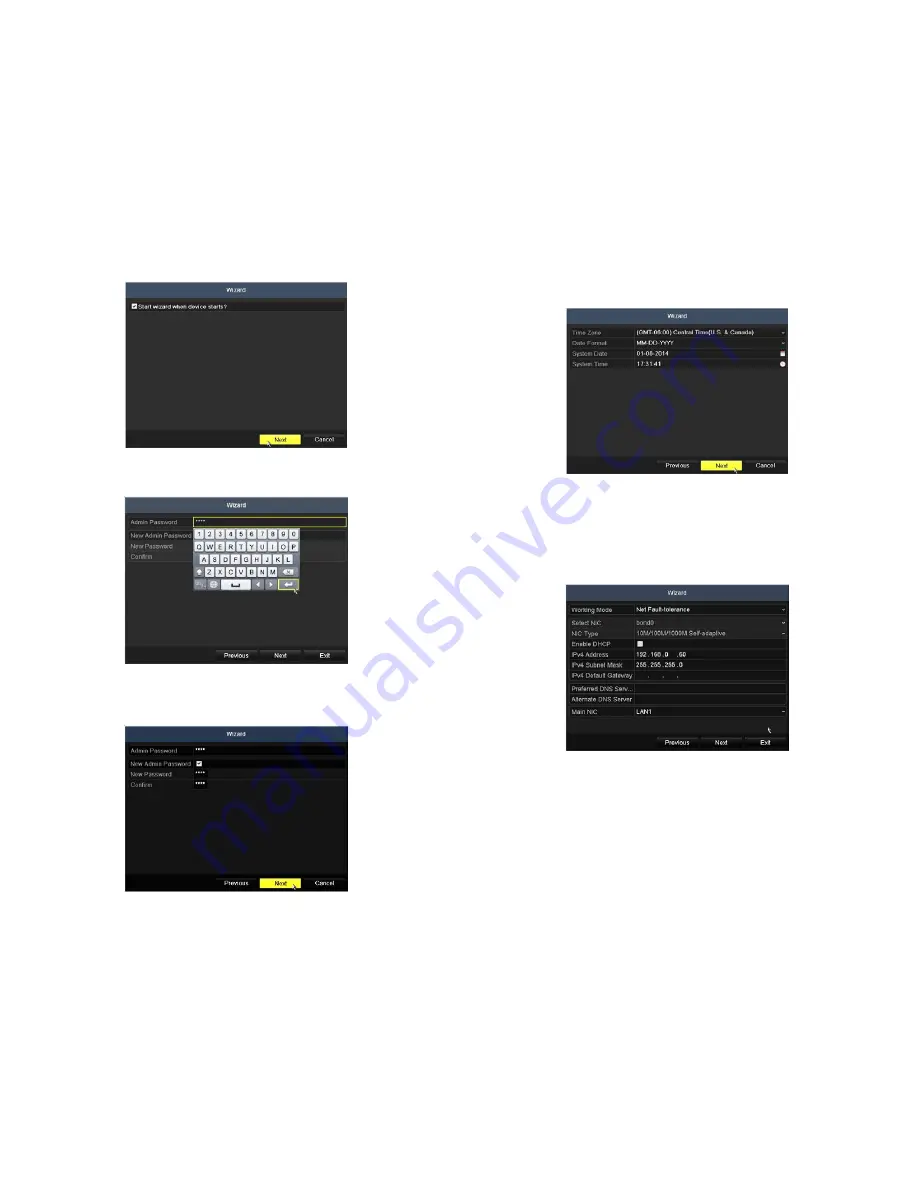
4.
Click the
Next
button to open the date and time settings window.
5.
In the date and time setup window, click the field you want to change, then use the drop-down list or setup aid to select the
appropriate values. Click
Next
to confirm your settings or
Cancel
to discard them and open the network setup Wizard window.
6.
In the
Network
setup Wizard window, click the field value you want to change, then use the pop-up aid to enter a new value. By
default, the network working mode is set to Net Fault-tolerance with an IP address of 192.168.0.60. It is generally preferable to setup
the NVR network interfaces with fixed network settings, if possible, to assure the NVR has an unchanging IP address for remote login.
To enable fixed network settings, un-check the
Enable DHCP
box if necessary, then edit the appropriate fields to change the settings.
Working Mode:
In this field, open the drop-down list and select the mode chosen when the the NVR was installed. If LAN1 and
LAN2 were connected to the same network, you must choose either
Net Fault-tolerance
or
Load Balance
mode. If the two LAN
ports were connected to different networks, choose
Multi-address
.
Select NIC
,
NIC Type
: These fields are selectable in Multi-address mode only, where you must setup the network configurations
for both the LAN1 and LAN2 network interfaces. After selecting the NIC, select the NIC type and choose the best parameter for the
network interface. The network interfaces can use DHCP (Dynamic Host Configuration Protocol), if preferred.
Enable DHCP
: If you check this select box, the NVR will access the DHCP server on the network to find compatible network settings
for the NVR. If the box is unchecked, you must enter network settings for the IPv4 Address, Subnet Mask, and Default Gateway. In
Net
Fault-tolerance
or
Load Balance
modes, these settings are applied to both LAN1 and LAN2 network interfaces. IF DHCP is not
enabled, enter settings for the following that are compatible with your network configuration.
3.
Enter the admin password in the appropriate field. To do that, click inside the
Admin Password
field to open the virtual keyboard.
Click the appropriate keys (icons) to enter the password, then click the
Enter
icon. The default
admin
password is
1111
.
Observint strongly recommends that you change the default admin user password to improve the security of your surveillance system.
To change the admin password, check the
New Admin Password
box, then enter the new password in the
New Password
and
Confirm
fields.


