14
SECTION 2: INSTALLATION
Power cables
You can power the camera directly by applying 24 Vac power to the drop cable power screw-down connectors. Refer to
“APPENDIX D 24 Vac Wire Gauge and Transmission Distance” on page 32 for more information.
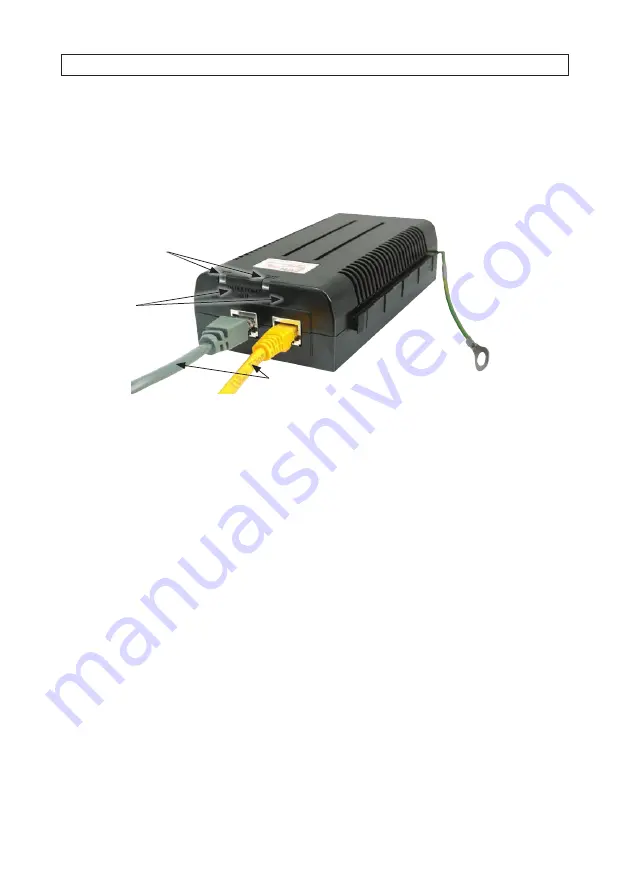
The LAN cable can also provide Hi-PoE to the camera. A Hi-PoE injector is provided. A typical PoE injector is shown below.
Injector status LEDs
LAN cables for
DATA IN (to network switch) and
DATA and POWER OUT (to camera)
Ground wire
Port labeling
To use the injector:
1. Connect the injector ground wire to an earth ground terminal. (
NOTE
: Not all PoE injectors have a ground wire.)
2. Connect a LAN drop cable between the network switch and the DATA IN port on the injector.
3. Connect a LAN drop cable between the injector DATA and POWER OUT port and the camera LAN drop cable.
4. Plug the power cable provided (not shown) for the PoE injector into the jack on the injector, then into a standard 120 Vac
electrical outlet.
After power is applied to the camera, the camera will perform initial motion checks. Allow these motion checks to complete before
continuing (~ 1 minute).
2.4 Ceiling mounting
Following the instructions below to install the camera using the
ALI-PTZCL Ceiling Mount Bracket
.
1. Determine the best mounting screws and hardware to anchor the mounting bracket with the camera to the mounting surface.
Use the following guidelines. Make sure that the ceiling is strong enough to withstand more than
8 times
the weight of the
camera and the bracket:
—
For cement ceiling mounting, use the expansion screw to anchor the bracket.
—
For wooden ceiling mounting, use self-tapping screw to anchor the bracket.


