


T-TAP Pro Thunderbolt 3 to 12G-SDI/HDMI v16.1 10 www.aja.com
Chapter 2 – Installation
Unpacking T-TAP Pro
As you unpack T-TAP Pro, carefully examine the unit to ensure that nothing was
damaged during shipment. If you find any damage, immediately notify the
shipping service and supply them with a complete description of the damage.
AJA will repair or replace damaged units. If you find shipping damage, contact
your AJA dealer or distributor for details on how to have your T-TAP Pro repaired
or replaced. Save packing materials and the shipping box. If you ever require
service or move your system, use the packaging materials and box for safe
shipment.
Installation Procedure
1. Unpack the T-TAP Pro shipping box (see above).
2. Ensure that your editing or streaming application software has been
installed on your computer.
3. Install the latest AJA T-TAP Pro software on your computer.
4. Connect your T-TAP Pro to its power supply unit, and connect the power
cord to mains AC, using the provided cables.
NOTE: T-TAP Pro cannot be powered by its Thunderbolt connection (insufficient bus
power).
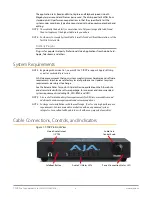
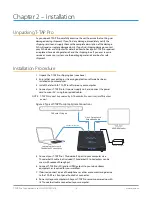
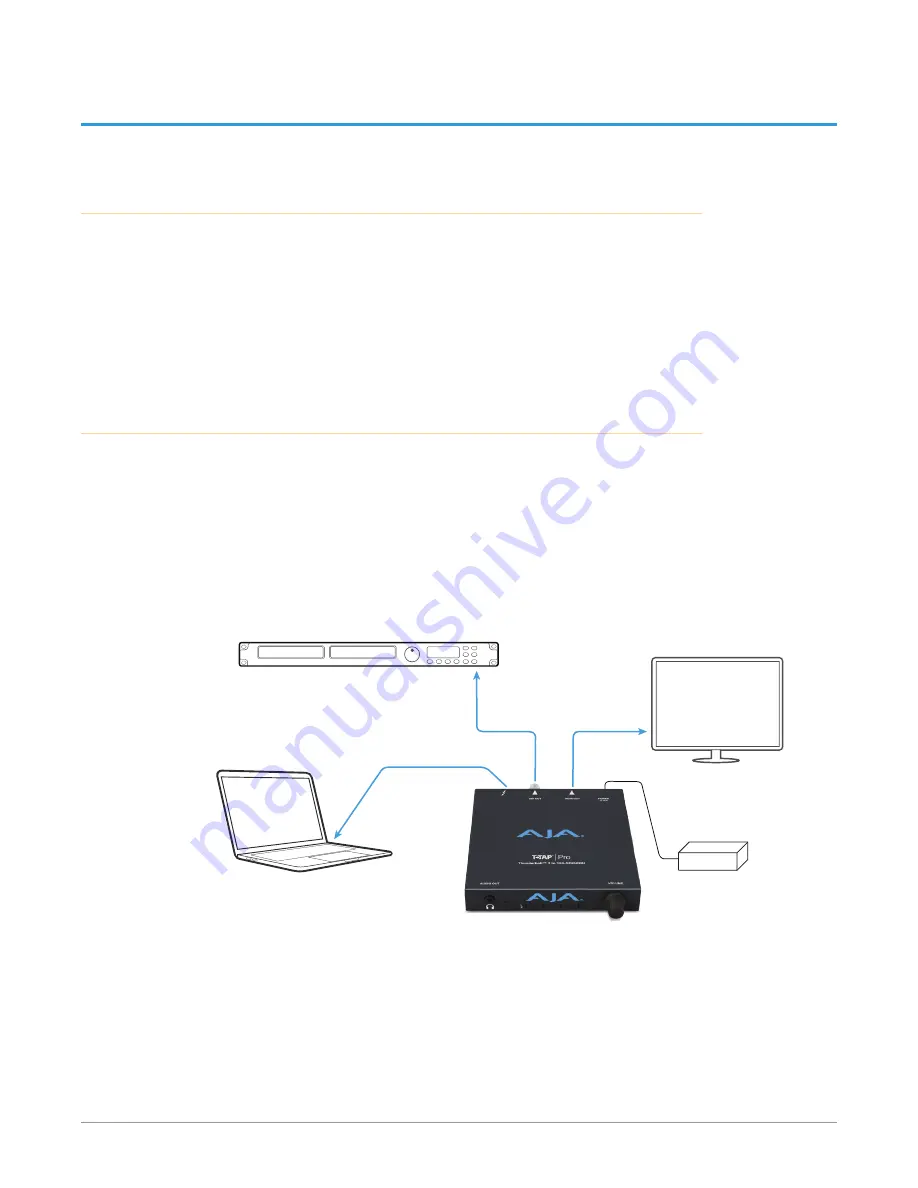
Figure 3. Typical T-TAP Pro Laptop System Connections
DVR with SDI Inputs
Video Output with
Embedded Audio
4K HDMI Monitor
AC Power Supply
HDMI
SDI
Laptop Computer with
Thunderbolt Connectivity
Thunderbolt 3 Cable
5. Connect your T-TAP Pro 's Thunderbolt 3 port to your computer via a
Thunderbolt 3 cable (not included). Thunderbolt 2 to 3 adaptors can be
used, with reduced throughput.
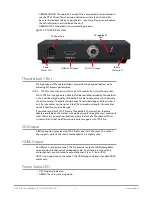
6. Connect T-TAP Pro's SDI and/or HDMI outputs to your downstream
equipment, as required for your workflow.
7. If desired, connect a pair of headphones or other audio monitoring device
to the T-TAP Pro's front panel Audio Out connector.
8. Power cycle your computer while your T-TAP Pro remains powered up with
its Thunderbolt cable connected to your computer.


