ELECTRICAL ADJUSTMENTS
(TV SECTION)
4. BASIC ADJUSTMENTS
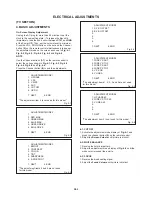
On-Screen Display Adjustment
Unplug the AC plug for more than 30 minutes to set the
clock to the non-setting state. (To release the Back-Up
immediately, take the short circuit between C101 and GND
at the Power Off.) Then, set the volume level to minimum.
Press the VOL. DOWN button on the set and the Channel
button (9) on the remote control simultaneously to appear
the adjustment mode on the screen as shown in Fig. 4-1,
Fig. 4-2, Fig. 4-3, Fig. 4-4, Fig. 4-5 and Fig. 4-6.
NOTE
Use the Channel buttons (1-7) on the remote control to
select the options shown in Fig. 4-1, Fig. 4-2, Fig. 4-3,
Fig. 4-4, Fig. 4-5 and Fig. 4-6.
Press the Channel button (8) to end the adjustments.
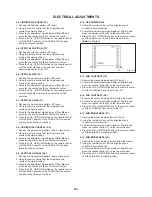
ADJUSTMENT MODE1
1. H PHASE
2. V DC
3. V SIZE
4. AGC
5. CUT OFF
6. OSD H
7. NEXT 8. END
"The adjustment item 4 is not used for this model."
Fig. 4-1
ADJUSTMENT MODE2
1.
2. RED BIAS
3. GREEN BIAS
4. BLUE BIAS
5. GREEN DRIVE
6. BLUE DRIVE
7. NEXT 8. END
Fig. 4-2
ADJUSTMENT MODE3
1. BRIGHT
2. CONTRAST
3. COLOR
4. TINT
5. SHARPNESS
6. E-RGB CONT
7. NEXT 8. END
"The adjustment items 5 and 6 are not used
for this model."
Fig. 4-3
ADJUSTMENT MODE4
1. R-Y B OFFSET
2. B-Y B OFFSET
3.
4.
5.
6.
7. NEXT 8. END
Fig. 4-4
ADJUSTMENT MODE5
1. WIDE V SART
2. WIDE V STOP
3. WIDE P SART
4. WIDE P STOP
5. V S-COR
6. V LINEA
7. NEXT 8. END
"The adjustment items 1, 2, 3, 4 and 5 are not used
for this model."
Fig. 4-5
ADJUSTMENT MODE6
1. H PHASE 60
2. WIDE V STOP 60
3. V LINEA 60
4.
5.
6.
7. NEXT 8. END
"The adjustment item 2 is not used for this model."
Fig. 4-6
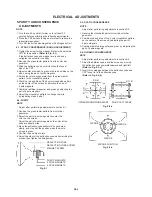
4-1: CUT OFF
1.
2.
Activate the adjustment mode display of Fig. 4-1 and
press the channel button (5) on the remote control.
Adjust the Screen Volume until picture is distinct.
4-2: WHITE BALANCE
1.
2.
Receive the color bar pattern.
Adjust the adjustment mode display of Fig. 4-2 until the
white color is looked like a white.
4-3: FOCUS
1.
2.
Receive the broadcasting signal.
Adjust the Focus Volume until picture is distinct.
D3-2


