42
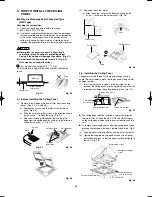
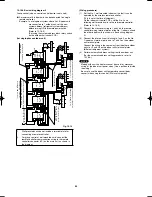
(4) Check that the panel is attached tightly to the ceiling.
●
At this time, make sure that there are no gaps between the
unit and the ceiling panel, or between the ceiling panel and
the ceiling surface. (Fig. 9-9)
Main unit
Do not allow gaps
Ceiling surface
Ceiling panel
Fig. 9-9
●
If there is a gap between the panel and the ceiling, leave
the ceiling panel attached and make fine adjustments to the
installation height of the unit to eliminate the gap with the
ceiling. (Fig. 9-10)
Insert a wrench or other tool into
the corner cover installation hole
and make fine adjustments to the
unit nut.
Fig. 9-10
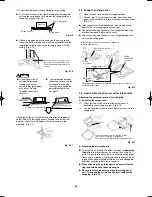
CAUTION
●
If the screws are not
sufficiently tightened,
trouble such as that
shown in the figure below
may occur. Be sure
to tighten the screws
securely.
●
If a gap remains between
the ceiling surface and the
ceiling panel even after
the screws are tightened,
adjust the height of the
unit again.
Adjust so that there are
no gaps.
Air leakage
Air leakage from
ceiling surface
Staining
Condensation, water leakage
The height of the unit can be adjusted from the ceiling panel
corner hole, with the ceiling panel attached, to an extent that
does not affect the unit levelness, the drain hose, or other
elements. (Fig. 9-11)
Fig. 9-11
9-3. Wiring the Ceiling Panel
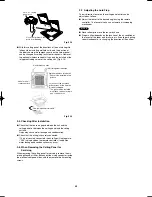
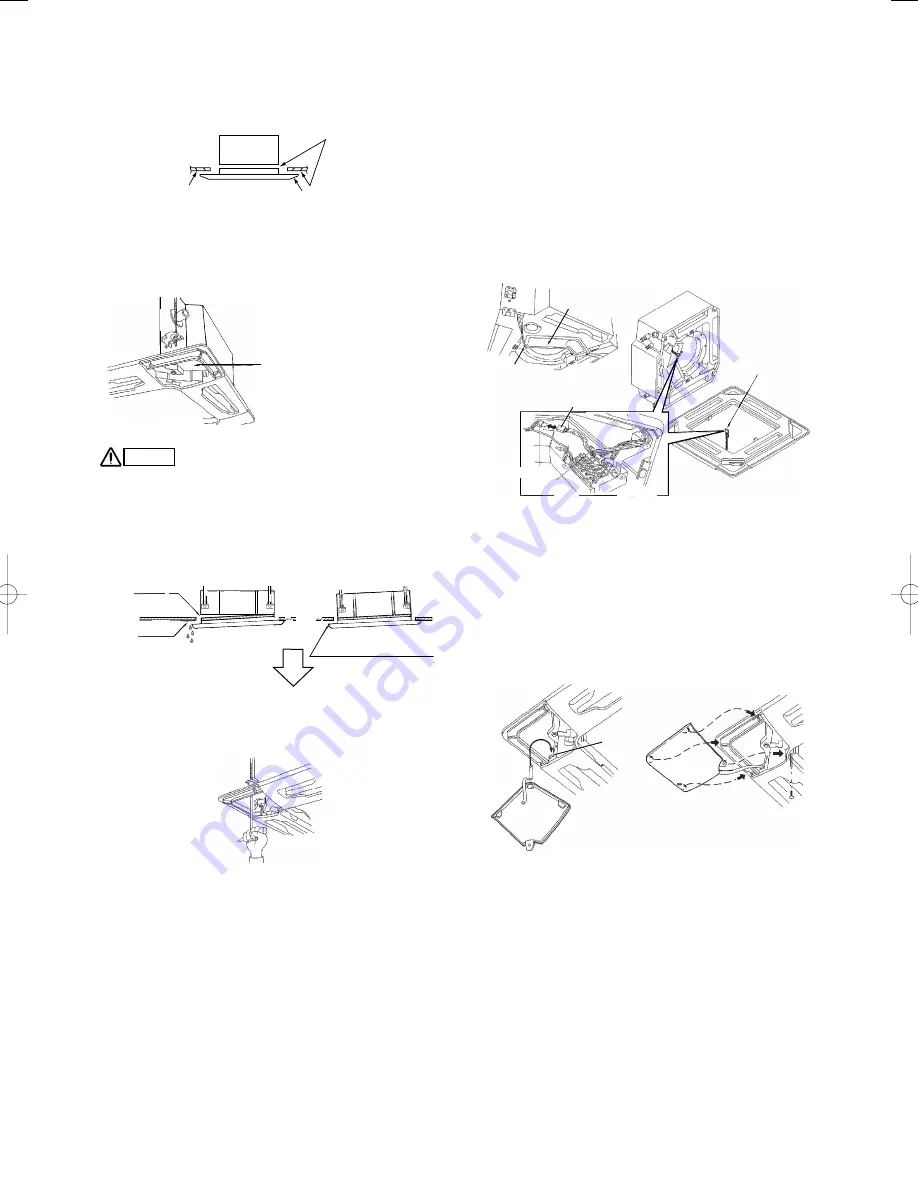
(1) Open the cover of the electrical component box.
(2) Connect the 7P wiring connector (red) from the ceiling
panel to the connector in the unit electrical component box.
(Fig. 9-12)
●
If the connectors are not connected, the auto flap will not
operate. Be sure to connect them securely.
●
Check that the wiring connector is not caught between the
electrical component box and the cover.
●
Check that the wiring connector is not caught between the
unit and the ceiling panel.
(Direction that the unit faces has been changed to
facilitate explanation.)
Electrical component
box cover
Screws
(3 locations)
Ceiling panel side
Mains side
Ceiling
panel wiring
connector
* Pass the wiring connector through the clamp to fasten it in place,
as shown in the figure.
Clamp
Fig. 9-12
9-4. How to Attach the Corner and Air Intake Grille
Attaching the corner cover and air-intake grille
A. Attaching the corner cover
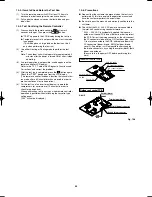
(1) Check that the safety cord from the corner cover is
fastened to the ceiling panel pin. (Fig. 9-13)
(2) Use the supplied screws to attach the corner cover to the
ceiling panel.
Place the corner cover so that the 3 tabs
fit into the holes in the ceiling panel.
Then fasten it in place with the supplied screws.
Pin
Fig. 9-13
B. Attaching the air-intake grille
●
To install the air-intake grille, follow the steps for
Removing
the grille
in the reverse order. By rotating the air-intake
grille, it is possible to attach the grille onto the ceiling panel
from any of 4 directions. Coordinate the directions of the air-
intake grilles when installing multiple units, and change the
directions according to customer requests.
●
When attaching the air-intake grille, be careful that the
flap lead wire does not become caught.
●
Be sure to attach the safety cord to the ceiling panel
unit. This keeps the air intake grille from accidentally
dropping. (Fig. 9-14)
Airwell̲PAC-i̲eng.indb 42
Airwell̲PAC-i̲eng.indb 42
2009/07/09 16:13:33
2009/07/09 16:13:33
Summary of Contents for OU-PSINV-25HR
Page 75: ...75 ...


