


74
Chapter 6. RAID Configuration
6�2 Manage Hot Spare Disks
Create/delete one or two global hot spare disks to safeguard the data on mirrored volumes
on the controller.
6�2�1 Create Hot Spare Disks
Add global hot spare disks to an existing volume.
Procedure
Step 1: Select the adapter on which you want to create hot spare disks and press
Enter
.
Step 2: Select
RAID Properties
and press
Enter
.
Step 3: Select
View Existing Array
. The View Array window will appear. If necessary, press
Alt + N
to switch to another array.
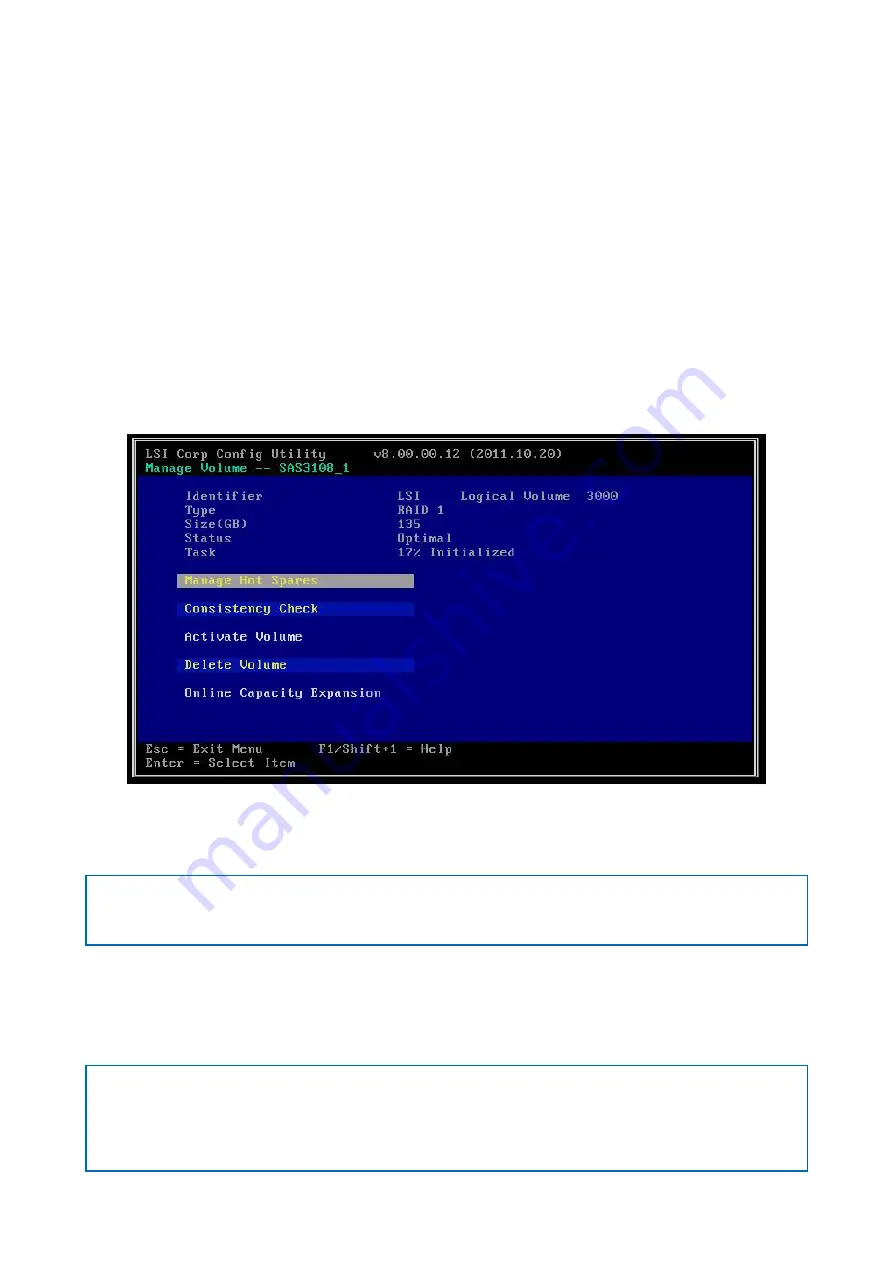
Step 4: Select
Manage Volume
. The Manage Volume window will appear as shown below.
Figure 6 Manage Volume Window page
Step 5: Select
Manage Hot Spares
.
Step 6: Identify a disk that is not part of a RAID array and that is not identified as a hot
spare disk.
NOTE
A global hot spare disk must have 512-byte blocks and nonremovable media. The disk type must
be either SATA with extended command set support or SAS with SMART support.
Step 7: Select the Hot Spare field for this disk and press the
space bar
. The Hot
Spare status changes to Yes.
Step 8: Repeat the preceding step to select a second global hot spare disk (optional).
Step 9: Press
C
to create the hot spare disk. A menu window will appear.
NOTE
An error message will appear if the selected disk is not at least as large as the smallest disk
used in the existing array or arrays. An error message will also appear if you try to add a SATA
disk as a hot spare for arrays that use SAS disks, or if you try to add a SAS disk as a hot spare
for arrays that use SATA disks.
Step 10: Select
Save changes
and then exit this menu to create the hot spare disk or disks.
Summary of Contents for SB401-VG
Page 1: ...UM_SB401 VG_v1 2_081921 SB401 VG Storage Barebone User s Manual...
Page 12: ...3 Chapter 1 Product Features 1 3 System Block Diagram...
Page 49: ...40 Chapter 3 Hardware Settings 3 3 1 Placement Top view Backside view 3 3 HDD Backplane 24 Bay...
Page 74: ...65 Chapter 5 BMC Configuration Settings Step 2 Input the IP address Set static IP...
Page 75: ...66 Chapter 5 BMC Configuration Settings Step 3 Input the subnet mask address...