present
⑯
FPV camera screen small window: click to switch to full screen display with map.
⑰
Hide FPV window or map window
⑱
Camera switching button
: Click to switch between the downward-looking and
forward-looking cameras.
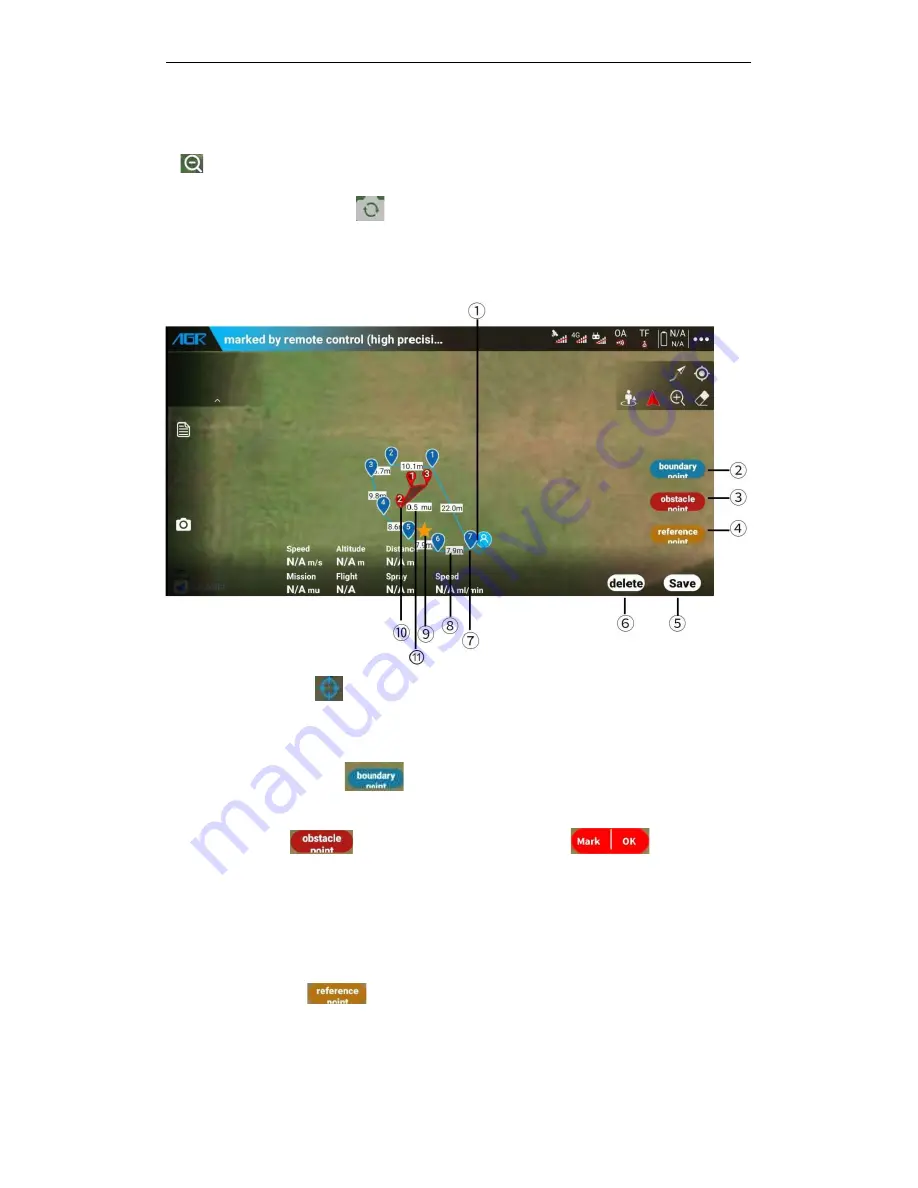
4.3. Mission planning interface
①
Mark positioning icon
: indicates the position of the mark, forming a boundary point and
an obstacle point.
②
Add boundary area: Click
to add a boundary point. The distance between two
boundary points cannot be less than 1M.
③
Add obstacle area
: Click the obstacle point, it appears
, click "marks" to
add the obstacle point, and click "OK" to form the obstacle area. Then click the "obstacle point"
button to add multiple obstacle zones in order.
A.
The distance between two obstacle points cannot be less than 1M.
B.
Multiple obstacle zones can be formed inside / outside the lot boundaries.
④
Add reference point
: Click to add a reference point
Function: Reduce the overall deviation of the RBI and drone positioning systems.
How to use: Place the drone at the reference point before operation, and click "Correct to


