background image

P1512134 R2

5

1. Introduction

Thank you for purchasing a Westfield Portable Grain Belt Conveyor. This equipment will allow safe and
efficient operation when you read and follow all of the instructions contained in this manual. With
proper care, your conveyor will provide you with many years of trouble-free operation.

Keep this manual handy for frequent reference and to review with new personnel. A sign-off form is
provided on the inside front cover for your convenience. If any information in this manual is not
understood or if you need additional information, please contact your local distributor or dealer for
assistance.

This manual should be regarded as part of the equipment. Suppliers of both new and second-hand
equipment are advised to retain documentary evidence that this manual was provided with the
equipment.

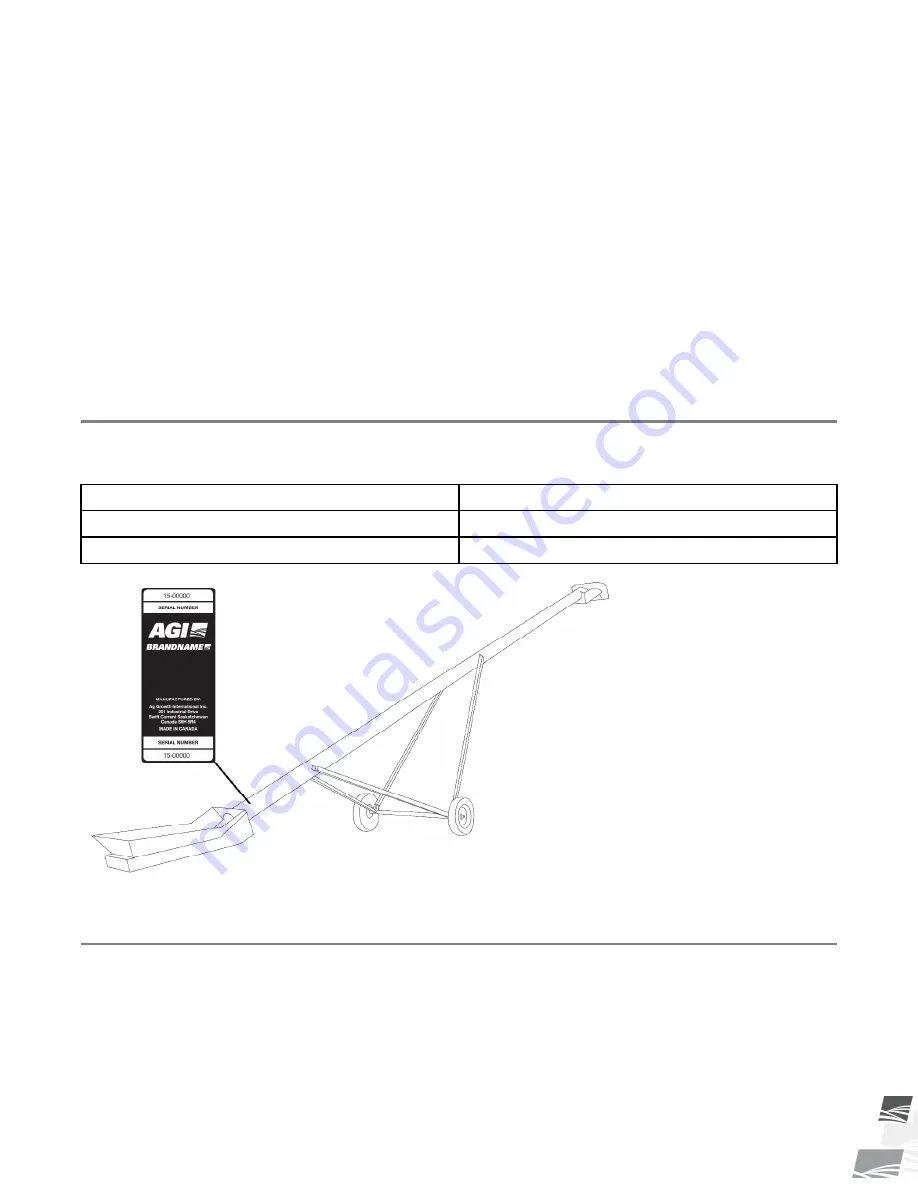
1.1. Serial Number Location

Always give your dealer the serial number on your conveyor (shown below) when ordering parts or requesting
service or other information. Please record this information in the table below for easy reference.

Model Number

Serial Number

Date Received

1.2. Intended Use

The conveyor is designed solely for use in the intended agricultural use as listed below. Use in any other way is
considered as contrary to the intended use. Compliance with and strict adherence to the conditions of
operation and maintenance as specified by the manufacturer, also constitute essential elements of the intended
use.

The conveyor should be operated, maintained, serviced, and repaired only by persons who are familiar with its
particular characteristics and who are acquainted with the relevant safety procedures.

S-DRIVE FIELD LOADER – PORTABLE GRAIN BELT CONVEYOR

1. INTRODUCTION

Summary of Contents for Westfield WCX1535FL

Page 1: ...n serious injury death or property damage Keep manual for future reference Part Number P1512134 R2 Revised May 2018 S Drive Field Loader Portable Grain Belt Conveyor Operator s Manual This manual appl...

Page 2: ...quired for this product This product has been designed and constructed according to general engineering standards other local regulations may apply and must be followed by the operator Use the sign of...

Page 3: ...ety 11 2 14 1 Gas Engine Safety 12 2 14 2 Electric Motor Safety 12 2 14 3 Hydraulic Power Safety 13 2 15 Tire Safety 14 2 16 Battery Safety 14 2 17 Personal Protective Equipment 15 2 18 Safety Equipme...

Page 4: ...7 7 Inspect Hydraulic Hoses and Fittings 56 7 8 Inspect the Hopper Flashing 56 7 9 Check the Roller Bearings 56 7 10 Check the Roller Lagging 56 7 11 Tension the Conveyor Belt 56 7 11 1 S Drive Pinch...

Page 5: ...n documentary evidence that this manual was provided with the equipment 1 1 Serial Number Location Always give your dealer the serial number on your conveyor shown below when ordering parts or request...

Page 6: ...nveyor Handling grain pulse crops treated seeds or other similar materials Handling fertilizer when strict operation and cleanout procedures are followed as noted in Operation section Use in any other...

Page 7: ...ho is going to work around the conveyor understands all procedures and related SAFETY information contained in this manual Remember YOU are the key to safety Good safety practices not only protect you...

Page 8: ...attached to tow bar or resting on ground Do not raise intake end above tow bar height Empty the conveyor and fully lower before moving 2 6 Rotating Parts Safety Keep body hair and clothing away from...

Page 9: ...fety Keep guards in place and do not operate unless all guards are in place Do not walk on step on or damage guards Lock out power before removing a guard Ensure all guards are replaced after performi...

Page 10: ...sure lift cable is seated properly in cable sheaves and cable clamps are secure Tighten brake lock by turning winch handle clockwise at least two clicks after lowering the conveyor Lower the conveyor...

Page 11: ...aking and oncoming traffic Always use hazard warning flashers on tractor towing vehicle when transporting unless prohibited by law Do not allow riders on the conveyor or towing vehicle during transpor...

Page 12: ...Power Source Electric motors and controls shall be installed and serviced by a qualified electrician and must meet all local codes and standards A magnetic starter should be used to protect your moto...

Page 13: ...od as a backstop when searching for hydraulic leaks and wear proper hand and eye protection Check all hydraulic components are tight and in good condition Replace any worn cut abraded flattened or cri...

Page 14: ...erated at speeds higher than their rated speed Keep wheel lug nuts tightened to manufacturer s recommendations Never reinflate a tire that has been run flat or seriously under inflated without removin...

Page 15: ...lp protect your head Steel Toe Boots Wear steel toe boots to protect feet from falling debris Work Gloves Wear work gloves to protect your hands from sharp and rough edges Dust Mask Wear a dust mask t...

Page 16: ...emove the backing paper 3 Align the decal over the specified area and carefully press the small portion with the exposed sticky backing in place 4 Slowly peel back the remaining paper and carefully sm...

Page 17: ...P1512134 R2 17 Figure 2 Safety Decal Locations if equipped with EPA gas tank if equipped with hand winch S DRIVE FIELD LOADER PORTABLE GRAIN BELT CONVEYOR 2 SAFETY...

Page 18: ...18 P1512134 R2 Figure 3 S Drive Safety Decal Location P1513022 2 SAFETY S DRIVE FIELD LOADER PORTABLE GRAIN BELT CONVEYOR...

Page 19: ...P1512134 R2 19 Figure 4 Gas Drive Safety Decal Locations Over Mount S DRIVE FIELD LOADER PORTABLE GRAIN BELT CONVEYOR 2 SAFETY...

Page 20: ...20 P1512134 R2 Figure 5 Electric Drive Safety Decal Locations Over Mount 2 SAFETY S DRIVE FIELD LOADER PORTABLE GRAIN BELT CONVEYOR...

Page 21: ...P1512134 R2 21 Figure 6 Gas Drive Safety Decal Locations Under Mount S DRIVE FIELD LOADER PORTABLE GRAIN BELT CONVEYOR 2 SAFETY...

Page 22: ...lic Winch Decal Locations If Equipped Figure 8 Wheel Move Kit 1500 and 2000 Series Decal Locations P1513057 P1513040 P1513058 P1513036 P1513036 P1513038 P1513036 P1513038 2 SAFETY S DRIVE FIELD LOADER...

Page 23: ...P1512134 R2 23 Figure 9 Wheel Move Kit 1800 and 2400 Series Decal Locations S DRIVE FIELD LOADER PORTABLE GRAIN BELT CONVEYOR 2 SAFETY...

Page 24: ...equipment before moving This equipment is not insulated Electrocution can occur without direct contact ELECTROCUTION HAZARD DANGER P1513038 To prevent death or serious injury Keep away from rotating...

Page 25: ...moving conveyor belt Shut off and lock out power to adjust service or clean OPEN BELT CONVEYOR WARNING P1513037 To prevent serious injury or death Securely attach equipment to vehicle with correct pin...

Page 26: ...trained personnel must be kept outside of the work area Do not modify the equipment Keep in good working order If the manual guards or decals are missing or damaged contact factory or dealer for repla...

Page 27: ...resting on ground Do not raise intake end above tow bar height Empty conveyor and fully lower before moving P1513002 To prevent serious injury or death Keep body hair and clothing away from rotating...

Page 28: ...Disconnect and lockout power before inspecting or servicing unit Keep electrical components in good repair ELECTROCUTION HAZARD WARNING P1513036 HIGH PRESSURE FLUID HAZARD Hydraulic fluid can cause se...

Page 29: ...lic fluid can cause serious injury if it penetrates the skin If it does see a doctor immediately Relieve system pressure before repairing adjusting or disconnecting Wear proper hand and eye protection...

Page 30: ...efore opening tank and release tab STOP Lock may engage again 4 PRESS Pressure Relief Tab down again and turn slowly to remove cap To tighten cap Turn Closure caps until an audible click is heard Fail...

Page 31: ...o not attempt to adjust belt tracking with the take up roller To set correct belt tension While conveyor is running empty fully tighten nut against the pretensioner take up pipe so that spring is not...

Page 32: ...ting in the direction of belt travel Annually inspect condition of roller lagging and belt Ensure that you do not run a machine with loose lagging or the conveyor belt may become damaged NOTICE Belt D...

Page 33: ...P1512134 R2 33 Table 1 Safety Decals continued Part Number Description P1513057 INTAKE DISCHARGE P1513055 1 4 3 2 4 2 3 1 S DRIVE FIELD LOADER PORTABLE GRAIN BELT CONVEYOR 2 SAFETY...

Page 34: ...er Components Table 2 Typical S Drive Field Loader Components ITEM DESCRIPTION ITEM DESCRIPTION 1 Tube 7 Hitch 2 A Frame 8 Jack 3 Hopper 9 S Drive 4 Spout Assembly 10 Collapsible Hopper Control 5 Hood...

Page 35: ...P1512134 R2 35 3 1 Model Number S DRIVE FIELD LOADER PORTABLE GRAIN BELT CONVEYOR 3 FEATURES...

Page 36: ...orting Electrocution can occur without direct contact Fully lower the conveyor before transporting and only raise when next to storage facility Attach to a proper towing vehicle with a pin and retaine...

Page 37: ...able section Follow all safety precautions when transporting the conveyor and use a proper towing vehicle 1 Fully lower the conveyor there should be slight tension on the lift cable 2 Connect the conv...

Page 38: ...conveyor when raising or lowering Move the conveyor into position slowly Do not unhitch and attempt to move by hand Do not leave tube in raised position when not in use 5 2 Positioning the Conveyor To...

Page 39: ...ks in the front and back of each wheel and anchor the intake end 5 3 Positioning the Conveyor with a Wheel Move Kit When equipped with a Wheel Move Kit Before Operating the Wheel Move Kit Ensure the a...

Page 40: ...page 40 or Figure 14 4 Before moving the conveyor into position Fully lower the conveyor Raise the intake end slightly off the ground to position the conveyor Raise the conveyor discharge end only for...

Page 41: ...m the hydraulic oil can damage the pump or other components When Operation of the Wheel Move Kit is Complete 1 Secure the wheel move kit axle to the conveyor when operation is complete or before trans...

Page 42: ...everse the winch and raise the conveyor until the cable is taut and the track slides normally Do not lubricate the winch brake discs 3 After lowering the conveyor always tighten the brake lock by turn...

Page 43: ...normally 5 After lowering adjust the hydraulic winch until cable has light tension 5 6 Collapsible Hopper Cloth Control The conveyor is designed with a collapsible hopper cloth to allow it to go under...

Page 44: ...tring with a weight attached to end against the top of this page Weighted end of string will fall between degree lines and from this the approximate angle of the conveyor can be determined Figure 17 C...

Page 45: ...erating Angle degrees Oats 28 Peas 30 Rice 36 Rye 25 Soybeans 28 Sunflower 22 Triticale 23 Wheat 26 Alfalfa Pellets 34 Barley 25 Canary Seed 26 Chickpeas 30 Corn 26 Shelled Corn dry 25 Shelled Corn we...

Page 46: ...lignment does not vary under loaded conditions See Maintenance Section for alignment instructions 3 Check the conveyor belt tension See Maintenance Section for tension instructions 4 Check the drive b...

Page 47: ...ansfer from the engine and possibly causing a squealing sound If the belt is too tight it will cause excess wear 4 Note The drive belt should be just tight enough to not slip on the drive pulley If th...

Page 48: ...your dealer or the factory for the appropriate drive components to give the recommended belt speed If the belt speed is too low conveyor may leak around transition area 6 7 Emergency Shutdown In an em...

Page 49: ...to clean out the conveyor can cause build up of product on the belt and roller shafts causing spillage roller misalignment and excess wear damage to the belt Failure to lock out power can cause sever...

Page 50: ...p ensure that any product that may be under the belt will be cleaned out and prevent build up Do not attempt to manually remove build up while conveyor is running 2 Next run the belt at low idle and i...

Page 51: ...the next season To ensure a long trouble free life this procedure should be followed when preparing the unit for storage 1 Remove all residual material from the hopper and the tube 2 Stop the machine...

Page 52: ...if applicable Have required repairs performed to replace worn or damaged components 8 Store in an area that is dry level free of debris and away from human activity Store inside if possible 9 Cover th...

Page 53: ...rized parts will void warranty If in doubt contact Westfield or your local dealer Before attempting maintenance of any kind Lower the conveyor fully Chock wheels Support tube if performing maintenance...

Page 54: ...d Winch and Lift Cable on page 64 7 15 Replace the Conveyor Belt on page 60 Section 7 22 Pinion Gear Adjustment on page 64 7 3 Visually Inspect the Equipment Check the following during a visual inspec...

Page 55: ...x Oil 1 Remove fill vent plug to check gearbox oil level Insert an improvised dipstick rolled paper or plastic tie into the oil filler hole to determine the oil level 2 Note the level and the conditio...

Page 56: ...gging Inspect roller lagging to see if it is showing signs of wear Operating the conveyor with a damaged roller will result in a damaged conveyor belt 7 11 Tension the Conveyor Belt Adjusting your con...

Page 57: ...inch roller should always be set with its flange nuts wiggle loose allowing the spring to push against and pinch the conveyor belt This should not normally require adjustment 1 Do not tighten nuts Bea...

Page 58: ...veyor must be empty of all grain Wait until the belt makes a complete revolution before adjusting the rollers Some belts may have uneven edges appearing misaligned To Align the Belt If your belt is tr...

Page 59: ...the power source 5 If the belt has centered move to next step If not repeat Step 2 to Step 4 until the belt is centered 6 Tighten the bearing bolts and jam nut if equipped 7 Replace any guards that we...

Page 60: ...re one clip shorter than the belt width For example the lacing for a 15 wide belt is 14 clips Center the lacing on the belt and install the lacing as per instructions on the lacing tool 6 Reattach the...

Page 61: ...equired use a ratchet strap clamped to both ends of belt to cinch belting ends together Figure 28 on page 61 Figure 28 Using the Ratchet Strap 1 3 4 2 9 Install the lacing pin and crimp the retainer c...

Page 62: ...ove guard and push on the center of the belt span with a force of approximately 5 lb 2 The belts will deflect approximately 1 25 mm when properly tensioned Figure 30 Typical Drive Belt Tensioning 1 in...

Page 63: ...s described in Belt Tension 4 Align the drive belts as described in Belt Alignment 5 Reattach and secure the guard 7 20 Repack the Wheel Bearings with Grease 1 Block wheels and ensure unit is stable 2...

Page 64: ...eplace brake discs if less than 1 16 1 6 mm thick 7 Check for proper ratchet pawl operation When cranking in clockwise loud clicking When cranking out counterclockwise no clicking and ratchet pawl ful...

Page 65: ...tly Gear teeth binding If the handle will not lock into over center position loosen the slot bolt nuts and slide the handle away from the tire Insufficient Meshing If the pinion gear will barely mesh...

Page 66: ...ation Incorrect belt speed Verify and adjust belt speed to appropriate speed see Belt Speed in Operation Conveyor belt slipping Tighten conveyor belt see Conveyor Belt Tension in Maintenance Drive bel...

Page 67: ...llation and repair as required Pivot shafts improperly installed On some machines switching pivot shafts left to right will increase hopper tension Grain leaking from conveyor discharge between belt a...

Page 68: ...r unit may not have enough capacity to operate properly Cushion block needs adjusting Adjust valve on cushion block by turning inward 1 8 of a turn at a time refer to Ram and Travel Speed Filter plugg...

Page 69: ...with Hand Winch Problem Cause Solution The conveyor will not raise or lower The conveyor is already at its maximum or minimum height If at maximum height lower the conveyor Obstruction in the slide C...

Page 70: ...eration Down Transport Width ft HP PT0 HP Elec HP Gas HP Hyd in3 A ft B ft A ft B ft 1545 FL 107 2 2305 20 8 21 6 8 8 22 1 7 5 N A 20 HP 32 HP N A 2045 FL 114 3775 20 23 5 13 25 8 4 N A N A 35 HP N A...

Page 71: ...warranty is limited to repairing replacing or refunding defective part or parts which shall be returned to a distributor or a dealer of our Company or to our factory with transportation charges prepai...

Page 72: ...39 Rosenort Manitoba R0G 1W0 Canada Phone 866 467 7207 Canada USA or 204 746 2396 Fax 866 768 4852 Website www grainaugers com Email sales grainaugers com Ag Growth International Inc 2018 Printed in...

Reviews: