


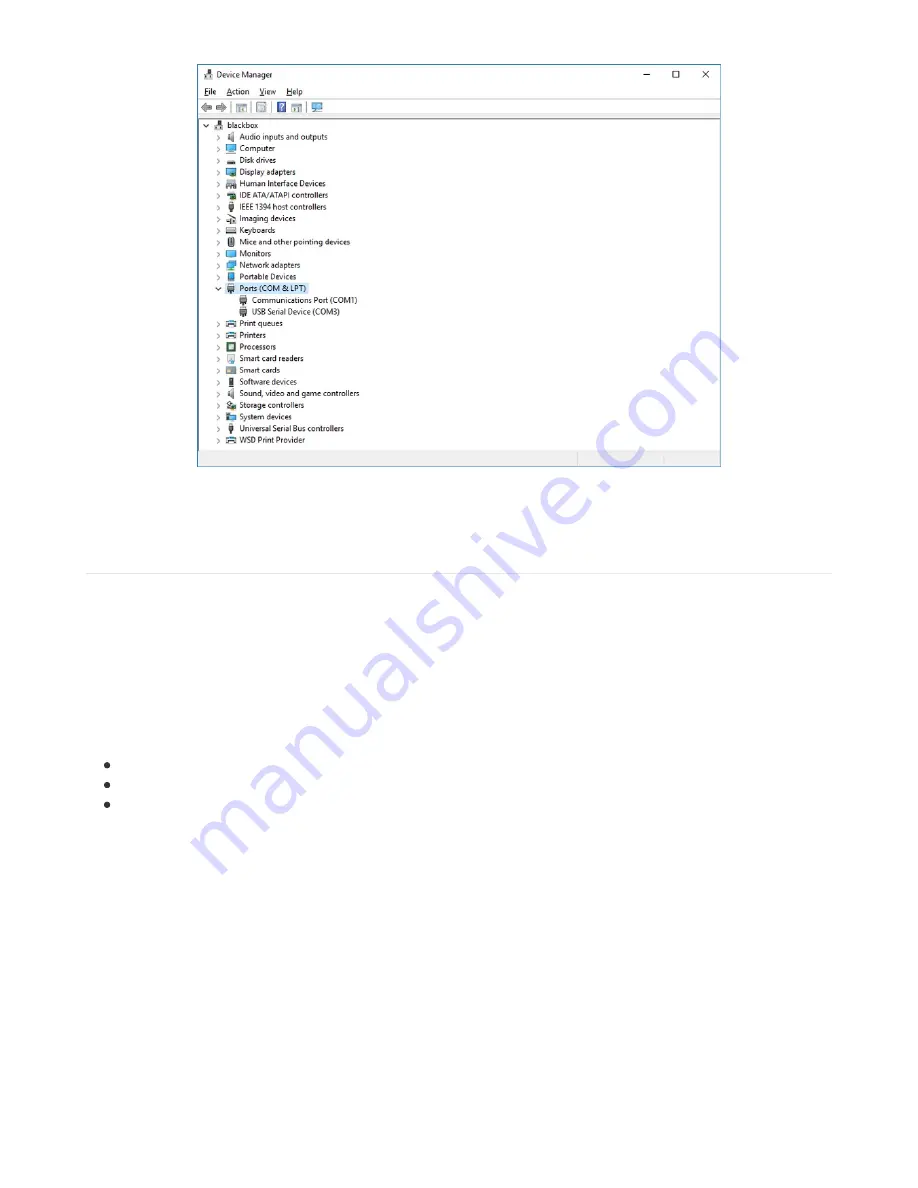
Sometimes the item will refer to the name of the board. Other times it may be called something like USB Serial Device,
as seen in the image above. Either way, there is a new (COM#) following the name. This is the port your board is using.
Install Putty
If you're using Windows, you'll need to download a terminal program. We're going to use PuTTY.
The first thing to do is download the
latest version of PuTTY
(https://adafru.it/Bf1)
. You'll want to download the Windows
installer file. It is most likely that you'll need the 64-bit version. Download the file and install the program on your
machine. If you run into issues, you can try downloading the 32-bit version instead. However, the 64-bit version will
work on most PCs.
Now you need to open PuTTY.
Under Connection type: choose the button next to Serial.
In the box under Serial line, enter the serial port you found that your board is using.
In the box under Speed, enter 115200. This called the baud rate, which is the speed in bits per second that data
is sent over the serial connection. For boards with built in USB it doesn't matter so much but for ESP8266 and
other board with a separate chip, the speed required by the board is 115200 bits per second. So you might as
well just use 115200!
If you want to save those settings for later, use the options under Load, save or delete a stored session. Enter a name
in the box under Saved Sessions, and click the Save button on the right.
© Adafruit Industries
https://learn.adafruit.com/adafruit-feather-m4-express-atsamd51
Page 85 of 183


