


66
67
Appendix C
Appendix B
XlV
XV
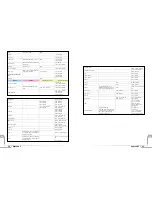
Standard Program and Port List:
Appendix C
Application Type
Application Notes˚
Required Settings for Port Forwarding
SERVICES
NOTES
Outgoing Connection
Incoming Connection
HTTP
Netscape, IE
None
80 /client IP
FTP
Windows FTP, Cuteftp
None
21 /client IP
TELNET
Windows Telnet, Neterm
None
23 /client IP
POP3
Eudora
None
110 /client IP
SMTP
Eudora
None
25 /client IP
mIRC
mIRC
None
.
Network Time Protocol (NTP)
123
123 /client IP
PPTP
Windows PPTP
None
1723 /client IP
APPLICATIONS
NOTES
Outgoing Connection
Incoming Connection
BAYVPN
500 /client IP
CarbonCopy32
1023 - 1680 /client IP
CITRIX
1494 /client IP
Cu-SeeMe
2
Cornell 1.1
None
7648 /client IP
.
White Pine 3.1.2
7648 /client IP &
24032 /client IP
Default /client IP
.
White Pine 4.0
(CuSeeMe Pro )
7648 /client IP &
24032 /client IP
Default /client IP
Direct Connect
375 - 425 /client IP
FW1VPN
259 /client IP
ICQ
For file transfer, we must enable:
ICQ -> preference -> connections -
> firewall and set the firewall time
out to 80 seconds in firewall
setting.
None for Chat.
Default /client IP
2.
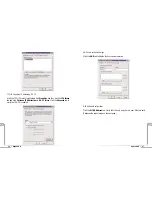
In the drop-down menu after Connect via, choose
Ethernet
or
Ethernet Built-In
.
3.
Close the Appletalk window by clicking the small box in the upper left corner.
4.
You may be asked to save changes to your Appletalk setting. If so, click the
OK
but-
ton.
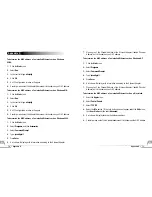
5.
Click the
Apple
menu in the upper left corner and scroll down to
Chooser
; then,
after the word Appltalk toward the bottom right, click the radio button before the
word “Active”.
6.
You'll be asked to make sure you are connected to an Appletalk network. Click the
OK
button.
7.
Close the Chooser window by clicking the small box in the upper left corner.
Note:
When print sharing is enabled, you cannot use a password to protect your
printer. Therefore, we strongly recommend that your leave this option enabled
only during the time you wish to share your printer with other users. When the
other users have finished printing their files on your printer, we recommend you
reverse the above process. To do so, you need not change your Appletalk settings
again. All you need to do is call up
Chooser
and disable Appletalk by clicking
the radio button before Inactive in the lower right corner.
Summary of Contents for R1020S(U)
Page 37: ...72 Notes Notes...