background image

C

HAPTER 

2:


I

NSTALLATION


13 


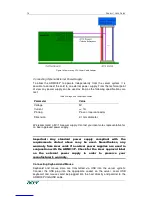
Connecting with Front Panel Connector  

There  are  motherboards  which  do  not  have  separated  pins  for  power  on/off  and 
reset. Both the reset and the power buttons are placed on the system’s front panel 
and  connected  to the  motherboard via  a  common front  panel  connector. To  allow 
the  connection  of  the  ARMC/3P’s  remote  reset  and  power  on/off  signals  to  those 
motherboards  a  special  front  panel  adapter  has  to  be  placed  between  the  front 
panel  connector  on  the  motherboard  and  the  cable  connector  to  the  front  panel. 
Please ask your local service center for assistance. 


Connecting Power Supply 

The  ARMC/3P  offers  the  possibility  to  be  powered  internally  by  the  host  system 
using  the  ATX  Power  Adaptor  cable  or  powered  externally  using  the  external 
Power adaptor. (see 

Package Contents

).  


Connecting Power using ATX Power Cable Adaptor 

If the host system provides an ATX 20 or ATX 24 (EPS) connection from the power 
supply  to  the  motherboard,  this  cable  can  be  extended  with  the  delivered  ATX 
Power  Cable  Adaptor.  In  that  case  the  ARMC/3P  is  powered  internally  using  the 
5V  Standby  Power  of  the  host  power  supply.  There  is  no  other  external  power 
supply necessary.  
 
For  connecting  the  ATX  Power  Cable  Adaptor  obey  the  following  steps  while 
referring to Figure 7. 
 
1.  Power off the host and disconnect it from the power line.  
2.  Find  the  ATX  cable  connecting  the  host  system  power  supply  and  the 

motherboard and remove the cable.  

3.  Exchange the disconnected cable with the delivered 20-pole ATX Power Cable 

Adaptor or the 24-pole ATX Power Cable Adaptor (EPS) cable. Then, connect 
the  male  connector  of  the  enclosed  ATX  Power  Cable  Adaptor  to  the  power 
supply  of  the  host  system  and  connect  the  female  connector  of  the  enclosed 
ATX Power Cable Adaptor to the power connector of the motherboard.  

4.  Connect the ATX Power Cable Adaptor male connector on the ARMC/3P with 

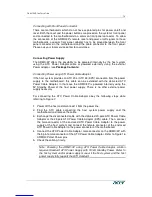
the 5 pin female connector of the ATX Power Cable Adaptor. Refer to Figure 16 
ARMC/3P Host Power pins  

5.  Check the cabling, finally. 
 

Note:  Powering  the  ARMC/3P  using  ATX  Power  Cable  Adaptor  solution 
requires  Standard  ATX  Power  Supply  with  5V/2A  Standby  Power.  Refer  to 
the host system and/or power supply manual if the host system and the host 
power supply fully support the ATX standard. 


Summary of Contents for ARMC_3P

Page 1: ...ARMC 3P User Guide Release 04 02 00 Copyright 2007 Acer Inc Userguide_ARMC 3P_v2 March 2007 100 80 8250 00 ...

Page 2: ......

Page 3: ...ested and found to comply with the limits for a Class A digital device pursuant to Part 15 of the FCC Rules These limits are designed to provide reasonable protection against harmful interference in a commercial installation This equipment generates uses and can radiate radio frequency energy and if not installed and used in accordance with the instructions may cause harmful interference to radio ...

Page 4: ...and possible damage to Acer equipment Test AC outlets at your computer and monitor for proper polarity and grounding Use only with grounded outlets at both the computer and monitor When using a backup UPS power the computer monitor and appliance off the supply ...

Page 5: ...gement Platform Bus Connector IPMB 9 The Set to Default S2D Pins 9 Serial 1 Serial 2 and PS 2 9 Placing the ARMC 3P into the Server 11 Open the Server 11 Plugging an ARMC 3P into a PCI Slot 11 Chapter 3 Configuration Chapter 3 Configuration Chapter 3 Configuration Chapter 3 Configuration 17 17 17 17 Initial Configuration 17 ARMC 3P Psetup Tool 17 Using the Psetup Tool via Graphical User Interface ...

Page 6: ...ol 49 KVM Console 49 Remote Power 49 Telnet Console 51 Virtual Media 54 Floppy Disk 54 CD ROM 55 Drive Redirection 59 Options 62 Creating an Image 63 System Health 65 Chassis Control 65 Monitor Sensors 65 System Event Log 66 Alarm Settings 66 User Management 67 Change Password 67 User and Groups 67 Permissions 69 KVM Settings 70 User Console 70 Power Control 73 Keyboard Mouse 74 Video 75 Device Se...

Page 7: ...111 RJ45 Connetcor Ethernet 111 IPMB I2 Connector 111 Serial SUB D9 Connector 1 112 PS 2 Connector 112 USB 112 Appendix E Troub Appendix E Troub Appendix E Troub Appendix E Troubleshooting leshooting leshooting leshooting 113 113 113 113 Appendix F GNU General Public License GPL Appendix F GNU General Public License GPL Appendix F GNU General Public License GPL Appendix F GNU General Public Licens...

Page 8: ...view 30 Figure 25 Navigation Frame Overview 30 Figure 26 Logout Link 31 Figure 27 Remote Console 32 Figure 28 Remote Console Control Bar 33 Figure 29 Remote Console Options Menu 34 Figure 30 Remote Console Options Menu Scaling 35 Figure 31 Remote Console Options Menu Mouse Handling 36 Figure 32 Remote Console Options Menu Local Cursor 37 Figure 33 Remote Console Options Menu Chat Window 37 Figure ...

Page 9: ...2 User Group Permission Settings 69 Figure 73 User Console Settings Part 1 70 Figure 74 User Console Settings Part 2 71 Figure 75 Power Control 73 Figure 76 Keyboard and Mouse Settings 74 Figure 77 Video Settings 77 Figure 78 Network Settings 78 Figure 79 Dynamic DNS 81 Figure 80 Dynamic DNS Scenario 81 Figure 81 Security Settings 83 Figure 82 Certificate Settings 87 Figure 83 SSL Certificate Uplo...

Page 10: ...er Settings 29 Table 9 Links for Navigation 30 Table 10 Buttons displaying the Access Status 45 Table 11 Buttons displaying the Monitor State 45 Table 12 ARMC 3P Specifications 105 Table 13 Temperature 105 Table 14 Humidity 105 Table 15 ARMC 3P Video Modes 107 Table 16 Key Names 109 Table 17 VGA HD 15 111 Table 18 RJ45 111 Table 19 IPMB I2C Connector 111 Table 20 Serial Connector 1 112 Table 21 Se...

Page 11: ...FIGURES vii ...

Page 12: ......

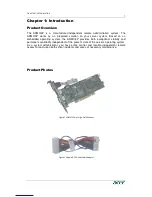
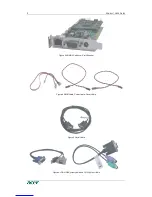
Page 13: ...ded operating system the ARMC 3P provides both exceptional stability and permanent availability independent of the present state of the server s operating system As a system administrator you have entire control and location independent remote access to react upon both critical incidents and cases of necessary maintenance Product Photos Figure 1 ARMC 3P with High Profil Bracket Figure 2 24 pole AT...

Page 14: ...2 PRODUCT USER GUIDE Figure 3 ARMC 3P with Low Profil Bracket Figure 4 IPMB Cable Power Cable Reset Cable Figure 5 Serial Cable Figure 6 VGA USB System Cable and PS 2 System Cable ...

Page 15: ...No impact on server or network performance Automatically senses video resolution for best possible screen capture High performance mouse tracking and synchronization Port to connect a user console for direct analogous access to KVM device Local mouse suppression only when using SUN s Java Virtual Machine Remote Power Management Remote Virtual Media Terminology ACPI Advanced Configuration and Power...

Page 16: ...hen electrically biased in the forward direction PS 2 Personal System 2 IBM s second generation of personal computers which was released to the public in 1987 Today PS 2 is known as a device interface for mouse and keyboard SNMP Simple Network Management Protocol A widely used network monitoring and control protocol SSH Secure Shell An encrypted network protocol providing a secure replacement for ...

Page 17: ...S 5mm TZ 30400 004 External Power Supply AC Power Cord US Power Pack UK PWRPK UK 5mm TZ 30400 005 External Power Supply AC Power Cord UK Power Pack EU PWRPK EU 5mm TZ 30400 006 External Power Supply AC Power Cord EU When the Server is up and running The ARMC 3P gives you full control over the remote server The Management Console allows you to access the remote server s graphics keyboard and mouse ...

Page 18: ... Controller motherboard failure 10 CPU fan failure 8 RAM failure 4 Using the ARMC 3P administrators can determine which kind of serious hardware failure has occurred see Table 2 Table 2 Host System Failures and how they are detected Category Probability Hard disk failure Console screen CMOS set up information Power cable detached power supply failure Server remeians in power off state after power ...

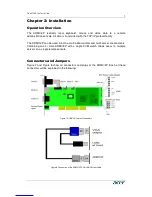
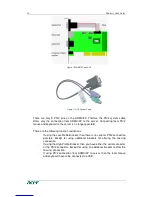
Page 19: ...can be used in both a multi administrator and multi server environments Combining one or more ARMC 3P with a single KVM switch allows acess to multiple servers on a single remote console Connectors and Jumpers Figure 7 and Figure 8 show all connectors and plugs of the ARMC 3P Each of these connectors will be explained in the following Figure 7 ARMC 3P Internal Connectors Figure 8 Connection of the...

Page 20: ...P using a standard RJ45 jack Refer to Appendix F for the details of the pin assignment for the RJ45 connector External Power Option To allow the ARMC 3P to operate independently from the server system An external power supply must be connected to the ARMC 3P Please see Chapter 2 Connecting Optional External Power Supply for further details Power using ATX Power Cable Adaptor The 20 pole or 24 pole...

Page 21: ... S2D Pins These pins may be used to reset the ARMC 3P to its factory settings See Chapter 3 Resetting the ARMC 3P to its Factory Settings for a detailed description on how to reset the ARMC 3P Serial 1 Serial 2 and PS 2 If your server does not support USB keyboard and or mouse in all states but only PS 2 mouse and keyboard you need the PS 2 system cable to connect the ARMC 3P The proprietary PS 2 ...

Page 22: ...There are the following function restrictions If using the Low Profile Bracket then there is no serial or PS 2 connection possible Except for using additional brackets for offering the missing connection If using the High Profile Bracket then you have either the serial connector or the PS 2 connector Except for using an additional bracket to offer the missing connection If using PS 2 connection fr...

Page 23: ... support it there is additional cabling necessary The preferred way for this cabling are the interfaces offered by IPMI However if your host does not support IPMI you may use one of the other possibilities Connecting over IPMB This connection is used to power on or power off the system or to perform a hard reset You must have a motherboard that supports IPMI 1 5 or higher and has a 3 or 4 pin IPMB...

Page 24: ...e motherboard s reset connector from where you just disconnected the cable to the front panel and the other end to RST1 of the RST PWR connector of the ARMC 3P 4 Find the cable connecting the front panel power button and the motherboard 5 Disconnect this cable from the motherboard and connect it to PWR2 For pin assignment details refer to Figure 9 6 Take the power cable provided with the ARMC 3P a...

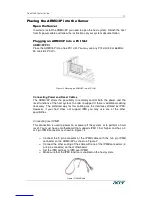
Page 25: ... In that case the ARMC 3P is powered internally using the 5V Standby Power of the host power supply There is no other external power supply necessary For connecting the ATX Power Cable Adaptor obey the following steps while referring to Figure 7 1 Power off the host and disconnect it from the power line 2 Find the ATX cable connecting the host system power supply and the motherboard and remove the...

Page 26: ...ecommend a 5V 1A power supply Contact your local sales representative for an Acer approved power supply Important Any standard power supply compliant with the requirements stated above may be used Nevertheless any warranty from Acer voids if non Acer power supplies are used in conjunction with the ARMC 3P Check for the Acer approval label on the external power supply in order to preserve your manu...

Page 27: ...ub 1 Make sure that the cable is wired appropriately for a standard 10BASE T adapter 2 Align the RJ45 plug with the notch on the adapter s connector and insert it into the adapter s connector 100 Mbps Connection For 100BASE TX Ethernet networks the ARMC 3P supports category 5 UTP cabling To establish a 100 Mbps connection the cable has to be connected to a 100BASE TX hub 1 Make sure that the cable...

Page 28: ......

Page 29: ...ecessary to access the ARMC 3P for the first time ARMC 3P Psetup Tool The psetup tool is used to determine the IP address assigned to the ARMC 3P by the DHCP server or to change the device s initial network configuration Using the Psetup Tool via Graphical User Interface Connect the ARMC 3P to your computer via local network Start the psetup tool which can be found on your ARMC 3P CD on the comput...

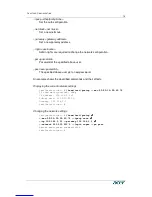
Page 30: ...sion Figure 18 ARMC 3P Psetup Tool Linux Version Running the Linux Psetup Tool via Command Line The following list shows the command syntax and their usage mac MAC address of the device Shows the current network configuration ip neue IP address Set a new IP address ...

Page 31: ...bove user get a new password An example shows the described commands and their effects Displaying the current network settings test teststation home test psetup mac 00 0D 5D 00 65 78 IP auto configuration dhcp IP address 192 168 5 135 Subnet mask 255 255 255 0 Gateway 192 168 5 1 test teststation Changing the network settings test teststation home test psetup mac 00 0D 5D 00 65 78 ipacp none ip 19...

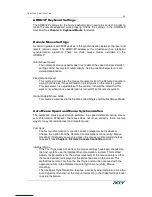
Page 32: ...d MAC address is the same MAC address printed on the white sticker placed on the back of the ARMC 3P Furthermore there are two buttons on the window Query Device and Setup Device Press the Query Device button to display the preconfigured values of the network configuration The values are displayed in the text fields located nearby If necessary adjust the network settings to your needs To save the ...

Page 33: ... 3P has a serial line interface rear bracket This connector is compliant with the RS 232 serial line standard To establish a serial connection use a standard NULL Modem cable The serial line has to be configured with the parameters given in Table 5 When configuring with a serial terminal reset the ARMC 3P and immediately press the ESC key You will see some device information and a prompt Enter con...

Page 34: ...nter the configured IP address of the ARMC 3P into your web browser The initial login settings are Table 6 Standard User Settings Parameter Value Login admin Password password Changing these settings to user specific values is strongly recommended and can be done on the User Management page see Chapter 5 User and Groups Mouse Keyboard and Video configuration Between the ARMC 3P and the host there ...

Page 35: ...use Mode This mode is described in the Section called Single and Double Mouse Mode Auto Mouse Speed and Mouse Synchronization The automatic mouse speed mode performs the speed detection during mouse syn chronization Whenever the mouse does not move correctly there are two ways for re synchronizing local and remote mouse Fast Sync The fast synchronization is used to correct a temporary but fixed sk...

Page 36: ...chronized with the remote mouse pointer press the Auto Adjust Button once Host System Mouse Settings The host s operating system knows various settings for the mouse driver Important The following limitations do not apply in case of USB and Mouse Type MS Windows 2000 and newer While the ARMC 3P works with accelerated mice and is able to synchronize the local with the remote mouse pointer there are...

Page 37: ...r Recommended Mouse Settings For the different operating systems on the host we can give the following advice MS Windows NT4 NT4 supports PS 2 only Please choose the options PS 2 mouse and Auto Mouse Speed MS Windows 2000 2003 XP all versions In general we recommend the usage of a mouse via USB Choose USB without Mouse Sync For a PS 2 mouse choose Auto Mouse Speed For XP disable the option enhance...

Page 38: ...ter 2 The Set to Default S2D Pins Upon delivery these pins are open Close the pins with a jumper and reboot the ARMC 3P Wait for about two or three minutes until the primary step for the reinitialization succeeded Remove the jumper from the Reset Pins and reboot the ARMC 3P again Now you may use the default settings as described in Chapter 3 The Initial Configuration Using the Serial Interface Res...

Page 39: ...nterface of the ARMC 3P is the HTTP interface This is covered extensively in this chapter Other interfaces are addressed in subtopics In order to use the Remote Console window of your managed host system the browser has to come with a Java Runtime Environment version 1 1 or higher If the browser has no Java support such as on a small handheld device you are still able to maintain your remote host ...

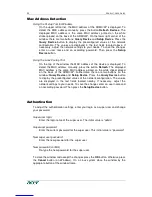
Page 40: ...fault Login into the ARMC 3P and logout Login into the ARMC 3P Open your web browser Type in the address of your ARMC 3P which you config ured during the installation process The address used might be a plain IP address or a host and domain name in case you have given your ARMC 3P a symbolic name in the DNS For instance type the following in the address line of your browser when establishing an un...

Page 41: ...nstalled and accessed your ARMC 3P for the first time Not changing the pass phrase for the admin user is a severe security risk and might result in unauthorized access to the ARMC 3P and to the host system including all possible consequences Navigation Having logged into the ARMC 3P successfully the main page of the ARMC 3P appears see Figure 24 This page consists of three parts each of which cont...

Page 42: ...iew Table 8 Links for Navigation Link Description Click to open the main page overview like Figure 24 Click to open the KVM Console Important If there is no activity for half an hour the ARMC 3P will log you out automatically A click on one of the links will bring you back to the login screen ...

Page 43: ...l only be granted through the CommandCenter Releasing the ARMC 3P from managed mode should be done with the CommandCenter Should the CommandCenter not be available for some reasons then the ARMC 3P will automatically reenable local logins after a defined time The administrator can then manually release the ARMC 3P from CommandCenter The Remote Console General Description The Remote Console is the ...

Page 44: ...ow It displays the screen content of your host system The Remote Console will behave exactly in the same way as if you were sitting directly in front of the screen of your remote system That means keyboard and mouse can be used in the usual way However be aware of the fact that the remote system will react to keyboard and mouse actions with a slight delay The delay depends on the bandwidth of the ...

Page 45: ...window contains a control bar Using its elements you can see the status of the Remote Console and influence the local Remote Console settings A description for each control follows Figure 28 Remote Console Control Bar Ctrl Alt Delete Special button key to send the Control Alt Delete key combination to the remote system see also Chapter 5 KVM Settings for defining new button keys Drive Redirection ...

Page 46: ...and local mouse pointers are visible and need to be synchonized Single Mouse Mode is only available if using SUN JVM 1 4 or higher Note If the Host Interface is set on USB and the USB Mouse Type is set on Windows 200 MAC OS X then the buttons for Sync Mouse and Single Double Mouse Mode are hide Options To open the Options menu click on the button Options See the Section Remote Console Options for ...

Page 47: ... access or logs off A change in the access mode is also visible in the status line See the Section Remote Console Status Line for more information Readability Filter Toggles the Readability Filter on or off If the filter is switched on in scaling mode it will preserve most of the screen details even if the image is substantially scaled down This option will be available only with a JVM 1 4 or high...

Page 48: ...Mouse or Double Mouse Mode see Section Remote Console Control Bar Important This method takes more time than the fast one and requires a correctly adjusted picture To setup the picture you may use either the auto adjustment function or the manual correction in the Video Settings panel Figure 31 Remote Console Options Menu Mouse Handling Local Cursor Offers a list of different cursor shapes to choo...

Page 49: ...ote Console Options Menu Chat Window shows an example of the Chat Frame Figure 33 Remote Console Options Menu Chat Window The Chat Frame is helpful especially for discussing problems and questions among the users logged into the ARMC 3P The remote host s screen should not be changed or misused for that purpose Title Bar Shows the IP address of the ARMC 3P you are connected to Title Bar Chat Area C...

Page 50: ...he message was sent There is no option to direct a message to a particular user only The Chat has no message history That means messages will be received only after opening the Remote Console Messages that possibly have been sent among other users will be lost for a user who opens up his Remote Console afterwards Video Settings Opens a panel for changing the ARMC 3P video settings The ARMC 3P feat...

Page 51: ...achieve a better picture quality you may try to change this setting together with the sampling phase Phase Defines the phase for video sampling used to control the display quality together with the setting for sampling clock Horizontal Position Use the left and right buttons to move the picture in horizontal direction while this option is selected Vertical Position Use the left and right buttons t...

Page 52: ...AltGr Shift F4 For a single key stroke you can click on the button with the appropriate character Single keys such as regular characters and numbers are sent immediately Special keys like Ctrl Shift as well as the function keys F1 to F12 have to be selected twice The first press sends the signal key is pressed the second press sends the signal key is released to the remote system After the first p...

Page 53: ...on your particular JVM and your browser settings this is not always possible A typical example is a German localized system that uses a US English keyboard mapping In this case you have to change the Local Keyboard setting to the right language manually Hotkeys Opens a list of hotkeys defined before In order to send a registered command to the host system choose the appropriate entry A confirmatio...

Page 54: ...ing Predefined Compression level You may select a value between 1 and 9 for the desired compression level with level 1 enabling the fastest compression and level 9 the best compression The most suitable compression level should always be seen as a compromise between the network bandwith that is available the video picture to be transferred and the number of changes between two single video picture...

Page 55: ...ures In this case the video compression is disabled completely and all video data is transferred via network as full quality video snippets Therefore a high amount of bandwidth is required to ensure the quality of the video picture Figure 39 Remote Console Options Menu Encoding Compression Color Depth Set the desired color depth You may select between 8 or 16 bit for Video Opti mized compression l...

Page 56: ...ed but no frames pictures lost That means a higher frame rate with fewer details Remote Console Status Line The status line shows both console and the connection state On the left the size of the remote screen is displayed Figure 41 was taken from a Remote Console with a resolution of 800x600 pixels see Appendix B ARMC 3P Video Modes for a list of screen resolutions that can be displayed using the...

Page 57: ... may not access the remote host via Remote Console unless the other user disables this option Exclusive access is set for you Any other user may not access the remote host via Remote Console unless you disable this option The outer right button displays the state of the Monitor Only settings Table 10 Buttons displaying the Monitor State The option Monitor Only is disabled The option Monitor Only i...

Page 58: ...rrently the video picture with the best quality can be achieved with the settings 16 bit High Color in the Remote Console or LAN High Color in the web frontend This option can also be preset in Chapter 5 User Console The sub menu Compression from the Options menu has no influence on the picture quality but on the data rate of the picture that is transferred to the Remote Console Reducing the Noise...

Page 59: ...hich video mode is chosen In terms of transferred data there can be an improvement The compression plays an important role here You can choose a compression level from the sub menu Compression in the Options menu of the Remote Console Please note that the video will be compressed on the ARMC 3P transferred to the Remote Console and unpacked in a Java environment Depending on the remote host and on...

Page 60: ......

Page 61: ...e Console link on the left or on the console picture on the right or click the Remote Control navigation button and choose KVM Console seen in Figure 44 To refresh the picture click on the button that is named Refresh Remote Power Use the Remote Power page to control the host system s power status via one of the following methods Internal Power Control via ATX wires Power Control via IPMI ...

Page 62: ...isplayed in the administration panel will not immediately reflect the requested change A controlled shut down of the system may take some minutes You can observe the action caused by your button press using the Remote Console window or by reloading the Server Power Control panel Long Press This will unconditionally power off the system Even if you have submitted a short press before this will shut...

Page 63: ...ecting to the ARMC 3P via Telnet protocol you may use a terminal program such as xterm TeraTerm or Putty As an alternative you may also enter the telnet command on the command line or use the Run dialog from the Windows Start Menu As an example you may type the following sequence telnet 192 168 1 22 Replace the IP address by the one that is actually assigned to the ARMC 3P This will prompt for use...

Page 64: ...elease information terminal Starts the terminal pass through mode for serial port 1 The key sequence esc exit switches back to the command mode The command has an optional parameter 1 or 2 to select the desired serial port for pass through access reset host card Resets the given target the host system or the ARMC 3P card If no reset target is given it defaults to host Note that resetting the ARMC ...

Page 65: ...ER 5 MENU OPTIONS 53 state will be displayed The given attribute either short or long will determine the ATX duration The default value is short Voltages Displays a list of all current voltages of the system ...

Page 66: ... that either by hand or by using the file selection dialog of your web browser To open the file selection dialog click on the Browse button and select the desired image file The maximum image size is limited to 1 44MB To use a larger image mount this image via Windows Share or SAMBA see the Section called Use Image on Windows Share SAMBA for details Secondly click on the Upload button to initiate ...

Page 67: ... CD ROM Use Image on Windows Share SAMBA To include an image from a Windows share select CD ROM from the submenu The following information has to be given to mount the selected image properly Share host The server name or its IP address On Windows 95 98 and Windows ME do not specify the IP address but the server name NetBIOS Name Share name The name of the share to be used Path to image The path o...

Page 68: ...ll look for a server named mysql acme com Then the entered share name is selected in our example we use the share storage and the image file cdrom_image iso is opened If this file can only be accessed with both a user name and password enter the appropriate values in the input fields for user name and password In our case the file is owned by the user johndoe and protected by a user specific pass ...

Page 69: ...ctly Therefore admin istrative permissions are required As a regular user you may not have these per missions You should either login as a system administrator or as root on UNIX systems or ask your system administrator for help to complete this task Windows 2000 XP Open the Explorer navigate to the directory or share and press the right mouse button to open the context menu Select Sharing to open...

Page 70: ...58 PRODUCT USER GUIDE Figure 54 Explorer Context Menu Figure 55 Share Configuration Dialog ...

Page 71: ... a write support so that for the remote machine it is possible to write data to your local disc Figure 56 Drive Redirection Please note that Drive Redirection works on a level which is far below the operating system That means that neither the local nor the remote operating system is aware that the drive is currently redirected actually This may lead to inconsistent data as soon as one of the oper...

Page 72: ...install the Drive Redirection software that is currently only available for Microsoft Windows This software can be found on your ARMC 3P CD Configuration Figure 57 Main View Specify the parameters of the network connection see Figure 57 Device This is the address either the DNS name or the IP address of the ARMC 3P you would like to connect to Port This is the network port By default ARMC 3P uses ...

Page 73: ...tters especially for an USB stick Write Support Figure 59 Selection Write Support This feature may be enabled here Write support means that the remote computer is allowed to write on your local drive As you can imagine this is very dangerous If both the remote and the local system try to write data on the same device this will certainly destroy the file system on the drive Please use this only whe...

Page 74: ... connection anyhow This should not be a serious problem when the note above is respected If the write support is enabled a drive which is not locked might be damaged by the Drive Redirection With the Disconnect button a connection via Drive Redirection connection is stopped Exit Hide If the Exit button is pressed the Drive Redirection software is closed If a Drive Redirection connection is active ...

Page 75: ... one of the original UNIX utilities and is included in every UNIX like OS UNIX Sun Solaris Linux To create a floppy image file copy the contents of a floppy to a file You can use the following command dd if dev fd0 of tmp floppy image dd reads the entire disc from the device dev fd0 and saves the output in the spec ified output file tmp floppy image Adjust both parameters exactly to your needs inp...

Page 76: ...m the device dev cdrom and saves the output in the specified output file tmp cdrom image Adjust both parameters exactly to your needs input device etc MS Windows To create the image file use your favourite CD imaging tool Copy the whole contents of the disc into one single ISO image file on your harddisk For example with Nero you choose Copy and Backup Then navigate to the Copy Disc section Select...

Page 77: ...possibility to show an event log of the host system and the status of some system sensors i e temperature Chassis Control With Chassis Control one can Get the information of the specified chassis Switch host power on off Locate host chassis Enable disable the Power Reset NMI buttons on the front panel Figure 66 Chassis Control Monitor Sensors Some of the sensors on the host will be listed here ...

Page 78: ...MI events they are independent to the system logs of the OPMA add on card Figure 68 System Event Log Overview Alarm Settings Here you can see all the alerts of the system You can also define the filters policies and LAN destinations to which the alerts will be sent For more details please consult the IPMI specifications Figure 69 IPMI Alarm Configuration ...

Page 79: ...ement Change Password Figure 70 Set Password To change your password enter the new password in the upper entry field Retype the password in the field below Click Apply to submit your changes User and Groups Figure 71 User Group Management ...

Page 80: ...as LDAP or RADIUS If this remote authentication service returns an invalid or no group assignment the user is considered to be member of the unknown group Upon delivery the account for the user admin has the password password Make sure to change the password immediately after you have installed and first accessed your ARMC 3P A full list of available options follows This list can only be seen by t...

Page 81: ...memory unit which both have a limitation in terms of the processing instructions and memory space To guarantee an acceptable response time we recommend not to exceed the number of 25 users connected to the ARMC 3P at the same time The memory space that is available onto the ARMC 3P mainly depends on the configuration and the usage of the ARMC 3P log file entries etc That s why we recommend not to ...

Page 82: ... for this task For a regular user without the correct permissions it is not possible to change the settings for any other users Transmission Encoding The Transmission Encoding setting allows changing the image encoding algorithm that is used to transmit the video data to the Remote Console window It is possible to optimize the speed of the remote screen depending on the number of users working at ...

Page 83: ...ypical desktop interfaces Photo like pictures have best results with 4 Bit 16 gray scales 1 Bit color depth black white should only be used for extremely slow network connections Remote Console Type Figure 74 User Console Settings Part 2 Specifies which Remote Console Viewer to use Default Java Virtual Machine JVM Uses the default JVM of your web browser This may be the Microsoft JVM for the Inter...

Page 84: ...ime again until you disable this feature or log off Mouse Hotkey Allows to specify a hotkey combination which starts either the mouse synchronization process if pressed in the Remote Console or is used to leave the single mouse mode Remote Console Button Keys Button Keys allow simulating keystrokes on the remote system that cannot be generated locally The reason for this might be a missing key or ...

Page 85: ...ed key combination as described above Name You may also name your button that will be visible in the Remote Console Control Bar If unspecified the sequence of keys will be displayed instead Note If you need more button keys than shown use the more entries button This will open a list of additional entry fields Power Control Figure 75 Power Control The Power Control panel enables the access to the ...

Page 86: ...e managing device If the managed host has no USB keyboard support in the BIOS and you have connected the USB cable only then you will have no remote keyboard access during the boot process of the host If USB and PS 2 are both connected and you selected Auto as host interface then the card will select USB if available or otherwise falls back to PS 2 To get USB remote keyboard access during the boot...

Page 87: ... mouse sync process Fixed mouse speed Use a direct translation of mouse movements between the local and the remote pointer You may also set a fixed scaling which determines the amount the remote mouse pointer is moved when the local mouse pointer is moved by one pixel This option only works when the mouse settings on the host are linear This means that there is no mouse acceleration involved To se...

Page 88: ...may be correctly recognized X Resolution Visible number of horizontal pixels Y Resolution Visible number of vertical pixels Horizontal Frequency Hz The horizontal line frequency in Hz Vertical Frequency Hz The vertical refresh frequency in Hz Total horizontal pixels The total amount of pixels per line including the non visible and blanking area Polarity The polarity positive negative of the synchr...

Page 89: ...all changes in some display regions may not be recognized immediately A small filter displays all changes instantly but may lead to a con stant amount of network traffic even if the display content is not really changing depending on the quality of the video input signal All in all the default setting should be suitable for most situations Force Composite Sync Required for Sun Computers To support...

Page 90: ... related parameters Each parameter will be explained below Once applied the new network settings will immediately come into effect Figure 78 Network Settings Important The initial IP configuration is usually done directly at the host system using the special procedure described in Table 4 Initial Network Configuration ...

Page 91: ...dress IP address in the usual dot notation Subnet Mask The net mask of the local network Gateway IP address In case the ARMC 3P should be accessible from networks other than the local one this IP address must be set to the local network router s IP address Primary DNS Server IP Address IP address of the primary Domain Name Server in dot notation This option may be left empty however the ARMC 3P wi...

Page 92: ... field displays the current settings for the Ethernet LAN interface of the ARMC 3P You may choose between auto negotiation and a fixed setting for the Ethernet transceiver settings interface speed and duplex mode in case auto negotiation does not work correctly LAN interface speed Depending on your network connection you may select an according speed value for this interface To adjust the interfac...

Page 93: ...R 5 MENU OPTIONS 81 Dynamic DNS Figure 79 Dynamic DNS A freely available Dynamic DNS service dyndns org can be used in the following scenario see Figure 80 Dynamic DNS Scenario Figure 80 Dynamic DNS Scenario ...

Page 94: ...ettings configuration dialog as shown in Figure 79 Enable Dynamic DNS and change the settings according to your needs see below Enable Dynamic DNS This enables the Dynamic DNS service This requires a configured DNS server IP address Dynamic DNS server This is the server name where ARMC 3P registers itself in regular intervals Currently this is a fixed setting since only dyndns org is supported for...

Page 95: ... web front end is only possible using a HTTPS connection The ARMC 3P will not listen on the HTTP port for incoming connections In case you want to create your own SSL certificate that is used to identify the ARMC 3P refer to Chapter 5 Certificate KVM encryption This option controls the encryption of the RFB protocol RFB is used by the ...

Page 96: ...ess control based on IP source addresses Default policy This option controls what to do with arriving IP packets that do not match any of the configured rules They can be accepted or dropped Important If you set this to DROP and you have no ACCEPT rules configured the access to the web front end over LAN is actually impossible To enable access again you can change the security settings via modem o...

Page 97: ...the login of a certain user if his password was entered incorrectly for a specific number of times The duration of the blocking is also configurable Maximum number of failed logins Enter the maximum number of failed login attempts after which it should not be possible for this user to login anymore Leave this field empty to disable the user blocking feature Block time The number of minutes the use...

Page 98: ...ected client During the connection establish ment the ARMC 3P has to expose its identity to a client using a cryptographic certificate Upon delivery this certificate and the underlying secret key is the same for all ARMC 3P ever produced and certainly will not match the network con figuration that will be applied to the ARMC 3P cards by its user The certificate s underlying secret key is also used...

Page 99: ...ained below Once this is done click on the Create button which will initiate the Certificate Signing Request generation The CSR can be downloaded to your administration machine with the Download button see Figure 83 Send the saved CSR to a CA for certification You will get the new certificate from the CA after a more or less complicated traditional authentication process depending on the CA Upload...

Page 100: ...ARMC 3P once it is installed in the user s network usually the fully qualified domain name It is identical to the name that is used to access the ARMC 3P with a web browser but without the prefix http In case the name given here and the actual network name differ the browser will pop up a security warning when the ARMC 3P is accessed using HTTPS Organizational unit This field is used for specifyin...

Page 101: ...ssword is four characters Confirm Challenge Password Confirmation of the Challenge Password Email The email address of a contact person that is responsible for the ARMC 3P and its security Key length This is the length of the generated key in bits 1024 Bits are supposed to be sufficient for most cases Longer keys may result in slower response time of the ARMC 3P during connection establishment Ser...

Page 102: ...ng a telephone line in addition to the standard access over the built in Ethernet adapter The modem needs to be connected to the serial interface of the ARMC 3P Logically connecting to the ARMC 3P using a telephone line means nothing else than building up a dedicated point to point connection from your console computer to the ARMC 3P In other words the ARMC 3P acts as an Internet Service Provider ...

Page 103: ...a connection to the public telephone network you can change this setting by giving a new string Refer to the modem s manual about the AT command syntax Modem server IP address This IP address will be assigned to the ARMC 3P itself during the PPP handshake Since it is a point to point IP connection virtually every IP address is possible but you must make sure that it is not interfering with the IP ...

Page 104: ... IPMI Settings IPMI Settings Figure 85 shows the ARMC 3P IPMI settings panel Its options will be explained below IPMI disabled Disables IPMI on the ARMC 3P This means that Status for example sensor and temperature information via IPMI and Event Log via IPMI are not available IPMI over IPMB This connection type uses an IPMB cable connected from the 1x5pin IPMB connector on the ARMC 3P card to the 3...

Page 105: ...re than a few minutes To avoid this you can use a NTP time server which sets up the internal clock automatically to the current UTC time Because NTP server time is always UTC there is a setting that allows you to set up a static offset to get your local time Important There is currently no way to adjust the daylight saving time automatically So you have to set up the UTC offset twice a year proper...

Page 106: ...Service nor a Microsoft Active Directory then choose a Generic LDAP Server and edit the LDAP scheme used see below Name of login name attribute This is the name of the attribute containing the unique login name of a user To use the default leave this field empty The default depends on the selected LDAP server type Name of user entry object class This is the object class that identifies a user in t...

Page 107: ...r RADIUS on UNIX systems The RADIUS protocol itself is well specified and tested We can give a recommendation for all products listed above especially for the freeRADIUS implementation Note Currently we do not support challenge response An Access Challenge response is seen and evaluated as an Access Reject To access a remote device using the RADIUS protocol you have to login first You are asked to...

Page 108: ...a z numerals 0 9 and other symbols all characters not defined as letters or numerals such as an exclamation point or an asterisk Authentication Port The port the RADIUS server listens for authentication requests The default value is 1812 Accounting Port The port the RADIUS server listens for accounting requests The default value is 1813 Timeout Sets the request time to live in seconds The time to ...

Page 109: ...Event Log Targets List logging enabled To log events you may use the internal log list of the ARMC 3P To show the log list click on Event Log on the Maintenance page Since the ARMC 3P s system memory is used to save all the information the maximum number of ...

Page 110: ...d of the file so it grows continuously and you may have to delete it or move it away from time to time SMTP Logging enabled With this option the ARMC 3P is able to send Emails to an address given by the Email address text field in the Event Log Settings These mails contain the same description strings as the internal log file and the mail subject is filled with the event group of the occurred log ...

Page 111: ...Login trial at the ARMC 3P succeeded Denying access to a particular action Server was reset Server was powered on off Figure 89 SNMP Settings The SNMP settings panel as shown in Figure 89 is described below It allows you to change SNMP related parameters Enable SNMP Agent If this option is checked the ARMC 3P will answer to SNMP requests Important If a community is left blank you cannot perform th...

Page 112: ...he host or the ARMC 3P System Location Enter a description of the physical location of the host The description will be used in reply to the SNMP request sysLocation 0 System Contact Enter a contact person for the host The value will be used in reply to the SNMP request sysContact 0 The ARMC 3P SNMP MIB This link allows you to download the ARMC 3P SNMP MIB file This file may be necessary for an SN...

Page 113: ...have a look at Figure 90 for an example The Data file for support allows you to download the ARMC 3P data file with specific support information This is an XML file with certain customized support information like the serial number etc You may send us this information together with a support request It will help us to locate and solve your reported problem Figure 91 Connected Users Host IP address...

Page 114: ...term active for an active user or the according idle time for an inactive user Figure 92 Voltages Overview Figure 92 shows an overview of the different occuring Voltages of the ARMC 3P and the host system EXT_PWR_SUP 0V 5V Shows only a voltage when the optional external power supply will be used Plane Voltage 3 3V Shows the current voltage of the KIM G4 PCI Voltages Display the voltages for the PC...

Page 115: ...ed by the event date a short event description and an IP address the request was sent from You may use the text buttons Prev and Next to browse within the data The Prev button displays the previous page with newer log information whereas the Next button switches to the following page with older log information Update Firmware Figure 95 Update Firmware Dialog ...

Page 116: ...ransmission errors In case of any error the Upload Firmware function will be aborted and the current firmware is kept as is Second if everything went well you see the Update Firmware panel The panel shows you the version number of the currently running firmware and the version number of the uploaded firmware Pressing the Update button will store the new version and substitute the old one completel...

Page 117: ...e about half a minute Resetting subdevices e g video engine will take some seconds only and does not result in closing connections To reset a certain ARMC 3P functionality click on the Reset button as displayed in Figure 96 Figure 96 Unit Reset ...

Page 118: ......

Page 119: ...mm 0 51 Width 167 64mm 6 6 Depth 64 41mmm 2 54 Weight 112g 0 25lb Power Consumption Up to 1A Environment Temperature Table 12 Temperature Attribute Value Operating 0 C to 55 C 32 F to 131 F Storage 18 C to 70 C 0 4 F to 158 F Humidity Table 13 Humidity Attribute Value Operating 10 to 90 non condensing Storage 5 to 95 non condensing ...

Page 120: ......

Page 121: ...MC 3P may not be able to detect them Table 14 ARMC 3P Video Modes Resolution x y Refresh Rates Hz 640x340 70 85 640x400 56 85 640x480 60 67 72 75 85 90 100 120 720x400 70 85 800x600 56 60 70 72 75 85 90 100 832x624 75 848x480 60 70 960x600 60 75 1024x768 60 70 72 75 85 90 100 1152x864 75 1152x870 75 1152x900 66 76 1280x960 60 85 1280x1024 60 75 85 1600x1200 60 65 70 75 2048x1536 85 local port only...

Page 122: ......

Page 123: ...his keyboard is shown in Figure 97 However most modifier keys and other alphanumeric keys used for hotkey purposes in application programs are on a similar position no matter what language mapping you are using Some of the keys also have aliases This means that a key can be named by two different key codes Figure 97 English US keyboard Layout used for the key codes Table 15 Key Names Key Alias Key...

Page 124: ... PRINTSCREEN SCROLL LOCK BREAK INSERT HOME POS 1 PAGE_UP PAGE_DOWN DELETE DEL END UP LEFT DOWN RIGHT NUM_LOCK NUMPAD0 NUMPAD1 NUMPAD2 NUMPAD3 NUMPAD4 NUMPAD5 NUMPAD6 NUMPAD7 NUMPAD8 NUMPAD9 NUMPADPLUS NUMPAD_PLUS NUMPAD NUMPADMUL NUMPAD_MUL NUMPADMINUS NUMPAD_MINUS NUMPADENTER WINDOWS MENU ...

Page 125: ... 12 SDA DDC 5 GND 13 HSYNC 6 GND red 14 VSYNC 7 GND green 15 SCL DDC 8 GND blue RJ45 Connetcor Ethernet Figure 99 RJ45 Table 17 RJ45 PIN Assignment PIN Assignment 1 TX 5 Not connected 2 TX 6 RX 3 RX 7 Not connected 4 Not connected 8 Not connected IPMB I2 Connector Table 18 IPMB I2C Connector PIN Assignment 1 IIC SCL Clock 2 Not connected 3 GND 4 IIC SDA Data 5 Not connected ...

Page 126: ...1 Not connected 6 Not connected 2 RX 7 Not connected 3 TX 8 Not connected 4 Not connected 9 Not connected 5 GND PS 2 Connector Table 21 PS 2 Connector PIN Assignment PIN Assignment 1 KBD_Data_Host 7 GND 2 KBD_CLK_Host 8 GND 3 Mouse_Data_Host 9 KBD_Data_DEV 4 Mouse_CLK_Host 10 KBD_CLK_Dev 5 5V_Mouse_Host 11 Mouse_Dta_Dev 6 5V_KBD_Host 12 Mouse_CLK_Dev USB Table 22 USB Connector PIN Assignment PIN A...

Page 127: ...ve a look on your hardware If there is a proxy server between the ARMC 3P and your host then you may not be able to transfer the video data using RFB Establish a direct connection between the ARMC 3P and the client Furthermore check the settings of the ARMC 3P and choose a different server port used for RFB transfer If you use a firewall then check the according port for accepting connections You ...

Page 128: ...tons the mouse pointers are not synchronous anymore Disable the setting Automatically move mouse pointer to the default button of dialog boxes in the mouse settings of your operating system 13 The Remote Console does not open with Opera in Linux Some versions of Opera do not grant enough permissions if the signature of the applet cannot be verified To solve the problem add the lines grant codeBase...

Page 129: ...our rights we need to make restrictions that forbid anyone to deny you these rights or to ask you to surrender the rights These restrictions translate to certain responsibilities for you if you distribute copies of the software or if you modify it For example if you distribute copies of such a program whether gratis or for a fee you must give the recipients all the rights that you have You must ma...

Page 130: ... transferring a copy and you may at your option offer warranty protection in exchange for a fee 2 You may modify your copy or copies of the Program or any portion of it thus forming a work based on the Program and copy and distribute such modifications or work under the terms of Section 1 above provided that you also meet all of these conditions a You must cause the modified files to carry promine...

Page 131: ...change or c Accompany it with the information you received as to the offer to distribute corresponding source code This alternative is allowed only for noncommercial distribution and only if you received the program in object code or executable form with such an offer in accord with Subsection b above The source code for a work means the preferred form of the work for making modifications to it Fo...

Page 132: ... or unenforceable under any particular circumstance the balance of the section is intended to apply and the section as a whole is intended to apply in other circumstances It is not the purpose of this section to induce you to infringe any patents or other property right claims or to contest validity of any such claims this section has the sole purpose of protecting the integrity of the free softwa...

Page 133: ...FECTIVE YOU ASSUME THE COST OF ALL NECESSARY SERVICING REPAIR OR CORRECTION 12 IN NO EVENT UNLESS REQUIRED BY APPLICABLE LAWOR AGREED TO IN WRITING WILL ANY COPYRIGHT HOLDER OR ANY OTHER PARTYWHOMAY MODIFY AND OR REDISTRIBUTE THE PROGRAM AS PERMITTED ABOVE BE LIABLE TO YOU FOR DAMAGES INCLUDING ANY GENERAL SPECIAL INCIDENTAL OR CONSEQUENTIAL DAMAGES ARISING OUT OF THE USE OR INABILITY TO USE THE P...

Page 134: ...with ABSOLUTELY NO WARRANTY for details type show w This is free software and you are welcome to redistribute it under certain conditions type show c for details The hypothetical commands show w and show c should show the appropriate parts of the General Public License Of course the commands you use may be called something other than show w and show c they could even be mouse clicks or menu items ...

Page 135: ...PLIED WARRANTIES INCLUDING BUT NOT LIMITED TO THE IMPLIED WARRANTIES OF MERCHANTABILITY AND FITNESS FOR A PARTICULAR PURPOSE ARE DISCLAIMED IN NO EVENT SHALL THE OPENLDAP FOUNDATION ITS CONTRIBUTORS OR THE AUTHOR S OR OWNER S OF THE SOFTWARE BE LIABLE FOR ANY DIRECT INDIRECT INCIDENTAL SPECIAL EXEMPLARY OR CONSEQUENTIAL DAMAGES INCLUDING BUT NOT LIMITED TO PROCUREMENT OF SUBSTITUTE GOODS OR SERVIC...

Page 136: ......
Reviews: