3 Upgrading your system
74
Note:
Place your forefingers on the top of the DIMM before
pressing the holding clips to gently disengage the DIMM from the
socket.
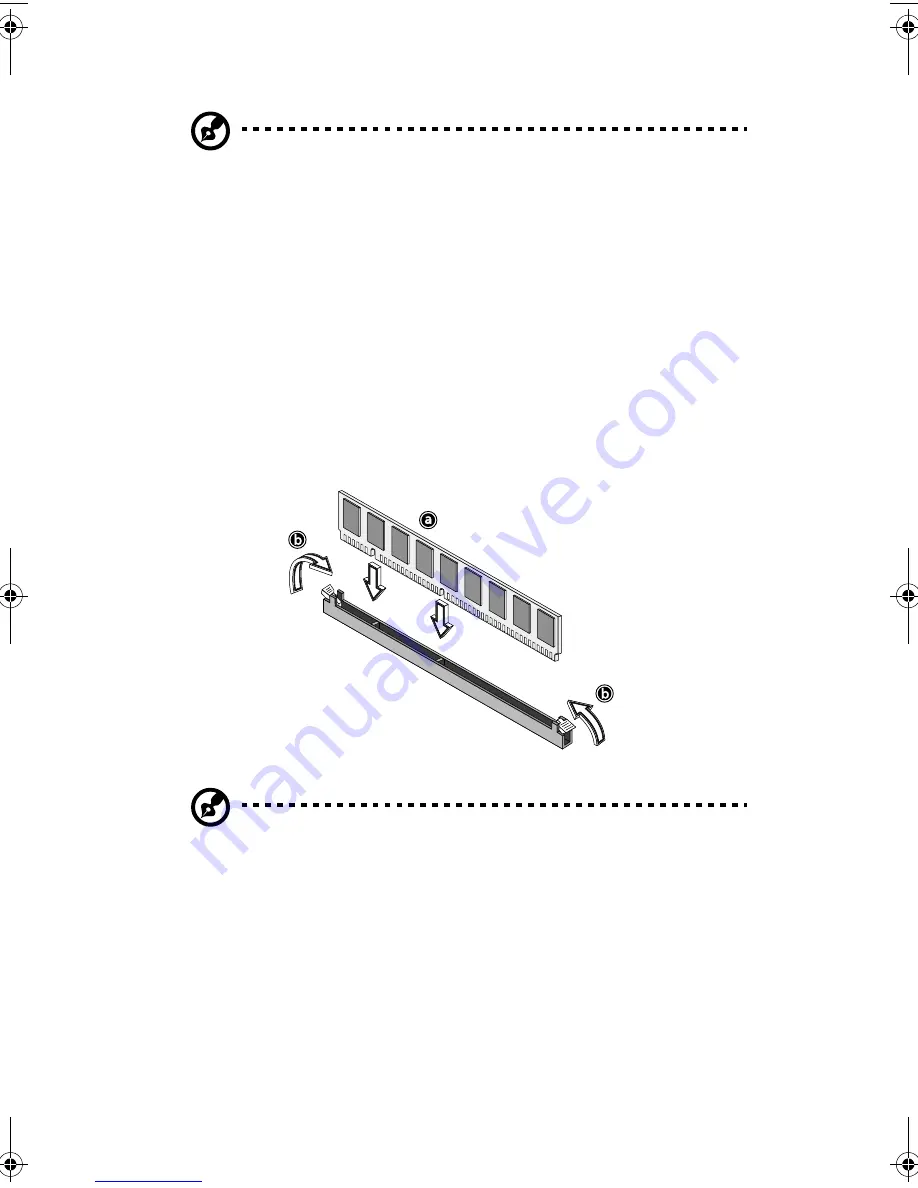
Installing a DIMM
Before you can install a new DIMM in a socket, remove first any
previously installed DIMM from that socket.
1
Locate the DIMM socket on the mainboard.
2
Open the clips on the socket.
3
Align then insert the DIMM into the socket (
a
).
4
Press the holding clips inward to lock the DIMM in place (
b
).
Note:
The DIMM socket is slotted to ensure proper installation.
If you insert a DIMM but it does not fit easily into the socket, you
may have inserted incorrectly. Reverse the orientation of the
DIMM and insert it again.
Reconfiguring your system memory
The system automatically detects the amount of memory installed.
Run the BIOS Setup utility to view the new value for total system
memory and make a note of it.
AA G610.book Page 74 Monday, October 22, 2001 9:46 AM
Summary of Contents for Altos G610
Page 1: ...Acer Altos G610 User s guide ...
Page 10: ......
Page 11: ...1 System overview ...
Page 18: ...1 System overview 8 ...
Page 19: ...2 System tour ...
Page 51: ...41 e Place the server on the tray and secure it with the four screws removed from the stands ...
Page 56: ...2 System tour 46 ...
Page 57: ...3 Upgrading your system ...
Page 90: ...3 Upgrading your system 80 ...
Page 91: ...4 BIOS Setup utility ...
Page 134: ...4 BIOS Setup utility 124 ...
Page 135: ...Appendix A ASM Pro quick installation guide ...
Page 136: ...This appendix shows you how to set up ASM Pro and its agent software ...
Page 154: ...Appendix A ASM Pro quick installation guide 144 ...


