


3 System upgrade
68
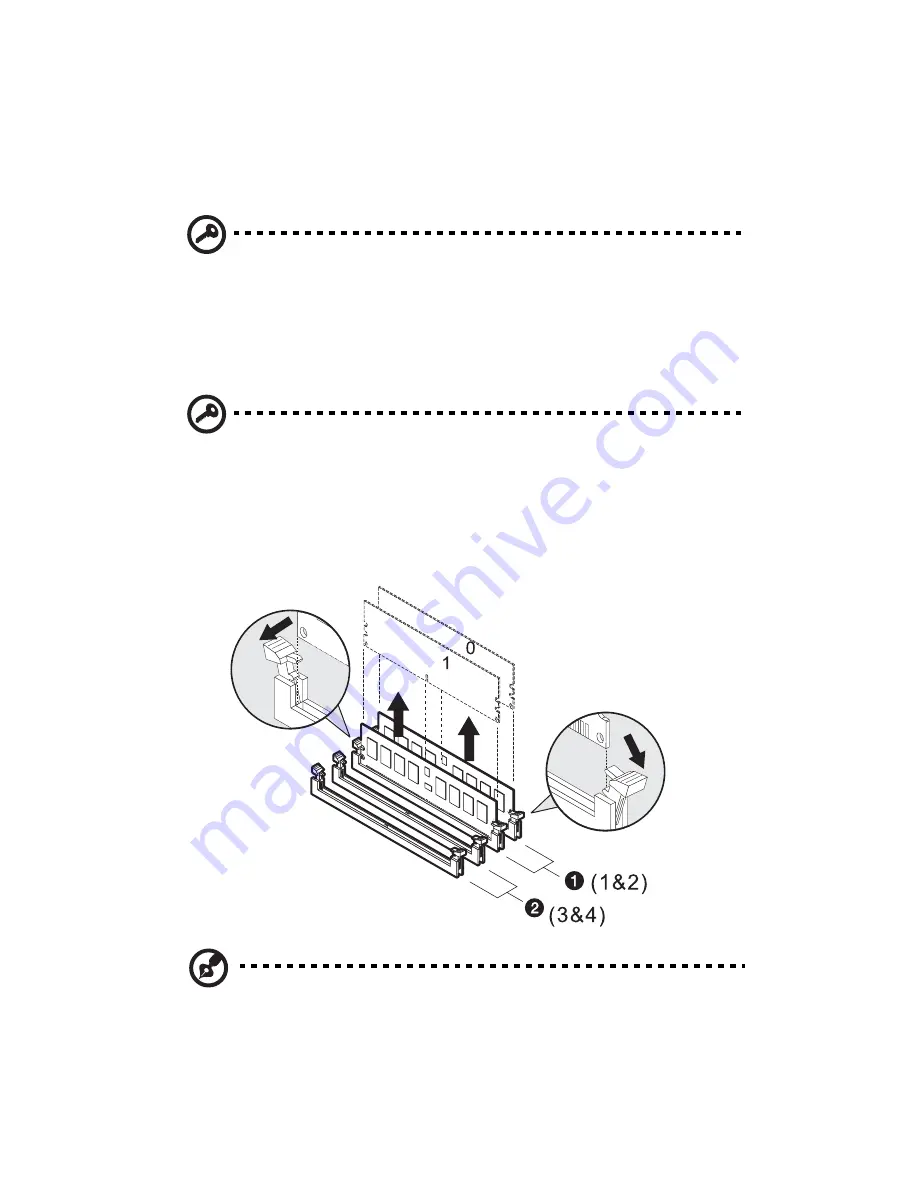
To remove a DIMM
Before you can install a new DIMM in a socket, first remove any
previously installed DIMM from that socket.
Important:
Before removing any DIMM from the mainboard,
make sure to create a backup file of all important data.
1
Observe the ESD precautions and pre-installation procedures
described on page 35.
2
Locate the DIMM slots on the mainboard.
Important:
Refer to DIMM population guidelines for important
information about requirements for removing DIMM modules.
3
Press the holding clips on both sides of the socket outward to
release the DIMM.
4
Gently pull the DIMM upward to remove it from the socket .
Note:
Place your forefingers on the top of the DIMM before
pressing the holding clips to gently disengage the DIMM from the
socket.
Summary of Contents for Altos G5350
Page 1: ...Acer Altos G5350 Series User s Guide ...
Page 10: ...x ...
Page 11: ...1 System tour ...
Page 31: ...21 5 4 pin power cable connector 6 I2 C bus interface connector No Code Description ...
Page 32: ...1 System tour 22 ...
Page 33: ...2 System setup ...
Page 43: ...3 System upgrade ...
Page 88: ...3 System upgrade 78 ...
Page 89: ...4 BIOS setup ...
Page 123: ...113 Save Changes Saves changes made in the BIOS setup Parameter Description ...
Page 124: ...4 BIOS setup 114 ...
Page 125: ...5 Troubleshooting ...
Page 136: ...5 Troubleshooting 126 ...
Page 137: ...Appendix A System management utility ...
Page 144: ...Appendix A System management utility 134 ...
Page 145: ...Appendix B Acer Altos G5350 rack installation guide ...
Page 146: ...This appendix shows you how to set up the Altos G5350 server in a rack mount configuration ...
Page 161: ...Appendix C SCSI RAID configuration ...
Page 162: ...This appendix shows you how to create a RAID volume in your SCSI drives ...