3 Upgrading the system
62
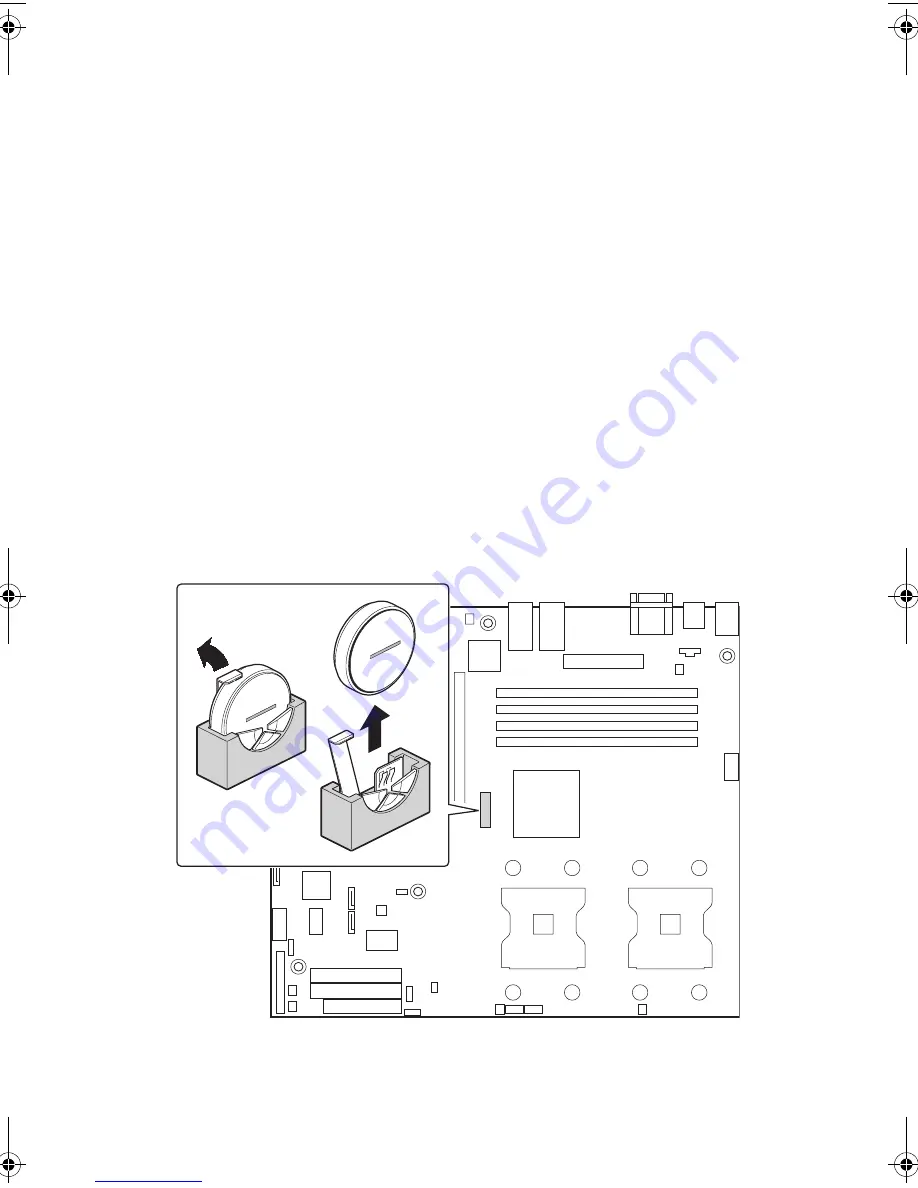
Replacing the Backup Battery
The lithium battery on the server board powers the RTC for up to 10
years in the absence of power. When the battery starts to weaken, it
loses voltage, and the server settings stored in CMOS RAM in the RTC
(for example, the date and time) may be wrong. Contact your customer
service representative or dealer for a list of approved devices.
1
Observe the safety and ESD precautions above and at the
beginning of this book.
2
Turn off all peripheral devices connected to the server. Turn off
the server.
3
Remove power from your system by unplugging the AC power
cord.
4
Remove the chassis cover.
5
Locate the battery.
6
Gently pull back on the metal tab to release the battery.
7
Remove the battery from its socket. See “Battery” in “Mainboard
layout”
8
Dispose of the battery according to local ordinance.
BB!H631!.!FO/cppl!!Qbhf!73!!Uvftebz-!Bvhvtu!28-!3115!!5;13!QN
Summary of Contents for Altos G520 series
Page 1: ...Acer Altos G520 series User s guide ...
Page 11: ...1 System tour ...
Page 29: ...19 2 SATA cable connector 3 HDD backplane power connector 10pin Label Description ...
Page 30: ...1 System tour 20 ...
Page 31: ...2 System setup ...
Page 44: ...2 System setup 34 ...
Page 45: ...3 Upgrading the system ...
Page 79: ...4 BIOS setup ...
Page 131: ...Appendix A Troubleshooting ...
Page 145: ...Appendix B ASM Quick Installation Guide ...
Page 146: ...This appendix shows you how to install the ASM software package ...
Page 149: ...Appendix C Altos G520 Rack Installation Guide ...
Page 150: ...This appendix shows you how to install the optional rack mount kit for Acer Altos G520 ...
Page 157: ...Appendix D SATA RAID Configuration ...
Page 158: ...This appendix shows you how to create SATA RAID ...
Page 162: ...Appendix D SATA RAID Configuration 152 ...
Page 163: ...Appendix E RAID Configuration ...
Page 164: ...This appendix shows you how to create RAID ...
Page 169: ...Appendix F Diagnostic Code Checkpoints ...


