19
E
ASY
G
UIDER
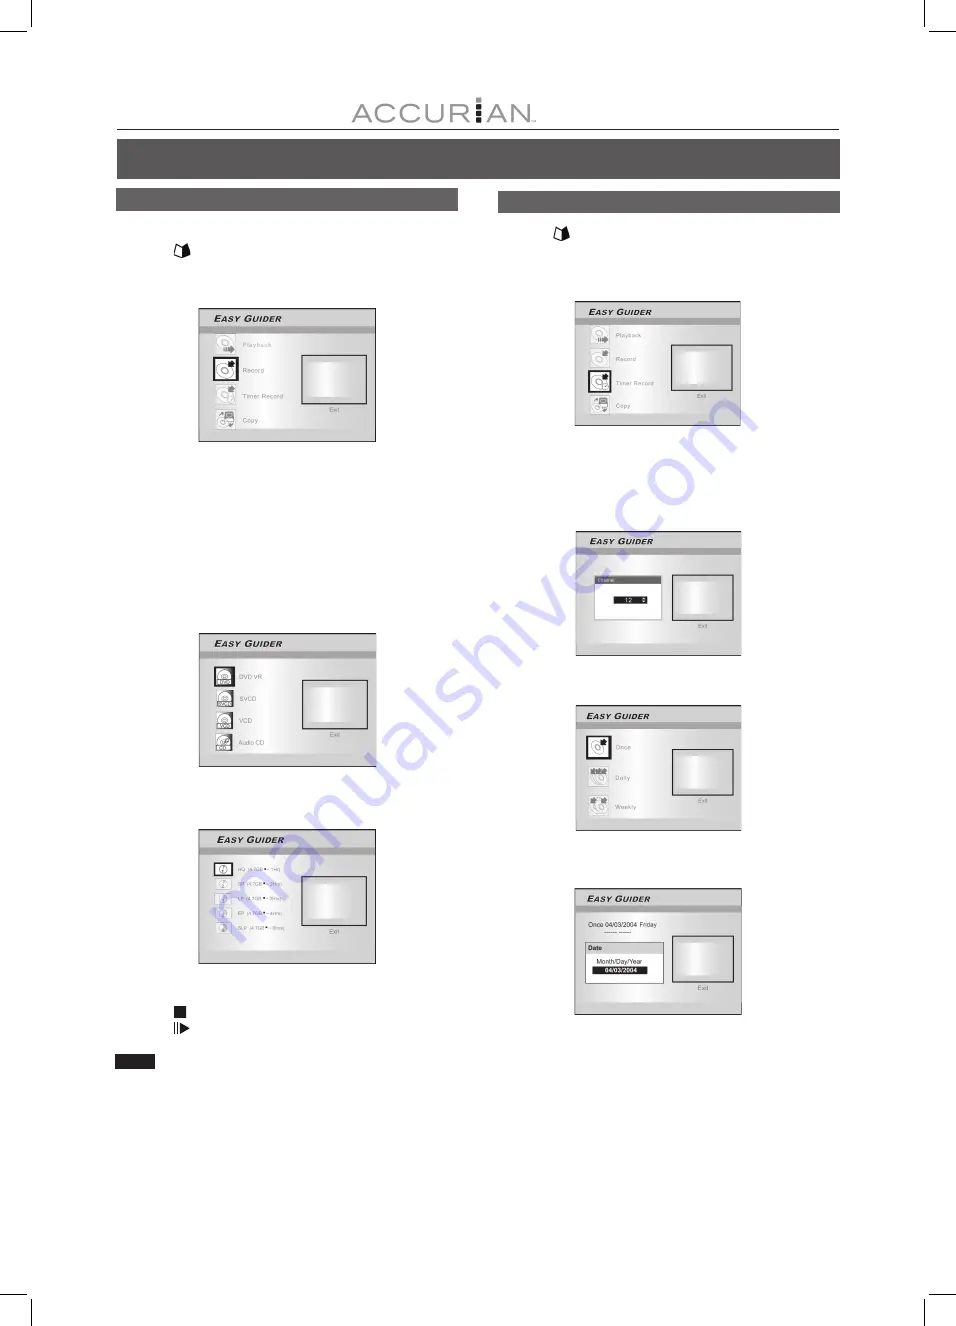
Record on DVD
Make sure a recordable disc is inserted before recording.
1. Press [
GUIDER] to display the Easy Guider menu.
2. Press [
] [
] to select “Record” and then
press [ENTER].
3. Press [
] [
] to select the Signal-Input
(TV, AV1, AV2, S-Video, DV) and press [ENTER].
If you select “TV,” press [
] [
] to select the channel you want to
record and press [ENTER].
4. Press [
] [
] to select “DVD” and press [ENTER].
5. Press [
] [
] to select the disc recording format
and then press [ENTER].
If a CD-R or CD-RW is used for recording, you need to select VCD,
VCD or Audio CD. If a DVD disc is used for recording, you need to
select “DVD VR” format.
When a DVD disc is used for recording, after selecting the recording
format, press [
] [
] to select a recording mode and then press
[ENTER].
6. Press [ENTER] to start recording.
Press [ STOP] to stop recording.
Press [
PAUSE] to pause recording.
Notes:
1. If a new recordable CD-R or a newly erased CD-RW is used for
recording, press [
] [
] [
] [
] to select a format for the disc and
press [ENTER]: SVCD, VCD, Audio CD or Data CD.
2. When a recordable DVD-RW disc is used for recording, you need to
first select either “Quick preparation” or “Full preparation” and press
[ENTER] for the disc to be prepared for recording.
Timer Record (Date/Time Setting)
1. Press [
GUIDER] to display the Easy Guider menu.
2. Press [
] [
] to select “Timer Record”, and
then press [ENTER].
3. Press [
] [
] to select the Signal-Input
(TV, AV1, AV2, S-Video, DV) and press [ENTER].
If you select “TV,” press [
] [
] to select the channel you want to
record and press [ENTER].
4. Press [
][
] to select “Once,” “Daily,” or “Weekly.”
5. Press [
][
] [
] [
] or the numbered buttons
(0~9) to set the date and press [ENTER] when done.


