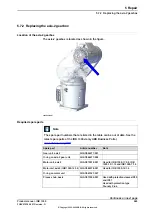
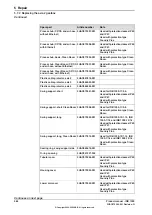
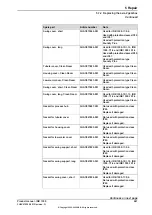
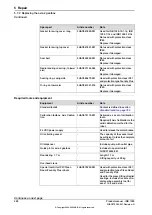
background image

Note

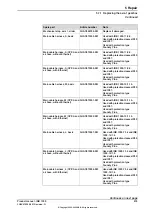
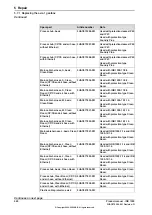
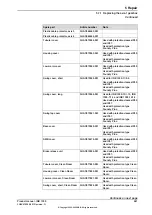
Article number

Spare part

Not used with protection class
IP40.
Replace if damaged.

3HAC032050-001

Seal bolt

Used with protection types Clean
Room and Foundry Plus.
Replace if damaged.

3HAC070148-003

Radial sealing on swing (to base)

Required tools and equipment

Note

Article number

Equipment

Content is defined in section

Standard toolkit on page 759

.

-

Standard toolkit

Delivered as a set of calibration
tools.
Required if Axis Calibration is the
valid calibration method for the
robot.

3HAC074119-001

Calibration toolbox, Axis Calibra-
tion

Used to release the motor brakes.

-

24 VDC power supply

The capacity of the vessel must
be sufficient to take the complete
amount of oil.

-

Oil collecting vessel

Used for draining and filling oil to
axis-1 gearbox.
Connector specification: G3/8

-

Connector for quick coupling, with
outlet pipe

Includes pump with outlet pipe.

-

Oil dispenser

Included in special toolkit
3HAC076396-001.

-

Axis-1 gearbox assembly cap

Length: 1.7 m
Lifting capacity: >400 kg

-

Roundsling, 1.7 m

-

Overhead crane

Used with protection class IP67,
and protection types Clean Room
and Foundry Plus.
Used for the press-fitting of radial
sealings. Includes five sets of ra-
dial sealing assembly tool for
axes 1 to 4 and axis 6.

3HAC078203-001

Special toolkit for IP67/Clean
Room/Foundry Plus robots

Required consumables

Note

Article number

Consumable

-

Cable straps

FM 222

3HAC029132-001

Grease

Kyodo Yushi TMO150

3HAC032140-001

Lubricating oil

Loctite 577

-

Flange sealant for conical fittings

Continues on next page

Product manual - IRB 1300

583

3HAC070390-001 Revision: G

© Copyright 2020-2022 ABB. All rights reserved.

5 Repair

5.7.1 Replacing the axis-1 gearbox

Continued

Summary of Contents for IRB 1300

Page 1: ...ROBOTICS Product manual IRB 1300 ...

Page 2: ...Trace back information Workspace 22A version a22 Checked in 2022 03 21 Skribenta version 5 5 019 ...

Page 3: ...manual IRB 1300 11 0 9 IRB 1300 10 1 15 IRB 1300 7 1 4 IRB 1300 12 1 4 OmniCore Document ID 3HAC070390 001 Revision G Copyright 2020 2022 ABB All rights reserved Specifications subject to change without notice ...

Page 4: ...ty by ABB for losses damage to persons or property fitness for a specific purpose or the like In no event shall ABB be liable for incidental or consequential damages arising from use of this manual and products described herein This manual and parts thereof must not be reproduced or copied without ABB s written permission Keep for future reference Additional copies of this manual may be obtained f...

Page 5: ...ocedure 53 3 2 2 Risk of tipping stability 55 3 2 3 Extra O rings 56 3 2 4 Transportation bracket 58 3 3 On site installation 58 3 3 1 Lifting the robot 58 3 3 1 1 Lifting the robot with roundslings 64 3 3 1 2 Lifting and rotating a suspended mounted manipulator 65 3 3 2 Manually releasing the brakes 67 3 3 3 Orienting and securing the robot 71 3 3 4 Setting the system parameters for an inverted o...

Page 6: ...elease buttons may be jammed after service work 148 5 3 Cable harness 148 5 3 1 Replacing the cable package 193 5 3 2 Replacing the SMB unit 202 5 3 3 Replacing the brake release unit 208 5 4 Swing and base 208 5 4 1 Replacing the base 237 5 4 2 Replacing the swing 290 5 4 3 Replacing the axis 1 mechanical stops 292 5 4 4 Replacing the axis 2 mechanical stops 294 5 5 Upper and lower arms 294 5 5 1...

Page 7: ...cedure 735 6 4 5 Reference calibration 737 6 5 Verifying the calibration 738 6 6 Checking the synchronization position 739 7 Troubleshooting 739 7 1 Introduction to troubleshooting 741 7 2 Oil and grease stains on motors and gearboxes 742 7 3 Mechanical noise or dissonance 744 7 4 Manipulator collapses on power down 745 7 5 Motor temperature too high 747 8 Decommissioning 747 8 1 Introduction 748 ...

Page 8: ...This page is intentionally left blank ...

Page 9: ... final application It is the responsibility of the integrator to provide safety and user guides for the robot system Who should read this manual This manual is intended for installation personnel maintenance personnel repair personnel Prerequisites A maintenance repair installation craftsman working with an ABB robot must be trained by ABB and have the required knowledge of mechanical and electric...

Page 10: ...e manipulators and the controllers Revisions Description Revision First edition A Published in release 20D The following updates are made in this revision Installation of signal lamp is added Information about mechanical restriction of axis 5 working range is updated and a figure showing related location is added A new O ring on swing 3HAC061327 036 is added Updated cleaning method Added maximum a...

Page 11: ...of connection point on cabinet Updated the naming of timing belt tension adjustment tools from acoustic tensiometer and tensiometer to sonic tension meter and dynamometer respectively E Published in release 21D The following updates are done in this revision Updated the standard toolkit table F Published in release 22A The following updates are done in this revision Added variant IRB 1300 12 1 4 U...

Page 12: ...sioning Reference information safety standards unit conversions screw joints lists of tools Spare parts list with corresponding figures or references to separate spare parts lists References to circuit diagrams Technical reference manuals The technical reference manuals describe reference information for robotics products for example lubrication the RAPID language and system parameters Application...

Page 13: ...s The manuals are aimed at those having first hand operational contact with the product that is production cell operators programmers and troubleshooters Product manual IRB 1300 13 3HAC070390 001 Revision G Copyright 2020 2022 ABB All rights reserved Product documentation Continued ...

Page 14: ... include specific safety information when dangerous steps are to be performed Read more in the chapter Safety on page 15 Illustrations The product is illustrated with general figures that does not take painting or protection type in consideration Likewise certain work methods or general information that is valid for several product models can be illustrated with illustrations that show a different...

Page 15: ...ration of the robot when the safety devices are defective not in their intended location or in any other way not working When instructions for operation and maintenance are not followed Non authorized design modifications of the robot Repairs on the robot and its spare parts carried out by in experienced or non qualified personnel Foreign objects Force majeure Spare parts and equipment ABB supplie...

Page 16: ...uence of alcohol drugs or any other intoxicating substances are not allowed to install maintain service repair or use the robot The plant liable must make sure that the personnel is trained on the robot and on responding to emergency or abnormal situations Personal protective equipment Use personal protective equipment as stated in the instructions 16 Product manual IRB 1300 3HAC070390 001 Revisio...

Page 17: ...d will result in ser ious injury DANGER Signal word used to indicate a potentially hazardous situation which if not avoided could result in serious injury WARNING Signal word used to indicate a potentially hazardous situation related to electrical hazards which if not avoided could result in serious injury ELECTRICAL SHOCK Signal word used to indicate a potentially hazardous situation which if not...

Page 18: ...d to indicate where to find additional information or how to do an operation in an easier way TIP 18 Product manual IRB 1300 3HAC070390 001 Revision G Copyright 2020 2022 ABB All rights reserved 1 Safety 1 2 1 Safety signals in the manual Continued ...

Page 19: ...ription Symbol Warning xx0900000812 Warns that an accident may occur if the instructions are not followed that can lead to serious injury possibly fatal and or great damage to the product It applies to warnings that apply to danger with for example contact with high voltage electrical units explosion or fire risk risk of poisonous gases risk of crushing impact fall from height etc Caution xx090000...

Page 20: ...0815 Disassembling this part can cause injury Extended rotation xx0900000814 This axis has extended rotation working area compared to standard Brake release xx0900000808 Pressing this button will release the brakes This means that the robot arm can fall down Continues on next page 20 Product manual IRB 1300 3HAC070390 001 Revision G Copyright 2020 2022 ABB All rights reserved 1 Safety 1 2 2 Safety...

Page 21: ... over if the bolts are not securely fastened xx1500002402 Crush xx0900000817 Risk of crush injuries Continues on next page Product manual IRB 1300 21 3HAC070390 001 Revision G Copyright 2020 2022 ABB All rights reserved 1 Safety 1 2 2 Safety symbols on manipulator labels Continued ...

Page 22: ...1 06 xx1300001087 Moving robot 1 2 3 4 5 6 xx0900000819 The robot can move unexpectedly xx1000001141 1 2 3 4 xx1500002616 Continues on next page 22 Product manual IRB 1300 3HAC070390 001 Revision G Copyright 2020 2022 ABB All rights reserved 1 Safety 1 2 2 Safety symbols on manipulator labels Continued ...

Page 23: ...01242 Lifting of robot xx0900000822 Oil xx0900000823 Can be used in combination with prohibition if oil is not allowed Mechanical stop xx0900000824 Continues on next page Product manual IRB 1300 23 3HAC070390 001 Revision G Copyright 2020 2022 ABB All rights reserved 1 Safety 1 2 2 Safety symbols on manipulator labels Continued ...

Page 24: ...t this part is pressurized Usually contains additional text with the pressure level Shut off with handle xx0900000827 Use the power switch on the controller Do not step xx1400002648 Warns that stepping on these parts can cause damage to the parts 24 Product manual IRB 1300 3HAC070390 001 Revision G Copyright 2020 2022 ABB All rights reserved 1 Safety 1 2 2 Safety symbols on manipulator labels Cont...

Page 25: ...ystem Category 1 emergency stop is used otherwise because Stopping using the motor produces repeatable stopping distances no variation of brake friction coefficient Stopping using the motor produces the shortest stopping distance without any risk of overloading structural components pre defined braking torque no delay and minimizes the forces applied by robot Stopping using the motor saves on brak...

Page 26: ...impact caused by a breaking or malfunctioning rotating tool or other device fitted to the robot The maximum TCP speed and the maximum velocity of the robot axes are detailed in the section Robot motion in the product specification for the respective manipulator Consider exposure to hazards such as slipping tripping and falling Hazards due to the working position and posture for a person working wi...

Page 27: ...ot with external devices to a robot system The integrator of the robot system must ensure that emergency stop functions are interlocked in accordance with applicable standards The integrator of the robot system must ensure that safety functions are interlocked in accordance with applicable standards Other hazards A robot may perform unexpected limited movement WARNING Manipulator movements can cau...

Page 28: ...t of robot arm WARNING Hazards due to the use of brake release devices and or gravity beneath the manipulator shall be considered A robot may perform unexpected limited movement WARNING Manipulator movements can cause serious injuries on users and may damage equipment 28 Product manual IRB 1300 3HAC070390 001 Revision G Copyright 2020 2022 ABB All rights reserved 1 Safety 1 5 Safety during operati...

Page 29: ...are working as intended Hot surfaces Surfaces can be hot after running the robot and touching these may result in burns Allow the surfaces to cool down before maintenance or repair Allergic reaction Elimination Action Description Warning Make sure that protective gear like goggles and gloves are al ways worn When working with lubricants there is a risk of an allergic reac tion Allergic reaction Ge...

Page 30: ...en drained from the gearbox Specified amount de pends on drained volume For lifetime reasons always drain as much oil as possible from the gearbox The magnetic oil plugs will gather residual metal chips Contaminated oil in gearboxes Hazards related to batteries Under rated conditions the electrode materials and liquid electrolyte in the batteries are sealed and not exposed to the outside There is ...

Page 31: ... unexpected limited movement WARNING Manipulator movements can cause serious injuries on users and may damage equipment Related information See also the safety information related to installation and operation Product manual IRB 1300 31 3HAC070390 001 Revision G Copyright 2020 2022 ABB All rights reserved 1 Safety 1 6 1 Safety during maintenance and repair Continued ...

Page 32: ...ire using an overhead crane or similar equipment Increased injury Before releasing the brakes make sure that the weight of the manipulator does not result in additional hazards for example even more severe injuries on a trapped person DANGER When releasing the holding brakes the robot axes may move very quickly and sometimes in unexpected ways Make sure no personnel is near or beneath the robot 32...

Page 33: ... Switch the motor to the MOTORS OFF 3 Inspect and verify that the axis maintains its position If the manipulator does not change position as the motors are switched off then the brake function is adequate Note It is recommended to run the service routine BrakeCheck as part of the regular maintenance see the operating manual for the robot controller For robots with the option SafeMove the Cyclic Br...

Page 34: ...engineers A risk assessment must be done to address both robot and robot system specific hazards WARNING Hazards due to the use of brake release devices and or gravity beneath the manipulator shall be considered A robot may perform unexpected limited movement WARNING Manipulator movements can cause serious injuries on users and may damage equipment Related information See also the safety informati...

Page 35: ...e release devices and or gravity beneath the manipulator shall be considered A robot may perform unexpected limited movement WARNING Manipulator movements can cause serious injuries on users and may damage equipment Product manual IRB 1300 35 3HAC070390 001 Revision G Copyright 2020 2022 ABB All rights reserved 1 Safety 1 8 Safety during decommissioning ...

Page 36: ...This page is intentionally left blank ...

Page 37: ... Loads on foundation robot The illustration shows the directions of the robots stress forces The directions are valid for all floor mounted suspended and wall mounted robots xy xy z z T F F T xx1100000521 Force in any direction in the XY plane Fxy Force in the Z plane Fz Bending torque in any direction in the XY plane Txy Bending torque in the Z plane Tz Continues on next page Product manual IRB 1...

Page 38: ...peration Force 2186 N 821 N Force xy 1547 N 1000 N 428 N 1000 N Force z 2392 Nm 814 Nm Torque xy 583 Nm 236 Nm Torque z Wall mounted Max load emergency stop Endurance load in operation Force 2860 N 1478 N Force xy 963 N 288 N Force z 2741 Nm 1068 Nm Torque xy 863 Nm 352 Nm Torque z Suspended Max load emergency stop Endurance load in operation Force 2186 N 821 N Force xy 1547 N 1000 N 428 N 1000 N ...

Page 39: ... is added i e the stiffness of the pedestal where the robot is mounted The minimum resonance frequency should not be interpreted as the resonance frequency of the building floor etc For example if the equivalent mass of the floor is very high it will not affect robot movement even if the frequency is well below the stated frequency The robot should be mounted as rigid as possibly to the floor Dist...

Page 40: ...e corresponding protection class Protection class i Protection type IP40 Manipulator protection type Standard IP67 option 3350 670 IP67 Manipulator protection type Foundry Plus 2 ISO 4 IP54 Manipulator protection type Clean Room i According to IEC 60529 Environmental information The product complies with IEC 63000 Technical documentation for the assessment of electrical and electronic products wit...

Page 41: ... 340 126 8 62 5 190 190 220 A B R101 5 118 190 190 189 80 170 96 21 xx1900001331 Description Pos Turning radius R84 A Turning radius R207 B Continues on next page Product manual IRB 1300 41 3HAC070390 001 Revision G Copyright 2020 2022 ABB All rights reserved 2 Technical data 2 2 Dimensions ...

Page 42: ...8 62 5 B 190 190 220 R101 5 118 190 190 189 80 170 96 21 xx1900001332 Description Pos Turning radius R84 A Turning radius R282 B Continues on next page 42 Product manual IRB 1300 3HAC070390 001 Revision G Copyright 2020 2022 ABB All rights reserved 2 Technical data 2 2 Dimensions Continued ...

Page 43: ...9 544 90 765 A 340 62 5 B 190 190 220 R101 5 118 190 190 189 80 170 96 21 xx1900001333 Description Pos Turning radius R84 A Turning radius R282 B Product manual IRB 1300 43 3HAC070390 001 Revision G Copyright 2020 2022 ABB All rights reserved 2 Technical data 2 2 Dimensions Continued ...

Page 44: ...d 3 Angle degrees Positions at wrist center mm Position in the figure axis 3 axis 2 Z X 0 0 1009 475 pos0 84 6 0 1 395 9 50 pos1 65 0 600 7 265 9 pos2 84 6 90 544 901 9 pos3 84 6 130 3 6 702 6 pos4 210 100 170 3 64 7 pos5 65 100 746 7 43 3 pos6 84 6 90 544 801 9 pos7 84 6 100 396 1 788 9 pos8 210 130 696 3 410 pos9 Continues on next page 44 Product manual IRB 1300 3HAC070390 001 Revision G Copyrig...

Page 45: ...egrees Positions at wrist center mm Position in the figure axis 3 axis 2 Z X 0 0 1159 575 pos0 84 6 0 1 545 9 150 pos1 65 0 750 7 365 9 pos2 84 6 90 544 1 151 9 pos3 84 6 155 364 573 4 pos4 210 95 168 7 146 3 pos5 65 95 741 74 8 pos6 84 6 90 544 851 9 pos7 84 6 95 456 9 848 1 pos8 210 155 394 604 pos9 Continues on next page Product manual IRB 1300 45 3HAC070390 001 Revision G Copyright 2020 2022 A...

Page 46: ...es Positions at wrist center mm Position in the figure axis 3 axis 2 Z X 0 0 1159 825 pos0 86 6 0 1 795 2 150 pos1 69 0 503 2 429 2 pos2 86 6 90 544 1 401 2 pos3 86 6 155 590 678 8 pos4 210 95 36 1 2 9 pos5 69 95 825 7 166 3 pos6 86 6 90 544 1 101 2 pos7 86 6 95 435 1 096 4 pos8 210 155 598 7 747 4 pos9 Continues on next page 46 Product manual IRB 1300 3HAC070390 001 Revision G Copyright 2020 2022...

Page 47: ...ees Positions at wrist center mm Position in the figure axis 3 axis 2 Z X 0 0 1159 825 pos0 86 6 0 1 795 2 150 pos1 69 0 503 2 429 2 pos2 86 6 90 544 1 401 2 pos3 86 6 155 590 678 8 pos4 210 95 36 1 2 9 pos5 69 95 825 7 166 3 pos6 86 6 90 544 1 101 2 pos7 86 6 95 435 1 096 4 pos8 210 155 598 7 747 4 pos9 Continues on next page Product manual IRB 1300 47 3HAC070390 001 Revision G Copyright 2020 202...

Page 48: ... Working range Axis Wall mounted robot has a work area for axis 1 that depends on payload and the positions of other axes Simulation in RobotStudio is re commended 180 Axis 1 IRB 1300 10 1 15 IRB 1300 7 1 4 and IRB 1300 12 1 4 Axis 2 95 155 IRB 1300 11 0 9 100 130 IRB 1300 7 1 4 and IRB 1300 12 1 4 Axis 3 210 69 IRB 1300 10 1 15 and IRB 1300 11 0 9 210 65 230 Axis 4 Continues on next page 48 Produ...

Page 49: ...mum revolution value 242 The default working range for axis 6 can be extended by changing parameter values in the soft ware Product manual IRB 1300 49 3HAC070390 001 Revision G Copyright 2020 2022 ABB All rights reserved 2 Technical data 2 3 Working range Continued ...

Page 50: ... destroy sensitive electronics Safe handling Use one of the following alternatives Use a wrist strap Wrist straps must be tested frequently to ensure that they are not damaged and are operating correctly Use an ESD protective floor mat The mat must be grounded through a current limiting resistor Use a dissipative table mat The mat should provide a controlled discharge of static voltages and must b...

Page 51: ...n must be observed There are general safety aspects that must be read through as well as more specific safety information that describes the danger and safety risks when performing the procedures Read the chapter Safety on page15 before performing any installation work Note Always connect the IRB 1300 and the robot to protective earth and residual current device RCD before connecting to power and ...

Page 52: ...fting accessory used if required is suitable to handle the weight of the robot as specified in Weight robot on page 37 5 If the robot is not installed directly it must be stored as described in Storage condi tions robot on page 39 6 Make sure that the expected operating environment of the robot conforms to the specifications as described in Operating conditions robot on page 39 7 Before taking the...

Page 53: ...ransportation position IRB 1300 7 1 4 and IRB 1300 12 1 4 IRB 1300 10 1 15 IRB 1300 11 0 9 52 2 1 73 xx1900001578 41 4 0 81 xx1900001577 25 50 25 xx1900001576 Angle Axis 7 1 4 and 12 1 4 10 1 15 11 0 9 0 0 0 1 52 41 25 2 69 50 65 3 0 0 0 4 73 81 50 5 0 0 0 6 Transportation bracket At delivery the robot is locked in the correct position with a transportation bracket for securing the position during...

Page 54: ...bracket on page 56 WARNING The robot is likely to be mechanically unstable if not secured to the foundation 54 Product manual IRB 1300 3HAC070390 001 Revision G Copyright 2020 2022 ABB All rights reserved 3 Installation and commissioning 3 2 2 Risk of tipping stability Continued ...

Page 55: ...h protection class IP67 and protection types Clean Room and Foundry Plus 3HAB3772 19 O ring Used to seal between the main power cable and connector Robots with manipulator cables routed from the rear of the base xx2000002338 Robots with manipulator cables routed from below 3309 1 xx2000002339 Further information For installation information see On site installation on page 58 and Electrical connec...

Page 56: ...nd IRB 1300 12 1 4 IRB 1300 10 1 15 IRB 1300 11 0 9 xx1900001528 xx1900001527 xx1900001526 Removing the transportation bracket Note Action CAUTION For robots with protection type Clean Room Always cut the paint with a knife and grind the paint edge when disassembling parts of the robot See Cut the paint or surface on the robot before replacing parts on page 145 1 Continues on next page 56 Product ...

Page 57: ... The transportation bracket of IRB 1300 11 0 9 is used as an example xx1900001531 Remove the bracket 3 Product manual IRB 1300 57 3HAC070390 001 Revision G Copyright 2020 2022 ABB All rights reserved 3 Installation and commissioning 3 2 4 Transportation bracket Continued ...

Page 58: ...ring the lifting of the robot to the installation site For details see Transportation bracket on page 56 IRB 1300 7 1 4 and IRB 1300 12 1 4 IRB 1300 10 1 15 IRB 1300 11 0 9 xx1900001581 xx1900001580 xx1900001579 DANGER Attempting to lift a robot in any other position than the recommended lifting position may result in the robot tipping over causing severe damage or injury Continues on next page 58...

Page 59: ...m Lifting capacity 400 kg Roundsling 1 7 m Includes lifting accessories lifting beam and screws 3HAC077885 001 Lifting accessory robot Continues on next page Product manual IRB 1300 59 3HAC070390 001 Revision G Copyright 2020 2022 ABB All rights reserved 3 Installation and commissioning 3 3 1 1 Lifting the robot with roundslings Continued ...

Page 60: ...alid for IRB 1300 10 1 15 Jog the robot to the specified position Axis 1 0 Axis 2 41 Axis 3 50 Axis 4 0 Axis 5 81 Axis 6 0 WARNING The robot is mechanically unstable if not se cured to the foundation 2 Valid for IRB 1300 7 1 4 and IRB 1300 12 1 4 3 Jog the robot to the specified position Axis 1 0 Axis 2 52 Axis 3 69 Axis 4 0 Axis 5 73 Axis 6 0 Continues on next page 60 Product manual IRB 1300 3HAC...

Page 61: ...rque 15 Nm xx1900001594 Make sure the roundsling has free space and does not wear against any part of the robot Fit the roundslings to the lifting tools and attach them to the lifting beam 5 Roundsling 1 7 m xx1900001595 Continues on next page Product manual IRB 1300 61 3HAC070390 001 Revision G Copyright 2020 2022 ABB All rights reserved 3 Installation and commissioning 3 3 1 1 Lifting the robot ...

Page 62: ... IRB 1300 12 1 4 79 kg All lifting accessories used must be sized ac cordingly 7 WARNING Personnel must not under any circumstances be present under the suspended load 8 Raise the overhead crane to lift the robot 9 Continues on next page 62 Product manual IRB 1300 3HAC070390 001 Revision G Copyright 2020 2022 ABB All rights reserved 3 Installation and commissioning 3 3 1 1 Lifting the robot with r...

Page 63: ... wall or in an suspended position the manipulator can now be tilted slowly by hand 10 Product manual IRB 1300 63 3HAC070390 001 Revision G Copyright 2020 2022 ABB All rights reserved 3 Installation and commissioning 3 3 1 1 Lifting the robot with roundslings Continued ...

Page 64: ...tion is specified in Special tools on page 760 Any additional equipment required is specified in the instruction for the lifting accessory Contact ABB for more information How to lift and turn the robot into position for wall position Contact ABB for more information Illustration xx1900001596 64 Product manual IRB 1300 3HAC070390 001 Revision G Copyright 2020 2022 ABB All rights reserved 3 Install...

Page 65: ...ped with a brake release unit Note Action Note If the robot is not connected to the controller power must be supplied to the connector R1 MP according to the section Supplying power to connector R1 MP on page 66 1 DANGER When releasing the holding brakes the robot axes may move very quickly and sometimes in unexpec ted ways Make sure no personnel is near or beneath the ro bot 2 Continues on next p...

Page 66: ...plying power to the wrong pin may cause all brakes to be released simultaneously and instantly 1 xx1900001654 Supply 0V on pin 12 24V on pin 11 Note Do not interchange the 24V and 0V pins If they are mixed up damage can be caused to internal electrical components 2 Use the brake releasing button as described in Releasing the brakes on page 65 3 66 Product manual IRB 1300 3HAC070390 001 Revision G ...

Page 67: ...itable washer 2 pcs D10x30 ISO 2338 10m6x30 A1 Guide pins 150 Nm 10 Nm Tightening torque Minimum 19 mm for ground with material yield strength 150 MPa Length of thread engagement 0 1 500 mm Level surface requirements Installation of extra O rings For robots with protection class IP67 option 3350 670 For robots with protection type Clean Room option 3351 4 For robots with protection type Foundry Pl...

Page 68: ...nted Note Action Make sure the installation site for the robot con forms to the specifications in section Technical data on page 37 1 The hole configuration of the base is shown in the figure in Hole con figuration base on page 70 Prepare the installation site with attachment holes The foundation surface must be clean and un painted 2 CAUTION The weight of the IRB 1300 robot is IRB 1300 11 0 9 75 ...

Page 69: ... x 3 steel hard ness class 200HV Tightening torque 150 Nm 10 Nm Tighten the bolts in a crosswise pattern to ensure that the base is not distorted 9 Robots with manipulator cables routed from the rear of the base xx2000002338 For robots with protection class IP67 option 3350 670 For robots with protection type Clean Room option 3351 4 For robots with protection type Foundry Plus option 3352 10 Fit ...

Page 70: ...H7 0 015 0 73 100 73 A B B Detail A Section B 0 08 10 H7 0 015 0 0 5 0 5 0 08 18 5 22 0 2 R101 5 118 190 190 189 80 170 96 21 xx1900001337 70 Product manual IRB 1300 3HAC070390 001 Revision G Copyright 2020 2022 ABB All rights reserved 3 Installation and commissioning 3 3 3 Orienting and securing the robot Continued ...

Page 71: ... the best possible way An incorrect definition of the mounting angle will result in Overloading the mechanical structure Lower path performance and path accuracy Some functions will not work properly for example Load Identification and Collision detection Gravity Beta When the robot is mounted other than floor standing rotated around the y axis the robot base frame and the system parameter Gravity...

Page 72: ... motion Mounting angles and values The parameter Gravity Beta or Gravity Alpha specifies the mounting angle of the robot in radians It is calculated in the following way Gravity Beta A x 3 141593 180 B radians where A is the mounting angle in degrees and B is the mounting angle in radians Gravity Beta Mounting angle A Example of position 0 000000 Default 0 Floor mounted 1 570796 90 Wall mounted 3 ...

Page 73: ...stem parameters in RobotWare The value of the system parameters that define the mounting angle must be redefined when changing the mounting angle of the robot The parameters belong to the type Robot in the topic Motion The system parameters are described in Technical reference manual System parameters The system parameters are configured in RobotStudio or on the FlexPendant Product manual IRB 1300...

Page 74: ...ps or major damage to the robot Load diagrams permitted extra loads equipment and their positions are specified in the product specification The loads must be defined in the software Stopping time and braking distances The performance of the motor brake depends on if there are any loads attached to the robot See Product specification Robot stopping distances according to ISO 10218 1 74 Product man...

Page 75: ...40 6 1009 544 50 515 90 340 126 8 62 5 190 190 220 A B R101 5 118 190 190 189 80 170 96 21 xx1900001331 Description Pos Turning radius R84 A Turning radius R207 B Continues on next page Product manual IRB 1300 75 3HAC070390 001 Revision G Copyright 2020 2022 ABB All rights reserved 3 Installation and commissioning 3 3 6 Fitting equipment on the robot robot dimensions ...

Page 76: ...118 190 190 189 80 170 96 21 xx1900001332 Description Pos Turning radius R84 A Turning radius R282 B Continues on next page 76 Product manual IRB 1300 3HAC070390 001 Revision G Copyright 2020 2022 ABB All rights reserved 3 Installation and commissioning 3 3 6 Fitting equipment on the robot robot dimensions Continued ...

Page 77: ...101 5 118 190 190 189 80 170 96 21 xx1900001333 Description Pos Turning radius R84 A Turning radius R282 B Continues on next page Product manual IRB 1300 77 3HAC070390 001 Revision G Copyright 2020 2022 ABB All rights reserved 3 Installation and commissioning 3 3 6 Fitting equipment on the robot robot dimensions Continued ...

Page 78: ...owed arm load depends on center of gravity of arm load and robot payload 100 62 5 50 150 87 5 87 5 xx1900001599 Max armload kg Variant 1 IRB 1300 11 0 9 0 5 IRB 1300 10 1 15 0 5 IRB 1300 7 1 4 0 5 IRB 1300 12 1 4 Continues on next page 78 Product manual IRB 1300 3HAC070390 001 Revision G Copyright 2020 2022 ABB All rights reserved 3 Installation and commissioning 3 3 6 Fitting equipment on the rob...

Page 79: ...n in the following figures A B C 125 4x M10x15 A B 40 4x M4x8 65 4x M4x8 C xx1900001338 Continues on next page Product manual IRB 1300 79 3HAC070390 001 Revision G Copyright 2020 2022 ABB All rights reserved 3 Installation and commissioning 3 3 6 Fitting equipment on the robot robot dimensions Continued ...

Page 80: ...M4x6 D F xx1900001339 Continues on next page 80 Product manual IRB 1300 3HAC070390 001 Revision G Copyright 2020 2022 ABB All rights reserved 3 Installation and commissioning 3 3 6 Fitting equipment on the robot robot dimensions Continued ...

Page 81: ...0 IP67 CR xx1900001340 For robots with protection type Foundry Plus 02 L 4xM6 9 6 5 2 4 5 30 60 4 5 6 H7 0 012 0 9 6 5 2 45 5 H7 0 012 0 6 6 2 4 0 4 5 N N DETAIL L IRB1300 Foundry 0 2 0 04 0 04 8 25 H7 0 021 0 SECTION N N xx2100000705 Continues on next page Product manual IRB 1300 81 3HAC070390 001 Revision G Copyright 2020 2022 ABB All rights reserved 3 Installation and commissioning 3 3 6 Fittin...

Page 82: ...y 12 9 For other equipment use suitable screws and tightening torque for your application 82 Product manual IRB 1300 3HAC070390 001 Revision G Copyright 2020 2022 ABB All rights reserved 3 Installation and commissioning 3 3 6 Fitting equipment on the robot robot dimensions Continued ...

Page 83: ...to the I O connector on the controller Note The I O connectors provides 8 digital output signals for use Configure the lamp by adding a System Output type signal with status set to Motors On State 4 The lamp is now ready for use and is lit in MOTORS ON mode 5 Installation of signal lamp from MON_LAMP signal Action DANGER Make sure that all supplies for electrical power hydraulic pressure and air p...

Page 84: ...s now ready for use and is lit in MOTORS ON mode 4 Further information Further information about the MOTORS ON MOTORS OFF mode may be found in the product manual for the controller Further information about how to set up I O system may be found in Technical reference manual System parameters 84 Product manual IRB 1300 3HAC070390 001 Revision G Copyright 2020 2022 ABB All rights reserved 3 Installa...

Page 85: ...cal stops on the manipulator Mechanical stops are and can be installed on the manipulator as limiting devices to ensure that the manipulator axis does not exceed the working range values set in the software parameters Note The mechanical stops are only installed as safety precaution to physically stop the robot from exceeding the working range set A collision with a mechanical stop always requires...

Page 86: ...0406 Mechanical stop axis 1 slider A Mechanical stop axis 1 fixed block B Axis 2 xx2000000407 Continues on next page 86 Product manual IRB 1300 3HAC070390 001 Revision G Copyright 2020 2022 ABB All rights reserved 3 Installation and commissioning 3 4 2 Mechanically restricting the working range ...

Page 87: ...408 Axis 4 xx2000000409 Mechanical stop axis 4 flange A Mechanical stop axis 4 slider B Continues on next page Product manual IRB 1300 87 3HAC070390 001 Revision G Copyright 2020 2022 ABB All rights reserved 3 Installation and commissioning 3 4 2 Mechanically restricting the working range Continued ...

Page 88: ...e the stops see Replacing the axis 1 mechanical stops on page 290 Replacing the axis 2 mechanical stops on page 292 Replacing the axis 3 mechanical stops on page 486 Replacing the axis 4 mechanical stops on page 489 88 Product manual IRB 1300 3HAC070390 001 Revision G Copyright 2020 2022 ABB All rights reserved 3 Installation and commissioning 3 4 2 Mechanically restricting the working range Conti...

Page 89: ... to IPA test result the robot IRB 1300 is suitable for use in Clean Room environment Classification of airborne molecular contamination Outgassing amount Parameter Classifica tion in ac cordance to ISO 14644 8 Norm based on 1m2and 1s g Total detec ted ng Performed test Temp C Test dura tion s Area m2 6 8 1 7E 07 2848 TVOC 23 3600 4 5E 03 3 8 1 7E 04 46524 TVOC 90 60 4 5E 03 Preparations before com...

Page 90: ... fitted on the robot by the customer low voltage signals and high voltage power supply protective ground Customer cables The customer cables also handle databus communication The customer cables also include the air hose See the product manual for the controller see document number in References on page 10 The hose for compressed air is integrated with the manipu lator cable harness Air hoses Robo...

Page 91: ...067446 002 Signal cable shielded 7 m 3HAC067446 003 Signal cable shielded 15 m Bending radius for static floor cables The minimum bending radius is 10 times the cable diameter for static floor cables A B xx1600002016 Diameter A Diameter x10 B Continues on next page Product manual IRB 1300 91 3HAC070390 001 Revision G Copyright 2020 2022 ABB All rights reserved 3 Installation and commissioning 3 6 ...

Page 92: ...ices xx2000000414 Installation of extra O rings For robots with protection class IP67 option 3350 670 For robots with protection type Clean Room option 3351 4 For robots with protection type Foundry Plus option 3352 10 Continues on next page 92 Product manual IRB 1300 3HAC070390 001 Revision G Copyright 2020 2022 ABB All rights reserved 3 Installation and commissioning 3 6 1 Robot cabling and conn...

Page 93: ...till require to do wiring by their own make sure to use R1 C1 connector in M12 A code 12p female type It is the responsibility of the users to guarantee the safety of the system when self prepared cables and connectors are used Customer cables Ethernet floor cable Article numberi Ethernet floor cable length 3HAC067447 002 7 m 3HAC067447 003 15 m i It is recommended to always use the Ethernet floor...

Page 94: ...the manipulator There are 4 inlets at the base R1 8 and 4 outlets M5 on the tubular A A A B B B C C D D xx2000001007 Value Number Description Connection Position 30 V 1 5 A 12 wires Customer power signal R1 R2 C1 A 30 V 1 A or 1 Gbits s 8 wires Customer power signal or Ethernet R1 R2 C2 B 42 V DC or 25 V AC 4 Ai 4 wires Customer power signal R1 R2 C3 C Outer diameter of air hose 6 mm 4 Max 6 bar A...

Page 95: ...net if any connector kits for tubular Art no Description Position 3HAC066098 001 M12 CPCS Male straight connector kits R2 C1 CP CS Connector kits 3HAC066099 001 M12 CPCS Male angled con nector kits 3HAC068412 001 M12 CPCS Male straight connector kits R2 C3 3HAC068413 001 M12 CPCS Male angled con nector kits 3HAC067413 001 M12 Ethernet CAT6a Male straight connector kits R2 C2 Ethernet 3HAC067414 00...

Page 96: ...r and dust proofing Always remember to refit the protection covers after removing them A A B C C xx2000001008 CP CS or Ethernet connector protection covers A SMB connector protection cover B Air hose connector protection covers C 96 Product manual IRB 1300 3HAC070390 001 Revision G Copyright 2020 2022 ABB All rights reserved 3 Installation and commissioning 3 6 2 Customer connections Continued ...

Page 97: ...robot with its normal program but with reduced speed Note It is recommended to reduce the speed to a value smaller than 30 of the normal pro grammed speed 1 The warm up duration varies according to the working cycle If the working cycle is not tough enough a longer warm up duration is required After 10 minutes or more run the robot with the normal speed again 2 Adjusting the speed and acceleration...

Page 98: ...ntation velocity which is always high in predefined velocities needs to be included in the ramping up 98 Product manual IRB 1300 3HAC070390 001 Revision G Copyright 2020 2022 ABB All rights reserved 3 Installation and commissioning 3 7 Start of robot in cold environments Continued ...

Page 99: ...t the robot motion during service activity is removed 3 Verify that the fixture and work piece are well secured if applicable 4 Verify that all safety equipment is installed as designed for the application 5 Verify that no personnel are inside the safeguarded space 6 If maintenance or repair has been done verify the function of the part that was main tained 7 Verify the application in the operatin...

Page 100: ...This page is intentionally left blank ...

Page 101: ...al safety aspects that must be read through as well as more specific safety information that describes the danger and safety risks when performing the procedures Read the chapter Safety on page 15 before performing any service work The maintenance must be done by qualified personnel in accordance with the safety requirements set forth in the applicable national and regional standards and regulatio...

Page 102: ...nning means more frequent maintenance activities SIS specified by the robot s SIS Service Information System A typical value is given for a typical work cycle but the value will differ depending on how hard each part is run The SIS used in OmniCore is further described in the Operating manual OmniCore Robots with the functionality Service Information System activated can show active counters in th...

Page 103: ...mal wear or contamination For robots with protection type Clean Room Inspect daily x Inspecting the robot Inspect the oil level in the actual gearbox if there is a suspected leakage after an oil change or a maintenance or repair activity where draining and filling oil is required x Inspecting the oil level in gearboxes Inspecting the information labels on page 108 x Inspecting the information labe...

Page 104: ...ne vi x Overhaul of complete robot i Regularly implies that the activity is to be performed regularly but the actual interval may not be specified by the robot manufacturer The interval depends on the operation cycle of the robot its working environment and movement pattern Generally the more contaminated environment the shorter intervals The more demanding movement pattern sharper bending cable h...

Page 105: ...normal usage in regard to movement most material handling applications and limited use of bending backwards mode of axis 3 ii Severe chemical or thermal environments or similar environments can result in shortened life expectancy iii Examples of extreme usage in regard to movement press tending very severe palletizing applications major use of axis 1 movement and major use of bending backwards of ...

Page 106: ...aning Do not point the water jet at connectors joints sealings or gaskets Do not use compressed air to clean the robot Do not use solvents that are not approved by ABB to clean the robot Do not spray from a distance closer than 0 4 m Do not remove any covers or other protective devices before cleaning the robot Cleaning methods This following table defines what cleaning methods are allowed for ABB...

Page 107: ...ng with water water cleaner 1 The following list defines the prerequisites Maximum water pressure at the nozzle 700 kN m2 7 bar I Fan jet nozzle should be used min 45 spread Minimum distance from nozzle to encapsulation 0 4 meters Maximum flow 20 liters minI I Typical tap water pressure and flow Cables Movable cables need to be able to move freely Remove waste material such as sand dust and chips ...

Page 108: ... A A B C D E F G H J xx2000000500 ABB logo A Read manual label also specifying warning labels B Instruction label C Brake release WEEE label D Rating label CE label and AbsAcc label E UL label F Calibration label G Foundry Plus label H Clean Room label J Required tools and equipment Visual inspection no tools are required Continues on next page 108 Product manual IRB 1300 3HAC070390 001 Revision G...

Page 109: ...upply to the robot before entering the safeguarded space 1 Inspect the labels located as shown in the figures 2 Replace any missing or damaged labels 3 Product manual IRB 1300 109 3HAC070390 001 Revision G Copyright 2020 2022 ABB All rights reserved 4 Maintenance 4 4 1 Inspecting the information labels Continued ...

Page 110: ...red if the spare part needs to be replaced These are specified in the replacement procedure Inspection robot cabling Use this procedure to inspect the robot cabling Note Action DANGER Turn off all electric power supply to the robot hydraulic pressure supply to the robot air pressure supply to the robot Before entering the robot working area 1 Visually inspect the control cabling between the robot ...

Page 111: ...k see Cut the paint or surface on the robot before replacing parts on page 145 Location of mechanical stops Axis 1 xx2000000406 Mechanical stop axis 1 slider A Mechanical stop axis 1 fixed block B Continues on next page Product manual IRB 1300 111 3HAC070390 001 Revision G Copyright 2020 2022 ABB All rights reserved 4 Maintenance 4 4 3 Inspecting mechanical stops ...

Page 112: ...300 11 0 9 IRB 1300 7 1 4 and IRB 1300 12 1 4 xx2000000471 xx2000000408 Continues on next page 112 Product manual IRB 1300 3HAC070390 001 Revision G Copyright 2020 2022 ABB All rights reserved 4 Maintenance 4 4 3 Inspecting mechanical stops Continued ...

Page 113: ...stop axis 1 fixed block Replace if damaged 3HAC065755 001 Mechanical stop axis 1 slider Replace if damaged 3HAC065651 001 Mechanical stop block A Used for axis 3 of IRB 1300 10 1 15 Replace if damaged 3HAC065671 001 Mechanical stop block B Replace if damaged 3HAC065805 001 Mechanical stop axis 4 flange Replace if damaged 3HAC065804 001 Mechanical stop axis 4 slider Continues on next page Product m...

Page 114: ...off all electric power supply hydraulic pressure supply air pressure supply to the robot before entering the robot working area 1 CAUTION For robots with protection type Clean Room Always cut the paint with a knife and grind the paint edge when disassembling parts of the robot See Cut the paint or surface on the robot before replacing parts on page 145 2 See figures in Location of mechanical stops...

Page 115: ...int or surface on the robot before replacing parts on page 145 Location of timing belts Note It is recommended to inspect the axis 4 timing belt when replacing the motor Continues on next page Product manual IRB 1300 115 3HAC070390 001 Revision G Copyright 2020 2022 ABB All rights reserved 4 Maintenance 4 4 4 Inspecting timing belts ...

Page 116: ...n in the figures Location Axis xx2000001490 3 xx2000001491 4 5 Continues on next page 116 Product manual IRB 1300 3HAC070390 001 Revision G Copyright 2020 2022 ABB All rights reserved 4 Maintenance 4 4 4 Inspecting timing belts Continued ...

Page 117: ...dure Timing belt tension The table describes the timing belt tension Frequency Force Axis New timing belt Used timing belti New timing belt Used timing belti 87 8 92 1 Hz 73 4 78 5 Hz 43 1 47 4 N 30 2 34 5 N Axis 3 209 219 Hz 175 187 Hz 23 9 26 2 N 16 7 19 1 N Axis 4 70 8 74 3 Hz 59 3 63 4 Hz 13 8 15 2 N 9 68 11 1 N Axis 5 Continues on next page Product manual IRB 1300 117 3HAC070390 001 Revision ...

Page 118: ...crease 30 Inspecting timing belts Use this procedure to inspect timing belts Information Action DANGER Turn off all electric power supply hydraulic pressure supply air pressure supply to the robot before entering the robot working area 1 Gain access to each timing belt by removing the cover 2 Check the timing belts for damage or wear 3 Check the timing belt pulleys for damage 4 If any damage or we...

Page 119: ...d by connector interface location The cable packages are located as shown in the figures Bottom connector interface Rear connector interface Robot type xx2000001261 xx2000001260 IRB 1300 11 0 9 xx2000001259 xx2000001258 IRB 1300 10 1 15 Continues on next page Product manual IRB 1300 119 3HAC070390 001 Revision G Copyright 2020 2022 ABB All rights reserved 4 Maintenance 4 5 1 Lubricating the cable ...

Page 120: ...t procedure Required consumables Note Article number Consumable FM 222 3HAC029132 001 Grease Lubricating the cable package Use this procedure to lubricate the cable package Information Action DANGER Turn off all electric power supply hydraulic pressure supply air pressure supply to the robot before entering the robot working area 1 Gain access to the cable package by remov ing the covers 2 Continu...

Page 121: ...ed the part must be replaced 4 Apply grease to the cable package cover all moving area of the package 5 Apply grease to the covers that have con tacting area with the cable package 6 Product manual IRB 1300 121 3HAC070390 001 Revision G Copyright 2020 2022 ABB All rights reserved 4 Maintenance 4 5 1 Lubricating the cable package Continued ...

Page 122: ...siness Portal www abb com myABB Note Article number Spare part Battery includes protection cir cuits Only replace with the spe cified spare part or an ABB ap proved equivalent 3HAC044075 001 Battery pack Required tools and equipment Note Article number Equipment Content is defined in section Standard toolkit on page 759 Standard toolkit Continues on next page 122 Product manual IRB 1300 3HAC070390...

Page 123: ...h calibration routine to use and take actions accordingly prior to beginning the repair procedure 1 xx2000001520 Jog all axes to zero position 2 DANGER Turn off all electric power supply hydraulic pressure supply air pressure supply to the robot before entering the safeguarded space 3 CAUTION For robots with protection type Clean Room Always cut the paint with a knife and grind the paint edge when...

Page 124: ...000001503 Remove the SMB cover attachment screws and carefully open the cover CAUTION Clean cover from metal residues before opening Metal residues can cause shortage on the boards which can result in hazardous failures CAUTION There are cabling attached to the cover The cover cannot be removed completely until the connectors are removed 4 xx2000001504 Disconnect the connectors SMB J1 SMB J2 R2 SM...

Page 125: ... in section The unit is sensitive to ESD on page 50 2 CAUTION For robots with protection type Clean Room Always cut the paint with a knife and grind the paint edge when disassembling parts of the robot See Cut the paint or surface on the robot before replacing parts on page 145 3 Continues on next page Product manual IRB 1300 125 3HAC070390 001 Revision G Copyright 2020 2022 ABB All rights reserve...

Page 126: ... The unit is sensitive to ESD Before handling the unit read the safety information in section The unit is sensitive to ESD on page 50 1 For robots with protection type Clean Room 2 Clean the joints that have been opened and wipe the parts free from particles with spirit on a lint free Continues on next page 126 Product manual IRB 1300 3HAC070390 001 Revision G Copyright 2020 2022 ABB All rights re...

Page 127: ...e Clean Room 2 Clean the joints that have been opened and wipe the parts free from particles with spirit on a lint free Gasket for SMB cover 3HAC067820 001 xx2000002508 For robots with protection class IP67 option 3350 670 For robots with protection type Clean Room option 3351 4 For robots with protection type Foundry Plus option 3352 10 Check the gasket Replace if damaged 3 Continues on next page...

Page 128: ...e 2 6 Nm xx2000001503 Concluding procedure Note Action For robots with protection type Clean Room 1 Clean and paint the joints that have been opened See Cut the paint or surface on the robot before replacing parts on page 145 Note After all repair work wipe the Clean Room robot free from particles with spirit on a lint free cloth Calibration is detailed in section Calibration on page 713 Recalibra...

Page 129: ... type of lubrication article number as well as the amount in the specific gearbox can be found in Technical reference manual Lubrication in gearboxes available for registered users on myABB Business Portal www abb com myABB Location of gearboxes The figure shows the location of the gearboxes xx2000001510 Gearbox axis 1 inside base A Gearbox axis 2 B Gearbox axis 3 C Gearbox axis 4 inside housing D...

Page 130: ... filling oil to axis 1 gearbox Connector specification G3 8 Connector for quick coupling with outlet pipe Includes pump with outlet pipe Oil dispenser Content is defined in section Standard toolkit on page 759 Standard toolkit Consumable Note Material Information about the oil is found in Technical refer ence manual Lubrication in gearboxes Lubricating oil See Type and amount of oil in gearboxes o...

Page 131: ...ering the safeguarded space 2 CAUTION For robots with protection type Clean Room Always cut the paint with a knife and grind the paint edge when disassembling parts of the robot See Cut the paint or surface on the robot before replacing parts on page 145 3 Draining oil of axis 1 gearbox Note Action WARNING Handling gearbox oil involves several safety risks see Gearbox lubricants oil or grease on p...

Page 132: ...g on base 5 WARNING Used oil is hazardous material and must be disposed of in a safe way See Decom missioning on page 747 for more informa tion 6 Note Draining is time consuming Elapsed time varies depending on the temperature of the oil Drain the gearbox oil 7 Remove the quick coupling connector and clean the pipe after the oil is drained Note There will be some oil left in the gearbox after drai...

Page 133: ...lling and the other for venting 3 WARNING Overfilling of gearbox lubricant can lead to internal over pressure inside the gearbox which in turn may damage seals and gaskets completely press out seals and gaskets prevent the robot from moving freely 4 Type of oil and total amount is detailed in Technical reference manual Lubrication in gearboxes Refill the gearbox with oil Note The amount of oil to ...

Page 134: ... replacing parts on page 145 Note After all repair work wipe the Clean Room robot free from particles with spirit on a lint free cloth DANGER Make sure all safety requirements are met when performing the first test run 2 134 Product manual IRB 1300 3HAC070390 001 Revision G Copyright 2020 2022 ABB All rights reserved 4 Maintenance 4 7 2 Changing oil axis 1 gearbox Continued ...

Page 135: ... the complete amount of oil Oil collecting vessel Includes pump with outlet pipe Oil dispenser Content is defined in section Standard toolkit on page 759 Standard toolkit Consumable Note Material Information about the oil is found in Technical refer ence manual Lubrication in gearboxes Lubricating oil See Type and amount of oil in gearboxes on page129 Continues on next page Product manual IRB 1300...

Page 136: ...s 2 67 5 Axis 3 0 Axis 4 0 Axis 5 0 Axis 6 No significance 2 DANGER Turn off all electric power supply hydraulic pressure supply air pressure supply to the robot before entering the safeguarded space 3 CAUTION For robots with protection type Clean Room Always cut the paint with a knife and grind the paint edge when disassembling parts of the robot See Cut the paint or surface on the robot before r...

Page 137: ...e out 2 xx2000001515 Place the oil collecting vessel underneath the oil plug draining 3 xx2000001516 Remove the oil plug draining 4 Plug a clean pipe to the oil plug draining with the other end to the oil collecting ves sel 5 xx2000001517 Remove the oil plug venting and keep it opened to speed up the drainage 6 Continues on next page Product manual IRB 1300 137 3HAC070390 001 Revision G Copyright ...

Page 138: ...rque 10 Nm Refit oil plugs 10 Filling oil into the axis 2 gearbox Use this procedure to refill the gearbox with oil Refilling oil to axis 2 gearbox Note Action WARNING Handling gearbox oil involves several safety risks see Gearbox lubricants oil or grease on page 29 1 CAUTION The gearbox can contain an excess of pressure that can be hazardous Open the oil plug carefully in order to let the excess ...

Page 139: ...the gearbox with oil Note The amount of oil to be filled depends on the amount previously being drained 5 CAUTION Oil filling must be slow to make sure air venting is fluent xx2000001580 Inspect the oil level by measuring the level at the upper oil plug hole Required oil level within the range of 64 mm to 69 mm below the edge of the oil plug hole CAUTION The oil level sinks when the oil fills all ...

Page 140: ... See Cut the paint or surface on the robot before replacing parts on page 145 Note After all repair work wipe the Clean Room robot free from particles with spirit on a lint free cloth DANGER Make sure all safety requirements are met when performing the first test run 2 140 Product manual IRB 1300 3HAC070390 001 Revision G Copyright 2020 2022 ABB All rights reserved 4 Maintenance 4 7 3 Changing oil...

Page 141: ...is is particularly important for safety equipment to maintain the safety integrity of the installation Safety information Make sure to read through the chapter Safety on page 15 before commencing any service work Note The robot should be secured with the transportation brackets during removing from refitting to the foundation Note If the IRB 1300 is connected to power always make sure that the IRB...

Page 142: ...fore actual mounting The fitting of sealings and gears must be carried out on clean workbenches Use a protective sleeve for the main lip during mounting when sliding over threads keyways or other sharp edges Note Action Check the sealing to ensure that The sealing is of the correct type There is no damage on the main lip 1 Inspect the shaft surface before mounting If scratches or damage are found ...

Page 143: ...and the main lip with grease If the sealing is without dust lip just lubricate the main lip with a thin layer of grease 3 A xx2000000072 A Gap Mount the sealing correctly with a mounting tool Never hammer directly on the sealing as this may result in leakage 4 Make sure that no grease is left on the robot surface 5 Continues on next page Product manual IRB 1300 143 3HAC070390 001 Revision G Copyri...

Page 144: ...tening the flange joint 4 O rings The following procedure describes how to fit o rings Note Action Ensure that the correct o ring size is used 1 Defective o rings including damaged or deformed o rings may not be used Check the o ring for surface defects burrs shape accuracy or deformation 2 Check the o ring grooves 3 The grooves must be geometrically correct and should be free of pores and contami...

Page 145: ...Cleaning agent Knife Lint free cloth White 3HAC036639 001 Touch up paint Clean Room Hy gienic Graphite White 3HAC067974 001 Touch up paint Standard Foundry Plus Removing Description Action xx0900000121 Cut the paint with a knife in the joint between the part that will be removed and the struc ture to avoid that the paint cracks 1 Carefully grind the paint edge that is left on the structure to a sm...

Page 146: ...time 10 minutes 3HAC036639 001 Use Touch up paint Clean Room Hygienic white to paint any damaged surfaces Note Always read the instruction in the product data sheet in the paint repair kit for Clean Room Hygienic 6 Note After all repair work wipe the robot free from particles with spirit on a lint free cloth 146 Product manual IRB 1300 3HAC070390 001 Revision G Copyright 2020 2022 ABB All rights r...

Page 147: ...e to the robot Elimination To eliminate the danger after service work has been performed inside the SMB recess follow the procedure below Action Make sure the power is turned off 1 Remove the push button guard if necessary 2 Verify that the push buttons of the brake release unit are working by pressing them down one by one 3 Make sure none of the buttons are jammed in the tube If a button gets jam...

Page 148: ...d optional Ethernet must be disconnected inside the tubular before the cable package can be removed As standard feature the connector interface is located at the rear of the base The interface can also be bottom mounted as an option This section describes both configurations The cable packages are located as shown in the figures Bottom connector interface Rear connector interface Robot type xx2000...

Page 149: ...2 1 4 Required spare parts Note The spare part numbers that are listed in the table can be out of date See the latest spare parts of the IRB 1300 via myABB Business Portal www abb com myABB Continues on next page Product manual IRB 1300 149 3HAC070390 001 Revision G Copyright 2020 2022 ABB All rights reserved 5 Repair 5 3 1 Replacing the cable package Continued ...

Page 150: ...ose without Ethernet Used with IRB 1300 10 1 15 Used with protection classes IP40 and IP67 Used with protection type Foundry Plus 3HAC073302 001 Main cable harness M CP CS and air hose with Ethernet Used with IRB 1300 7 1 4 and IRB 1300 12 1 4 Used with protection classes IP40 and IP67 Used with protection type Foundry Plus 3HAC073297 001 Main cable harness L basic Used with IRB 1300 7 1 4 and IRB...

Page 151: ...1300 10 1 15 Used with protection type Clean Room 3HAC077832 001 Main cable harness M Clean Room CP CS and air hose with Ethernet Used with IRB 1300 7 1 4 and IRB 1300 12 1 4 Used with protection type Clean Room 3HAC077827 001 Main cable harness L basic Clean Room Used with IRB 1300 7 1 4 and IRB 1300 12 1 4 Used with protection type Clean Room 3HAC077828 001 Main cable harness L Clean Room CP CS ...

Page 152: ...1 Swing top cover Used with protection classes IP40 and IP67 Used with protection type Foundry Plus 3HAC073090 001 Base cover Used with protection classes IP40 and IP67 Used with protection type Foundry Plus 3HAC076475 001 SMB cover Used with protection classes IP40 and IP67 Used with protection type Foundry Plus 3HAC073296 001 Brake release unit Used with protection type Clean Room 3HAC077823 001...

Page 153: ...AC067834 001 Gasket for tubular cover Not used with protection class IP40 Replace if damaged 3HAC067833 001 Gasket for housing cover Not used with protection class IP40 Replace if damaged 3HAC067832 001 Gasket for lower arm cover Used for IRB 1300 11 0 9 Not used with protection class IP40 Replace if damaged 3HAC067822 001 Gasket for swing support short Used for IRB 1300 10 1 15 IRB 1300 7 1 4 and...

Page 154: ... flange also for reference calibration since the mount ing flange is used for installation of the calibration tool Decide which calibration routine to use for calibrating the robot Reference calibration External cable packages DressPack and tools can stay fitted on the robot Fine calibration All external cable packages DressPack and tools must be removed from the robot 1 Follow the instructions gi...

Page 155: ...ic power supply hydraulic pressure supply air pressure supply to the robot before entering the safeguarded space 3 CAUTION For robots with protection type Clean Room Always cut the paint with a knife and grind the paint edge when disassembling parts of the robot See Cut the paint or surface on the robot before replacing parts on page 145 4 Removing the covers Note Action DANGER Make sure that all ...

Page 156: ...ng the cables in the tubular Note Action DANGER Make sure that all supplies for electrical power hydraulic pressure and air pressure are turned off 1 CAUTION For robots with protection type Clean Room Always cut the paint with a knife and grind the paint edge when disassembling parts of the robot See Cut the paint or surface on the robot before replacing parts on page 145 2 xx2000001530 Cut the ca...

Page 157: ...ype Clean Room Always cut the paint with a knife and grind the paint edge when disassembling parts of the robot See Cut the paint or surface on the robot before replacing parts on page 145 2 xx2000001532 Disconnect the connectors MP6 FB6 Tip Take photos of the connector and cable position before disconnecting them to have as a reference when reconnecting 3 xx2000001533 Snap loose and remove the ma...

Page 158: ...2000001534 Disconnect the connectors MP5 FB5 Tip Take photos of the connector and cable position before disconnecting them to have as a reference when reconnecting 3 xx2000001535 Snap loose and remove the male head of the connectors from the connector plate 4 Disconnecting CP CS cabling if equipped Note Action DANGER Make sure that all supplies for electrical power hydraulic pressure and air press...

Page 159: ...537 Snap loose and remove the male head of the connectors from the connector plate 4 Separating the cable package from the tubular Note Action DANGER Make sure that all supplies for electrical power hydraulic pressure and air pressure are turned off 1 CAUTION For robots with protection type Clean Room Always cut the paint with a knife and grind the paint edge when disassembling parts of the robot ...

Page 160: ...type Clean Room Always cut the paint with a knife and grind the paint edge when disassembling parts of the robot See Cut the paint or surface on the robot before replacing parts on page 145 2 xx2000001538 Remove the screws and carefully open the cover CAUTION There is cabling attached to the cover The cover cannot be removed completely until the connect ors are removed 3 Continues on next page 160...

Page 161: ... when reconnecting 5 Tip The connector clip has to be pressed 1 and pushed forward 2 to separate the J2 C2 for Ethernet cabling xx1800002943 Disconnecting the axis 4 motor connectors Note Action DANGER Make sure that all supplies for electrical power hydraulic pressure and air pressure are turned off 1 Continues on next page Product manual IRB 1300 161 3HAC070390 001 Revision G Copyright 2020 2022...

Page 162: ...ctors are re move from the plate 3 xx2000001543 Cut the cable strap Note The motor cablings have another strap fixed Al ways cut the strap that fixes the cable package to the plate 4 xx2000001544 Disconnect the connectors MP4 FB4 Tip Take photos of the connector and cable position before disconnecting them to have as a reference when reconnecting 5 xx2000001545 Snap loose and remove the male head ...

Page 163: ...all supplies for electrical power hydraulic pressure and air pressure are turned off 1 CAUTION For robots with protection type Clean Room Always cut the paint with a knife and grind the paint edge when disassembling parts of the robot See Cut the paint or surface on the robot before replacing parts on page 145 2 xx2000001548 Remove the connector plate CAUTION Be aware of the cablings that are atta...

Page 164: ...age from the lower arm Note Action DANGER Make sure that all supplies for electrical power hydraulic pressure and air pressure are turned off 1 CAUTION For robots with protection type Clean Room Always cut the paint with a knife and grind the paint edge when disassembling parts of the robot See Cut the paint or surface on the robot before replacing parts on page 145 2 Continues on next page 164 Pr...

Page 165: ...rical power hydraulic pressure and air pressure are turned off 1 CAUTION For robots with protection type Clean Room Always cut the paint with a knife and grind the paint edge when disassembling parts of the robot See Cut the paint or surface on the robot before replacing parts on page 145 2 Continues on next page Product manual IRB 1300 165 3HAC070390 001 Revision G Copyright 2020 2022 ABB All rig...

Page 166: ...e that all supplies for electrical power hydraulic pressure and air pressure are turned off 1 ELECTROSTATIC DISCHARGE ESD The unit is sensitive to ESD Before handling the unit read the safety information in section The unit is sensitive to ESD on page 50 2 Continues on next page 166 Product manual IRB 1300 3HAC070390 001 Revision G Copyright 2020 2022 ABB All rights reserved 5 Repair 5 3 1 Replaci...

Page 167: ...000001504 Disconnect the connectors SMB J1 SMB J2 R2 SMB Tip Take photos of the connector and cable position before disconnecting them to have as a reference when reconnecting 5 Remove the SMB cover completely from the base 6 Disconnecting the axis 1 motor connectors Note Action DANGER Make sure that all supplies for electrical power hydraulic pressure and air pressure are turned off 1 CAUTION For...

Page 168: ...the connector plate 5 Opening the connector interface plate Notice that the procedure differs depending on if the connector interface is located either at the rear or at the bottom of the base Note Action DANGER Make sure that all supplies for electrical power hydraulic pressure and air pressure are turned off 1 CAUTION For robots with protection type Clean Room Always cut the paint with a knife a...

Page 169: ... sure that all supplies for electrical power hydraulic pressure and air pressure are turned off 1 CAUTION For robots with protection type Clean Room Always cut the paint with a knife and grind the paint edge when disassembling parts of the robot See Cut the paint or surface on the robot before replacing parts on page 145 2 xx2000001573 Valid for cabling with bottom interface option 3309 1 Remove t...

Page 170: ...t is sensitive to ESD on page 50 2 Cut the cable strap 3 xx2100001480 Disconnect the connector R2 BRU Tip Take photos of the connector and cable position before disconnecting them to have as a reference when reconnecting 4 Pulling out the cable package Note Action DANGER Make sure that all supplies for electrical power hydraulic pressure and air pressure are turned off 1 Continues on next page 170...

Page 171: ...figure Note Slip out the cable protectors while pulling out the cable package 5 Slip out the cable protectors 6 Refitting the cable package Use these procedures to refit the cable package Securing the cable package in the base Note Action For robots with protection type Clean Room 1 Clean the joints that have been opened and wipe the parts free from particles with spirit on a lint free Wrap the co...

Page 172: ...00001566 Insert the cable package up through the axis 1 gearbox and out from the swing top cover side CAUTION Make sure that no cables or hoses are twisted or strained Reroute if necessary 4 Screw M4x8 12 9 Lafre 2C2B FC6 9 2 pcs Refit the connector plate to the cable package 5 Tightening torque 2 6 Nm xx2000001564 Continues on next page 172 Product manual IRB 1300 3HAC070390 001 Revision G Copyri...

Page 173: ...from particles with spirit on a lint free xx2000001561 Insert the male header of the motor connectors to the connector plate 2 xx2000001560 Reconnect the connectors FB1 MP1 Tip See the number markings on the connectors for help to find the corresponding connector 3 Route and secure the cabling with cable straps CAUTION Correct cable routing is highly important If the cables are routed and secured ...

Page 174: ...lint free xx2000001745 Route the cable package through the swing sup port Make sure that the air hoses are facing the SMB side in the hollow tube of axis 1 gearbox the cable package is out from the hole near the base rear as circled in the figure CAUTION Make sure that no cables or hoses are twisted or strained Reroute if necessary 2 xx2000001747 Continues on next page 174 Product manual IRB 1300 ...

Page 175: ... the cable twisting way the axis 2 motor cablings are routed togeth er with the main cable package up to the lower arm CAUTION Make sure that no cables or hoses are twisted or strained Reroute if necessary 4 Screw M4x8 12 9 Lafre 2C2B FC6 9 2 pcs for each bracket on cable package and 2 pcs on swing Refit the cable brackets to the cable package first and then to the swing 5 Tightening torque 2 6 Nm...

Page 176: ...ean Room 1 Clean the joints that have been opened and wipe the parts free from particles with spirit on a lint free Screw M4x8 12 9 Lafre 2C2B FC6 9 2 pcs Refit the connector plate to the cable package 2 Tightening torque 2 6 Nm xx2000001554 Continues on next page 176 Product manual IRB 1300 3HAC070390 001 Revision G Copyright 2020 2022 ABB All rights reserved 5 Repair 5 3 1 Replacing the cable pa...

Page 177: ...up into the housing CAUTION Make sure that no cables or hoses are twisted or strained Reroute if necessary 4 Reconnecting the axis 2 and 3 motor connectors Note Action For robots with protection type Clean Room 1 Clean the joints that have been opened and wipe the parts free from particles with spirit on a lint free xx2000001551 Insert the male header of the motor connectors to the connector plate...

Page 178: ...responding connector 4 Screw M4x8 12 9 Lafre 2C2B FC6 9 2 pcs Refit the connector plate to the lower arm 5 Tightening torque 2 6 Nm xx2000001548 Securing the cable package in the lower arm Note Action For robots with protection type Clean Room 1 Clean the joints that have been opened and wipe the parts free from particles with spirit on a lint free Continues on next page 178 Product manual IRB 130...

Page 179: ...bots with protection type Clean Room 1 Clean the joints that have been opened and wipe the parts free from particles with spirit on a lint free Plastic cable protector axis 4 Slip the axis 4 cable protector over the cable package 2 3HAC064694 001 xx2000001570 Continues on next page Product manual IRB 1300 179 3HAC070390 001 Revision G Copyright 2020 2022 ABB All rights reserved 5 Repair 5 3 1 Repl...

Page 180: ...ean the joints that have been opened and wipe the parts free from particles with spirit on a lint free Screw M4x8 12 9 Lafre 2C2B FC6 9 4 pcs Refit the axis 4 cable protector 2 Tightening torque 2 6 Nm xx2000001546 Reconnecting the axis 4 motor connectors Note Action For robots with protection type Clean Room 1 Clean the joints that have been opened and wipe the parts free from particles with spir...

Page 181: ...ng is highly important If the cables are routed and secured incorrectly the cables can be damaged 4 Screw M4x8 12 9 Lafre 2C2B FC6 9 2 pcs Refit the connector plate 5 Tightening torque 2 6 Nm xx2000001542 Routing the cable package in the tubular Note Action For robots with protection type Clean Room 1 Clean the joints that have been opened and wipe the parts free from particles with spirit on a li...

Page 182: ...h protection type Clean Room 1 Clean the joints that have been opened and wipe the parts free from particles with spirit on a lint free xx2000001539 Reconnect the air hoses Note See the number markings on the air hoses for help to find the corresponding air hoses 2 xx2000001540 For robots with Ethernet cabling Access the connector from the process hub and reconnect the connector J1 C2 Tip See the ...

Page 183: ...J1 C3 Tip See the number markings on the connectors for help to find the corresponding connector 3 Reconnecting the axis 5 motor connectors Note Action For robots with protection type Clean Room 1 Clean the joints that have been opened and wipe the parts free from particles with spirit on a lint free xx2000001535 Insert the male header of the motor connectors to the connector plate 2 Continues on ...

Page 184: ...sert the male header of the motor connectors to the connector plate 2 xx2000001532 Reconnect the connectors FB6 MP6 Tip See the number markings on the connectors for help to find the corresponding connector 3 Refitting the process hub Note Action For robots with protection type Clean Room 1 Clean the joints that have been opened and wipe the parts free from particles with spirit on a lint free Con...

Page 185: ...the seal bolts Replace if damaged 3 Route and secure the cabling with cable straps CAUTION Correct cable routing is highly important If the cables are routed and secured incorrectly the cables can be damaged 4 Screw M4x10 12 9 Lafre 2C2B FC6 9 4 pcs Refit the process hub 5 Tightening torque 2 6 Nm xx2000001538 Securing the cable package in the tubular Note Action For robots with protection type Cl...

Page 186: ...le straps CAUTION Correct cable routing is highly important If the cables are routed and secured incorrectly the cables can be damaged 4 Reconnecting the brake release connector Note Action ELECTROSTATIC DISCHARGE ESD The unit is sensitive to ESD Before handling the unit read the safety information in section The unit is sensitive to ESD on page 50 1 Continues on next page 186 Product manual IRB 1...

Page 187: ...pe Clean Room 1 Clean the joints that have been opened and wipe the parts free from particles with spirit on a lint free Gasket for base cover 3HAC067819 001 xx2000002526 For robots with protection class IP67 option 3350 670 For robots with protection type Clean Room option 3351 4 For robots with protection type Foundry Plus option 3352 10 Check the gasket Replace if damaged 2 xx2000001574 Reconne...

Page 188: ...ipe the parts free from particles with spirit on a lint free Gasket for SMB cover 3HAC067820 001 xx2000002508 For robots with protection class IP67 option 3350 670 For robots with protection type Clean Room option 3351 4 For robots with protection type Foundry Plus option 3352 10 Check the gasket Replace if damaged 3 Tightening torque 0 3 Nm xx2000001504 Reconnect the connectors SMB J1 SMB J2 R2 S...

Page 189: ...lint free Gasket for base cover 3HAC067819 001 xx2000002514 For robots with protection class IP67 option 3350 670 For robots with protection type Clean Room option 3351 4 For robots with protection type Foundry Plus option 3352 10 Check the gasket Replace if damaged 2 Seal bolt 3HAC032050 001 xx2000002515 For robots with protection class IP67 option 3350 670 For robots with protection type Clean R...

Page 190: ...orque 2 6 Nm Valid for cabling with rear inter face xx2000001558 Valid for cabling with bottom inter face option 3309 1 xx2000001575 Refitting the covers Note Action For robots with protection type Clean Room 1 Clean the joints that have been opened and wipe the parts free from particles with spirit on a lint free Continues on next page 190 Product manual IRB 1300 3HAC070390 001 Revision G Copyrig...

Page 191: ...the covers Gasket for tubular support cover A Gasket for housing cover B Gasket for lower arm support cover C Gasket for swing support cover D Gasket for swing top cover E 5 Tightening torque 2 6 Nm xx2000001572 Concluding procedure Note Action For robots with protection type Clean Room 1 Clean and paint the joints that have been opened See Cut the paint or surface on the robot before replacing pa...

Page 192: ... sure all safety requirements are met when performing the first test run 3 192 Product manual IRB 1300 3HAC070390 001 Revision G Copyright 2020 2022 ABB All rights reserved 5 Repair 5 3 1 Replacing the cable package Continued ...

Page 193: ...Note Article number Spare part 3HAC063968 001 Serial measurement unit Used with protection classes IP40 and IP67 Used with protection type Foundry Plus 3HAC076475 001 SMB cover Used with protection type Clean Room 3HAC077839 001 SMB cover Clean Room Not used with protection class IP40 Replace if damaged 3HAC067820 001 Gasket for SMB cover Continues on next page Product manual IRB 1300 193 3HAC0703...

Page 194: ...ed for installation of the calibration tool Decide which calibration routine to use for calibrating the robot Reference calibration External cable packages DressPack and tools can stay fitted on the robot Fine calibration All external cable packages DressPack and tools must be removed from the robot 1 Follow the instructions given in the refer ence calibration routine on the FlexPendant to create ...

Page 195: ...ot before entering the safeguarded space 3 CAUTION For robots with protection type Clean Room Always cut the paint with a knife and grind the paint edge when disassembling parts of the robot See Cut the paint or surface on the robot before replacing parts on page 145 4 Disconnecting the SMB connectors Note Action DANGER Make sure that all supplies for electrical power hydraulic pressure and air pr...

Page 196: ...esidues can cause shortage on the boards which can result in hazardous failures CAUTION There are cabling attached to the cover The cover cannot be removed completely until the connectors are removed 4 xx2000001504 Disconnect the connectors SMB J1 SMB J2 R2 SMB Tip Take photos of the connector and cable position before disconnecting them to have as a reference when reconnecting 5 Remove the SMB co...

Page 197: ...age 145 3 xx2000001505 Disconnect the battery cable 4 xx2000001506 Remove the battery pack by cutting the cable strap 5 Removing the SMB unit Note Action DANGER Make sure that all supplies for electrical power hydraulic pressure and air pressure are turned off 1 ELECTROSTATIC DISCHARGE ESD The unit is sensitive to ESD Before handling the unit read the safety information in section The unit is sens...

Page 198: ...LECTROSTATIC DISCHARGE ESD The unit is sensitive to ESD Before handling the unit read the safety information in section The unit is sensitive to ESD on page 50 1 For robots with protection type Clean Room 2 Clean the joints that have been opened and wipe the parts free from particles with spirit on a lint free Screw M3x8 12 9 Lafre 2C2B FC6 9 4 pcs Refit the screws 3 Tightening torque 1 3 Nm xx200...

Page 199: ...sing the cable strap 3 xx2000001505 Reconnect the battery cable 4 Reconnecting the SMB connectors Note Action ELECTROSTATIC DISCHARGE ESD The unit is sensitive to ESD Before handling the unit read the safety information in section The unit is sensitive to ESD on page 50 1 For robots with protection type Clean Room 2 Clean the joints that have been opened and wipe the parts free from particles with...

Page 200: ...SMB Tip See the number markings on the connectors for help to find the corresponding connector 4 Route and secure the cabling with cable straps CAUTION Correct cable routing is highly important If the cables are routed and secured incorrectly the cables can be damaged 5 Screw M4x10 12 9 Lafre 2C2B FC6 9 6 pcs Refit the SMB cover to the base 6 Tightening torque 2 6 Nm xx2000001503 Continues on next...

Page 201: ...ter all repair work wipe the Clean Room robot free from particles with spirit on a lint free cloth Calibration is detailed in section Calibration on page 713 Recalibrate the robot 2 DANGER Make sure all safety requirements are met when performing the first test run 3 Product manual IRB 1300 201 3HAC070390 001 Revision G Copyright 2020 2022 ABB All rights reserved 5 Repair 5 3 2 Replacing the SMB u...

Page 202: ...w abb com myABB Note Article number Spare part Used with protection classes IP40 and IP67 Used with protection type Foundry Plus 3HAC073296 001 Brake release unit Used with protection type Clean Room 3HAC077826 001 Brake release unit Clean Room Not used with protection class IP40 Replace if damaged 3HAC070274 001 Gasket for brake release unit Continues on next page 202 Product manual IRB 1300 3HAC...

Page 203: ...e removed from the robot 1 Follow the instructions given in the refer ence calibration routine on the FlexPendant to create reference values If the robot is to be calibrated with refer ence calibration Find previous reference values for the axis or create new reference values These val ues are to be used after the repair proced ure is completed for calibration of the ro bot Creating new values req...

Page 204: ...aint or surface on the robot before replacing parts on page 145 4 Removing the brake release unit Note Action DANGER Make sure that all supplies for electrical power hydraulic pressure and air pressure are turned off 1 ELECTROSTATIC DISCHARGE ESD The unit is sensitive to ESD Before handling the unit read the safety information in section The unit is sensitive to ESD on page 50 2 Continues on next ...

Page 205: ...onnector R2 BRU Tip Take photos of the connector and cable position before disconnecting them to have as a reference when reconnecting 6 Remove the brake release unit completely from the base 7 Refitting the brake release unit Use these procedures to refit the brake release unit Refitting the brake release unit Note Action ELECTROSTATIC DISCHARGE ESD The unit is sensitive to ESD Before handling th...

Page 206: ...ber markings on the connectors for help to find the corresponding connector 4 Route and secure the cabling with cable straps CAUTION Correct cable routing is highly important If the cables are routed and secured incorrectly the cables can be damaged 5 Screw M4x10 12 9 Lafre 2C2B FC6 9 6 pcs Refit the brake release unit 6 Tightening torque 2 6 Nm xx2000001577 Continues on next page 206 Product manu...

Page 207: ...ll repair work wipe the Clean Room robot free from particles with spirit on a lint free cloth Calibration is detailed in section Calibration on page 713 Recalibrate the robot 2 DANGER Make sure all safety requirements are met when performing the first test run 3 Product manual IRB 1300 207 3HAC070390 001 Revision G Copyright 2020 2022 ABB All rights reserved 5 Repair 5 3 3 Replacing the brake rele...

Page 208: ...Business Portal www abb com myABB Note Article number Spare part Used for IRB 1300 11 0 9 IRB 1300 10 1 15 and IRB 1300 7 1 4 Used with protection classes IP40 and IP67 3HAC073029 001 Base Used for IRB 1300 11 0 9 IRB 1300 10 1 15 and IRB 1300 7 1 4 Used with protection type Clean Room 3HAC077806 001 Base Clean Room Continues on next page 208 Product manual IRB 1300 3HAC070390 001 Revision G Copyr...

Page 209: ...Replace if damaged 3HAC064478 001 Mechanical stop axis 1 fixed block Replace if damaged 3HAC065755 001 Mechanical stop axis 1 slider Used with IRB 1300 11 0 9 Used with protection classes IP40 and IP67 Used with protection type Foundry Plus 3HAC073303 001 Main cable harness S basic Used with IRB 1300 11 0 9 Used with protection classes IP40 and IP67 Used with protection type Foundry Plus 3HAC07330...

Page 210: ...tion type Foundry Plus 3HAC073299 001 Main cable harness L CP CS and air hose with Ethernet Used with protection classes IP40 and IP67 Used with protection type Foundry Plus 3HAC073306 001 Process hub basic Used with protection classes IP40 and IP67 Used with protection type Foundry Plus 3HAC073307 001 Process hub CP CS and air hose without Ethernet Used with protection classes IP40 and IP67 Used ...

Page 211: ...ith Ethernet Used with protection type Clean Room 3HAC077836 001 Process hub basic Clean Room Used with protection type Clean Room 3HAC077837 001 Process hub Clean Room CP CS and air hose without Ethernet Used with protection type Clean Room 3HAC077838 001 Process hub Clean Room CP CS and air hose with Ethernet 3HAC067816 001 Plastic cable protector axis 2 3HAC064693 001 Plastic cable protector ax...

Page 212: ...ousing cover Clean Room Used with protection type Clean Room 3HAC077821 001 Lower arm cover Clean Room Used with protection type Clean Room 3HAC077824 001 Swing cover short Clean Room Used for IRB 1300 10 1 15 IRB 1300 7 1 4 and IRB 1300 12 1 4 Used with protection type Clean Room 3HAC077825 001 Swing cover long Clean Room Used with protection type Clean Room 3HAC077820 001 Swing top cover Clean R...

Page 213: ...upport short Used for IRB 1300 10 1 15 IRB 1300 7 1 4 and IRB 1300 12 1 4 Not used with protection class IP40 Replace if damaged 3HAC067823 001 Gasket for swing support long Used for IRB 1300 11 0 9 Not used with protection class IP40 Replace if damaged 3HAC067824 001 Gasket for swing cover short Used for IRB 1300 10 1 15 IRB 1300 7 1 4 and IRB 1300 12 1 4 Not used with protection class IP40 Repla...

Page 214: ...toolkit 3HAC076396 001 Axis 1 gearbox assembly cap Included in special toolkit 3HAC076396 001 Axis 1 gearbox motor sealing pressfit tool Included in special toolkit 3HAC076396 001 Axis 1 gearbox motor sealing pressfit base Length 1 7 m Lifting capacity 400 kg Roundsling 1 7 m Overhead crane Used with protection class IP67 and protection types Clean Room and Foundry Plus Used for the press fitting ...

Page 215: ...ntering the safeguarded space 3 CAUTION For robots with protection type Clean Room Always cut the paint with a knife and grind the paint edge when disassembling parts of the robot See Cut the paint or surface on the robot before replacing parts on page 145 4 Draining oil of axis 1 gearbox Note Action WARNING Handling gearbox oil involves several safety risks see Gearbox lubricants oil or grease on...

Page 216: ...coupling on base 5 WARNING Used oil is hazardous material and must be disposed of in a safe way See Decom missioning on page 747 for more informa tion 6 Note Draining is time consuming Elapsed time varies depending on the temperature of the oil Drain the gearbox oil 7 Remove the quick coupling connector and clean the pipe after the oil is drained Note There will be some oil left in the gearbox aft...

Page 217: ...lways cut the paint with a knife and grind the paint edge when disassembling parts of the robot See Cut the paint or surface on the robot before replacing parts on page 145 2 Roundsling 1 7 m Lifting capacity 400 kg xx2000001651 Run a roundsling around the lower arm 3 CAUTION The arm system weighs 52 kg All lifting accessories used must be sized accord ingly 4 WARNING The robot is likely to be mec...

Page 218: ...re are turned off 1 CAUTION For robots with protection type Clean Room Always cut the paint with a knife and grind the paint edge when disassembling parts of the robot See Cut the paint or surface on the robot before replacing parts on page 145 2 xx2000000502 Remove screws and washers 3 xx2000001702 Lift the arm system little by little to separate the arm system from the base 4 Continues on next p...

Page 219: ... on the robot before replacing parts on page 145 2 xx2000001703 Access the axis 1 mechanical stop slider from the swing Put it aside for later refitting 3 xx2000001693 Remove the axis 1 mechanical stop fixed block 4 Removing the base from foundation Note Action DANGER Make sure that all supplies for electrical power hydraulic pressure and air pressure are turned off 1 Continues on next page Produc...

Page 220: ...r hydraulic pressure and air pressure are turned off 1 CAUTION For robots with protection type Clean Room Always cut the paint with a knife and grind the paint edge when disassembling parts of the robot See Cut the paint or surface on the robot before replacing parts on page 145 2 xx2000001642 Valid for cabling with rear interface Remove the base bottom cover together with the base adapter 3 Remov...

Page 221: ...m the opening Be fore proceeding please read the safety informa tion in the section Gearbox lubricants oil or grease on page 29 3 CAUTION Removing motors will release axes This means the axes can fall down Make sure axes are well supported before remov ing motors 4 xx2000001643 Access the screws and washers securing the axis 1 motor from the base bottom 5 xx2000001644 Remove the screws and washers...

Page 222: ...nife and grind the paint edge when disassembling parts of the robot See Cut the paint or surface on the robot before replacing parts on page 145 2 CAUTION Removing gearboxes will release axes This means the axes can fall down Make sure axes are well supported before remov ing gearboxes 3 xx2000001694 Remove the screws 4 Continues on next page 222 Product manual IRB 1300 3HAC070390 001 Revision G C...

Page 223: ...rts free from particles with spirit on a lint free xx2000001713 Check the radial sealings on the base Replace if damaged as described below 2 Radial sealing 3HAC066433 001 xx2000001714 Place the new motor side radial sealing in its groove in the base The sealing lip is towards the swing side 3 Continues on next page Product manual IRB 1300 223 3HAC070390 001 Revision G Copyright 2020 2022 ABB All ...

Page 224: ...sift tool with an M8 screw 5 Screw the screw little by little and evenly to press the sealing into place 6 Radial sealing 3HAC070148 002 Repeat steps 3 to 6 to replace the gearbox side radial sealing 7 Checking the quick coupling on the base Note Action For robots with protection type Clean Room 1 Clean the joints that have been opened and wipe the parts free from particles with spirit on a lint f...

Page 225: ... if there is any overflowing Loctite 577 3 Tightening torque N A tighten up properly xx2000001335 Refitting the axis 1 gearbox Note Action For robots with protection type Clean Room 1 Clean the joints that have been opened and wipe the parts free from particles with spirit on a lint free O ring on axis 1 gear unit 3HAC063187 007 xx2000001696 Check the O ring Replace if damaged 2 Continues on next ...

Page 226: ...d place the assembly cap to the gearbox 3 xx2000001710 Put the base onto the gearbox 4 xx2000001711 Turn the base together with the gearbox over to the standing position 5 xx2000001712 Remove the assembly cap 6 Continues on next page 226 Product manual IRB 1300 3HAC070390 001 Revision G Copyright 2020 2022 ABB All rights reserved 5 Repair 5 4 1 Replacing the base Continued ...

Page 227: ...f 1 Put the base on its side for easily refitting the motor and base cover 2 Refitting the axis 1 motor Note Action For robots with protection type Clean Room 1 Clean the joints that have been opened and wipe the parts free from particles with spirit on a lint free Check that all assembly surfaces are clean and without damages the motor is clean and undamaged 2 Continues on next page Product manua...

Page 228: ...cording to the figure below in regard to the encircled motor con nector xx2000001647 Orient the motor correctly and fit it into the swing Make sure the motor is properly fit to gearbox 5 Screw M6x20 12 9 Gleitmo 603 Geomet 500 4 pcs Refit the screws and washers 6 Tightening torque 10 Nm xx2000001644 Continues on next page 228 Product manual IRB 1300 3HAC070390 001 Revision G Copyright 2020 2022 AB...

Page 229: ...htening torque 2 6 Nm xx2000001642 Securing the base to the foundation Note Action For robots with protection type Clean Room 1 Clean the joints that have been opened and wipe the parts free from particles with spirit on a lint free Attachment screws M16x50 qual ity 8 8 Secure the base to the foundation with the attach ment screws and washers 2 Washers 17 x 30 x 3 steel hard ness class 200HV Tight...

Page 230: ...e swing on page 237 2 Pressfit support of the axis 1 seal ing assembly tool included in Special toolkit for IP67 Clean Room Foundry Plus robots 3HAC078203 001 xx2000002453 Place the pressfit support of the axis 1 sealing assembly tool on the workbench positioning as shown in the figure 3 Continues on next page 230 Product manual IRB 1300 3HAC070390 001 Revision G Copyright 2020 2022 ABB All rights...

Page 231: ... xx2000002456 Grease 3HAC029132 001 Apply a little grease to the sealing lip when repla cing the radial sealing and wipe clean after the replacement Note For Clean Room robots make sure no grease is applied to the sealing grooves 5 Continues on next page Product manual IRB 1300 231 3HAC070390 001 Revision G Copyright 2020 2022 ABB All rights reserved 5 Repair 5 4 1 Replacing the base Continued ...

Page 232: ...e outer side of the robot xx2000002537 6 Circular plate of the axis 1 sealing assembly tool included in Special toolkit for IP67 Clean Room Foundry Plus robots 3HAC078203 001 xx2000002458 Fit the circular plate of the axis 1 sealing assembly tool against the sealing and fix with four M8x145 screws 7 xx2000002459 Screw the screws little by little and evenly to press the sealing into place 8 Remove ...

Page 233: ...3 8 Nm xx2000001693 Grease 3HAC029132 001 xx2000001703 Apply grease to the axis 1 mechanical stop slider and refit it to the swing 3 Securing the arm system to the base Note Action For robots with protection type Clean Room 1 Clean the joints that have been opened and wipe the parts free from particles with spirit on a lint free Gasket on swing 3HAC067626 001 xx2000001704 Check the gasket Replace ...

Page 234: ...0000502 Refitting the complete cable package Follow the instructions detailed in Refitting the cable package on page 171 to refit the complete cable package Refilling oil to axis 1 gearbox Note Action WARNING Handling gearbox oil involves several safety risks see Gearbox lubricants oil or grease on page 29 1 Continues on next page 234 Product manual IRB 1300 3HAC070390 001 Revision G Copyright 202...

Page 235: ...on in gearboxes Refill the gearbox with oil Note The amount of oil to be filled depends on the amount previously being drained 5 Tightening torque 10 Nm Refit the oil plugs 6 Concluding procedure Note Action For robots with protection type Clean Room 1 Clean and paint the joints that have been opened See Cut the paint or surface on the robot before replacing parts on page 145 Note After all repair...

Page 236: ...Make sure all safety requirements are met when performing the first test run 3 236 Product manual IRB 1300 3HAC070390 001 Revision G Copyright 2020 2022 ABB All rights reserved 5 Repair 5 4 1 Replacing the base Continued ...

Page 237: ...11 0 9 Used with protection classes IP40 and IP67 Used with protection type Foundry Plus 3HAC073040 001 Swing short Used for IRB 1300 11 0 9 Used with protection type Clean Room 3HAC077807 001 Swing short Clean Room Used for IRB 1300 10 1 15 IRB 1300 7 1 4 and IRB 1300 12 1 4 Used with protection classes IP40 and IP67 Used with protection type Foundry Plus 3HAC073047 001 Swing long Continues on ne...

Page 238: ...B 1300 12 1 4 3HAC061327 037 O ring on motor unit 3HAC065676 001 Sealing ring swing support side 3HAC061327 036 O ring on swing Replace if damaged 3HAC065651 001 Mechanical stop block A 3HAC037925 001 Magnetic oil plug G 1 4 Used with protection classes IP40 and IP67 Used with protection type Foundry Plus 3HAC073306 001 Process hub basic Used with protection classes IP40 and IP67 Used with protect...

Page 239: ...tection type Foundry Plus 3HAC073096 001 Swing cover long Used with protection classes IP40 and IP67 Used with protection type Foundry Plus 3HAC073091 001 Swing top cover Used with protection type Clean Room 3HAC077823 001 Tubular cover Clean Room Used with protection type Clean Room 3HAC077822 001 Housing cover Clean Room Used with protection type Clean Room 3HAC077821 001 Lower arm cover Clean R...

Page 240: ...ort Used for IRB 1300 10 1 15 IRB 1300 7 1 4 and IRB 1300 12 1 4 Not used with protection class IP40 Replace if damaged 3HAC067825 001 Gasket for swing cover long Not used with protection class IP40 Replace if damaged 3HAC067821 001 Gasket for swing top cover Not used with protection class IP40 Replace if damaged 3HAC032050 001 Seal bolt Used with protection types Clean Room and Foundry Plus Repla...

Page 241: ...ra dial sealing assembly tool for axes 1 to 4 and axis 6 3HAC078203 001 Special toolkit for IP67 Clean Room Foundry Plus robots Required consumables Note Article number Consumable Cable straps FM 222 3HAC029132 001 Grease Kyodo Yushi TMO150 3HAC032140 001 Lubricating oil Loctite 243 3HAB7116 1 Locking liquid Removing the swing Use these procedures to remove the swing Preparations before removing t...

Page 242: ...ering the safeguarded space 2 Draining oil of axis 2 gearbox Note Action WARNING Handling gearbox oil involves several safety risks see Gearbox lubricants oil or grease on page 29 1 CAUTION The gearbox can contain an excess of pressure that can be hazardous Open the oil plug carefully in order to let the excess pressure out 2 Continues on next page 242 Product manual IRB 1300 3HAC070390 001 Revisi...

Page 243: ...nting and keep it opened to speed up the drainage 6 WARNING Used oil is hazardous material and must be disposed of in a safe way See Decom missioning on page 747 for more informa tion 7 Note Draining is time consuming Elapsed time varies depending on the temperature of the oil Drain the gearbox oil 8 Continues on next page Product manual IRB 1300 243 3HAC070390 001 Revision G Copyright 2020 2022 A...

Page 244: ...P according to Supplying power to connector R1 MP on page 66 xx2000001520 Jog all axes to zero position 2 DANGER Turn off all electric power supply hydraulic pressure supply air pressure supply to the robot before entering the safeguarded space 3 Removing the covers Note Action DANGER Make sure that all supplies for electrical power hydraulic pressure and air pressure are turned off 1 Continues on...

Page 245: ...ing the cables in the tubular Note Action DANGER Make sure that all supplies for electrical power hydraulic pressure and air pressure are turned off 1 CAUTION For robots with protection type Clean Room Always cut the paint with a knife and grind the paint edge when disassembling parts of the robot See Cut the paint or surface on the robot before replacing parts on page 145 2 xx2000001530 Cut the c...

Page 246: ...on type Clean Room Always cut the paint with a knife and grind the paint edge when disassembling parts of the robot See Cut the paint or surface on the robot before replacing parts on page 145 2 xx2000001532 Disconnect the connectors MP6 FB6 Tip Take photos of the connector and cable position before disconnecting them to have as a reference when reconnecting 3 xx2000001533 Snap loose and remove th...

Page 247: ...2 xx2000001534 Disconnect the connectors MP5 FB5 Tip Take photos of the connector and cable position before disconnecting them to have as a reference when reconnecting 3 xx2000001535 Snap loose and remove the male head of the connectors from the connector plate 4 Disconnecting CP CS cabling if equipped Note Action DANGER Make sure that all supplies for electrical power hydraulic pressure and air p...

Page 248: ...0001537 Snap loose and remove the male head of the connectors from the connector plate 4 Separating the cable package from the tubular Note Action DANGER Make sure that all supplies for electrical power hydraulic pressure and air pressure are turned off 1 CAUTION For robots with protection type Clean Room Always cut the paint with a knife and grind the paint edge when disassembling parts of the ro...

Page 249: ...ion type Clean Room Always cut the paint with a knife and grind the paint edge when disassembling parts of the robot See Cut the paint or surface on the robot before replacing parts on page 145 2 xx2000001538 Remove the screws and carefully open the cover CAUTION There is cabling attached to the cover The cover cannot be removed completely until the connect ors are removed 3 Continues on next page...

Page 250: ...ence when reconnecting 5 Tip The connector clip has to be pressed 1 and pushed forward 2 to separate the J2 C2 for Ethernet cabling xx1800002943 Disconnecting the axis 4 motor connectors Note Action DANGER Make sure that all supplies for electrical power hydraulic pressure and air pressure are turned off 1 Continues on next page 250 Product manual IRB 1300 3HAC070390 001 Revision G Copyright 2020 ...

Page 251: ...onnectors are re move from the plate 3 xx2000001543 Cut the cable strap Note The motor cablings have another strap fixed Al ways cut the strap that fixes the cable package to the plate 4 xx2000001544 Disconnect the connectors MP4 FB4 Tip Take photos of the connector and cable position before disconnecting them to have as a reference when reconnecting 5 xx2000001545 Snap loose and remove the male h...

Page 252: ...hat all supplies for electrical power hydraulic pressure and air pressure are turned off 1 CAUTION For robots with protection type Clean Room Always cut the paint with a knife and grind the paint edge when disassembling parts of the robot See Cut the paint or surface on the robot before replacing parts on page 145 2 xx2000001548 Remove the connector plate CAUTION Be aware of the cablings that are ...

Page 253: ...package from the lower arm Note Action DANGER Make sure that all supplies for electrical power hydraulic pressure and air pressure are turned off 1 CAUTION For robots with protection type Clean Room Always cut the paint with a knife and grind the paint edge when disassembling parts of the robot See Cut the paint or surface on the robot before replacing parts on page 145 2 Continues on next page Pr...

Page 254: ...lectrical power hydraulic pressure and air pressure are turned off 1 CAUTION For robots with protection type Clean Room Always cut the paint with a knife and grind the paint edge when disassembling parts of the robot See Cut the paint or surface on the robot before replacing parts on page 145 2 Continues on next page 254 Product manual IRB 1300 3HAC070390 001 Revision G Copyright 2020 2022 ABB All...

Page 255: ...ressure and air pressure are turned off 1 CAUTION For robots with protection type Clean Room Always cut the paint with a knife and grind the paint edge when disassembling parts of the robot See Cut the paint or surface on the robot before replacing parts on page 145 2 Wrap the connectors with the masking tape 3 Continues on next page Product manual IRB 1300 255 3HAC070390 001 Revision G Copyright ...

Page 256: ...nt or surface on the robot before replacing parts on page 145 2 xx2000001684 Remove the swing support Tip If the lower arm support is hard to loosen from the swing use a plastic hammer to knock on the lower arm support lightly 3 Supporting the lower and upper arms with roundslings Note The lower and upper arms include the lower arm housing extender unit only for IRB 1300 7 1 4 and IRB 1300 12 1 4 ...

Page 257: ... 1 7 m 2 pcs Lifting capacity 400 kg xx2000001685 Run two roundslings between the housing and the lower arm 3 CAUTION The lower and upper arms weighs 38 kg All lifting accessories used must be sized accord ingly 4 WARNING The robot is likely to be mechanically unstable if not secured to the foundation 5 WARNING Personnel must not under any circumstances be present under the suspended load 6 Contin...

Page 258: ... Room Always cut the paint with a knife and grind the paint edge when disassembling parts of the robot See Cut the paint or surface on the robot before replacing parts on page 145 2 xx2000001686 Remove the screws 3 xx2000001687 Separate the swing from the lower arm Tip If the swing is hard to loosen from the lower arm use a plastic hammer to knock on the swing lightly 4 Continues on next page 258 ...

Page 259: ...e The axis 1 mechanical stop slider is accessible from the swing Put it aside for later refitting xx2000001703 3 Pull the cable package completely out from the swing 4 Refitting the swing Use these procedures to refit the swing Check the radial sealing on the swing bottom IP67 Clean Room and Foundry Plus Note Action For robots with protection type Clean Room 1 Clean the joints that have been opene...

Page 260: ...e swing on page 237 2 Pressfit support of the axis 1 seal ing assembly tool included in Special toolkit for IP67 Clean Room Foundry Plus robots 3HAC078203 001 xx2000002453 Place the pressfit support of the axis 1 sealing assembly tool on the workbench positioning as shown in the figure 3 Continues on next page 260 Product manual IRB 1300 3HAC070390 001 Revision G Copyright 2020 2022 ABB All rights...

Page 261: ... xx2000002456 Grease 3HAC029132 001 Apply a little grease to the sealing lip when repla cing the radial sealing and wipe clean after the replacement Note For Clean Room robots make sure no grease is applied to the sealing grooves 5 Continues on next page Product manual IRB 1300 261 3HAC070390 001 Revision G Copyright 2020 2022 ABB All rights reserved 5 Repair 5 4 2 Replacing the swing Continued ...

Page 262: ...e outer side of the robot xx2000002537 6 Circular plate of the axis 1 sealing assembly tool included in Special toolkit for IP67 Clean Room Foundry Plus robots 3HAC078203 001 xx2000002458 Fit the circular plate of the axis 1 sealing assembly tool against the sealing and fix with four M8x145 screws 7 xx2000002459 Screw the screws little by little and evenly to press the sealing into place 8 Remove ...

Page 263: ...ing assembly tool included in Special toolkit for IP67 Clean Room Foundry Plus robots 3HAC078203 001 xx2000002461 Fit the big circular plate of the axis 2 sealing as sembly tool to the swing opposite side of the ra dial sealing with three M4x12 screws 3 Grease 3HAC029132 001 Apply a little grease to the sealing lip when repla cing the radial sealing and wipe clean after the replacement Note For Cl...

Page 264: ...g figure is facing the outer side of the robot xx2000002537 5 Ring of the axis 2 sealing assembly tool included in Special toolkit for IP67 Clean Room Foundry Plus robots 3HAC078203 001 xx2000002463 For robots with protection type Foundry Plus option 3352 10 Place the ring of the axis 2 sealing assembly tool against the sealing xx2000002562 6 Continues on next page 264 Product manual IRB 1300 3HAC...

Page 265: ... Remove the assembly tool 9 Check that the sealing is undamaged and properly fitted 10 Refitting the swing to the base Note Action For robots with protection type Clean Room 1 Clean the joints that have been opened and wipe the parts free from particles with spirit on a lint free See Replacing the axis 2 mechan ical stops on page 293 Check the axis 2 mechanical stops Replace if damaged 2 Continues...

Page 266: ...ply grease to the axis 1 mechanical stop slider and refit it to the swing 5 Route the cable package through the swing and out from the swing support side 6 Place the swing down to the base 7 xx2000001699 Align the oil plugs on the swing with the marked screws on the axis 1 gearbox 8 Continues on next page 266 Product manual IRB 1300 3HAC070390 001 Revision G Copyright 2020 2022 ABB All rights rese...

Page 267: ...ss IP67 option 3350 670 2 Sealing ring swing side 3HAC065675 001 Check the sealing ring Replace if damaged Screw M4x12 12 9 Lafre 2C2B FC6 9 8 pcs For robots with protection type Foundry Plus option 3352 10 Tightening torque 3 8 Nm Check the sealing ring and the O ring For robots with protection class IP67 option 3350 670 xx2000002516 Replace if damaged For robots with protection type Foundry Plus...

Page 268: ...or lower and upper arms Note Action For robots with protection type Clean Room 1 Clean the joints that have been opened and wipe the parts free from particles with spirit on a lint free WARNING Personnel must not under any circumstances be present under the suspended load 2 Make sure the lower and upper arms are firmly secured with the swing 3 Remove the roundslings 4 Continues on next page 268 Pr...

Page 269: ...cial toolkit for IP67 Clean Room Foundry Plus robots 3HAC078203 001 xx2000002467 Fit the big circular plate of the axis 2 sealing as sembly tool to the swing support opposite side of the radial sealing with three M4x12 screws 3 Grease 3HAC029132 001 Apply a little grease to the sealing lip when repla cing the radial sealing and wipe clean after the replacement Note For Clean Room robots make sure ...

Page 270: ...owing figure is facing the outer side of the robot xx2000002537 5 Ring of the axis 2 sealing assembly tool included in Special toolkit for IP67 Clean Room Foundry Plus robots 3HAC078203 001 xx2000002469 For robots with protection class IP67 option 3350 670 For robots with protection type Foundry Plus option 3352 10 Place the ring of the axis 2 sealing assembly tool against the sealing xx2000002562...

Page 271: ...Check that the sealing is undamaged and properly fitted 10 Refitting the swing support Note Action For robots with protection type Clean Room 1 Clean the joints that have been opened and wipe the parts free from particles with spirit on a lint free Sealing ring swing support side 3HAC065676 001 Check the sealing ring Replace if damaged 2 Screw M4x12 12 9 Lafre 2C2B FC6 9 16 pcs Tightening torque 3...

Page 272: ...th protection type Clean Room option 3351 4 For robots with protection type Foundry Plus option 3352 10 Check the gasket Replace if damaged xx2000001745 Route the cable package through the swing sup port Make sure that the air hoses are facing the SMB side in the hollow tube of axis 1 gearbox the cable package is out from the hole near the base rear as circled in the figure CAUTION Make sure that ...

Page 273: ...ote Action For robots with protection type Clean Room 1 Clean the joints that have been opened and wipe the parts free from particles with spirit on a lint free xx2000001746 Route the cable package up into the lower arm Make sure that the the air hoses are facing outside in the axis 2 cable protector see the figure as a guidance for the cable twisting way 2 Continues on next page Product manual IR...

Page 274: ...axis 2 cable protector 4 Tightening torque 2 6 Nm xx2000001556 Routing the cable package in the lower arm Note Action For robots with protection type Clean Room 1 Clean the joints that have been opened and wipe the parts free from particles with spirit on a lint free Continues on next page 274 Product manual IRB 1300 3HAC070390 001 Revision G Copyright 2020 2022 ABB All rights reserved 5 Repair 5 ...

Page 275: ...ced apply grease to the axis 3 cable pro tector before refitting Screw M4x10 12 9 Lafre 2C2B FC6 9 3 pcs Tightening torque 2 6 Nm xx2000001552 xx2000001569 Route the cable package through the lower arm support and up into the housing CAUTION Make sure that no cables or hoses are twisted or strained Reroute if necessary 4 Continues on next page Product manual IRB 1300 275 3HAC070390 001 Revision G ...

Page 276: ...TION Correct cable routing is highly important If the cables are routed and secured incorrectly the cables can be damaged 3 xx2000001550 Reconnect the connectors FB2 MP2 FB3 MP3 Tip See the number markings on the connectors for help to find the corresponding connector 4 Screw M4x8 12 9 Lafre 2C2B FC6 9 2 pcs Refit the connector plate to the lower arm 5 Tightening torque 2 6 Nm xx2000001548 Continu...

Page 277: ...g torque 2 6 Nm xx2100001465 xx2000001553 Routing the cable package in the housing Note Action For robots with protection type Clean Room 1 Clean the joints that have been opened and wipe the parts free from particles with spirit on a lint free Plastic cable protector axis 4 Slip the axis 4 cable protector over the cable package 2 3HAC064694 001 xx2000001570 Continues on next page Product manual I...

Page 278: ...1 Clean the joints that have been opened and wipe the parts free from particles with spirit on a lint free Screw M4x8 12 9 Lafre 2C2B FC6 9 4 pcs Refit the axis 4 cable protector 2 Tightening torque 2 6 Nm xx2000001546 Reconnecting the axis 4 motor connectors Note Action For robots with protection type Clean Room 1 Clean the joints that have been opened and wipe the parts free from particles with ...

Page 279: ...outing is highly important If the cables are routed and secured incorrectly the cables can be damaged 4 Screw M4x8 12 9 Lafre 2C2B FC6 9 2 pcs Refit the connector plate 5 Tightening torque 2 6 Nm xx2000001542 Routing the cable package in the tubular Note Action For robots with protection type Clean Room 1 Clean the joints that have been opened and wipe the parts free from particles with spirit on ...

Page 280: ... with protection type Clean Room 1 Clean the joints that have been opened and wipe the parts free from particles with spirit on a lint free xx2000001539 Reconnect the air hoses Note See the number markings on the air hoses for help to find the corresponding air hoses 2 xx2000001540 For robots with Ethernet cabling Access the connector from the process hub and reconnect the connector J1 C2 Tip See ...

Page 281: ... C1 J1 C3 Tip See the number markings on the connectors for help to find the corresponding connector 3 Reconnecting the axis 5 motor connectors Note Action For robots with protection type Clean Room 1 Clean the joints that have been opened and wipe the parts free from particles with spirit on a lint free xx2000001535 Insert the male header of the motor connectors to the connector plate 2 Continues...

Page 282: ...3 Insert the male header of the motor connectors to the connector plate 2 xx2000001532 Reconnect the connectors FB6 MP6 Tip See the number markings on the connectors for help to find the corresponding connector 3 Refitting the process hub Note Action For robots with protection type Clean Room 1 Clean the joints that have been opened and wipe the parts free from particles with spirit on a lint free...

Page 283: ...eck the seal bolts Replace if damaged 3 Route and secure the cabling with cable straps CAUTION Correct cable routing is highly important If the cables are routed and secured incorrectly the cables can be damaged 4 Screw M4x10 12 9 Lafre 2C2B FC6 9 4 pcs Refit the process hub 5 Tightening torque 2 6 Nm xx2000001538 Securing the cable package in the tubular Note Action For robots with protection typ...

Page 284: ...the cabling with cable straps CAUTION Correct cable routing is highly important If the cables are routed and secured incorrectly the cables can be damaged 4 Refitting the covers Note Action For robots with protection type Clean Room 1 Clean the joints that have been opened and wipe the parts free from particles with spirit on a lint free Continues on next page 284 Product manual IRB 1300 3HAC07039...

Page 285: ...AC029132 001 Apply grease to the covers that have contacting area with the cable package 4 Screw M4x10 12 9 Lafre 2C2B FC6 9 Refit the covers Tubular support cover A Housing cover B Lower arm support cover C Swing covers D Swing top cover E 5 Tightening torque 2 6 Nm xx2000001722 Jogging the robot to oil filling position Note Action Turn on the electric power to the robot 1 If the robot is not con...

Page 286: ...space 3 Refilling oil to axis 2 gearbox Note Action WARNING Handling gearbox oil involves several safety risks see Gearbox lubricants oil or grease on page 29 1 CAUTION The gearbox can contain an excess of pressure that can be hazardous Open the oil plug carefully in order to let the excess pressure out 2 Continues on next page 286 Product manual IRB 1300 3HAC070390 001 Revision G Copyright 2020 2...

Page 287: ...efill the gearbox with oil Note The amount of oil to be filled depends on the amount previously being drained 5 CAUTION Oil filling must be slow to make sure air venting is fluent xx2000001580 Inspect the oil level by measuring the level at the upper oil plug hole Required oil level within the range of 64 mm to 69 mm below the edge of the oil plug hole CAUTION The oil level sinks when the oil fill...

Page 288: ...sure supply air pressure supply to the robot before entering the safeguarded space 3 Concluding procedure Note Action For robots with protection type Clean Room 1 Clean and paint the joints that have been opened See Cut the paint or surface on the robot before replacing parts on page 145 Note After all repair work wipe the Clean Room robot free from particles with spirit on a lint free cloth Calib...

Page 289: ...Make sure all safety requirements are met when performing the first test run 3 Product manual IRB 1300 289 3HAC070390 001 Revision G Copyright 2020 2022 ABB All rights reserved 5 Repair 5 4 2 Replacing the swing Continued ...

Page 290: ...rts of the IRB 1300 via myABB Business Portal www abb com myABB Note Article number Spare part Replace if damaged 3HAC064478 001 Mechanical stop axis 1 fixed block Replace if damaged 3HAC065755 001 Mechanical stop axis 1 slider Required tools and equipment Note Article number Equipment Content is defined in section Standard toolkit on page 759 Standard toolkit Continues on next page 290 Product ma...

Page 291: ...tection types Clean Room and Foundry Plus Used for the press fitting of radial sealings Includes five sets of ra dial sealing assembly tool for axes 1 to 4 and axis 6 3HAC078203 001 Special toolkit for IP67 Clean Room Foundry Plus robots Replacement of axis 1 mechanical stops The axis 1 mechanical stops both block and slider are accessible after removing the base see Replacing the base on page 208...

Page 292: ...tal www abb com myABB Note Article number Spare part Replace if damaged 3HAC065651 001 Mechanical stop block A Required tools and equipment Note Article number Equipment Content is defined in section Standard toolkit on page 759 Standard toolkit Required consumables Note Article number Consumable Loctite 243 3HAB7116 1 Locking liquid Continues on next page 292 Product manual IRB 1300 3HAC070390 00...

Page 293: ...anical stop block A 3HAC065651 001 2 pcs Discard the old stops and refit with new ones 4 Apply a little Loctite 243 to the screws Note If there is locking liquid residues on the screw please clean it before refitting Remove residual locking liquid after refitting 5 Screw M4x16 stainless steel 1 pcs per stop Secure the mechanical stops 6 Tightening torque 1 Nm Product manual IRB 1300 293 3HAC070390...

Page 294: ...com myABB Note Article number Spare part Used for IRB 1300 11 0 9 Used with protection class IP40 and protection type Foundry Plus 3HAC073073 001 Lower arm short Used for IRB 1300 11 0 9 Used with protection class IP67 3HAC077798 001 Lower arm short IP67 Used for IRB 1300 11 0 9 Used with protection type Clean Room 3HAC077811 001 Lower arm short Clean Room Continues on next page 294 Product manual...

Page 295: ...an Room Used for IRB 1300 10 1 15 IRB 1300 7 1 4 and IRB 1300 12 1 4 Used with protection classes IP40 and IP67 Used with protection type Foundry Plus 3HAC073052 001 Swing support long Used for IRB 1300 10 1 15 IRB 1300 7 1 4 and IRB 1300 12 1 4 Used with protection type Clean Room 3HAC077810 001 Swing support long Clean Room 3HAC064977 001 Gear unit axis 2 Used for IRB 1300 11 0 9 IRB 1300 10 1 1...

Page 296: ...e Clean Room 3HAC077838 001 Process hub Clean Room CP CS and air hose with Ethernet 3HAC067816 001 Plastic cable protector axis 2 3HAC064693 001 Plastic cable protector axis 3 3HAC064694 001 Plastic cable protector axis 4 Used with protection classes IP40 and IP67 Used with protection type Foundry Plus 3HAC073094 001 Tubular cover Used with protection classes IP40 and IP67 Used with protection typ...

Page 297: ...on class IP40 Replace if damaged 3HAC067826 001 Gasket for lower arm support Not used with protection class IP40 Replace if damaged 3HAC067832 001 Gasket for lower arm cover Used for IRB 1300 11 0 9 Not used with protection class IP40 Replace if damaged 3HAC067822 001 Gasket for swing support short Used for IRB 1300 10 1 15 IRB 1300 7 1 4 and IRB 1300 12 1 4 Not used with protection class IP40 Rep...

Page 298: ... the motor brakes 24 VDC power supply The capacity of the vessel must be sufficient to take the complete amount of oil Oil collecting vessel Includes pump with outlet pipe Oil dispenser Included in special toolkit 3HAC076396 001 Guide pin for axis 2 gearbox Used for measuring the timing belt tension Sonic tension meter Used with protection class IP67 and protection types Clean Room and Foundry Plu...

Page 299: ...age 145 2 Jogging the robot to oil draining position Note Action xx2000001519 Jog the robot to the specified position Axis 1 0 Axis 2 67 5 Axis 3 0 Axis 4 0 Axis 5 0 Axis 6 No significance 1 DANGER Turn off all electric power supply hydraulic pressure supply air pressure supply to the robot before entering the safeguarded space 2 Draining oil of axis 2 gearbox Note Action WARNING Handling gearbox ...

Page 300: ...Plug a clean pipe to the oil plug draining with the other end to the oil collecting ves sel 5 xx2000001517 Remove the oil plug venting and keep it opened to speed up the drainage 6 WARNING Used oil is hazardous material and must be disposed of in a safe way See Decom missioning on page 747 for more informa tion 7 Continues on next page 300 Product manual IRB 1300 3HAC070390 001 Revision G Copyrigh...

Page 301: ... the electric power to the robot 1 If the robot is not connected to the controller power must be supplied to the connector R1 MP according to Supplying power to connector R1 MP on page 66 xx2000001520 Jog all axes to zero position 2 DANGER Turn off all electric power supply hydraulic pressure supply air pressure supply to the robot before entering the safeguarded space 3 Continues on next page Pro...

Page 302: ...t cover A Housing cover B Lower arm covers C Swing covers D 3 Loosening the cables in the tubular Note Action DANGER Make sure that all supplies for electrical power hydraulic pressure and air pressure are turned off 1 CAUTION For robots with protection type Clean Room Always cut the paint with a knife and grind the paint edge when disassembling parts of the robot See Cut the paint or surface on t...

Page 303: ...ction DANGER Make sure that all supplies for electrical power hydraulic pressure and air pressure are turned off 1 CAUTION For robots with protection type Clean Room Always cut the paint with a knife and grind the paint edge when disassembling parts of the robot See Cut the paint or surface on the robot before replacing parts on page 145 2 Continues on next page Product manual IRB 1300 303 3HAC070...

Page 304: ...Note Action DANGER Make sure that all supplies for electrical power hydraulic pressure and air pressure are turned off 1 CAUTION For robots with protection type Clean Room Always cut the paint with a knife and grind the paint edge when disassembling parts of the robot See Cut the paint or surface on the robot before replacing parts on page 145 2 Continues on next page 304 Product manual IRB 1300 3...

Page 305: ...e are turned off 1 CAUTION For robots with protection type Clean Room Always cut the paint with a knife and grind the paint edge when disassembling parts of the robot See Cut the paint or surface on the robot before replacing parts on page 145 2 xx2000001536 For robots with CP CS cabling Disconnect the connectors J1 C1 J1 C3 Tip Take photos of the connector and cable position before disconnecting ...

Page 306: ...pe Clean Room Always cut the paint with a knife and grind the paint edge when disassembling parts of the robot See Cut the paint or surface on the robot before replacing parts on page 145 2 xx2000001748 Remove the first semicircular bracket that fixes the cable package 3 xx2000001749 Remove the second semicircular bracket from the tubular 4 Continues on next page 306 Product manual IRB 1300 3HAC07...

Page 307: ...of the robot See Cut the paint or surface on the robot before replacing parts on page 145 2 xx2000001538 Remove the screws and carefully open the cover CAUTION There is cabling attached to the cover The cover cannot be removed completely until the connect ors are removed 3 xx2000001539 Disconnect the air hoses 4 Continues on next page Product manual IRB 1300 307 3HAC070390 001 Revision G Copyright...

Page 308: ...00002943 Disconnecting the axis 4 motor connectors Note Action DANGER Make sure that all supplies for electrical power hydraulic pressure and air pressure are turned off 1 CAUTION For robots with protection type Clean Room Always cut the paint with a knife and grind the paint edge when disassembling parts of the robot See Cut the paint or surface on the robot before replacing parts on page 145 2 C...

Page 309: ... Disconnect the connectors MP4 FB4 Tip Take photos of the connector and cable position before disconnecting them to have as a reference when reconnecting 5 xx2000001545 Snap loose and remove the male head of the connectors from the connector plate 6 Separating the cable package from the housing Note Action DANGER Make sure that all supplies for electrical power hydraulic pressure and air pressure ...

Page 310: ...rned off 1 CAUTION For robots with protection type Clean Room Always cut the paint with a knife and grind the paint edge when disassembling parts of the robot See Cut the paint or surface on the robot before replacing parts on page 145 2 xx2000001548 Remove the connector plate CAUTION Be aware of the cablings that are attached to the connector plate The connector plate cannot be removed completely...

Page 311: ...ckage from the lower arm Note Action DANGER Make sure that all supplies for electrical power hydraulic pressure and air pressure are turned off 1 CAUTION For robots with protection type Clean Room Always cut the paint with a knife and grind the paint edge when disassembling parts of the robot See Cut the paint or surface on the robot before replacing parts on page 145 2 Continues on next page Prod...

Page 312: ...ctrical power hydraulic pressure and air pressure are turned off 1 CAUTION For robots with protection type Clean Room Always cut the paint with a knife and grind the paint edge when disassembling parts of the robot See Cut the paint or surface on the robot before replacing parts on page 145 2 Continues on next page 312 Product manual IRB 1300 3HAC070390 001 Revision G Copyright 2020 2022 ABB All r...

Page 313: ...ssure and air pressure are turned off 1 CAUTION For robots with protection type Clean Room Always cut the paint with a knife and grind the paint edge when disassembling parts of the robot See Cut the paint or surface on the robot before replacing parts on page 145 2 Wrap the connectors with the masking tape 3 Continues on next page Product manual IRB 1300 313 3HAC070390 001 Revision G Copyright 20...

Page 314: ...before replacing parts on page 145 2 CAUTION Loosening timing belts will release axes This means the axes can fall down Make sure axes are well supported before loosening timing belts 3 CAUTION The upper arms which includes housing extender unit only for IRB 1300 7 1 4 and IRB 1300 12 1 4 tubular and tilt unit weighs 17 kg All lifting accessories used must be sized accord ingly 4 Fit a roundsling ...

Page 315: ...For robots with protection type Clean Room Always cut the paint with a knife and grind the paint edge when disassembling parts of the robot See Cut the paint or surface on the robot before replacing parts on page 145 2 CAUTION Removing motors will release axes This means the axes can fall down Make sure axes are well supported before remov ing motors 3 Continues on next page Product manual IRB 130...

Page 316: ...ys cut the paint with a knife and grind the paint edge when disassembling parts of the robot See Cut the paint or surface on the robot before replacing parts on page 145 2 xx2000001663 Remove the lower arm support Tip If the lower arm support is hard to loosen from the swing use a plastic hammer to knock on the lower arm support lightly 3 Continues on next page 316 Product manual IRB 1300 3HAC0703...

Page 317: ...perly secured The upper arm including housing extender unit only for IRB 1300 7 1 4 and IRB 1300 12 1 4 tu bular and tilt unit weighs 17 kg 3 xx2000001665 Separate the lower arm from the housing Tip If the lower arm is hard to loosen from the hous ing use a plastic hammer to knock on the lower arm lightly 4 Lay down the upper arm on a workbench Make sure to support the gravity center of the upper ...

Page 318: ...paint edge when disassembling parts of the robot See Cut the paint or surface on the robot before replacing parts on page 145 2 WARNING When separating the motor from the gearbox there may be pressure present in the gearbox causing lubricant to spray from the opening Be fore proceeding please read the safety informa tion in the section Gearbox lubricants oil or grease on page 29 3 CAUTION Removing...

Page 319: ...s and washers 8 xx2000001628 Carefully lift out the motor 9 Removing the swing support Note Action DANGER Make sure that all supplies for electrical power hydraulic pressure and air pressure are turned off 1 Continues on next page Product manual IRB 1300 319 3HAC070390 001 Revision G Copyright 2020 2022 ABB All rights reserved 5 Repair 5 5 1 Replacing the lower arm Continued ...

Page 320: ...ghtly 3 Separating the swing from the lower arm Note Action DANGER Make sure that all supplies for electrical power hydraulic pressure and air pressure are turned off 1 CAUTION For robots with protection type Clean Room Always cut the paint with a knife and grind the paint edge when disassembling parts of the robot See Cut the paint or surface on the robot before replacing parts on page 145 2 xx20...

Page 321: ...ways cut the paint with a knife and grind the paint edge when disassembling parts of the robot See Cut the paint or surface on the robot before replacing parts on page 145 2 xx2000002516 For robots with protection class IP67 option 3350 670 For robots with protection type Foundry Plus option 3352 10 Remove the sealing ring on the swing side 3 xx2000001692 Remove the sealing ring on the swing suppo...

Page 322: ... parts of the robot See Cut the paint or surface on the robot before replacing parts on page 145 2 CAUTION Removing gearboxes will release axes This means the axes can fall down Make sure axes are well supported before remov ing gearboxes 3 xx2000001688 Remove the screws 4 xx2000001689 Pull out the gearbox 5 Continues on next page 322 Product manual IRB 1300 3HAC070390 001 Revision G Copyright 202...

Page 323: ...ged 2 Magnetic oil plug G 1 4 3HAC037925 001 Check the oil plugs Replace if damaged 3 Tightening torque 10 Nm xx2000001726 Refitting the axis 2 gearbox Note Action For robots with protection type Clean Room 1 Clean the joints that have been opened and wipe the parts free from particles with spirit on a lint free O ring on axis 2 gear unit 3HAC064977 004 xx2000001690 Check the O ring Replace if dam...

Page 324: ...2000001706 Refit the axis 2 gearbox with guidance from the guide pins 4 Screw M5x25 12 9 Lafre 2C2B FC6 9 16 pcs Secure with screws 5 Tightening torque 8 9 Nm 3 xx2000001707 xx2000001708 Remove the guide pins 6 Continues on next page 324 Product manual IRB 1300 3HAC070390 001 Revision G Copyright 2020 2022 ABB All rights reserved 5 Repair 5 5 1 Replacing the lower arm Continued ...

Page 325: ... robots with protection type Foundry Plus option 3352 10 For robots with protection type Foundry Plus option 3352 10 xx2000002518 Check the O rings on both swing and swing sup port sides For robots with protection type Foundry Plus option 3352 10 xx2000002517 Sealing ring swing side 3HAC065675 001 For robots with protection class IP67 option 3350 670 3 Screw M4x12 12 9 Lafre 2C2B FC6 9 8 pcs For r...

Page 326: ...ticles with spirit on a lint free xx2000002460 Check the radial sealing on the swing top Replace if damaged as described below 2 Big circular plate of the axis 2 sealing assembly tool included in Special toolkit for IP67 Clean Room Foundry Plus robots 3HAC078203 001 xx2000002461 Fit the big circular plate of the axis 2 sealing as sembly tool to the swing opposite side of the ra dial sealing with t...

Page 327: ...obot For robots with protection type Foundry Plus option 3352 10 The sealing lip as pointed in the following figure is facing the outer side of the robot xx2000002537 5 Ring of the axis 2 sealing assembly tool included in Special toolkit for IP67 Clean Room Foundry Plus robots 3HAC078203 001 xx2000002463 For robots with protection type Foundry Plus option 3352 10 Place the ring of the axis 2 seali...

Page 328: ...to place 8 Remove the assembly tool 9 Check that the sealing is undamaged and properly fitted 10 Refitting the swing to the lower arm Note Action For robots with protection type Clean Room 1 Clean the joints that have been opened and wipe the parts free from particles with spirit on a lint free O ring on swing 3HAC061327 036 xx2000001750 Check the O ring Replace if damaged 2 Continues on next page...

Page 329: ...s free from particles with spirit on a lint free xx2000002466 Check the radial sealing on the swing support Replace if damaged as described below 2 Big circular plate of the axis 2 sealing assembly tool included in Special toolkit for IP67 Clean Room Foundry Plus robots 3HAC078203 001 xx2000002467 Fit the big circular plate of the axis 2 sealing as sembly tool to the swing support opposite side of...

Page 330: ...3350 670 For robots with protection type Foundry Plus option 3352 10 The sealing lip as pointed in the following figure is facing the outer side of the robot xx2000002537 5 Ring of the axis 2 sealing assembly tool included in Special toolkit for IP67 Clean Room Foundry Plus robots 3HAC078203 001 xx2000002469 For robots with protection class IP67 option 3350 670 For robots with protection type Foun...

Page 331: ...swing support Note Action For robots with protection type Clean Room 1 Clean the joints that have been opened and wipe the parts free from particles with spirit on a lint free Gasket for swing support short 3HAC067822 001 For robots with protection class IP67 option 3350 670 2 Gasket for swing support long 3HAC067823 001 xx2000002520 For robots with protection type Clean Room option 3351 4 For rob...

Page 332: ...protector axis 2 3HAC067816 001 xx2000001567 Refitting the axis 2 motor Note Action For robots with protection type Clean Room 1 Clean the joints that have been opened and wipe the parts free from particles with spirit on a lint free Axis 2 motor for IRB 1300 7 1 4 3HAC073078 001 CAUTION Do not mix the axis 2 motor used for IRB 1300 7 1 4 and IRB 1300 12 1 4 Always carefully check the part number ...

Page 333: ...ing oil to the motor that has contact ing area with the gearbox 5 Motor orientation orient the motor according to the figure below in regard to the encircled motor con nector xx2000001630 Orient the motor correctly and fit it into the swing Make sure the motor is properly fit to gearbox 6 Continues on next page Product manual IRB 1300 333 3HAC070390 001 Revision G Copyright 2020 2022 ABB All right...

Page 334: ...2 Figure 5 1 Check the radial sealing on the lower arm Replace if damaged as described below 2 Big circular plate of the axis 3 sealing assembly tool included in Special toolkit for IP67 Clean Room Foundry Plus robots 3HAC078203 001 xx2000002473 Fit the big circular plate of the axis 3 sealing as sembly tool to the lower arm opposite side of the radial sealing with three M4x12 screws 3 Continues o...

Page 335: ...ure is facing the outer side of the robot xx2000002537 5 Ring of the axis 3 sealing assembly tool included in Special toolkit for IP67 Clean Room Foundry Plus robots 3HAC078203 001 xx2000002499 Place the ring of the axis 3 sealing assembly tool against the sealing xx2000002562 6 Continues on next page Product manual IRB 1300 335 3HAC070390 001 Revision G Copyright 2020 2022 ABB All rights reserved...

Page 336: ...ve the assembly tool 9 Check that the sealing is undamaged and properly fitted 10 Refitting the lower arm to the housing Note Action For robots with protection type Clean Room 1 Clean the joints that have been opened and wipe the parts free from particles with spirit on a lint free Screw M4x16 12 9 Lafre 2C2B FC6 9 PrO COat111 16 pcs Refit the lower arm to the housing 2 Tightening torque 4 5 Nm 3 ...

Page 337: ...pecial toolkit for IP67 Clean Room Foundry Plus robots 3HAC078203 001 xx2000002478 Fit the big circular plate of the axis 3 sealing as sembly tool to the lower arm support opposite side of the radial sealing with three M4x12 screws 3 Grease 3HAC029132 001 Apply a little grease to the sealing lip when repla cing the radial sealing and wipe clean after the replacement Note For Clean Room robots make...

Page 338: ...owing figure is facing the outer side of the robot xx2000002537 5 Ring of the axis 3 sealing assembly tool included in Special toolkit for IP67 Clean Room Foundry Plus robots 3HAC078203 001 xx2000002480 For robots with protection class IP67 option 3350 670 For robots with protection type Foundry Plus option 3352 10 Place the ring of the axis 3 sealing assembly tool against the sealing xx2000002562...

Page 339: ...ted 10 Refitting the lower arm support Note Action For robots with protection type Clean Room 1 Clean the joints that have been opened and wipe the parts free from particles with spirit on a lint free Gasket for lower arm support 3HAC067826 001 xx2000002521 For robots with protection class IP67 option 3350 670 For robots with protection type Clean Room option 3351 4 For robots with protection type...

Page 340: ...for IRB 1300 7 1 4 and IRB 1300 12 1 4 Always carefully check the part number attached to the motor and the robot type and refit with the right one 2 Axis 3 motor for IRB 1300 12 1 4 3HAC082079 001 Check that all assembly surfaces are clean and without damages the motor is clean and undamaged 3 Resolver cover on motor IRB 1300 12 1 4 3HAC060261 001 xx2100002770 Valid for IRB 1300 12 1 4 Check the ...

Page 341: ...ave been opened and wipe the parts free from particles with spirit on a lint free xx2000001615 Install the timing belt to the pulleys and verify that the belt runs correctly in the grooves of the pul leys 2 Used belt 73 4 78 5 Hz Move the motor to achieve proper belt tension 3 New belt 87 8 92 1 Hz Use a sonic tension meter to measure the timing belt tension 4 If the timing belt tension does not m...

Page 342: ...e been opened and wipe the parts free from particles with spirit on a lint free xx2000001746 Route the cable package up into the lower arm Make sure that the the air hoses are facing outside in the axis 2 cable protector see the figure as a guidance for the cable twisting way 2 Continues on next page 342 Product manual IRB 1300 3HAC070390 001 Revision G Copyright 2020 2022 ABB All rights reserved ...

Page 343: ...is 2 cable protector 4 Tightening torque 2 6 Nm xx2000001556 Routing the cable package in the lower arm Note Action For robots with protection type Clean Room 1 Clean the joints that have been opened and wipe the parts free from particles with spirit on a lint free Continues on next page Product manual IRB 1300 343 3HAC070390 001 Revision G Copyright 2020 2022 ABB All rights reserved 5 Repair 5 5 ...

Page 344: ...d apply grease to the axis 3 cable pro tector before refitting Screw M4x10 12 9 Lafre 2C2B FC6 9 3 pcs Tightening torque 2 6 Nm xx2000001552 xx2000001569 Route the cable package through the lower arm support and up into the housing CAUTION Make sure that no cables or hoses are twisted or strained Reroute if necessary 4 Continues on next page 344 Product manual IRB 1300 3HAC070390 001 Revision G Co...

Page 345: ...ON Correct cable routing is highly important If the cables are routed and secured incorrectly the cables can be damaged 3 xx2000001550 Reconnect the connectors FB2 MP2 FB3 MP3 Tip See the number markings on the connectors for help to find the corresponding connector 4 Screw M4x8 12 9 Lafre 2C2B FC6 9 2 pcs Refit the connector plate to the lower arm 5 Tightening torque 2 6 Nm xx2000001548 Continues...

Page 346: ...torque 2 6 Nm xx2100001465 xx2000001553 Routing the cable package in the housing Note Action For robots with protection type Clean Room 1 Clean the joints that have been opened and wipe the parts free from particles with spirit on a lint free Plastic cable protector axis 4 Slip the axis 4 cable protector over the cable package 2 3HAC064694 001 xx2000001570 Continues on next page 346 Product manual...

Page 347: ...Clean the joints that have been opened and wipe the parts free from particles with spirit on a lint free Screw M4x8 12 9 Lafre 2C2B FC6 9 4 pcs Refit the axis 4 cable protector 2 Tightening torque 2 6 Nm xx2000001546 Reconnecting the axis 4 motor connectors Note Action For robots with protection type Clean Room 1 Clean the joints that have been opened and wipe the parts free from particles with sp...

Page 348: ...ting is highly important If the cables are routed and secured incorrectly the cables can be damaged 4 Screw M4x8 12 9 Lafre 2C2B FC6 9 2 pcs Refit the connector plate 5 Tightening torque 2 6 Nm xx2000001542 Routing the cable package in the tubular Note Action For robots with protection type Clean Room 1 Clean the joints that have been opened and wipe the parts free from particles with spirit on a ...

Page 349: ...ith protection type Clean Room 1 Clean the joints that have been opened and wipe the parts free from particles with spirit on a lint free xx2000001539 Reconnect the air hoses Note See the number markings on the air hoses for help to find the corresponding air hoses 2 xx2000001540 For robots with Ethernet cabling Access the connector from the process hub and reconnect the connector J1 C2 Tip See th...

Page 350: ...1 J1 C3 Tip See the number markings on the connectors for help to find the corresponding connector 3 Reconnecting the axis 5 motor connectors Note Action For robots with protection type Clean Room 1 Clean the joints that have been opened and wipe the parts free from particles with spirit on a lint free xx2000001535 Insert the male header of the motor connectors to the connector plate 2 Continues o...

Page 351: ...Insert the male header of the motor connectors to the connector plate 2 xx2000001532 Reconnect the connectors FB6 MP6 Tip See the number markings on the connectors for help to find the corresponding connector 3 Refitting the process hub Note Action For robots with protection type Clean Room 1 Clean the joints that have been opened and wipe the parts free from particles with spirit on a lint free C...

Page 352: ...k the seal bolts Replace if damaged 3 Route and secure the cabling with cable straps CAUTION Correct cable routing is highly important If the cables are routed and secured incorrectly the cables can be damaged 4 Screw M4x10 12 9 Lafre 2C2B FC6 9 4 pcs Refit the process hub 5 Tightening torque 2 6 Nm xx2000001538 Securing the cable package in the tubular Note Action For robots with protection type ...

Page 353: ...e cabling with cable straps CAUTION Correct cable routing is highly important If the cables are routed and secured incorrectly the cables can be damaged 4 Refitting the covers Note Action For robots with protection type Clean Room 1 Clean the joints that have been opened and wipe the parts free from particles with spirit on a lint free Continues on next page Product manual IRB 1300 353 3HAC070390 ...

Page 354: ... 001 Apply grease to the covers that have contacting area with the cable package 4 Screw M4x10 12 9 Lafre 2C2B FC6 9 Refit the covers Tubular support cover A Housing cover B Lower arm covers C Swing covers D 5 Tightening torque 2 6 Nm xx2000001724 Jogging the robot to oil filling position Note Action Turn on the electric power to the robot 1 If the robot is not connected to the controller power mu...

Page 355: ...ace 3 Refilling oil to axis 2 gearbox Note Action WARNING Handling gearbox oil involves several safety risks see Gearbox lubricants oil or grease on page 29 1 CAUTION The gearbox can contain an excess of pressure that can be hazardous Open the oil plug carefully in order to let the excess pressure out 2 Continues on next page Product manual IRB 1300 355 3HAC070390 001 Revision G Copyright 2020 202...

Page 356: ...ill the gearbox with oil Note The amount of oil to be filled depends on the amount previously being drained 5 CAUTION Oil filling must be slow to make sure air venting is fluent xx2000001580 Inspect the oil level by measuring the level at the upper oil plug hole Required oil level within the range of 64 mm to 69 mm below the edge of the oil plug hole CAUTION The oil level sinks when the oil fills ...

Page 357: ...re supply air pressure supply to the robot before entering the safeguarded space 3 Concluding procedure Note Action For robots with protection type Clean Room 1 Clean and paint the joints that have been opened See Cut the paint or surface on the robot before replacing parts on page 145 Note After all repair work wipe the Clean Room robot free from particles with spirit on a lint free cloth Calibra...

Page 358: ...ke sure all safety requirements are met when performing the first test run 3 358 Product manual IRB 1300 3HAC070390 001 Revision G Copyright 2020 2022 ABB All rights reserved 5 Repair 5 5 1 Replacing the lower arm Continued ...

Page 359: ...e housing and extender unit The housing is located as shown in the figure xx2000001476 Continues on next page Product manual IRB 1300 359 3HAC070390 001 Revision G Copyright 2020 2022 ABB All rights reserved 5 Repair 5 5 2 Replacing the housing and extender unit ...

Page 360: ...01 001 Housing IP67 Used with protection type Clean Room 3HAC077814 001 Housing Clean Room Used with protection type Foundry Plus 3HAC077848 001 Housing Foundry Plus Used for IRB 1300 7 1 4 and IRB 1300 12 1 4 Used with protection classes IP40 and IP67 3HAC073085 001 Extender unit Used for IRB 1300 7 1 4 and IRB 1300 12 1 4 Used with protection type Clean Room 3HAC077818 001 Extender unit Clean Ro...

Page 361: ... with protection type Foundry Plus 3HAC073306 001 Process hub basic Used with protection classes IP40 and IP67 Used with protection type Foundry Plus 3HAC073307 001 Process hub CP CS and air hose without Ethernet Used with protection classes IP40 and IP67 Used with protection type Foundry Plus 3HAC073308 001 Process hub CP CS and air hose with Ethernet Used with protection type Clean Room 3HAC0778...

Page 362: ...r housing cover Not used with protection class IP40 Replace if damaged 3HAC067826 001 Gasket for lower arm support Not used with protection class IP40 Replace if damaged 3HAC067832 001 Gasket for lower arm cover Not used with protection class IP40 Replace if damaged 3HAC032050 001 Seal bolt Not used with protection class IP40 Replace if damaged 3HAC070148 005 Radial sealing on lower arm Used with ...

Page 363: ...ed for measuring the timing belt tension Dynamometer Used with protection class IP67 and protection types Clean Room and Foundry Plus Used for the press fitting of radial sealings Includes five sets of ra dial sealing assembly tool for axes 1 to 4 and axis 6 3HAC078203 001 Special toolkit for IP67 Clean Room Foundry Plus robots Required consumables Note Article number Consumable Cable straps FM 22...

Page 364: ...before replacing parts on page 145 4 Removing the covers Note Action DANGER Make sure that all supplies for electrical power hydraulic pressure and air pressure are turned off 1 CAUTION For robots with protection type Clean Room Always cut the paint with a knife and grind the paint edge when disassembling parts of the robot See Cut the paint or surface on the robot before replacing parts on page 1...

Page 365: ...aint edge when disassembling parts of the robot See Cut the paint or surface on the robot before replacing parts on page 145 2 xx2000001530 Cut the cable straps 3 xx2000001531 Remove the connector plates CAUTION Be aware of the cablings that are attached to the connector plate The connector plate cannot be removed completely until the connectors are re move from the plate 4 Continues on next page ...

Page 366: ...532 Disconnect the connectors MP6 FB6 Tip Take photos of the connector and cable position before disconnecting them to have as a reference when reconnecting 3 xx2000001533 Snap loose and remove the male head of the connectors from the connector plate 4 Disconnecting the axis 5 motor connectors Note Action DANGER Make sure that all supplies for electrical power hydraulic pressure and air pressure a...

Page 367: ...emove the male head of the connectors from the connector plate 4 Disconnecting CP CS cabling if equipped Note Action DANGER Make sure that all supplies for electrical power hydraulic pressure and air pressure are turned off 1 CAUTION For robots with protection type Clean Room Always cut the paint with a knife and grind the paint edge when disassembling parts of the robot See Cut the paint or surfa...

Page 368: ...hat all supplies for electrical power hydraulic pressure and air pressure are turned off 1 CAUTION For robots with protection type Clean Room Always cut the paint with a knife and grind the paint edge when disassembling parts of the robot See Cut the paint or surface on the robot before replacing parts on page 145 2 xx2000001748 Remove the first semicircular bracket that fixes the cable package 3 ...

Page 369: ...nt edge when disassembling parts of the robot See Cut the paint or surface on the robot before replacing parts on page 145 2 xx2000001538 Remove the screws and carefully open the cover CAUTION There is cabling attached to the cover The cover cannot be removed completely until the connect ors are removed 3 xx2000001539 Disconnect the air hoses 4 Continues on next page Product manual IRB 1300 369 3H...

Page 370: ... Disconnecting the axis 4 motor connectors Note Action DANGER Make sure that all supplies for electrical power hydraulic pressure and air pressure are turned off 1 CAUTION For robots with protection type Clean Room Always cut the paint with a knife and grind the paint edge when disassembling parts of the robot See Cut the paint or surface on the robot before replacing parts on page 145 2 Continues...

Page 371: ...ect the connectors MP4 FB4 Tip Take photos of the connector and cable position before disconnecting them to have as a reference when reconnecting 5 xx2000001545 Snap loose and remove the male head of the connectors from the connector plate 6 Separating the cable package from the housing Note Action DANGER Make sure that all supplies for electrical power hydraulic pressure and air pressure are turn...

Page 372: ... 1 CAUTION For robots with protection type Clean Room Always cut the paint with a knife and grind the paint edge when disassembling parts of the robot See Cut the paint or surface on the robot before replacing parts on page 145 2 xx2000001548 Remove the connector plate CAUTION Be aware of the cablings that are attached to the connector plate The connector plate cannot be removed completely until t...

Page 373: ...package Note Action DANGER Make sure that all supplies for electrical power hydraulic pressure and air pressure are turned off 1 CAUTION For robots with protection type Clean Room Always cut the paint with a knife and grind the paint edge when disassembling parts of the robot See Cut the paint or surface on the robot before replacing parts on page 145 2 Continues on next page Product manual IRB 13...

Page 374: ...Removing the axis 4 motor Note Action DANGER Make sure that all supplies for electrical power hydraulic pressure and air pressure are turned off 1 CAUTION For robots with protection type Clean Room Always cut the paint with a knife and grind the paint edge when disassembling parts of the robot See Cut the paint or surface on the robot before replacing parts on page 145 2 Continues on next page 374...

Page 375: ...ightly to slacken the timing belt 4 Remove the timing belt from its groove on the motor 5 xx2000001605 Remove the screws and washers 6 xx2000001669 Carefully lift out the motor 7 xx2000001670 Remove the timing belt 8 Continues on next page Product manual IRB 1300 375 3HAC070390 001 Revision G Copyright 2020 2022 ABB All rights reserved 5 Repair 5 5 2 Replacing the housing and extender unit Continu...

Page 376: ...support lightly 3 Removing the axis 3 timing belt Note Action DANGER Make sure that all supplies for electrical power hydraulic pressure and air pressure are turned off 1 CAUTION For robots with protection type Clean Room Always cut the paint with a knife and grind the paint edge when disassembling parts of the robot See Cut the paint or surface on the robot before replacing parts on page 145 2 CA...

Page 377: ...om its groove on the motor 7 Separating the lower arm from the housing Note Action DANGER Make sure that all supplies for electrical power hydraulic pressure and air pressure are turned off 1 CAUTION For robots with protection type Clean Room Always cut the paint with a knife and grind the paint edge when disassembling parts of the robot See Cut the paint or surface on the robot before replacing p...

Page 378: ...ter of the upper arm 5 Removing the axis 3 gearbox Note Action DANGER Make sure that all supplies for electrical power hydraulic pressure and air pressure are turned off 1 CAUTION For robots with protection type Clean Room Always cut the paint with a knife and grind the paint edge when disassembling parts of the robot See Cut the paint or surface on the robot before replacing parts on page 145 2 C...

Page 379: ...e paint with a knife and grind the paint edge when disassembling parts of the robot See Cut the paint or surface on the robot before replacing parts on page 145 2 xx2000001729 Support the weight of the extender unit only for IRB 1300 7 1 4 and IRB 1300 12 1 4 tubular and tilt unit and remove the screws 3 Continues on next page Product manual IRB 1300 379 3HAC070390 001 Revision G Copyright 2020 20...

Page 380: ...d air pressure are turned off 1 CAUTION For robots with protection type Clean Room Always cut the paint with a knife and grind the paint edge when disassembling parts of the robot See Cut the paint or surface on the robot before replacing parts on page 145 2 xx2000001732 Access the axis 4 mechanical stop slider from the housing Put it aside for later refitting 3 Continues on next page 380 Product ...

Page 381: ...UTION For robots with protection type Clean Room Always cut the paint with a knife and grind the paint edge when disassembling parts of the robot See Cut the paint or surface on the robot before replacing parts on page 145 2 xx2000001673 Remove the axis 4 mechanical stop flange CAUTION The axis 4 mechanical stop slider is accessible from the housing Put it aside for later refitting xx2000001674 3 ...

Page 382: ...s on page 145 2 CAUTION Removing gearboxes will release axes This means the axes can fall down Make sure axes are well supported before remov ing gearboxes 3 xx2000001675 Remove the screws 4 xx2000001676 Pull out the gearbox 5 Separating the extender unit Note Action DANGER Make sure that all supplies for electrical power hydraulic pressure and air pressure are turned off 1 Continues on next page ...

Page 383: ...der unit before refitting the housing Refitting the extender unit Note Action For robots with protection type Clean Room 1 Clean the joints that have been opened and wipe the parts free from particles with spirit on a lint free O ring on tubular 3HAC061327 018 xx2000002519 For robots with protection class IP67 option 3350 670 For robots with protection type Clean Room option 3351 4 For robots with...

Page 384: ...rom particles with spirit on a lint free O ring on circular spline side axis 4 3HAC061327 021 For robots with protection class IP67 option 3350 670 2 O ring on flexible spline side axis 4 3HAC061327 017 xx2000002525 For robots with protection type Clean Room option 3351 4 For robots with protection type Foundry Plus option 3352 10 Check the o rings Replace if damaged Continues on next page 384 Pro...

Page 385: ...rews 5 Tightening torque 1 9 Nm xx2000001675 Refitting the axis 4 mechanical stop flange Note Action For robots with protection type Clean Room 1 Clean the joints that have been opened and wipe the parts free from particles with spirit on a lint free Continues on next page Product manual IRB 1300 385 3HAC070390 001 Revision G Copyright 2020 2022 ABB All rights reserved 5 Repair 5 5 2 Replacing the...

Page 386: ...refit the housing Check the radial sealing on the housing IP67 Clean Room and Foundry Plus Note Action For robots with protection type Clean Room 1 Clean the joints that have been opened and wipe the parts free from particles with spirit on a lint free xx2000002483 Check the radial sealing on the housing Replace if damaged as described below 2 Continues on next page 386 Product manual IRB 1300 3HA...

Page 387: ...om robots make sure no grease is applied to the sealing grooves 4 xx2000002486 Fit the new sealing into the housing For robots with protection type Clean Room option 3351 4 The sealing lip as pointed in the following figure is facing the inner side of the robot For robots with protection class IP67 option 3350 670 For robots with protection type Foundry Plus option 3352 10 The sealing lip as point...

Page 388: ...o place 7 Remove the assembly tool 8 Check that the sealing is undamaged and properly fitted 9 Refitting the axis 4 mechanical stop slider Note Action For robots with protection type Clean Room 1 Clean the joints that have been opened and wipe the parts free from particles with spirit on a lint free xx2000001732 Place the axis 4 mechanical stop slider in the housing 2 Continues on next page 388 Pr...

Page 389: ...ption 3352 10 Valid for IRB 1300 11 0 9 and IRB 1300 10 1 15 Check the O ring Replace if damaged 2 xx2000001728 Valid for IRB 1300 11 0 9 and IRB 1300 10 1 15 Refit the tubular to the housing 3 xx2000001727 Valid for IRB 1300 7 1 4 and IRB 1300 12 1 4 Refit the extender unit to the housing 4 Screw M4x12 12 9 Lafre 2C2B FC6 9 PrO COat111 14 pcs Refit the screws 5 Tightening torque 3 3 Nm xx20000017...

Page 390: ...y Plus option 3352 10 Check the O ring Replace if damaged 2 xx2000001667 Refit the axis 3 gearbox 3 Screw M4x35 12 9 Lafre 2C2B FC6 9 12 pcs Secure with screws 4 Tightening torque 4 2 Nm 3 xx2000001666 Checking the radial sealing on the lower arm Foundry Plus Note Action For robots with protection type Clean Room 1 Clean the joints that have been opened and wipe the parts free from particles with ...

Page 391: ...r arm opposite side of the radial sealing with three M4x12 screws 3 Grease 3HAC029132 001 Apply a little grease to the sealing lip when repla cing the radial sealing and wipe clean after the replacement 4 xx2000002474 Fit the new sealing into the lower arm The sealing lip as pointed in the following figure is facing the outer side of the robot xx2000002537 5 Continues on next page Product manual I...

Page 392: ...ing assembly tool against the sealing and fix with three M6x75 screws 7 xx2000002476 Screw the screws little by little and evenly to press the sealing into place 8 Remove the assembly tool 9 Check that the sealing is undamaged and properly fitted 10 Refitting the lower arm to the housing Note Action For robots with protection type Clean Room 1 Clean the joints that have been opened and wipe the pa...

Page 393: ... xx2000002477 Check the radial sealing on the lower arm support Replace if damaged as described below 2 Big circular plate of the axis 3 sealing assembly tool included in Special toolkit for IP67 Clean Room Foundry Plus robots 3HAC078203 001 xx2000002478 Fit the big circular plate of the axis 3 sealing as sembly tool to the lower arm support opposite side of the radial sealing with three M4x12 scr...

Page 394: ...70 For robots with protection type Foundry Plus option 3352 10 The sealing lip as pointed in the following figure is facing the outer side of the robot xx2000002537 5 Ring of the axis 3 sealing assembly tool included in Special toolkit for IP67 Clean Room Foundry Plus robots 3HAC078203 001 xx2000002480 For robots with protection class IP67 option 3350 670 For robots with protection type Foundry Pl...

Page 395: ...efitting the lower arm support Note Action For robots with protection type Clean Room 1 Clean the joints that have been opened and wipe the parts free from particles with spirit on a lint free Gasket for lower arm support 3HAC067826 001 xx2000002521 For robots with protection class IP67 option 3350 670 For robots with protection type Clean Room option 3351 4 For robots with protection type Foundry...

Page 396: ...t runs correctly in the grooves of the pul leys 2 Used belt 73 4 78 5 Hz Move the motor to achieve proper belt tension 3 New belt 87 8 92 1 Hz Use a sonic tension meter to measure the timing belt tension 4 If the timing belt tension does not meet the require ment loosen the motor screws and readjust Tightening torque 3 3 Nm xx2000001614 Secure the motor with the screws 5 Release the support to the...

Page 397: ...rectly in the grooves of the pulley 3 Motor orientation orient the motor according to the figure below in regard to the encircled motor con nector xx2000001607 Orient the motor correctly and fit it into the hous ing Note Make sure the motor flange does not press on the timing belt 4 xx2000001680 Refit the motor and verify that the timing belt runs correctly in the groove of the motor pulley 5 Cont...

Page 398: ...ipe the parts free from particles with spirit on a lint free xx2000001609 Remove the screw below the housing 2 Tension adjustment tool for axis 4 timing belt Included in special toolkit 3HAC076396 001 xx2000001610 Fit the tension adjustment tool for axis 4 timing belt to the screw hole 3 Continues on next page 398 Product manual IRB 1300 3HAC070390 001 Revision G Copyright 2020 2022 ABB All rights...

Page 399: ...force range Note Pay attention to the force application direction 5 New belt 23 9 26 2 N xx2000001612 Tightening torque 3 3 Nm 3 xx2000001604 Secure the motor with the screws 6 Continues on next page Product manual IRB 1300 399 3HAC070390 001 Revision G Copyright 2020 2022 ABB All rights reserved 5 Repair 5 5 2 Replacing the housing and extender unit Continued ...

Page 400: ...ber sealing washer 3HAC075325 001 xx2000002496 Routing the cable package in the lower arm Note Action For robots with protection type Clean Room 1 Clean the joints that have been opened and wipe the parts free from particles with spirit on a lint free Screw M4x8 12 9 Lafre 2C2B FC6 9 2 pcs Refit the connector plate to the cable package 2 Tightening torque 2 6 Nm xx2000001554 Continues on next page...

Page 401: ...o the housing CAUTION Make sure that no cables or hoses are twisted or strained Reroute if necessary 4 Reconnecting the axis 2 and 3 motor connectors Note Action For robots with protection type Clean Room 1 Clean the joints that have been opened and wipe the parts free from particles with spirit on a lint free xx2000001551 Insert the male header of the motor connectors to the connector plate 2 Con...

Page 402: ...ding connector 4 Screw M4x8 12 9 Lafre 2C2B FC6 9 2 pcs Refit the connector plate to the lower arm 5 Tightening torque 2 6 Nm xx2000001548 Securing the cable package in the lower arm Note Action For robots with protection type Clean Room 1 Clean the joints that have been opened and wipe the parts free from particles with spirit on a lint free Continues on next page 402 Product manual IRB 1300 3HAC...

Page 403: ...ith protection type Clean Room 1 Clean the joints that have been opened and wipe the parts free from particles with spirit on a lint free Plastic cable protector axis 4 Slip the axis 4 cable protector over the cable package 2 3HAC064694 001 xx2000001570 Continues on next page Product manual IRB 1300 403 3HAC070390 001 Revision G Copyright 2020 2022 ABB All rights reserved 5 Repair 5 5 2 Replacing ...

Page 404: ...e joints that have been opened and wipe the parts free from particles with spirit on a lint free Screw M4x8 12 9 Lafre 2C2B FC6 9 4 pcs Refit the axis 4 cable protector 2 Tightening torque 2 6 Nm xx2000001546 Reconnecting the axis 4 motor connectors Note Action For robots with protection type Clean Room 1 Clean the joints that have been opened and wipe the parts free from particles with spirit on ...

Page 405: ...highly important If the cables are routed and secured incorrectly the cables can be damaged 4 Screw M4x8 12 9 Lafre 2C2B FC6 9 2 pcs Refit the connector plate 5 Tightening torque 2 6 Nm xx2000001542 Routing the cable package in the tubular Note Action For robots with protection type Clean Room 1 Clean the joints that have been opened and wipe the parts free from particles with spirit on a lint fre...

Page 406: ...ection type Clean Room 1 Clean the joints that have been opened and wipe the parts free from particles with spirit on a lint free xx2000001539 Reconnect the air hoses Note See the number markings on the air hoses for help to find the corresponding air hoses 2 xx2000001540 For robots with Ethernet cabling Access the connector from the process hub and reconnect the connector J1 C2 Tip See the number...

Page 407: ...Tip See the number markings on the connectors for help to find the corresponding connector 3 Reconnecting the axis 5 motor connectors Note Action For robots with protection type Clean Room 1 Clean the joints that have been opened and wipe the parts free from particles with spirit on a lint free xx2000001535 Insert the male header of the motor connectors to the connector plate 2 Continues on next p...

Page 408: ...he male header of the motor connectors to the connector plate 2 xx2000001532 Reconnect the connectors FB6 MP6 Tip See the number markings on the connectors for help to find the corresponding connector 3 Refitting the process hub Note Action For robots with protection type Clean Room 1 Clean the joints that have been opened and wipe the parts free from particles with spirit on a lint free Continues...

Page 409: ...al bolts Replace if damaged 3 Route and secure the cabling with cable straps CAUTION Correct cable routing is highly important If the cables are routed and secured incorrectly the cables can be damaged 4 Screw M4x10 12 9 Lafre 2C2B FC6 9 4 pcs Refit the process hub 5 Tightening torque 2 6 Nm xx2000001538 Securing the cable package in the tubular Note Action For robots with protection type Clean Ro...

Page 410: ...g with cable straps CAUTION Correct cable routing is highly important If the cables are routed and secured incorrectly the cables can be damaged 4 Refitting the covers Note Action For robots with protection type Clean Room 1 Clean the joints that have been opened and wipe the parts free from particles with spirit on a lint free Continues on next page 410 Product manual IRB 1300 3HAC070390 001 Revi...

Page 411: ...Refit the covers Tubular support cover A Housing cover B Lower arm covers C 5 Tightening torque 2 6 Nm xx2000001661 Concluding procedure Note Action For robots with protection type Clean Room 1 Clean and paint the joints that have been opened See Cut the paint or surface on the robot before replacing parts on page 145 Note After all repair work wipe the Clean Room robot free from particles with sp...

Page 412: ...the tubular and tilt unit The tubular is located as shown in the figure xx2000001478 Continues on next page 412 Product manual IRB 1300 3HAC070390 001 Revision G Copyright 2020 2022 ABB All rights reserved 5 Repair 5 5 3 Replacing the tubular and tilt unit ...

Page 413: ...AC077817 001 Tilt unit Clean Room Used with protection type Foundry Plus 3HAC077851 001 Tilt unit Foundry Plus Used with protection classes IP40 and IP67 3HAC073081 001 Tubular Used with protection type Clean Room 3HAC077815 001 Tubular Clean Room Used with protection type Foundry Plus 3HAC077849 001 Tubular Foundry Plus 3HAC073082 001 Tubular support Used with protection class IP67 3HAC077803 001...

Page 414: ...e Foundry Plus 3HAC073308 001 Process hub CP CS and air hose with Ethernet Used with protection type Clean Room 3HAC077836 001 Process hub basic Clean Room Used with protection type Clean Room 3HAC077837 001 Process hub Clean Room CP CS and air hose without Ethernet Used with protection type Clean Room 3HAC077838 001 Process hub Clean Room CP CS and air hose with Ethernet 3HAC064693 001 Plastic ca...

Page 415: ...s Replace if damaged 3HAC070148 006 Radial sealing on housing Not used with protection class IP40 Replace if damaged 3HAC061327 018 O ring on tubular Not used with protection type Clean Room Replace if damaged 3HAC078352 001 Plug screw Used with protection type Clean Room Replace if damaged 3HAC078351 001 Plug screw Clean Room Used with protection type Clean Room Replace if damaged 3HAC075325 001 ...

Page 416: ...press fitting of radial sealings Includes five sets of ra dial sealing assembly tool for axes 1 to 4 and axis 6 3HAC078203 001 Special toolkit for IP67 Clean Room Foundry Plus robots Required consumables Note Article number Consumable Cable straps FM 222 3HAC029132 001 Grease Loctite 574 Flange sealant Isopropanol Cleaning agent Removing the tubular and tilt unit IRB 1300 11 0 9 and IRB 1300 10 1 ...

Page 417: ...t before replacing parts on page 145 4 Removing the covers Note Action DANGER Make sure that all supplies for electrical power hydraulic pressure and air pressure are turned off 1 CAUTION For robots with protection type Clean Room Always cut the paint with a knife and grind the paint edge when disassembling parts of the robot See Cut the paint or surface on the robot before replacing parts on page...

Page 418: ... paint edge when disassembling parts of the robot See Cut the paint or surface on the robot before replacing parts on page 145 2 xx2000001530 Cut the cable straps 3 xx2000001531 Remove the connector plates CAUTION Be aware of the cablings that are attached to the connector plate The connector plate cannot be removed completely until the connectors are re move from the plate 4 Continues on next pag...

Page 419: ...01532 Disconnect the connectors MP6 FB6 Tip Take photos of the connector and cable position before disconnecting them to have as a reference when reconnecting 3 xx2000001533 Snap loose and remove the male head of the connectors from the connector plate 4 Disconnecting the axis 5 motor connectors Note Action DANGER Make sure that all supplies for electrical power hydraulic pressure and air pressure...

Page 420: ... remove the male head of the connectors from the connector plate 4 Disconnecting CP CS cabling if equipped Note Action DANGER Make sure that all supplies for electrical power hydraulic pressure and air pressure are turned off 1 CAUTION For robots with protection type Clean Room Always cut the paint with a knife and grind the paint edge when disassembling parts of the robot See Cut the paint or sur...

Page 421: ... that all supplies for electrical power hydraulic pressure and air pressure are turned off 1 CAUTION For robots with protection type Clean Room Always cut the paint with a knife and grind the paint edge when disassembling parts of the robot See Cut the paint or surface on the robot before replacing parts on page 145 2 xx2000001748 Remove the first semicircular bracket that fixes the cable package ...

Page 422: ...aint edge when disassembling parts of the robot See Cut the paint or surface on the robot before replacing parts on page 145 2 xx2000001538 Remove the screws and carefully open the cover CAUTION There is cabling attached to the cover The cover cannot be removed completely until the connect ors are removed 3 xx2000001539 Disconnect the air hoses 4 Continues on next page 422 Product manual IRB 1300 ...

Page 423: ...all supplies for electrical power hydraulic pressure and air pressure are turned off 1 CAUTION For robots with protection type Clean Room Always cut the paint with a knife and grind the paint edge when disassembling parts of the robot See Cut the paint or surface on the robot before replacing parts on page 145 2 CAUTION Loosening timing belts will release axes This means the axes can fall down Mak...

Page 424: ...bots with protection type Clean Room Always cut the paint with a knife and grind the paint edge when disassembling parts of the robot See Cut the paint or surface on the robot before replacing parts on page 145 2 CAUTION Removing motors will release axes This means the axes can fall down Make sure axes are well supported before remov ing motors 3 Continues on next page 424 Product manual IRB 1300 ...

Page 425: ...Always cut the paint with a knife and grind the paint edge when disassembling parts of the robot See Cut the paint or surface on the robot before replacing parts on page 145 2 CAUTION Loosening timing belts will release axes This means the axes can fall down Make sure axes are well supported before loosening timing belts 3 Continues on next page Product manual IRB 1300 425 3HAC070390 001 Revision ...

Page 426: ...bots with protection type Clean Room Always cut the paint with a knife and grind the paint edge when disassembling parts of the robot See Cut the paint or surface on the robot before replacing parts on page 145 2 CAUTION Removing motors will release axes This means the axes can fall down Make sure axes are well supported before remov ing motors 3 Continues on next page 426 Product manual IRB 1300 ...

Page 427: ... knife and grind the paint edge when disassembling parts of the robot See Cut the paint or surface on the robot before replacing parts on page 145 2 xx2000001542 Remove the connector plate CAUTION Be aware of the cablings that are attached to the connector plate The connector plate cannot be removed completely until the connectors are re move from the plate 3 Continues on next page Product manual ...

Page 428: ...m the connector plate 6 Separating the cable package from the housing Note Action DANGER Make sure that all supplies for electrical power hydraulic pressure and air pressure are turned off 1 CAUTION For robots with protection type Clean Room Always cut the paint with a knife and grind the paint edge when disassembling parts of the robot See Cut the paint or surface on the robot before replacing pa...

Page 429: ...g parts of the robot See Cut the paint or surface on the robot before replacing parts on page 145 2 Wrap the connectors with the masking tape 3 xx2000001662 Pull the cable package out to the lower arm sup port 4 Removing the axis 4 motor Note Action DANGER Make sure that all supplies for electrical power hydraulic pressure and air pressure are turned off 1 Continues on next page Product manual IRB...

Page 430: ...he axes can fall down Make sure axes are well supported before remov ing motors 3 xx2000001604 Loosen the screws and move the motor slightly to slacken the timing belt 4 Remove the timing belt from its groove on the motor 5 xx2000001605 Remove the screws and washers 6 xx2000001669 Carefully lift out the motor 7 Continues on next page 430 Product manual IRB 1300 3HAC070390 001 Revision G Copyright ...

Page 431: ...h a knife and grind the paint edge when disassembling parts of the robot See Cut the paint or surface on the robot before replacing parts on page 145 2 xx2000001729 Support the weight of the tubular and tilt unit and remove the screws 3 xx2000001734 Separate the tubular from the housing 4 Continues on next page Product manual IRB 1300 431 3HAC070390 001 Revision G Copyright 2020 2022 ABB All right...

Page 432: ... robot before replacing parts on page 145 2 xx2000001735 Remove the axis 4 mechanical stop flange CAUTION The axis 4 mechanical stop slider is accessible from the housing Put it aside for later refitting xx2000001674 3 Removing the axis 4 gearbox Note Action DANGER Make sure that all supplies for electrical power hydraulic pressure and air pressure are turned off 1 Continues on next page 432 Produ...

Page 433: ... screws 4 xx2000001737 Pull out the gearbox 5 Separating the tubular support Note Action DANGER Make sure that all supplies for electrical power hydraulic pressure and air pressure are turned off 1 CAUTION For robots with protection type Clean Room Always cut the paint with a knife and grind the paint edge when disassembling parts of the robot See Cut the paint or surface on the robot before repla...

Page 434: ...rts of the robot See Cut the paint or surface on the robot before replacing parts on page 145 2 xx2000001741 Remove the tilt unit 3 Removing the tubular and tilt unit IRB 1300 7 1 4 and IRB 1300 12 1 4 Use these procedures to remove the tubular and tilt unit for IRB 1300 7 1 4 and IRB 1300 12 1 4 Preparations before removing the tubular and tilt unit Note Action Decide which calibration routine to...

Page 435: ...fore replacing parts on page 145 4 Removing the tubular covers Note Action DANGER Make sure that all supplies for electrical power hydraulic pressure and air pressure are turned off 1 CAUTION For robots with protection type Clean Room Always cut the paint with a knife and grind the paint edge when disassembling parts of the robot See Cut the paint or surface on the robot before replacing parts on ...

Page 436: ...bling parts of the robot See Cut the paint or surface on the robot before replacing parts on page 145 2 xx2000001530 Cut the cable straps 3 xx2000001531 Remove the connector plates CAUTION Be aware of the cablings that are attached to the connector plate The connector plate cannot be removed completely until the connectors are re move from the plate 4 Continues on next page 436 Product manual IRB ...

Page 437: ...01532 Disconnect the connectors MP6 FB6 Tip Take photos of the connector and cable position before disconnecting them to have as a reference when reconnecting 3 xx2000001533 Snap loose and remove the male head of the connectors from the connector plate 4 Disconnecting the axis 5 motor connectors Note Action DANGER Make sure that all supplies for electrical power hydraulic pressure and air pressure...

Page 438: ... remove the male head of the connectors from the connector plate 4 Disconnecting CP CS cabling if equipped Note Action DANGER Make sure that all supplies for electrical power hydraulic pressure and air pressure are turned off 1 CAUTION For robots with protection type Clean Room Always cut the paint with a knife and grind the paint edge when disassembling parts of the robot See Cut the paint or sur...

Page 439: ... that all supplies for electrical power hydraulic pressure and air pressure are turned off 1 CAUTION For robots with protection type Clean Room Always cut the paint with a knife and grind the paint edge when disassembling parts of the robot See Cut the paint or surface on the robot before replacing parts on page 145 2 xx2000001748 Remove the first semicircular bracket that fixes the cable package ...

Page 440: ...aint edge when disassembling parts of the robot See Cut the paint or surface on the robot before replacing parts on page 145 2 xx2000001538 Remove the screws and carefully open the cover CAUTION There is cabling attached to the cover The cover cannot be removed completely until the connect ors are removed 3 xx2000001539 Disconnect the air hoses 4 Continues on next page 440 Product manual IRB 1300 ...

Page 441: ...all supplies for electrical power hydraulic pressure and air pressure are turned off 1 CAUTION For robots with protection type Clean Room Always cut the paint with a knife and grind the paint edge when disassembling parts of the robot See Cut the paint or surface on the robot before replacing parts on page 145 2 CAUTION Loosening timing belts will release axes This means the axes can fall down Mak...

Page 442: ...bots with protection type Clean Room Always cut the paint with a knife and grind the paint edge when disassembling parts of the robot See Cut the paint or surface on the robot before replacing parts on page 145 2 CAUTION Removing motors will release axes This means the axes can fall down Make sure axes are well supported before remov ing motors 3 Continues on next page 442 Product manual IRB 1300 ...

Page 443: ...Always cut the paint with a knife and grind the paint edge when disassembling parts of the robot See Cut the paint or surface on the robot before replacing parts on page 145 2 CAUTION Loosening timing belts will release axes This means the axes can fall down Make sure axes are well supported before loosening timing belts 3 Continues on next page Product manual IRB 1300 443 3HAC070390 001 Revision ...

Page 444: ...bots with protection type Clean Room Always cut the paint with a knife and grind the paint edge when disassembling parts of the robot See Cut the paint or surface on the robot before replacing parts on page 145 2 CAUTION Removing motors will release axes This means the axes can fall down Make sure axes are well supported before remov ing motors 3 Continues on next page 444 Product manual IRB 1300 ...

Page 445: ...ts with protection type Clean Room Always cut the paint with a knife and grind the paint edge when disassembling parts of the robot See Cut the paint or surface on the robot before replacing parts on page 145 2 xx2000001739 Remove the tubular and tilt unit from the extender unit 3 Continues on next page Product manual IRB 1300 445 3HAC070390 001 Revision G Copyright 2020 2022 ABB All rights reserv...

Page 446: ...hard to loosen from the tubular use a plastic hammer to knock on the tu bular support lightly 3 Separating the tilt unit Note Action DANGER Make sure that all supplies for electrical power hydraulic pressure and air pressure are turned off 1 CAUTION For robots with protection type Clean Room Always cut the paint with a knife and grind the paint edge when disassembling parts of the robot See Cut th...

Page 447: ...Check the sealing set on the tilt unit The sealing set includes an inner ring cover A a radial sealing B an outer ring cover C and a gasket D Replace the damaged part as described below If the inner ring cover is damaged proceed to 3 If the radial sealing is damaged proceed to 4 If the outer ring cover is damaged proceed to 5 If the gasket is damaged proceed to 6 2 xx2000002490 Remove the old inne...

Page 448: ...ots 3HAC078203 001 xx2000002492 2 Fit the small cap of the axis 6 sealing assembly tool against inner ring cover and fix with two M6x16 screws Big cap of the axis 6 sealing as sembly tool included in Special toolkit for IP67 Clean Room Foundry Plus robots 3HAC078203 001 xx2000002493 3 Fit the big cap of the axis 6 sealing assembly tool against the sealing and fix with two M6x25 screws 4 Screw the ...

Page 449: ...aged 6 Refitting the tilt unit Note Action For robots with protection type Clean Room 1 Clean the joints that have been opened and wipe the parts free from particles with spirit on a lint free M2 variseal sealing 3HAC044641 008 xx2000002522 For robots with protection type Foundry Plus option 3352 10 Check the M2 variseal sealings on both sides Replace if damaged Note The sealing lip is facing outs...

Page 450: ...esidual locking liquid and other pollutants with cleaning agent Loctite 7063 2 Apply flange sealing Loctite 574 on the mounting surfaces of the CP CS connector and wipe clean if there is any overflowing Loctite 574 2 Screw M6x20 12 9 Gleitmo 603 Geomet 500 6 pcs Refit the tubular support 3 Tightening torque 14 Nm xx2000001740 Refitting the axis 4 gearbox Note Action For robots with protection type...

Page 451: ... 4 For robots with protection type Foundry Plus option 3352 10 Check the o rings Replace if damaged xx2000001737 Refit the axis 4 gearbox 3 xx2000001720 Make sure that the screws on the gearbox are properly fitted into the notches on the tubular 4 xx2000001738 Continues on next page Product manual IRB 1300 451 3HAC070390 001 Revision G Copyright 2020 2022 ABB All rights reserved 5 Repair 5 5 3 Rep...

Page 452: ...articles with spirit on a lint free xx2000001735 Refit the axis 4 mechanical stop flange to the gearbox 2 xx2000001678 Make sure that the block on the mechanical stop flange is towards the upper side process hub side the notches on the tubular and the mechan ical stop flange are aligned 3 xx2000001718 Continues on next page 452 Product manual IRB 1300 3HAC070390 001 Revision G Copyright 2020 2022 ...

Page 453: ...lean Room Foundry Plus robots 3HAC078203 001 xx2000002484 Fit the lug plate of the axis 4 sealing assembly tool into the housing with three M4x10 screws Note Pay attention to the location of the lugs xx2000002485 3 Grease 3HAC029132 001 Apply a little grease to the sealing lip when repla cing the radial sealing and wipe clean after the replacement Note For Clean Room robots make sure no grease is ...

Page 454: ...37 5 Circular plate of the axis 4 sealing assembly tool included in Special toolkit for IP67 Clean Room Foundry Plus robots 3HAC078203 001 xx2000002487 Fit the circular plate of the axis 4 sealing assembly tool against the sealing and fix with three M6x85 screws 6 xx2000002488 Screw the screws little by little and evenly to press the sealing into place 7 Remove the assembly tool 8 Check that the s...

Page 455: ...nd wipe the parts free from particles with spirit on a lint free O ring on tubular 3HAC061327 018 xx2000002519 For robots with protection class IP67 option 3350 670 For robots with protection type Clean Room option 3351 4 For robots with protection type Foundry Plus option 3352 10 Valid for IRB 1300 11 0 9 and IRB 1300 10 1 15 Check the O ring Replace if damaged 2 xx2000001734 Refit the tubular to...

Page 456: ...r is clean and undamaged 2 xx2000001670 Install the timing belt to the gearbox pulley and verify that the belt runs correctly in the grooves of the pulley 3 Motor orientation orient the motor according to the figure below in regard to the encircled motor con nector xx2000001607 Orient the motor correctly and fit it into the hous ing Note Make sure the motor flange does not press on the timing belt...

Page 457: ... Clean Room 1 Clean the joints that have been opened and wipe the parts free from particles with spirit on a lint free xx2000001609 Remove the screw below the housing 2 Tension adjustment tool for axis 4 timing belt Included in special toolkit 3HAC076396 001 xx2000001610 Fit the tension adjustment tool for axis 4 timing belt to the screw hole 3 Continues on next page Product manual IRB 1300 457 3H...

Page 458: ...d force range Note Pay attention to the force application direction 5 New belt 23 9 26 2 N xx2000001612 Tightening torque 3 3 Nm 3 xx2000001604 Secure the motor with the screws 6 Continues on next page 458 Product manual IRB 1300 3HAC070390 001 Revision G Copyright 2020 2022 ABB All rights reserved 5 Repair 5 5 3 Replacing the tubular and tilt unit Continued ...

Page 459: ...Clean Room option 3351 4 Plug screw Clean Room 3HAC078351 001 Rubber sealing washer 3HAC075325 001 xx2000002496 Securing the cable package in the lower arm Note Action For robots with protection type Clean Room 1 Clean the joints that have been opened and wipe the parts free from particles with spirit on a lint free Continues on next page Product manual IRB 1300 459 3HAC070390 001 Revision G Copyr...

Page 460: ...TION Make sure that no cables or hoses are twisted or strained Reroute if necessary 3 Routing the cable package in the housing Note Action For robots with protection type Clean Room 1 Clean the joints that have been opened and wipe the parts free from particles with spirit on a lint free Plastic cable protector axis 4 Slip the axis 4 cable protector over the cable package 2 3HAC064694 001 xx200000...

Page 461: ...the joints that have been opened and wipe the parts free from particles with spirit on a lint free Screw M4x8 12 9 Lafre 2C2B FC6 9 4 pcs Refit the axis 4 cable protector 2 Tightening torque 2 6 Nm xx2000001546 Reconnecting the axis 4 motor connectors Note Action For robots with protection type Clean Room 1 Clean the joints that have been opened and wipe the parts free from particles with spirit o...

Page 462: ...s highly important If the cables are routed and secured incorrectly the cables can be damaged 4 Screw M4x8 12 9 Lafre 2C2B FC6 9 2 pcs Refit the connector plate 5 Tightening torque 2 6 Nm xx2000001542 Routing the cable package in the tubular Note Action For robots with protection type Clean Room 1 Clean the joints that have been opened and wipe the parts free from particles with spirit on a lint f...

Page 463: ...otection type Clean Room 1 Clean the joints that have been opened and wipe the parts free from particles with spirit on a lint free xx2000001539 Reconnect the air hoses Note See the number markings on the air hoses for help to find the corresponding air hoses 2 xx2000001540 For robots with Ethernet cabling Access the connector from the process hub and reconnect the connector J1 C2 Tip See the numb...

Page 464: ... 6 motor connectors accessible from the tubular support side 3 Screw M5x16 12 9 Lafre 2C2B FC6 9 4 pcs xx2000001601 Refit the screws and washers Note Do not tighten the screws yet 4 Refitting the axis 6 timing belt Note Action For robots with protection type Clean Room 1 Clean the joints that have been opened and wipe the parts free from particles with spirit on a lint free xx2000001600 Install th...

Page 465: ...otection type Clean Room 1 Clean the joints that have been opened and wipe the parts free from particles with spirit on a lint free Check that all assembly surfaces are clean and without damages the motor is clean and undamaged 2 Motor orientation orient the motor according to the figure below in regard to the encircled motor con nector xx2000001598 Orient the motor correctly and fit it into the t...

Page 466: ...s and verify that the belt runs correctly in the grooves of the pul leys 2 Used belt 59 3 63 4 Hz Move the motor to achieve proper belt tension 3 New belt 70 8 74 3 Hz Use a sonic tension meter to measure the timing belt tension 4 If the timing belt tension does not meet the require ment loosen the motor screws and readjust Tightening torque 6 Nm xx2000001594 Secure the motor with the screws 5 Con...

Page 467: ...3 Tip See the number markings on the connectors for help to find the corresponding connector 3 Reconnecting the axis 5 motor connectors Note Action For robots with protection type Clean Room 1 Clean the joints that have been opened and wipe the parts free from particles with spirit on a lint free xx2000001535 Insert the male header of the motor connectors to the connector plate 2 Continues on next...

Page 468: ... the male header of the motor connectors to the connector plate 2 xx2000001532 Reconnect the connectors FB6 MP6 Tip See the number markings on the connectors for help to find the corresponding connector 3 Refitting the process hub Note Action For robots with protection type Clean Room 1 Clean the joints that have been opened and wipe the parts free from particles with spirit on a lint free Continu...

Page 469: ...gasket Replace if damaged 3 Seal bolt 3HAC032050 001 xx2000002513 For robots with protection class IP67 option 3350 670 For robots with protection type Clean Room option 3351 4 For robots with protection type Foundry Plus option 3352 10 Check the seal bolts Replace if damaged 4 Screw M4x10 12 9 Lafre 2C2B FC6 9 4 pcs Refit the process hub 5 Tightening torque 2 6 Nm xx2000001538 Continues on next p...

Page 470: ...e connector plate 3 Tightening torque 1 3 Nm xx2000001531 xx2000001530 Route and secure the cabling with cable straps CAUTION Correct cable routing is highly important If the cables are routed and secured incorrectly the cables can be damaged 4 Refitting the covers Note Action For robots with protection type Clean Room 1 Clean the joints that have been opened and wipe the parts free from particles...

Page 471: ... covers Tubular covers A Housing cover B Lower arm support cover C 5 Tightening torque 2 6 Nm xx2000001733 Concluding procedure Note Action For robots with protection type Clean Room 1 Clean and paint the joints that have been opened See Cut the paint or surface on the robot before replacing parts on page 145 Note After all repair work wipe the Clean Room robot free from particles with spirit on a...

Page 472: ...he tilt unit The sealing set includes an inner ring cover A a radial sealing B an outer ring cover C and a gasket D Replace the damaged part as described below If the inner ring cover is damaged proceed to 3 If the radial sealing is damaged proceed to 4 If the outer ring cover is damaged proceed to 5 If the gasket is damaged proceed to 6 2 xx2000002490 Remove the old inner ring cover and fit the n...

Page 473: ...ots 3HAC078203 001 xx2000002492 2 Fit the small cap of the axis 6 sealing assembly tool against inner ring cover and fix with two M6x16 screws Big cap of the axis 6 sealing as sembly tool included in Special toolkit for IP67 Clean Room Foundry Plus robots 3HAC078203 001 xx2000002493 3 Fit the big cap of the axis 6 sealing assembly tool against the sealing and fix with two M6x25 screws 4 Screw the ...

Page 474: ...aged 6 Refitting the tilt unit Note Action For robots with protection type Clean Room 1 Clean the joints that have been opened and wipe the parts free from particles with spirit on a lint free M2 variseal sealing 3HAC044641 008 xx2000002522 For robots with protection type Foundry Plus option 3352 10 Check the M2 variseal sealings on both sides Replace if damaged Note The sealing lip is facing outs...

Page 475: ...ve residual locking liquid and other pollutants with cleaning agent Loctite 7063 2 Apply flange sealing Loctite 574 on the mounting surfaces of the CP CS connector and wipe clean if there is any overflowing Loctite 574 2 Screw M6x20 12 9 Gleitmo 603 Geomet 500 6 pcs Refit the tubular support 3 Tightening torque 14 Nm xx2000001740 Refitting the tubular Note Action For robots with protection type Cl...

Page 476: ...que 3 8 Nm xx2000001739 xx2000001742 Make sure that the notches on the extender unit and tubular are aligned 4 Refitting the axis 6 motor Note Action For robots with protection type Clean Room 1 Clean the joints that have been opened and wipe the parts free from particles with spirit on a lint free Check that all assembly surfaces are clean and without damages the motor is clean and undamaged 2 Co...

Page 477: ...an Room 1 Clean the joints that have been opened and wipe the parts free from particles with spirit on a lint free xx2000001600 Install the timing belt to the pulleys and verify that the belt runs correctly in the grooves of the pul leys 2 Used belt 85 7 91 6 Hz Move the motor to achieve proper belt tension 3 New belt 102 107 Hz Use a sonic tension meter to measure the timing belt tension 4 If the...

Page 478: ...ut damages the motor is clean and undamaged 2 Motor orientation orient the motor according to the figure below in regard to the encircled motor con nector xx2000001598 Orient the motor correctly and fit it into the tubular 3 Screw M5x16 12 9 Lafre 2C2B FC6 9 4 pcs xx2000001596 Refit the screws and washers Note Do not tighten the screws yet 4 Continues on next page 478 Product manual IRB 1300 3HAC0...

Page 479: ... Use a sonic tension meter to measure the timing belt tension 4 If the timing belt tension does not meet the require ment loosen the motor screws and readjust Tightening torque 6 Nm xx2000001594 Secure the motor with the screws 5 Routing the cable package in the tubular Note Action For robots with protection type Clean Room 1 Clean the joints that have been opened and wipe the parts free from part...

Page 480: ...otection type Clean Room 1 Clean the joints that have been opened and wipe the parts free from particles with spirit on a lint free xx2000001539 Reconnect the air hoses Note See the number markings on the air hoses for help to find the corresponding air hoses 2 xx2000001540 For robots with Ethernet cabling Access the connector from the process hub and reconnect the connector J1 C2 Tip See the numb...

Page 481: ...3 Tip See the number markings on the connectors for help to find the corresponding connector 3 Reconnecting the axis 5 motor connectors Note Action For robots with protection type Clean Room 1 Clean the joints that have been opened and wipe the parts free from particles with spirit on a lint free xx2000001535 Insert the male header of the motor connectors to the connector plate 2 Continues on next...

Page 482: ... the male header of the motor connectors to the connector plate 2 xx2000001532 Reconnect the connectors FB6 MP6 Tip See the number markings on the connectors for help to find the corresponding connector 3 Refitting the process hub Note Action For robots with protection type Clean Room 1 Clean the joints that have been opened and wipe the parts free from particles with spirit on a lint free Continu...

Page 483: ...gasket Replace if damaged 3 Seal bolt 3HAC032050 001 xx2000002513 For robots with protection class IP67 option 3350 670 For robots with protection type Clean Room option 3351 4 For robots with protection type Foundry Plus option 3352 10 Check the seal bolts Replace if damaged 4 Screw M4x10 12 9 Lafre 2C2B FC6 9 4 pcs Refit the process hub 5 Tightening torque 2 6 Nm xx2000001538 Continues on next p...

Page 484: ...nnector plate 3 Tightening torque 1 3 Nm xx2000001531 xx2000001530 Route and secure the cabling with cable straps CAUTION Correct cable routing is highly important If the cables are routed and secured incorrectly the cables can be damaged 4 Refitting the tubular covers Note Action For robots with protection type Clean Room 1 Clean the joints that have been opened and wipe the parts free from parti...

Page 485: ...covers 5 Tightening torque 2 6 Nm xx2000001593 Concluding procedure Note Action For robots with protection type Clean Room 1 Clean and paint the joints that have been opened See Cut the paint or surface on the robot before replacing parts on page 145 Note After all repair work wipe the Clean Room robot free from particles with spirit on a lint free cloth Calibration is detailed in section Calibrat...

Page 486: ...w abb com myABB Note Article number Spare part Replace if damaged 3HAC065651 001 Mechanical stop block A Used for axis 3 of IRB 1300 10 1 15 Replace if damaged 3HAC065671 001 Mechanical stop block B Required tools and equipment Note Article number Equipment Content is defined in section Standard toolkit on page 759 Standard toolkit Required consumables Note Article number Consumable Loctite 243 3H...

Page 487: ...B 1300 11 0 9 IRB 1300 7 1 4 and IRB 1300 12 1 4 Discard the old stops and refit with new ones 4 Mechanical stop block A 3HAC065651 001 2 pcs For IRB 1300 10 1 15 Mechanical stop block A 3HAC065651 001 1 pcs Mechanical stop block B 3HAC065671 001 1 pcs Apply a little Loctite 243 to the screws Note If there is locking liquid residues on the screw please clean it before refitting Remove residual loc...

Page 488: ... steel 1 pcs per stop Secure the mechanical stops 6 Tightening torque 1 Nm 488 Product manual IRB 1300 3HAC070390 001 Revision G Copyright 2020 2022 ABB All rights reserved 5 Repair 5 5 4 Replacing the axis 3 mechanical stops Continued ...

Page 489: ...rts of the IRB 1300 via myABB Business Portal www abb com myABB Note Article number Spare part Replace if damaged 3HAC065805 001 Mechanical stop axis 4 flange Replace if damaged 3HAC065804 001 Mechanical stop axis 4 slider Required tools and equipment Note Article number Equipment Content is defined in section Standard toolkit on page 759 Standard toolkit Continues on next page Product manual IRB ...

Page 490: ...ection class IP67 and protection types Clean Room and Foundry Plus Used for the press fitting of radial sealings Includes five sets of ra dial sealing assembly tool for axes 1 to 4 and axis 6 3HAC078203 001 Special toolkit for IP67 Clean Room Foundry Plus robots Replacement of axis 4 mechanical stops The axis 4 mechanical stops both flange and slider are accessible after removing the housing see R...

Page 491: ...e IRB 1300 via myABB Business Portal www abb com myABB Note Article number Spare part 3HAC073039 001 Motor unit axis 1 3HAC061327 037 O ring on motor unit Used with IRB 1300 11 0 9 Used with protection classes IP40 and IP67 Used with protection type Foundry Plus 3HAC073303 001 Main cable harness S basic Continues on next page Product manual IRB 1300 491 3HAC070390 001 Revision G Copyright 2020 202...

Page 492: ...in cable harness M CP CS and air hose with Ethernet Used with IRB 1300 7 1 4 and IRB 1300 12 1 4 Used with protection classes IP40 and IP67 Used with protection type Foundry Plus 3HAC073297 001 Main cable harness L basic Used with IRB 1300 7 1 4 and IRB 1300 12 1 4 Used with protection classes IP40 and IP67 Used with protection type Foundry Plus 3HAC073298 001 Main cable harness L CP CS and air ho...

Page 493: ...t Used with IRB 1300 7 1 4 and IRB 1300 12 1 4 Used with protection type Clean Room 3HAC077827 001 Main cable harness L basic Clean Room Used with IRB 1300 7 1 4 and IRB 1300 12 1 4 Used with protection type Clean Room 3HAC077828 001 Main cable harness L Clean Room CP CS and air hose without Ethernet Used with IRB 1300 7 1 4 and IRB 1300 12 1 4 Used with protection type Clean Room 3HAC077829 001 M...

Page 494: ...r robots with bottom con nector interface 3HAC073089 001 Base adapter Used with protection classes IP40 and IP67 Used with protection type Foundry Plus 3HAC076475 001 SMB cover Used with protection classes IP40 and IP67 Used with protection type Foundry Plus 3HAC073296 001 Brake release unit Used with protection type Clean Room 3HAC077823 001 Tubular cover Clean Room Used with protection type Clea...

Page 495: ...apter Not used with protection class IP40 Replace if damaged 3HAC067834 001 Gasket for tubular cover Not used with protection class IP40 Replace if damaged 3HAC067833 001 Gasket for housing cover Not used with protection class IP40 Replace if damaged 3HAC067832 001 Gasket for lower arm cover Used for IRB 1300 11 0 9 Not used with protection class IP40 Replace if damaged 3HAC067824 001 Gasket for s...

Page 496: ...e straps FM 222 3HAC029132 001 Grease Kyodo Yushi TMO150 3HAC032140 001 Lubricating oil Deciding calibration routine Decide which calibration routine to be used based on the information in the table Depending on which routine is chosen action might be required prior to beginning the repair work of the robot see the table Note Action Note Calibrating axis 6 always requires tools to be removed from ...

Page 497: ...ration Remove all external cable packages DressPack and tools from the robot Removing the motor Use these procedures to remove the axis 1 motor Preparations before removing the axis 1 motor Note Action Decide which calibration routine to use and take actions accordingly prior to beginning the repair procedure 1 xx2000001520 Jog all axes to zero position 2 DANGER Turn off all electric power supply ...

Page 498: ... oil collecting vessel underneath the quick coupling 3 xx2000001513 Remove the oil plugs and keep them opened to speed up the drainage 4 Plug a G3 8 quick coupling connector with pipe to the quick coupling on base 5 WARNING Used oil is hazardous material and must be disposed of in a safe way See Decom missioning on page 747 for more informa tion 6 Continues on next page 498 Product manual IRB 1300...

Page 499: ...ackage Putting the robot on its side Note Action DANGER Make sure that all supplies for electrical power hydraulic pressure and air pressure are turned off 1 CAUTION For robots with protection type Clean Room Always cut the paint with a knife and grind the paint edge when disassembling parts of the robot See Cut the paint or surface on the robot before replacing parts on page 145 2 Roundsling 1 7 ...

Page 500: ...e robot down with the lower arm support and swing support towards upside 6 Removing the base covers Note Action DANGER Make sure that all supplies for electrical power hydraulic pressure and air pressure are turned off 1 CAUTION For robots with protection type Clean Room Always cut the paint with a knife and grind the paint edge when disassembling parts of the robot See Cut the paint or surface on...

Page 501: ...g parts on page 145 2 WARNING When separating the motor from the gearbox there may be pressure present in the gearbox causing lubricant to spray from the opening Be fore proceeding please read the safety informa tion in the section Gearbox lubricants oil or grease on page 29 3 CAUTION Removing motors will release axes This means the axes can fall down Make sure axes are well supported before remov...

Page 502: ...n the joints that have been opened and wipe the parts free from particles with spirit on a lint free Check that all assembly surfaces are clean and without damages the motor is clean and undamaged 2 O ring on motor unit 3HAC061327 037 xx2000001646 Check the O ring Replace if damaged 3 Continues on next page 502 Product manual IRB 1300 3HAC070390 001 Revision G Copyright 2020 2022 ABB All rights re...

Page 503: ... sure the motor is properly fit to gearbox 5 Screw M6x20 12 9 Gleitmo 603 Geomet 500 4 pcs Refit the screws and washers 6 Tightening torque 10 Nm xx2000001644 Refitting the base covers Note Action For robots with protection type Clean Room 1 Clean the joints that have been opened and wipe the parts free from particles with spirit on a lint free Continues on next page Product manual IRB 1300 503 3H...

Page 504: ...ar interface Refit the base bottom cover together with the base adapter 3 Tightening torque 2 6 Nm xx2000001642 Securing the robot to the foundation Note Action For robots with protection type Clean Room 1 Clean the joints that have been opened and wipe the parts free from particles with spirit on a lint free Roundsling 1 7 m Lifting capacity 400 kg xx2000001649 Run a roundsling around the lower a...

Page 505: ...the instructions detailed in Refitting the cable package on page 171 to refit the complete cable package Refilling oil to axis 1 gearbox Note Action WARNING Handling gearbox oil involves several safety risks see Gearbox lubricants oil or grease on page 29 1 CAUTION The gearbox can contain an excess of pressure that can be hazardous Open the oil plug carefully in order to let the excess pressure ou...

Page 506: ...10 Nm Refit the oil plugs 6 Concluding procedure Note Action For robots with protection type Clean Room 1 Clean and paint the joints that have been opened See Cut the paint or surface on the robot before replacing parts on page 145 Note After all repair work wipe the Clean Room robot free from particles with spirit on a lint free cloth Calibration is detailed in section Calibration on page 713 Rec...

Page 507: ... 15 and IRB 1300 7 1 4 3HAC073078 001 Motor unit axis 2 Used for IRB 1300 12 1 4 3HAC082078 001 Motor unit axis 2 IRB 1300 12 1 4 3HAC061327 037 O ring on motor unit Used with protection classes IP40 and IP67 Used with protection type Foundry Plus 3HAC073092 001 Lower arm cover Used for IRB 1300 11 0 9 Used with protection classes IP40 and IP67 Used with protection type Foundry Plus 3HAC073095 001...

Page 508: ...g cover short Used for IRB 1300 10 1 15 IRB 1300 7 1 4 and IRB 1300 12 1 4 Not used with protection class IP40 Replace if damaged 3HAC067825 001 Gasket for swing cover long Not used with protection class IP40 Replace if damaged 3HAC067832 001 Gasket for lower arm cover Required tools and equipment Note Article number Equipment Content is defined in section Standard toolkit on page 759 Standard too...

Page 509: ...endant to create reference values If the robot is to be calibrated with refer ence calibration Find previous reference values for the axis or create new reference values These val ues are to be used after the repair proced ure is completed for calibration of the ro bot Creating new values requires possibility to move the robot Read more about reference calibration for Axis Calibration in Reference...

Page 510: ... on its side CAUTION If the axis 2 motor is removed with the robot standing on floor oil will leak from the axis 2 gearbox Note Action DANGER Make sure that all supplies for electrical power hydraulic pressure and air pressure are turned off 1 CAUTION For robots with protection type Clean Room Always cut the paint with a knife and grind the paint edge when disassembling parts of the robot See Cut ...

Page 511: ...t secured to the foundation 5 xx2000001648 Loosen the robot from the foundation by removing the foundation attachment screws and put the robot on its side Note Lay the robot down with the lower arm support and swing support towards upside 6 Removing the covers Note Action DANGER Make sure that all supplies for electrical power hydraulic pressure and air pressure are turned off 1 Continues on next ...

Page 512: ...ER Make sure that all supplies for electrical power hydraulic pressure and air pressure are turned off 1 CAUTION For robots with protection type Clean Room Always cut the paint with a knife and grind the paint edge when disassembling parts of the robot See Cut the paint or surface on the robot before replacing parts on page 145 2 xx2000001553 Remove the cable bracket in the lower arm 3 Continues o...

Page 513: ...mbling parts of the robot See Cut the paint or surface on the robot before replacing parts on page 145 2 xx2000001548 Remove the connector plate CAUTION Be aware of the cablings that are attached to the connector plate The connector plate cannot be removed completely until the connectors are re move from the plate as shown in following step 3 xx2000001640 Cut the cable strap 4 Continues on next pa...

Page 514: ...ts with protection type Clean Room Always cut the paint with a knife and grind the paint edge when disassembling parts of the robot See Cut the paint or surface on the robot before replacing parts on page 145 2 WARNING When separating the motor from the gearbox there may be pressure present in the gearbox causing lubricant to spray from the opening Be fore proceeding please read the safety informa...

Page 515: ...p the connectors with the masking tape and pull the motor cablings carefully down to the swing from the lower arm 7 xx2000001627 Access the screws and washers securing the axis 2 motor from the swing support 8 xx2000001626 Remove the screws and washers 9 Continues on next page Product manual IRB 1300 515 3HAC070390 001 Revision G Copyright 2020 2022 ABB All rights reserved 5 Repair 5 6 2 Replacing...

Page 516: ...x the axis 2 motor used for IRB 1300 7 1 4 and IRB 1300 12 1 4 Always carefully check the part number attached to the motor and the robot type and refit with the right one 2 Axis 2 motor for IRB 1300 12 1 4 3HAC082078 001 Check that all assembly surfaces are clean and without damages the motor is clean and undamaged 3 O ring on motor unit 3HAC061327 037 xx2000001629 Check the O ring Replace if dam...

Page 517: ... sure the motor is properly fit to gearbox 6 Screw M6x20 12 9 Gleitmo 603 Geomet 500 4 pcs Refit the screws and washers 7 Tightening torque 10 Nm xx2000001626 Securing the motor cabling Note Action For robots with protection type Clean Room 1 Clean the joints that have been opened and wipe the parts free from particles with spirit on a lint free Continues on next page Product manual IRB 1300 517 3...

Page 518: ... Clean the joints that have been opened and wipe the parts free from particles with spirit on a lint free xx2000001641 Insert the male header of the motor connectors to the connector plate 2 xx2000001640 Route and secure the cabling with a cable strap CAUTION Correct cable routing is highly important If the cables are routed and secured incorrectly the cables can be damaged 3 Continues on next pag...

Page 519: ...ecuring the cable package Note Action For robots with protection type Clean Room 1 Clean the joints that have been opened and wipe the parts free from particles with spirit on a lint free Screw M4x8 12 9 Lafre 2C2B FC6 9 2 pcs Refit the cable bracket in the swing 2 Tightening torque 2 6 Nm xx2000001623 Continues on next page Product manual IRB 1300 519 3HAC070390 001 Revision G Copyright 2020 2022...

Page 520: ... Room option 3351 4 For robots with protection type Foundry Plus option 3352 10 Check the gaskets Replace if damaged 2 Grease 3HAC029132 001 Apply grease to the cable package cover all moving area of the package 3 Grease 3HAC029132 001 Apply grease to the covers that have contacting area with the cable package 4 Screw M4x10 12 9 Lafre 2C2B FC6 9 Refit the covers lower arm support cover swing suppo...

Page 521: ... to standing and secure to the foundation with the attachment screws and washers 4 Washers 17 x 30 x 3 steel hard ness class 200HV Tightening Torque 150 Nm 10 Nm Concluding procedure Note Action For robots with protection type Clean Room 1 Clean and paint the joints that have been opened See Cut the paint or surface on the robot before replacing parts on page 145 Note After all repair work wipe th...

Page 522: ... sure all safety requirements are met when performing the first test run 3 522 Product manual IRB 1300 3HAC070390 001 Revision G Copyright 2020 2022 ABB All rights reserved 5 Repair 5 6 2 Replacing the axis 2 motor Continued ...

Page 523: ...RB 1300 7 1 4 3HAC073086 001 Motor unit axis 3 Used for IRB 1300 12 1 4 3HAC082079 001 Motor unit axis 3 IRB 1300 12 1 4 Used for IRB 1300 12 1 4 3HAC060261 001 Resolver cover on motor IRB 1300 12 1 4 3HAC067040 001 Timing belt axis 3 Used with protection classes IP40 and IP67 Used with protection type Foundry Plus 3HAC073092 001 Lower arm cover Used with protection type Clean Room 3HAC077821 001 ...

Page 524: ...ed for installation of the calibration tool Decide which calibration routine to use for calibrating the robot Reference calibration External cable packages DressPack and tools can stay fitted on the robot Fine calibration All external cable packages DressPack and tools must be removed from the robot 1 Follow the instructions given in the refer ence calibration routine on the FlexPendant to create ...

Page 525: ...ore entering the safeguarded space 3 CAUTION For robots with protection type Clean Room Always cut the paint with a knife and grind the paint edge when disassembling parts of the robot See Cut the paint or surface on the robot before replacing parts on page 145 4 Removing the lower arm covers Note Action DANGER Make sure that all supplies for electrical power hydraulic pressure and air pressure ar...

Page 526: ...f 1 CAUTION For robots with protection type Clean Room Always cut the paint with a knife and grind the paint edge when disassembling parts of the robot See Cut the paint or surface on the robot before replacing parts on page 145 2 xx2000001548 Remove the connector plate CAUTION Be aware of the cablings that are attached to the connector plate The connector plate cannot be removed completely until ...

Page 527: ...iming belt Note Action DANGER Make sure that all supplies for electrical power hydraulic pressure and air pressure are turned off 1 CAUTION For robots with protection type Clean Room Always cut the paint with a knife and grind the paint edge when disassembling parts of the robot See Cut the paint or surface on the robot before replacing parts on page 145 2 Continues on next page Product manual IRB...

Page 528: ... ingly 4 Fit a roundsling to the upper arm to support the weight no force 5 xx2000001614 Loosen the screws and move the motor slightly to slacken the timing belt 6 xx2000001615 Remove the timing belt from its groove on the motor 7 Removing the axis 3 motor Note Action DANGER Make sure that all supplies for electrical power hydraulic pressure and air pressure are turned off 1 Continues on next page...

Page 529: ...ted before remov ing motors 3 xx2000001616 Remove the screws and washers 4 xx2000001617 Carefully lift out the motor 5 Refitting the motor Use these procedures to refit the axis 3 motor Refitting the axis 3 motor Note Action For robots with protection type Clean Room 1 Clean the joints that have been opened and wipe the parts free from particles with spirit on a lint free Continues on next page Pr...

Page 530: ...r cover on motor IRB 1300 12 1 4 3HAC060261 001 xx2100002770 Valid for IRB 1300 12 1 4 Check the resolver cover Replace if damaged 4 Motor orientation orient the motor according to the figure below in regard to the encircled motor con nector xx2000001618 Orient the motor correctly and fit it into the lower arm 5 Screw M4x16 12 9 Lafre 2C2B FC6 9 4 pcs xx2000001616 Refit the screws and washers Note...

Page 531: ...on 4 If the timing belt tension does not meet the require ment loosen the motor screws and readjust Tightening torque 3 3 Nm xx2000001614 Secure the motor with the screws 5 Release the support to the upper arm 6 Reconnecting the axis 3 motor connectors Note Action For robots with protection type Clean Room 1 Clean the joints that have been opened and wipe the parts free from particles with spirit ...

Page 532: ... corresponding connector 4 Screw M4x8 12 9 Lafre 2C2B FC6 9 2 pcs Refit the connector plate to the lower arm 5 Tightening torque 2 6 Nm xx2000001548 Refitting the lower arm covers Note Action For robots with protection type Clean Room 1 Clean the joints that have been opened and wipe the parts free from particles with spirit on a lint free Continues on next page 532 Product manual IRB 1300 3HAC070...

Page 533: ... arm covers 5 Tightening torque 2 6 Nm xx2000001613 Concluding procedure Note Action For robots with protection type Clean Room 1 Clean and paint the joints that have been opened See Cut the paint or surface on the robot before replacing parts on page 145 Note After all repair work wipe the Clean Room robot free from particles with spirit on a lint free cloth Calibration is detailed in section Cal...

Page 534: ...ber Spare part 3HAC073087 001 Motor unit axis 4 3HAC065806 001 Timing belt axis 4 Used with protection classes IP40 and IP67 Used with protection type Foundry Plus 3HAC073093 001 Housing cover Used with protection type Clean Room 3HAC077822 001 Housing cover Clean Room Not used with protection class IP40 Replace if damaged 3HAC067833 001 Gasket for housing cover Continues on next page 534 Product ...

Page 535: ...the calibration tool Decide which calibration routine to use for calibrating the robot Reference calibration External cable packages DressPack and tools can stay fitted on the robot Fine calibration All external cable packages DressPack and tools must be removed from the robot 1 Follow the instructions given in the refer ence calibration routine on the FlexPendant to create reference values If the...

Page 536: ...fore entering the safeguarded space 3 CAUTION For robots with protection type Clean Room Always cut the paint with a knife and grind the paint edge when disassembling parts of the robot See Cut the paint or surface on the robot before replacing parts on page 145 4 Removing the housing cover Note Action DANGER Make sure that all supplies for electrical power hydraulic pressure and air pressure are ...

Page 537: ...re turned off 1 CAUTION For robots with protection type Clean Room Always cut the paint with a knife and grind the paint edge when disassembling parts of the robot See Cut the paint or surface on the robot before replacing parts on page 145 2 xx2000001542 Remove the connector plate CAUTION Be aware of the cablings that are attached to the connector plate The connector plate cannot be removed compl...

Page 538: ... connectors from the connector plate 6 Removing the axis 4 motor Note Action DANGER Make sure that all supplies for electrical power hydraulic pressure and air pressure are turned off 1 CAUTION For robots with protection type Clean Room Always cut the paint with a knife and grind the paint edge when disassembling parts of the robot See Cut the paint or surface on the robot before replacing parts o...

Page 539: ...Remove the screws and washers 6 xx2000001606 Carefully lift out the motor 7 Refitting the motor Use these procedures to refit the axis 4 motor Refitting the axis 4 motor Note Action For robots with protection type Clean Room 1 Clean the joints that have been opened and wipe the parts free from particles with spirit on a lint free Continues on next page Product manual IRB 1300 539 3HAC070390 001 Re...

Page 540: ...belt to the motor pulley and verify that the belt runs correctly in the grooves of the pulley 4 Screw M4x16 12 9 Lafre 2C2B FC6 9 3 pcs xx2000001605 Refit the screws and washers Note Do not tighten the screws yet 5 Adjusting the axis 4 timing belt tension Note Action For robots with protection type Clean Room 1 Clean the joints that have been opened and wipe the parts free from particles with spir...

Page 541: ...ew hole 3 xx2000001611 Use a handheld dynamometer hooking to the tool 4 Used belt 16 7 19 1 N Pull the dynamometer to make the tension falling in the allowed force range Note Pay attention to the force application direction 5 New belt 23 9 26 2 N xx2000001612 Continues on next page Product manual IRB 1300 541 3HAC070390 001 Revision G Copyright 2020 2022 ABB All rights reserved 5 Repair 5 6 4 Repl...

Page 542: ...ber washer For robots with protection type Clean Room option 3351 4 Plug screw Clean Room 3HAC078351 001 Rubber sealing washer 3HAC075325 001 xx2000002496 Reconnecting the axis 4 motor connectors Note Action For robots with protection type Clean Room 1 Clean the joints that have been opened and wipe the parts free from particles with spirit on a lint free Continues on next page 542 Product manual ...

Page 543: ... have another strap fixed Pay attention to the location where the new strap to be fixed see the figure as a guidance CAUTION Correct cable routing is highly important If the cables are routed and secured incorrectly the cables can be damaged 4 Screw M4x8 12 9 Lafre 2C2B FC6 9 2 pcs Refit the connector plate 5 Tightening torque 2 6 Nm xx2000001542 Continues on next page Product manual IRB 1300 543 ...

Page 544: ...contacting area with the cable package 4 Screw M4x10 12 9 Lafre 2C2B FC6 9 Refit the housing cover 5 Tightening torque 2 6 Nm xx2000001541 Concluding procedure Note Action For robots with protection type Clean Room 1 Clean and paint the joints that have been opened See Cut the paint or surface on the robot before replacing parts on page 145 Note After all repair work wipe the Clean Room robot free...

Page 545: ...otection classes IP40 and IP67 Used with protection type Foundry Plus 3HAC073306 001 Process hub basic Used with protection classes IP40 and IP67 Used with protection type Foundry Plus 3HAC073307 001 Process hub CP CS and air hose without Ethernet Used with protection classes IP40 and IP67 Used with protection type Foundry Plus 3HAC073308 001 Process hub CP CS and air hose with Ethernet Used with ...

Page 546: ...4 001 Gasket for tubular cover Not used with protection class IP40 Replace if damaged 3HAC032050 001 Seal bolt Required tools and equipment Note Article number Equipment Content is defined in section Standard toolkit on page 759 Standard toolkit Delivered as a set of calibration tools Required if Axis Calibration is the valid calibration method for the robot 3HAC074119 001 Calibration toolbox Axis...

Page 547: ... calibrated with refer ence calibration Find previous reference values for the axis or create new reference values These val ues are to be used after the repair proced ure is completed for calibration of the ro bot Creating new values requires possibility to move the robot Read more about reference calibration for Axis Calibration in Reference calibration routine on page 722 If no previous referen...

Page 548: ...t before replacing parts on page 145 4 Removing the tubular covers Note Action DANGER Make sure that all supplies for electrical power hydraulic pressure and air pressure are turned off 1 CAUTION For robots with protection type Clean Room Always cut the paint with a knife and grind the paint edge when disassembling parts of the robot See Cut the paint or surface on the robot before replacing parts...

Page 549: ... Cut the paint or surface on the robot before replacing parts on page 145 2 xx2000001538 Remove the screws and carefully open the cover CAUTION There is cabling attached to the cover The cover cannot be removed completely 3 Loosening the cables in the tubular Note Action DANGER Make sure that all supplies for electrical power hydraulic pressure and air pressure are turned off 1 Continues on next p...

Page 550: ...ed completely until the connectors are re move from the plate 4 Disconnecting the axis 6 motor connectors Note Action DANGER Make sure that all supplies for electrical power hydraulic pressure and air pressure are turned off 1 CAUTION For robots with protection type Clean Room Always cut the paint with a knife and grind the paint edge when disassembling parts of the robot See Cut the paint or surf...

Page 551: ...ote Action DANGER Make sure that all supplies for electrical power hydraulic pressure and air pressure are turned off 1 CAUTION For robots with protection type Clean Room Always cut the paint with a knife and grind the paint edge when disassembling parts of the robot See Cut the paint or surface on the robot before replacing parts on page 145 2 Continues on next page Product manual IRB 1300 551 3H...

Page 552: ... are turned off 1 CAUTION For robots with protection type Clean Room Always cut the paint with a knife and grind the paint edge when disassembling parts of the robot See Cut the paint or surface on the robot before replacing parts on page 145 2 xx2000001536 For robots with CP CS cabling Disconnect the connectors J1 C1 J1 C3 Tip Take photos of the connector and cable position before disconnecting t...

Page 553: ... grind the paint edge when disassembling parts of the robot See Cut the paint or surface on the robot before replacing parts on page 145 2 CAUTION Loosening timing belts will release axes This means the axes can fall down Make sure axes are well supported before loosening timing belts 3 xx2000001594 Loosen the screws and move the motor slightly to slacken the timing belt 4 Continues on next page P...

Page 554: ... a knife and grind the paint edge when disassembling parts of the robot See Cut the paint or surface on the robot before replacing parts on page 145 2 CAUTION Removing motors will release axes This means the axes can fall down Make sure axes are well supported before remov ing motors 3 xx2000001596 Remove the screws and washers 4 Continues on next page 554 Product manual IRB 1300 3HAC070390 001 Re...

Page 555: ...faces are clean and without damages the motor is clean and undamaged 2 Motor orientation orient the motor according to the figure below in regard to the encircled motor con nector xx2000001598 Orient the motor correctly and fit it into the tubular 3 Screw M5x16 12 9 Lafre 2C2B FC6 9 4 pcs xx2000001596 Refit the screws and washers Note Do not tighten the screws yet 4 Continues on next page Product ...

Page 556: ...e the timing belt tension 4 If the timing belt tension does not meet the require ment loosen the motor screws and readjust Tightening torque 6 Nm xx2000001594 Secure the motor with the screws 5 Reconnecting the CP CS cabling if equipped Note Action For robots with protection type Clean Room 1 Clean the joints that have been opened and wipe the parts free from particles with spirit on a lint free x...

Page 557: ...0001535 Insert the male header of the motor connectors to the connector plate 2 xx2000001534 Reconnect the connectors FB5 MP5 Tip See the number markings on the connectors for help to find the corresponding connector 3 Reconnecting the axis 6 motor connectors Note Action For robots with protection type Clean Room 1 Clean the joints that have been opened and wipe the parts free from particles with ...

Page 558: ...ve been opened and wipe the parts free from particles with spirit on a lint free Screw M3x8 12 9 Lafre 2C2B FC6 9 2 pcs for each plate Refit the connector plate 2 Tightening torque 1 3 Nm xx2000001531 xx2000001530 Route and secure the cabling with cable straps CAUTION Correct cable routing is highly important If the cables are routed and secured incorrectly the cables can be damaged 3 Continues on...

Page 559: ...ean Room option 3351 4 For robots with protection type Foundry Plus option 3352 10 Check the gasket Replace if damaged 3 Seal bolt 3HAC032050 001 xx2000002513 For robots with protection class IP67 option 3350 670 For robots with protection type Clean Room option 3351 4 For robots with protection type Foundry Plus option 3352 10 Check the seal bolts Replace if damaged 4 Screw M4x10 12 9 Lafre 2C2B ...

Page 560: ... grease to the covers that have contacting area with the cable package 4 Screw M4x10 12 9 Lafre 2C2B FC6 9 Refit the tubular covers 5 Tightening torque 2 6 Nm xx2000001593 Concluding procedure Note Action For robots with protection type Clean Room 1 Clean and paint the joints that have been opened See Cut the paint or surface on the robot before replacing parts on page 145 Note After all repair wo...

Page 561: ... sure all safety requirements are met when performing the first test run 3 Product manual IRB 1300 561 3HAC070390 001 Revision G Copyright 2020 2022 ABB All rights reserved 5 Repair 5 6 5 Replacing the axis 5 motor Continued ...

Page 562: ...le number Spare part 3HAC073088 001 Motor unit axis 5 and axis 6 3HAC065788 001 Timing belt axis 6 Used with protection classes IP40 and IP67 Used with protection type Foundry Plus 3HAC073306 001 Process hub basic Used with protection classes IP40 and IP67 Used with protection type Foundry Plus 3HAC073307 001 Process hub CP CS and air hose without Ethernet Continues on next page 562 Product manual...

Page 563: ...f damaged 3HAC070887 001 Gasket for process hub Not used with protection class IP40 Replace if damaged 3HAC067834 001 Gasket for tubular cover Not used with protection class IP40 Replace if damaged 3HAC032050 001 Seal bolt Required tools and equipment Note Article number Equipment Content is defined in section Standard toolkit on page 759 Standard toolkit Delivered as a set of calibration tools Re...

Page 564: ...ibrated with refer ence calibration Find previous reference values for the axis or create new reference values These val ues are to be used after the repair proced ure is completed for calibration of the ro bot Creating new values requires possibility to move the robot Read more about reference calibration for Axis Calibration in Reference calibration routine on page 722 If no previous reference v...

Page 565: ...t before replacing parts on page 145 4 Removing the tubular covers Note Action DANGER Make sure that all supplies for electrical power hydraulic pressure and air pressure are turned off 1 CAUTION For robots with protection type Clean Room Always cut the paint with a knife and grind the paint edge when disassembling parts of the robot See Cut the paint or surface on the robot before replacing parts...

Page 566: ... Cut the paint or surface on the robot before replacing parts on page 145 2 xx2000001538 Remove the screws and carefully open the cover CAUTION There is cabling attached to the cover The cover cannot be removed completely 3 Loosening the cables in the tubular Note Action DANGER Make sure that all supplies for electrical power hydraulic pressure and air pressure are turned off 1 Continues on next p...

Page 567: ...d completely until the connectors are re move from the plate 4 Disconnecting the axis 6 motor connectors Note Action DANGER Make sure that all supplies for electrical power hydraulic pressure and air pressure are turned off 1 CAUTION For robots with protection type Clean Room Always cut the paint with a knife and grind the paint edge when disassembling parts of the robot See Cut the paint or surfa...

Page 568: ...ssure and air pressure are turned off 1 CAUTION For robots with protection type Clean Room Always cut the paint with a knife and grind the paint edge when disassembling parts of the robot See Cut the paint or surface on the robot before replacing parts on page 145 2 CAUTION Loosening timing belts will release axes This means the axes can fall down Make sure axes are well supported before loosening...

Page 569: ...obots with protection type Clean Room Always cut the paint with a knife and grind the paint edge when disassembling parts of the robot See Cut the paint or surface on the robot before replacing parts on page 145 2 CAUTION Loosening timing belts will release axes This means the axes can fall down Make sure axes are well supported before loosening timing belts 3 Continues on next page Product manual...

Page 570: ...r robots with protection type Clean Room Always cut the paint with a knife and grind the paint edge when disassembling parts of the robot See Cut the paint or surface on the robot before replacing parts on page 145 2 CAUTION Removing motors will release axes This means the axes can fall down Make sure axes are well supported before remov ing motors 3 Continues on next page 570 Product manual IRB 1...

Page 571: ...rit on a lint free Check that all assembly surfaces are clean and without damages the motor is clean and undamaged 2 Motor orientation orient the motor according to the figure below in regard to the encircled motor con nector xx2000001603 Orient the motor correctly and fit it into the tubular Tip Leave the axis 6 motor connectors accessible from the tubular support side 3 Continues on next page Pr...

Page 572: ...ulleys and verify that the belt runs correctly in the grooves of the pul leys 2 Used belt 85 7 91 6 Hz Move the motor to achieve proper belt tension 3 New belt 102 107 Hz Use a sonic tension meter to measure the timing belt tension 4 If the timing belt tension does not meet the require ment loosen the motor screws and readjust Tightening torque 6 Nm xx2000001599 Secure the motor with the screws 5 ...

Page 573: ...the timing belt tension 4 If the timing belt tension does not meet the require ment loosen the motor screws and readjust Tightening torque 6 Nm xx2000001594 Secure the motor with the screws 5 Reconnecting the axis 6 motor connectors Note Action For robots with protection type Clean Room 1 Clean the joints that have been opened and wipe the parts free from particles with spirit on a lint free xx200...

Page 574: ... connector plate 2 Tightening torque 1 3 Nm xx2100001484 xx2100001483 Route and secure the cabling with a cable strap CAUTION Correct cable routing is highly important If the cables are routed and secured incorrectly the cables can be damaged 3 Refitting the process hub Note Action For robots with protection type Clean Room 1 Clean the joints that have been opened and wipe the parts free from part...

Page 575: ... the gasket Replace if damaged 3 Seal bolt 3HAC032050 001 xx2000002513 For robots with protection class IP67 option 3350 670 For robots with protection type Clean Room option 3351 4 For robots with protection type Foundry Plus option 3352 10 Check the seal bolts Replace if damaged 4 Screw M4x10 12 9 Lafre 2C2B FC6 9 4 pcs Refit the process hub 5 Tightening torque 2 6 Nm xx2000001538 Continues on n...

Page 576: ... grease to the covers that have contacting area with the cable package 4 Screw M4x10 12 9 Lafre 2C2B FC6 9 Refit the tubular covers 5 Tightening torque 2 6 Nm xx2000001593 Concluding procedure Note Action For robots with protection type Clean Room 1 Clean and paint the joints that have been opened See Cut the paint or surface on the robot before replacing parts on page 145 Note After all repair wo...

Page 577: ... sure all safety requirements are met when performing the first test run 3 Product manual IRB 1300 577 3HAC070390 001 Revision G Copyright 2020 2022 ABB All rights reserved 5 Repair 5 6 6 Replacing the axis 6 motor Continued ...

Page 578: ...ww abb com myABB Note Article number Spare part 3HAC063187 001 Gear unit axis 1 3HAC063187 007 O ring on axis 1 gear unit 3HAC073039 001 Motor unit axis 1 3HAC061327 037 O ring on motor unit 3HAC066433 001 Radial sealing 3HAC070148 002 Radial sealing 3HAC067626 001 Gasket on swing Replace if damaged 3HAC064478 001 Mechanical stop axis 1 fixed block Continues on next page 578 Product manual IRB 130...

Page 579: ...sed with protection type Foundry Plus 3HAC073301 001 Main cable harness M CP CS and air hose without Ethernet Used with IRB 1300 10 1 15 Used with protection classes IP40 and IP67 Used with protection type Foundry Plus 3HAC073302 001 Main cable harness M CP CS and air hose with Ethernet Used with IRB 1300 7 1 4 and IRB 1300 12 1 4 Used with protection classes IP40 and IP67 Used with protection typ...

Page 580: ... Room 3HAC077831 001 Main cable harness M Clean Room CP CS and air hose without Ethernet Used with IRB 1300 10 1 15 Used with protection type Clean Room 3HAC077832 001 Main cable harness M Clean Room CP CS and air hose with Ethernet Used with IRB 1300 7 1 4 and IRB 1300 12 1 4 Used with protection type Clean Room 3HAC077827 001 Main cable harness L basic Clean Room Used with IRB 1300 7 1 4 and IRB...

Page 581: ...001 Swing cover long Used with protection classes IP40 and IP67 Used with protection type Foundry Plus 3HAC073091 001 Swing top cover Used with protection classes IP40 and IP67 Used with protection type Foundry Plus 3HAC073090 001 Base cover Used with protection classes IP40 and IP67 Used with protection type Foundry Plus 3HAC076475 001 SMB cover Used with protection classes IP40 and IP67 Used wit...

Page 582: ...IP40 Replace if damaged 3HAC067819 001 Gasket for base cover Not used with protection class IP40 Replace if damaged 3HAC067818 001 Gasket for base adapter Not used with protection class IP40 Replace if damaged 3HAC067834 001 Gasket for tubular cover Not used with protection class IP40 Replace if damaged 3HAC067833 001 Gasket for housing cover Not used with protection class IP40 Replace if damaged ...

Page 583: ...il to axis 1 gearbox Connector specification G3 8 Connector for quick coupling with outlet pipe Includes pump with outlet pipe Oil dispenser Included in special toolkit 3HAC076396 001 Axis 1 gearbox assembly cap Length 1 7 m Lifting capacity 400 kg Roundsling 1 7 m Overhead crane Used with protection class IP67 and protection types Clean Room and Foundry Plus Used for the press fitting of radial s...

Page 584: ... the FlexPendant to create reference values If the robot is to be calibrated with refer ence calibration Find previous reference values for the axis or create new reference values These val ues are to be used after the repair proced ure is completed for calibration of the ro bot Creating new values requires possibility to move the robot Read more about reference calibration for Axis Calibration in...

Page 585: ...064977 001 Gear unit axis 2 3HAC064977 004 O ring on axis 2 gear unit Used for IRB 1300 11 0 9 IRB 1300 10 1 15 and IRB 1300 7 1 4 3HAC073078 001 Motor unit axis 2 Used for IRB 1300 12 1 4 3HAC082078 001 Motor unit axis 2 IRB 1300 12 1 4 3HAC061327 037 O ring on motor unit Used with protection classes IP40 and IP67 Used with protection type Foundry Plus 3HAC073306 001 Process hub basic Continues o...

Page 586: ...y Plus 3HAC073041 001 Swing support short Used for IRB 1300 11 0 9 Used with protection type Clean Room 3HAC077808 001 Swing support short Clean Room Used for IRB 1300 10 1 15 IRB 1300 7 1 4 and IRB 1300 12 1 4 Used with protection classes IP40 and IP67 Used with protection type Foundry Plus 3HAC073052 001 Swing support long Used for IRB 1300 10 1 15 IRB 1300 7 1 4 and IRB 1300 12 1 4 Used with pr...

Page 587: ...er long Clean Room Not used with protection class IP40 Replace if damaged 3HAC070887 001 Gasket for process hub Not used with protection class IP40 Replace if damaged 3HAC067834 001 Gasket for tubular cover Not used with protection class IP40 Replace if damaged 3HAC067833 001 Gasket for housing cover Not used with protection class IP40 Replace if damaged 3HAC067832 001 Gasket for lower arm cover U...

Page 588: ... 759 Standard toolkit Delivered as a set of calibration tools Required if Axis Calibration is the valid calibration method for the robot 3HAC074119 001 Calibration toolbox Axis Calibra tion Used to release the motor brakes 24 VDC power supply The capacity of the vessel must be sufficient to take the complete amount of oil Oil collecting vessel Includes pump with outlet pipe Oil dispenser Included ...

Page 589: ...revious reference values for the axis or create new reference values These val ues are to be used after the repair proced ure is completed for calibration of the ro bot Creating new values requires possibility to move the robot Read more about reference calibration for Axis Calibration in Reference calibration routine on page 722 If no previous reference values exist and no new reference values ca...

Page 590: ...g the safeguarded space 2 Draining oil of axis 2 gearbox Note Action WARNING Handling gearbox oil involves several safety risks see Gearbox lubricants oil or grease on page 29 1 CAUTION The gearbox can contain an excess of pressure that can be hazardous Open the oil plug carefully in order to let the excess pressure out 2 Continues on next page 590 Product manual IRB 1300 3HAC070390 001 Revision G...

Page 591: ... and keep it opened to speed up the drainage 6 WARNING Used oil is hazardous material and must be disposed of in a safe way See Decom missioning on page 747 for more informa tion 7 Note Draining is time consuming Elapsed time varies depending on the temperature of the oil Drain the gearbox oil 8 Continues on next page Product manual IRB 1300 591 3HAC070390 001 Revision G Copyright 2020 2022 ABB Al...

Page 592: ...cording to Supplying power to connector R1 MP on page 66 xx2000001520 Jog all axes to zero position 2 DANGER Turn off all electric power supply hydraulic pressure supply air pressure supply to the robot before entering the safeguarded space 3 Removing the covers Note Action DANGER Make sure that all supplies for electrical power hydraulic pressure and air pressure are turned off 1 Continues on nex...

Page 593: ... in the tubular Note Action DANGER Make sure that all supplies for electrical power hydraulic pressure and air pressure are turned off 1 CAUTION For robots with protection type Clean Room Always cut the paint with a knife and grind the paint edge when disassembling parts of the robot See Cut the paint or surface on the robot before replacing parts on page 145 2 xx2000001530 Cut the cable straps 3 ...

Page 594: ...ype Clean Room Always cut the paint with a knife and grind the paint edge when disassembling parts of the robot See Cut the paint or surface on the robot before replacing parts on page 145 2 xx2000001532 Disconnect the connectors MP6 FB6 Tip Take photos of the connector and cable position before disconnecting them to have as a reference when reconnecting 3 xx2000001533 Snap loose and remove the ma...

Page 595: ...000001534 Disconnect the connectors MP5 FB5 Tip Take photos of the connector and cable position before disconnecting them to have as a reference when reconnecting 3 xx2000001535 Snap loose and remove the male head of the connectors from the connector plate 4 Disconnecting CP CS cabling if equipped Note Action DANGER Make sure that all supplies for electrical power hydraulic pressure and air pressu...

Page 596: ...37 Snap loose and remove the male head of the connectors from the connector plate 4 Separating the cable package from the tubular Note Action DANGER Make sure that all supplies for electrical power hydraulic pressure and air pressure are turned off 1 CAUTION For robots with protection type Clean Room Always cut the paint with a knife and grind the paint edge when disassembling parts of the robot S...

Page 597: ...type Clean Room Always cut the paint with a knife and grind the paint edge when disassembling parts of the robot See Cut the paint or surface on the robot before replacing parts on page 145 2 xx2000001538 Remove the screws and carefully open the cover CAUTION There is cabling attached to the cover The cover cannot be removed completely until the connect ors are removed 3 Continues on next page Pro...

Page 598: ...when reconnecting 5 Tip The connector clip has to be pressed 1 and pushed forward 2 to separate the J2 C2 for Ethernet cabling xx1800002943 Disconnecting the axis 4 motor connectors Note Action DANGER Make sure that all supplies for electrical power hydraulic pressure and air pressure are turned off 1 Continues on next page 598 Product manual IRB 1300 3HAC070390 001 Revision G Copyright 2020 2022 ...

Page 599: ...ctors are re move from the plate 3 xx2000001543 Cut the cable strap Note The motor cablings have another strap fixed Al ways cut the strap that fixes the cable package to the plate 4 xx2000001544 Disconnect the connectors MP4 FB4 Tip Take photos of the connector and cable position before disconnecting them to have as a reference when reconnecting 5 xx2000001545 Snap loose and remove the male head ...

Page 600: ...ll supplies for electrical power hydraulic pressure and air pressure are turned off 1 CAUTION For robots with protection type Clean Room Always cut the paint with a knife and grind the paint edge when disassembling parts of the robot See Cut the paint or surface on the robot before replacing parts on page 145 2 xx2000001548 Remove the connector plate CAUTION Be aware of the cablings that are attac...

Page 601: ...age from the lower arm Note Action DANGER Make sure that all supplies for electrical power hydraulic pressure and air pressure are turned off 1 CAUTION For robots with protection type Clean Room Always cut the paint with a knife and grind the paint edge when disassembling parts of the robot See Cut the paint or surface on the robot before replacing parts on page 145 2 Continues on next page Produc...

Page 602: ...rical power hydraulic pressure and air pressure are turned off 1 CAUTION For robots with protection type Clean Room Always cut the paint with a knife and grind the paint edge when disassembling parts of the robot See Cut the paint or surface on the robot before replacing parts on page 145 2 Continues on next page 602 Product manual IRB 1300 3HAC070390 001 Revision G Copyright 2020 2022 ABB All rig...

Page 603: ...ure and air pressure are turned off 1 CAUTION For robots with protection type Clean Room Always cut the paint with a knife and grind the paint edge when disassembling parts of the robot See Cut the paint or surface on the robot before replacing parts on page 145 2 Wrap the connectors with the masking tape 3 Continues on next page Product manual IRB 1300 603 3HAC070390 001 Revision G Copyright 2020...

Page 604: ...r surface on the robot before replacing parts on page 145 2 xx2000001684 Remove the swing support Tip If the lower arm support is hard to loosen from the swing use a plastic hammer to knock on the lower arm support lightly 3 Supporting the lower and upper arms with roundslings Note The lower and upper arms include the lower arm housing extender unit only for IRB 1300 7 1 4 and IRB 1300 12 1 4 tubu...

Page 605: ... m 2 pcs Lifting capacity 400 kg xx2000001685 Run two roundslings between the housing and the lower arm 3 CAUTION The lower and upper arms weighs 38 kg All lifting accessories used must be sized accord ingly 4 WARNING The robot is likely to be mechanically unstable if not secured to the foundation 5 WARNING Personnel must not under any circumstances be present under the suspended load 6 Continues ...

Page 606: ...e on the robot before replacing parts on page 145 2 WARNING When separating the motor from the gearbox there may be pressure present in the gearbox causing lubricant to spray from the opening Be fore proceeding please read the safety informa tion in the section Gearbox lubricants oil or grease on page 29 3 CAUTION Removing motors will release axes This means the axes can fall down Make sure axes a...

Page 607: ...hers 8 xx2000001628 Carefully lift out the motor 9 Separating the swing from the lower arm Note Action DANGER Make sure that all supplies for electrical power hydraulic pressure and air pressure are turned off 1 Continues on next page Product manual IRB 1300 607 3HAC070390 001 Revision G Copyright 2020 2022 ABB All rights reserved 5 Repair 5 7 2 Replacing the axis 2 gearbox Continued ...

Page 608: ...knock on the swing lightly 4 Removing the axis 2 sealing ring on the swing side Note Action DANGER Make sure that all supplies for electrical power hydraulic pressure and air pressure are turned off 1 CAUTION For robots with protection type Clean Room Always cut the paint with a knife and grind the paint edge when disassembling parts of the robot See Cut the paint or surface on the robot before re...

Page 609: ...th protection type Clean Room Always cut the paint with a knife and grind the paint edge when disassembling parts of the robot See Cut the paint or surface on the robot before replacing parts on page 145 2 CAUTION Removing gearboxes will release axes This means the axes can fall down Make sure axes are well supported before remov ing gearboxes 3 xx2000001688 Remove the screws 4 Continues on next p...

Page 610: ...om particles with spirit on a lint free O ring on axis 2 gear unit 3HAC064977 004 xx2000001690 Check the O ring Replace if damaged 2 Guide pin for axis 2 gearbox In cluded in special toolkit 3HAC076396 001 xx2000001705 Fit guide pins to the axis 2 gearbox Note Always use two guide pins together 3 Continues on next page 610 Product manual IRB 1300 3HAC070390 001 Revision G Copyright 2020 2022 ABB A...

Page 611: ... top Clean Room and Foundry Plus Note Action For robots with protection type Clean Room 1 Clean the joints that have been opened and wipe the parts free from particles with spirit on a lint free xx2000002460 Check the radial sealing on the swing top Replace if damaged as described below 2 Continues on next page Product manual IRB 1300 611 3HAC070390 001 Revision G Copyright 2020 2022 ABB All right...

Page 612: ...replacement Note For Clean Room robots make sure no grease is applied to the sealing grooves 4 xx2000002462 Fit the new sealing into the swing For robots with protection type Clean Room option 3351 4 The sealing lip as pointed in the following figure is facing the inner side of the robot For robots with protection type Foundry Plus option 3352 10 The sealing lip as pointed in the following figure ...

Page 613: ...ol included in Special toolkit for IP67 Clean Room Foundry Plus robots 3HAC078203 001 xx2000002464 Fit the small circular plate of the axis 2 sealing assembly tool and fix with three M6x75 screws 7 xx2000002465 Screw the screws little by little and evenly to press the sealing into place 8 Remove the assembly tool 9 Check that the sealing is undamaged and properly fitted 10 Continues on next page P...

Page 614: ...ew M4x12 12 9 Lafre 2C2B FC6 9 8 pcs For robots with protection type Foundry Plus option 3352 10 Tightening torque 3 8 Nm Check the sealing ring and the O ring For robots with protection class IP67 option 3350 670 xx2000002516 Replace if damaged For robots with protection type Foundry Plus option 3352 10 xx2000002527 O ring on swing 3HAC061327 036 xx2000001750 Check the O ring Replace if damaged 3...

Page 615: ...free from particles with spirit on a lint free xx2000002466 Check the radial sealing on the swing support Replace if damaged as described below 2 Big circular plate of the axis 2 sealing assembly tool included in Special toolkit for IP67 Clean Room Foundry Plus robots 3HAC078203 001 xx2000002467 Fit the big circular plate of the axis 2 sealing as sembly tool to the swing support opposite side of t...

Page 616: ...0 670 For robots with protection type Foundry Plus option 3352 10 The sealing lip as pointed in the following figure is facing the outer side of the robot xx2000002537 5 Ring of the axis 2 sealing assembly tool included in Special toolkit for IP67 Clean Room Foundry Plus robots 3HAC078203 001 xx2000002469 For robots with protection class IP67 option 3350 670 For robots with protection type Foundry...

Page 617: ...k that the sealing is undamaged and properly fitted 10 Refitting the swing support Note Action For robots with protection type Clean Room 1 Clean the joints that have been opened and wipe the parts free from particles with spirit on a lint free Sealing ring swing support side 3HAC065676 001 Check the sealing ring Replace if damaged 2 Screw M4x12 12 9 Lafre 2C2B FC6 9 16 pcs Tightening torque 3 8 N...

Page 618: ...otection type Clean Room option 3351 4 For robots with protection type Foundry Plus option 3352 10 Check the gasket Replace if damaged xx2000001745 Route the cable package through the swing sup port Make sure that the air hoses are facing the SMB side in the hollow tube of axis 1 gearbox the cable package is out from the hole near the base rear as circled in the figure CAUTION Make sure that no ca...

Page 619: ...the parts free from particles with spirit on a lint free Axis 2 motor for IRB 1300 7 1 4 3HAC073078 001 CAUTION Do not mix the axis 2 motor used for IRB 1300 7 1 4 and IRB 1300 12 1 4 Always carefully check the part number attached to the motor and the robot type and refit with the right one 2 Axis 2 motor for IRB 1300 12 1 4 3HAC082078 001 Check that all assembly surfaces are clean and without da...

Page 620: ...ng to the figure below in regard to the encircled motor con nector xx2000001630 Orient the motor correctly and fit it into the swing Make sure the motor is properly fit to gearbox 6 Screw M6x20 12 9 Gleitmo 603 Geomet 500 4 pcs Refit the screws and washers 7 Tightening torque 10 Nm xx2000001626 Continues on next page 620 Product manual IRB 1300 3HAC070390 001 Revision G Copyright 2020 2022 ABB All...

Page 621: ...roundslings 4 Securing the cable package in the swing Note Action For robots with protection type Clean Room 1 Clean the joints that have been opened and wipe the parts free from particles with spirit on a lint free xx2000001746 Route the cable package up into the lower arm Make sure that the the air hoses are facing outside in the axis 2 cable protector see the figure as a guidance for the cable ...

Page 622: ...2 cable protector 4 Tightening torque 2 6 Nm xx2000001556 Routing the cable package in the lower arm Note Action For robots with protection type Clean Room 1 Clean the joints that have been opened and wipe the parts free from particles with spirit on a lint free Continues on next page 622 Product manual IRB 1300 3HAC070390 001 Revision G Copyright 2020 2022 ABB All rights reserved 5 Repair 5 7 2 R...

Page 623: ...pply grease to the axis 3 cable pro tector before refitting Screw M4x10 12 9 Lafre 2C2B FC6 9 3 pcs Tightening torque 2 6 Nm xx2000001552 xx2000001569 Route the cable package through the lower arm support and up into the housing CAUTION Make sure that no cables or hoses are twisted or strained Reroute if necessary 4 Continues on next page Product manual IRB 1300 623 3HAC070390 001 Revision G Copyr...

Page 624: ... Correct cable routing is highly important If the cables are routed and secured incorrectly the cables can be damaged 3 xx2000001550 Reconnect the connectors FB2 MP2 FB3 MP3 Tip See the number markings on the connectors for help to find the corresponding connector 4 Screw M4x8 12 9 Lafre 2C2B FC6 9 2 pcs Refit the connector plate to the lower arm 5 Tightening torque 2 6 Nm xx2000001548 Continues o...

Page 625: ...que 2 6 Nm xx2100001465 xx2000001553 Routing the cable package in the housing Note Action For robots with protection type Clean Room 1 Clean the joints that have been opened and wipe the parts free from particles with spirit on a lint free Plastic cable protector axis 4 Slip the axis 4 cable protector over the cable package 2 3HAC064694 001 xx2000001570 Continues on next page Product manual IRB 13...

Page 626: ...ean the joints that have been opened and wipe the parts free from particles with spirit on a lint free Screw M4x8 12 9 Lafre 2C2B FC6 9 4 pcs Refit the axis 4 cable protector 2 Tightening torque 2 6 Nm xx2000001546 Reconnecting the axis 4 motor connectors Note Action For robots with protection type Clean Room 1 Clean the joints that have been opened and wipe the parts free from particles with spir...

Page 627: ...g is highly important If the cables are routed and secured incorrectly the cables can be damaged 4 Screw M4x8 12 9 Lafre 2C2B FC6 9 2 pcs Refit the connector plate 5 Tightening torque 2 6 Nm xx2000001542 Routing the cable package in the tubular Note Action For robots with protection type Clean Room 1 Clean the joints that have been opened and wipe the parts free from particles with spirit on a lin...

Page 628: ... protection type Clean Room 1 Clean the joints that have been opened and wipe the parts free from particles with spirit on a lint free xx2000001539 Reconnect the air hoses Note See the number markings on the air hoses for help to find the corresponding air hoses 2 xx2000001540 For robots with Ethernet cabling Access the connector from the process hub and reconnect the connector J1 C2 Tip See the n...

Page 629: ...1 C3 Tip See the number markings on the connectors for help to find the corresponding connector 3 Reconnecting the axis 5 motor connectors Note Action For robots with protection type Clean Room 1 Clean the joints that have been opened and wipe the parts free from particles with spirit on a lint free xx2000001535 Insert the male header of the motor connectors to the connector plate 2 Continues on n...

Page 630: ...sert the male header of the motor connectors to the connector plate 2 xx2000001532 Reconnect the connectors FB6 MP6 Tip See the number markings on the connectors for help to find the corresponding connector 3 Refitting the process hub Note Action For robots with protection type Clean Room 1 Clean the joints that have been opened and wipe the parts free from particles with spirit on a lint free Con...

Page 631: ...he seal bolts Replace if damaged 3 Route and secure the cabling with cable straps CAUTION Correct cable routing is highly important If the cables are routed and secured incorrectly the cables can be damaged 4 Screw M4x10 12 9 Lafre 2C2B FC6 9 4 pcs Refit the process hub 5 Tightening torque 2 6 Nm xx2000001538 Securing the cable package in the tubular Note Action For robots with protection type Cle...

Page 632: ...cabling with cable straps CAUTION Correct cable routing is highly important If the cables are routed and secured incorrectly the cables can be damaged 4 Refitting the covers Note Action For robots with protection type Clean Room 1 Clean the joints that have been opened and wipe the parts free from particles with spirit on a lint free Continues on next page 632 Product manual IRB 1300 3HAC070390 00...

Page 633: ...that have contacting area with the cable package 4 Screw M4x10 12 9 Lafre 2C2B FC6 9 Refit the covers Tubular support cover A Housing cover B Lower arm support cover C Swing covers D 5 Tightening torque 2 6 Nm xx2000001682 Jogging the robot to oil filling position Note Action Turn on the electric power to the robot 1 If the robot is not connected to the controller power must be supplied to the con...

Page 634: ...e 3 Refilling oil to axis 2 gearbox Note Action WARNING Handling gearbox oil involves several safety risks see Gearbox lubricants oil or grease on page 29 1 CAUTION The gearbox can contain an excess of pressure that can be hazardous Open the oil plug carefully in order to let the excess pressure out 2 Continues on next page 634 Product manual IRB 1300 3HAC070390 001 Revision G Copyright 2020 2022 ...

Page 635: ...l the gearbox with oil Note The amount of oil to be filled depends on the amount previously being drained 5 CAUTION Oil filling must be slow to make sure air venting is fluent xx2000001580 Inspect the oil level by measuring the level at the upper oil plug hole Required oil level within the range of 64 mm to 69 mm below the edge of the oil plug hole CAUTION The oil level sinks when the oil fills al...

Page 636: ...supply air pressure supply to the robot before entering the safeguarded space 3 Concluding procedure Note Action For robots with protection type Clean Room 1 Clean and paint the joints that have been opened See Cut the paint or surface on the robot before replacing parts on page 145 Note After all repair work wipe the Clean Room robot free from particles with spirit on a lint free cloth Calibratio...

Page 637: ...sure all safety requirements are met when performing the first test run 3 Product manual IRB 1300 637 3HAC070390 001 Revision G Copyright 2020 2022 ABB All rights reserved 5 Repair 5 7 2 Replacing the axis 2 gearbox Continued ...

Page 638: ...axis 3 Not used with protection class IP40 Replace if damaged 3HAC061327 016 O ring on circular spline side axis 3 3HAC067040 001 Timing belt axis 3 Used with protection classes IP40 and IP67 Used with protection type Foundry Plus 3HAC073306 001 Process hub basic Used with protection classes IP40 and IP67 Used with protection type Foundry Plus 3HAC073307 001 Process hub CP CS and air hose without ...

Page 639: ... 3HAC073094 001 Tubular cover Used with protection classes IP40 and IP67 Used with protection type Foundry Plus 3HAC073093 001 Housing cover Used with protection classes IP40 and IP67 Used with protection type Foundry Plus 3HAC073092 001 Lower arm cover Used with protection type Clean Room 3HAC077823 001 Tubular cover Clean Room Used with protection type Clean Room 3HAC077822 001 Housing cover Cle...

Page 640: ...ealing assembly tool for axes 1 to 4 and axis 6 3HAC078203 001 Special toolkit for IP67 Clean Room Foundry Plus robots Required consumables Note Article number Consumable Cable straps FM 222 3HAC029132 001 Grease Deciding calibration routine Decide which calibration routine to be used based on the information in the table Depending on which routine is chosen action might be required prior to begin...

Page 641: ...on Remove all external cable packages DressPack and tools from the robot Removing the gearbox Use these procedures to remove the axis 3 gearbox Preparations before removing the axis 3 gearbox Note Action Decide which calibration routine to use and take actions accordingly prior to beginning the repair procedure 1 xx2000001520 Jog all axes to zero position 2 DANGER Turn off all electric power suppl...

Page 642: ...upport cover A Housing cover B Lower arm covers C 3 Loosening the cables in the tubular Note Action DANGER Make sure that all supplies for electrical power hydraulic pressure and air pressure are turned off 1 CAUTION For robots with protection type Clean Room Always cut the paint with a knife and grind the paint edge when disassembling parts of the robot See Cut the paint or surface on the robot b...

Page 643: ...ion DANGER Make sure that all supplies for electrical power hydraulic pressure and air pressure are turned off 1 CAUTION For robots with protection type Clean Room Always cut the paint with a knife and grind the paint edge when disassembling parts of the robot See Cut the paint or surface on the robot before replacing parts on page 145 2 Continues on next page Product manual IRB 1300 643 3HAC07039...

Page 644: ...te Action DANGER Make sure that all supplies for electrical power hydraulic pressure and air pressure are turned off 1 CAUTION For robots with protection type Clean Room Always cut the paint with a knife and grind the paint edge when disassembling parts of the robot See Cut the paint or surface on the robot before replacing parts on page 145 2 Continues on next page 644 Product manual IRB 1300 3HA...

Page 645: ...are turned off 1 CAUTION For robots with protection type Clean Room Always cut the paint with a knife and grind the paint edge when disassembling parts of the robot See Cut the paint or surface on the robot before replacing parts on page 145 2 xx2000001536 For robots with CP CS cabling Disconnect the connectors J1 C1 J1 C3 Tip Take photos of the connector and cable position before disconnecting th...

Page 646: ...Clean Room Always cut the paint with a knife and grind the paint edge when disassembling parts of the robot See Cut the paint or surface on the robot before replacing parts on page 145 2 xx2000001748 Remove the first semicircular bracket that fixes the cable package 3 xx2000001749 Remove the second semicircular bracket from the tubular 4 Continues on next page 646 Product manual IRB 1300 3HAC07039...

Page 647: ...the robot See Cut the paint or surface on the robot before replacing parts on page 145 2 xx2000001538 Remove the screws and carefully open the cover CAUTION There is cabling attached to the cover The cover cannot be removed completely until the connect ors are removed 3 xx2000001539 Disconnect the air hoses 4 Continues on next page Product manual IRB 1300 647 3HAC070390 001 Revision G Copyright 20...

Page 648: ...002943 Disconnecting the axis 4 motor connectors Note Action DANGER Make sure that all supplies for electrical power hydraulic pressure and air pressure are turned off 1 CAUTION For robots with protection type Clean Room Always cut the paint with a knife and grind the paint edge when disassembling parts of the robot See Cut the paint or surface on the robot before replacing parts on page 145 2 Con...

Page 649: ...isconnect the connectors MP4 FB4 Tip Take photos of the connector and cable position before disconnecting them to have as a reference when reconnecting 5 xx2000001545 Snap loose and remove the male head of the connectors from the connector plate 6 Separating the cable package from the housing Note Action DANGER Make sure that all supplies for electrical power hydraulic pressure and air pressure ar...

Page 650: ...ed off 1 CAUTION For robots with protection type Clean Room Always cut the paint with a knife and grind the paint edge when disassembling parts of the robot See Cut the paint or surface on the robot before replacing parts on page 145 2 xx2000001548 Remove the connector plate CAUTION Be aware of the cablings that are attached to the connector plate The connector plate cannot be removed completely u...

Page 651: ...cable package Note Action DANGER Make sure that all supplies for electrical power hydraulic pressure and air pressure are turned off 1 CAUTION For robots with protection type Clean Room Always cut the paint with a knife and grind the paint edge when disassembling parts of the robot See Cut the paint or surface on the robot before replacing parts on page 145 2 Continues on next page Product manual ...

Page 652: ... 5 Removing the lower arm support Note Action DANGER Make sure that all supplies for electrical power hydraulic pressure and air pressure are turned off 1 CAUTION For robots with protection type Clean Room Always cut the paint with a knife and grind the paint edge when disassembling parts of the robot See Cut the paint or surface on the robot before replacing parts on page 145 2 Continues on next ...

Page 653: ...he robot See Cut the paint or surface on the robot before replacing parts on page 145 2 CAUTION Loosening timing belts will release axes This means the axes can fall down Make sure axes are well supported before loosening timing belts 3 CAUTION The upper arms which includes housing extender unit only for IRB 1300 7 1 4 and IRB 1300 12 1 4 tubular and tilt unit weighs 17 kg All lifting accessories ...

Page 654: ... with a knife and grind the paint edge when disassembling parts of the robot See Cut the paint or surface on the robot before replacing parts on page 145 2 xx2000001664 Remove the screws WARNING This releases the upper arm from the lower arm Make sure the weight of the upper arm is properly secured The upper arm including housing extender unit only for IRB 1300 7 1 4 and IRB 1300 12 1 4 tu bular a...

Page 655: ...ressure are turned off 1 CAUTION For robots with protection type Clean Room Always cut the paint with a knife and grind the paint edge when disassembling parts of the robot See Cut the paint or surface on the robot before replacing parts on page 145 2 CAUTION Removing gearboxes will release axes This means the axes can fall down Make sure axes are well supported before remov ing gearboxes 3 xx2000...

Page 656: ... lint free O ring on circular spline side axis 3 3HAC061327 016 xx2000002524 For robots with protection class IP67 option 3350 670 For robots with protection type Clean Room option 3351 4 For robots with protection type Foundry Plus option 3352 10 Check the O ring Replace if damaged 2 xx2000001667 Refit the axis 3 gearbox 3 Continues on next page 656 Product manual IRB 1300 3HAC070390 001 Revision...

Page 657: ... 5 3 Check the radial sealing on the lower arm Replace if damaged as described below 2 Big circular plate of the axis 3 sealing assembly tool included in Special toolkit for IP67 Clean Room Foundry Plus robots 3HAC078203 001 xx2000002473 Fit the big circular plate of the axis 3 sealing as sembly tool to the lower arm opposite side of the radial sealing with three M4x12 screws 3 Continues on next p...

Page 658: ...e is facing the outer side of the robot xx2000002537 5 Ring of the axis 3 sealing assembly tool included in Special toolkit for IP67 Clean Room Foundry Plus robots 3HAC078203 001 xx2000002499 Place the ring of the axis 3 sealing assembly tool against the sealing xx2000002562 6 Continues on next page 658 Product manual IRB 1300 3HAC070390 001 Revision G Copyright 2020 2022 ABB All rights reserved 5...

Page 659: ...the assembly tool 9 Check that the sealing is undamaged and properly fitted 10 Refitting the lower arm to the housing Note Action For robots with protection type Clean Room 1 Clean the joints that have been opened and wipe the parts free from particles with spirit on a lint free Screw M4x16 12 9 Lafre 2C2B FC6 9 PrO COat111 16 pcs Refit the lower arm to the housing 2 Tightening torque 4 5 Nm 3 xx2...

Page 660: ...ial toolkit for IP67 Clean Room Foundry Plus robots 3HAC078203 001 xx2000002478 Fit the big circular plate of the axis 3 sealing as sembly tool to the lower arm support opposite side of the radial sealing with three M4x12 screws 3 Grease 3HAC029132 001 Apply a little grease to the sealing lip when repla cing the radial sealing and wipe clean after the replacement Note For Clean Room robots make su...

Page 661: ...ng figure is facing the outer side of the robot xx2000002537 5 Ring of the axis 3 sealing assembly tool included in Special toolkit for IP67 Clean Room Foundry Plus robots 3HAC078203 001 xx2000002480 For robots with protection class IP67 option 3350 670 For robots with protection type Foundry Plus option 3352 10 Place the ring of the axis 3 sealing assembly tool against the sealing xx2000002562 6 ...

Page 662: ...d 10 Refitting the lower arm support Note Action For robots with protection type Clean Room 1 Clean the joints that have been opened and wipe the parts free from particles with spirit on a lint free Gasket for lower arm support 3HAC067826 001 xx2000002521 For robots with protection class IP67 option 3350 670 For robots with protection type Clean Room option 3351 4 For robots with protection type F...

Page 663: ...he belt runs correctly in the grooves of the pul leys 2 Used belt 73 4 78 5 Hz Move the motor to achieve proper belt tension 3 New belt 87 8 92 1 Hz Use a sonic tension meter to measure the timing belt tension 4 If the timing belt tension does not meet the require ment loosen the motor screws and readjust Tightening torque 3 3 Nm xx2000001614 Secure the motor with the screws 5 Release the support ...

Page 664: ...tening torque 2 6 Nm xx2000001554 Grease 3HAC029132 001 Check the axis 3 cable protector 3 Plastic cable protector axis 3 3HAC064693 001 xx2000001568 Replace if damaged Note If replaced apply grease to the axis 3 cable pro tector before refitting Screw M4x10 12 9 Lafre 2C2B FC6 9 3 pcs Tightening torque 2 6 Nm xx2000001552 Continues on next page 664 Product manual IRB 1300 3HAC070390 001 Revision ...

Page 665: ...been opened and wipe the parts free from particles with spirit on a lint free xx2000001551 Insert the male header of the motor connectors to the connector plate 2 xx2000001549 Route and secure the cabling with cable straps CAUTION Correct cable routing is highly important If the cables are routed and secured incorrectly the cables can be damaged 3 Continues on next page Product manual IRB 1300 665...

Page 666: ... lower arm 5 Tightening torque 2 6 Nm xx2000001548 Securing the cable package in the lower arm Note Action For robots with protection type Clean Room 1 Clean the joints that have been opened and wipe the parts free from particles with spirit on a lint free Continues on next page 666 Product manual IRB 1300 3HAC070390 001 Revision G Copyright 2020 2022 ABB All rights reserved 5 Repair 5 7 3 Replaci...

Page 667: ...ots with protection type Clean Room 1 Clean the joints that have been opened and wipe the parts free from particles with spirit on a lint free Plastic cable protector axis 4 Slip the axis 4 cable protector over the cable package 2 3HAC064694 001 xx2000001570 Continues on next page Product manual IRB 1300 667 3HAC070390 001 Revision G Copyright 2020 2022 ABB All rights reserved 5 Repair 5 7 3 Repla...

Page 668: ...ean the joints that have been opened and wipe the parts free from particles with spirit on a lint free Screw M4x8 12 9 Lafre 2C2B FC6 9 4 pcs Refit the axis 4 cable protector 2 Tightening torque 2 6 Nm xx2000001546 Reconnecting the axis 4 motor connectors Note Action For robots with protection type Clean Room 1 Clean the joints that have been opened and wipe the parts free from particles with spir...

Page 669: ...g is highly important If the cables are routed and secured incorrectly the cables can be damaged 4 Screw M4x8 12 9 Lafre 2C2B FC6 9 2 pcs Refit the connector plate 5 Tightening torque 2 6 Nm xx2000001542 Routing the cable package in the tubular Note Action For robots with protection type Clean Room 1 Clean the joints that have been opened and wipe the parts free from particles with spirit on a lin...

Page 670: ... protection type Clean Room 1 Clean the joints that have been opened and wipe the parts free from particles with spirit on a lint free xx2000001539 Reconnect the air hoses Note See the number markings on the air hoses for help to find the corresponding air hoses 2 xx2000001540 For robots with Ethernet cabling Access the connector from the process hub and reconnect the connector J1 C2 Tip See the n...

Page 671: ...1 C3 Tip See the number markings on the connectors for help to find the corresponding connector 3 Reconnecting the axis 5 motor connectors Note Action For robots with protection type Clean Room 1 Clean the joints that have been opened and wipe the parts free from particles with spirit on a lint free xx2000001535 Insert the male header of the motor connectors to the connector plate 2 Continues on n...

Page 672: ...sert the male header of the motor connectors to the connector plate 2 xx2000001532 Reconnect the connectors FB6 MP6 Tip See the number markings on the connectors for help to find the corresponding connector 3 Refitting the process hub Note Action For robots with protection type Clean Room 1 Clean the joints that have been opened and wipe the parts free from particles with spirit on a lint free Con...

Page 673: ...he seal bolts Replace if damaged 3 Route and secure the cabling with cable straps CAUTION Correct cable routing is highly important If the cables are routed and secured incorrectly the cables can be damaged 4 Screw M4x10 12 9 Lafre 2C2B FC6 9 4 pcs Refit the process hub 5 Tightening torque 2 6 Nm xx2000001538 Securing the cable package in the tubular Note Action For robots with protection type Cle...

Page 674: ...cabling with cable straps CAUTION Correct cable routing is highly important If the cables are routed and secured incorrectly the cables can be damaged 4 Refitting the covers Note Action For robots with protection type Clean Room 1 Clean the joints that have been opened and wipe the parts free from particles with spirit on a lint free Continues on next page 674 Product manual IRB 1300 3HAC070390 00...

Page 675: ... support cover A Housing cover B Lower arm covers C 5 Tightening torque 2 6 Nm xx2000001661 Concluding procedure Note Action For robots with protection type Clean Room 1 Clean and paint the joints that have been opened See Cut the paint or surface on the robot before replacing parts on page 145 Note After all repair work wipe the Clean Room robot free from particles with spirit on a lint free clot...

Page 676: ...1 Gear unit axis 4 Not used with protection class IP40 Replace if damaged 3HAC061327 021 O ring on circular spline side axis 4 Not used with protection class IP40 Replace if damaged 3HAC061327 017 O ring on flexible spline side axis 4 3HAC065806 001 Timing belt axis 4 Replace if damaged 3HAC065805 001 Mechanical stop axis 4 flange Replace if damaged 3HAC065804 001 Mechanical stop axis 4 slider Con...

Page 677: ... Used with protection classes IP40 and IP67 Used with protection type Foundry Plus 3HAC073094 001 Tubular cover Used with protection classes IP40 and IP67 Used with protection type Foundry Plus 3HAC073093 001 Housing cover Used with protection classes IP40 and IP67 Used with protection type Foundry Plus 3HAC073092 001 Lower arm cover Used with protection type Clean Room 3HAC077823 001 Tubular cove...

Page 678: ...fined in section Standard toolkit on page 759 Standard toolkit Delivered as a set of calibration tools Required if Axis Calibration is the valid calibration method for the robot 3HAC074119 001 Calibration toolbox Axis Calibra tion Used to release the motor brakes 24 VDC power supply Included in special toolkit 3HAC076396 001 Tension adjustment tool for axis 4 timing belt Used for measuring the tim...

Page 679: ...ibrated with refer ence calibration Find previous reference values for the axis or create new reference values These val ues are to be used after the repair proced ure is completed for calibration of the ro bot Creating new values requires possibility to move the robot Read more about reference calibration for Axis Calibration in Reference calibration routine on page 722 If no previous reference v...

Page 680: ...obot before replacing parts on page 145 4 Removing the covers Note Action DANGER Make sure that all supplies for electrical power hydraulic pressure and air pressure are turned off 1 CAUTION For robots with protection type Clean Room Always cut the paint with a knife and grind the paint edge when disassembling parts of the robot See Cut the paint or surface on the robot before replacing parts on p...

Page 681: ...ind the paint edge when disassembling parts of the robot See Cut the paint or surface on the robot before replacing parts on page 145 2 xx2000001530 Cut the cable straps 3 xx2000001531 Remove the connector plates CAUTION Be aware of the cablings that are attached to the connector plate The connector plate cannot be removed completely until the connectors are re move from the plate 4 Continues on n...

Page 682: ...00001532 Disconnect the connectors MP6 FB6 Tip Take photos of the connector and cable position before disconnecting them to have as a reference when reconnecting 3 xx2000001533 Snap loose and remove the male head of the connectors from the connector plate 4 Disconnecting the axis 5 motor connectors Note Action DANGER Make sure that all supplies for electrical power hydraulic pressure and air press...

Page 683: ...and remove the male head of the connectors from the connector plate 4 Disconnecting CP CS cabling if equipped Note Action DANGER Make sure that all supplies for electrical power hydraulic pressure and air pressure are turned off 1 CAUTION For robots with protection type Clean Room Always cut the paint with a knife and grind the paint edge when disassembling parts of the robot See Cut the paint or ...

Page 684: ...sure that all supplies for electrical power hydraulic pressure and air pressure are turned off 1 CAUTION For robots with protection type Clean Room Always cut the paint with a knife and grind the paint edge when disassembling parts of the robot See Cut the paint or surface on the robot before replacing parts on page 145 2 xx2000001748 Remove the first semicircular bracket that fixes the cable pack...

Page 685: ...he paint edge when disassembling parts of the robot See Cut the paint or surface on the robot before replacing parts on page 145 2 xx2000001538 Remove the screws and carefully open the cover CAUTION There is cabling attached to the cover The cover cannot be removed completely until the connect ors are removed 3 xx2000001539 Disconnect the air hoses 4 Continues on next page Product manual IRB 1300 ...

Page 686: ...002943 Disconnecting the axis 4 motor connectors Note Action DANGER Make sure that all supplies for electrical power hydraulic pressure and air pressure are turned off 1 CAUTION For robots with protection type Clean Room Always cut the paint with a knife and grind the paint edge when disassembling parts of the robot See Cut the paint or surface on the robot before replacing parts on page 145 2 Con...

Page 687: ...isconnect the connectors MP4 FB4 Tip Take photos of the connector and cable position before disconnecting them to have as a reference when reconnecting 5 xx2000001545 Snap loose and remove the male head of the connectors from the connector plate 6 Separating the cable package from the housing Note Action DANGER Make sure that all supplies for electrical power hydraulic pressure and air pressure ar...

Page 688: ...ical power hydraulic pressure and air pressure are turned off 1 CAUTION For robots with protection type Clean Room Always cut the paint with a knife and grind the paint edge when disassembling parts of the robot See Cut the paint or surface on the robot before replacing parts on page 145 2 Wrap the connectors with the masking tape 3 xx2000001662 Pull the cable package out to the lower arm sup port...

Page 689: ...t before replacing parts on page 145 2 CAUTION Removing motors will release axes This means the axes can fall down Make sure axes are well supported before remov ing motors 3 xx2000001604 Loosen the screws and move the motor slightly to slacken the timing belt 4 Remove the timing belt from its groove on the motor 5 xx2000001605 Remove the screws and washers 6 Continues on next page Product manual ...

Page 690: ...ean Room Always cut the paint with a knife and grind the paint edge when disassembling parts of the robot See Cut the paint or surface on the robot before replacing parts on page 145 2 xx2000001671 Support the weight of the extender unit only for IRB 1300 7 1 4 tubular and tilt unit and remove the screws 3 Continues on next page 690 Product manual IRB 1300 3HAC070390 001 Revision G Copyright 2020 ...

Page 691: ...all supplies for electrical power hydraulic pressure and air pressure are turned off 1 CAUTION For robots with protection type Clean Room Always cut the paint with a knife and grind the paint edge when disassembling parts of the robot See Cut the paint or surface on the robot before replacing parts on page 145 2 Continues on next page Product manual IRB 1300 691 3HAC070390 001 Revision G Copyright...

Page 692: ...TION For robots with protection type Clean Room Always cut the paint with a knife and grind the paint edge when disassembling parts of the robot See Cut the paint or surface on the robot before replacing parts on page 145 2 CAUTION Removing gearboxes will release axes This means the axes can fall down Make sure axes are well supported before remov ing gearboxes 3 Continues on next page 692 Product...

Page 693: ...pirit on a lint free O ring on circular spline side axis 4 3HAC061327 021 For robots with protection class IP67 option 3350 670 2 O ring on flexible spline side axis 4 3HAC061327 017 xx2000002525 For robots with protection type Clean Room option 3351 4 For robots with protection type Foundry Plus option 3352 10 Check the o rings Replace if damaged Continues on next page Product manual IRB 1300 693...

Page 694: ...he notches on the extender unit tubular 4 Valid for IRB 1300 11 0 9 and IRB 1300 10 1 15 xx2000001719 Valid for IRB 1300 7 1 4 and IRB 1300 12 1 4 xx2000001679 Continues on next page 694 Product manual IRB 1300 3HAC070390 001 Revision G Copyright 2020 2022 ABB All rights reserved 5 Repair 5 7 4 Replacing the axis 4 gearbox Continued ...

Page 695: ...ith protection type Clean Room 1 Clean the joints that have been opened and wipe the parts free from particles with spirit on a lint free xx2000001673 Refit the axis 4 mechanical stop flange to the gearbox 2 Continues on next page Product manual IRB 1300 695 3HAC070390 001 Revision G Copyright 2020 2022 ABB All rights reserved 5 Repair 5 7 4 Replacing the axis 4 gearbox Continued ...

Page 696: ...xx2000001677 Check the radial sealing on the housing IP67 Clean Room and Foundry Plus Note Action For robots with protection type Clean Room 1 Clean the joints that have been opened and wipe the parts free from particles with spirit on a lint free xx2000002483 Check the radial sealing on the housing Replace if damaged as described below 2 Continues on next page 696 Product manual IRB 1300 3HAC0703...

Page 697: ...ean Room robots make sure no grease is applied to the sealing grooves 4 xx2000002486 Fit the new sealing into the housing For robots with protection type Clean Room option 3351 4 The sealing lip as pointed in the following figure is facing the inner side of the robot For robots with protection class IP67 option 3350 670 For robots with protection type Foundry Plus option 3352 10 The sealing lip as...

Page 698: ...g into place 7 Remove the assembly tool 8 Check that the sealing is undamaged and properly fitted 9 Refitting the axis 4 mechanical stop slider Note Action For robots with protection type Clean Room 1 Clean the joints that have been opened and wipe the parts free from particles with spirit on a lint free xx2000001732 Place the axis 4 mechanical stop slider in the housing 2 Continues on next page 6...

Page 699: ...IRB 1300 11 0 9 and IRB 1300 10 1 15 Check the O ring Replace if damaged 2 xx2000001721 Valid for IRB 1300 11 0 9 and IRB 1300 10 1 15 Refit the tubular to the housing 3 xx2000001672 Valid for IRB 1300 7 1 4 and IRB 1300 12 1 4 Refit the extender unit to the housing 4 Flange socket head screw with glue 3HAB3413 412 M4x12 12 9 Lafre 2C2B FC6 9 PrO COat111 with NYPLAS glue 14 pcs Refit the screws 5 ...

Page 700: ...s correctly in the grooves of the pulley 3 Motor orientation orient the motor according to the figure below in regard to the encircled motor con nector xx2000001607 Orient the motor correctly and fit it into the hous ing Note Make sure the motor flange does not press on the timing belt 4 xx2000001680 Refit the motor and verify that the timing belt runs correctly in the groove of the motor pulley 5...

Page 701: ... and wipe the parts free from particles with spirit on a lint free xx2000001609 Remove the screw below the housing 2 Tension adjustment tool for axis 4 timing belt Included in special toolkit 3HAC076396 001 xx2000001610 Fit the tension adjustment tool for axis 4 timing belt to the screw hole 3 Continues on next page Product manual IRB 1300 701 3HAC070390 001 Revision G Copyright 2020 2022 ABB All ...

Page 702: ...owed force range Note Pay attention to the force application direction 5 New belt 23 9 26 2 N xx2000001612 Tightening torque 3 3 Nm 3 xx2000001604 Secure the motor with the screws 6 Continues on next page 702 Product manual IRB 1300 3HAC070390 001 Revision G Copyright 2020 2022 ABB All rights reserved 5 Repair 5 7 4 Replacing the axis 4 gearbox Continued ...

Page 703: ...pe Clean Room option 3351 4 Plug screw Clean Room 3HAC078351 001 Rubber sealing washer 3HAC075325 001 xx2000002496 Securing the cable package in the lower arm Note Action For robots with protection type Clean Room 1 Clean the joints that have been opened and wipe the parts free from particles with spirit on a lint free Continues on next page Product manual IRB 1300 703 3HAC070390 001 Revision G Co...

Page 704: ...CAUTION Make sure that no cables or hoses are twisted or strained Reroute if necessary 3 Routing the cable package in the housing Note Action For robots with protection type Clean Room 1 Clean the joints that have been opened and wipe the parts free from particles with spirit on a lint free Plastic cable protector axis 4 Slip the axis 4 cable protector over the cable package 2 3HAC064694 001 xx200...

Page 705: ...ean the joints that have been opened and wipe the parts free from particles with spirit on a lint free Screw M4x8 12 9 Lafre 2C2B FC6 9 4 pcs Refit the axis 4 cable protector 2 Tightening torque 2 6 Nm xx2000001546 Reconnecting the axis 4 motor connectors Note Action For robots with protection type Clean Room 1 Clean the joints that have been opened and wipe the parts free from particles with spir...

Page 706: ...g is highly important If the cables are routed and secured incorrectly the cables can be damaged 4 Screw M4x8 12 9 Lafre 2C2B FC6 9 2 pcs Refit the connector plate 5 Tightening torque 2 6 Nm xx2000001542 Routing the cable package in the tubular Note Action For robots with protection type Clean Room 1 Clean the joints that have been opened and wipe the parts free from particles with spirit on a lin...

Page 707: ... protection type Clean Room 1 Clean the joints that have been opened and wipe the parts free from particles with spirit on a lint free xx2000001539 Reconnect the air hoses Note See the number markings on the air hoses for help to find the corresponding air hoses 2 xx2000001540 For robots with Ethernet cabling Access the connector from the process hub and reconnect the connector J1 C2 Tip See the n...

Page 708: ...1 C3 Tip See the number markings on the connectors for help to find the corresponding connector 3 Reconnecting the axis 5 motor connectors Note Action For robots with protection type Clean Room 1 Clean the joints that have been opened and wipe the parts free from particles with spirit on a lint free xx2000001535 Insert the male header of the motor connectors to the connector plate 2 Continues on n...

Page 709: ...sert the male header of the motor connectors to the connector plate 2 xx2000001532 Reconnect the connectors FB6 MP6 Tip See the number markings on the connectors for help to find the corresponding connector 3 Refitting the process hub Note Action For robots with protection type Clean Room 1 Clean the joints that have been opened and wipe the parts free from particles with spirit on a lint free Con...

Page 710: ...he seal bolts Replace if damaged 3 Route and secure the cabling with cable straps CAUTION Correct cable routing is highly important If the cables are routed and secured incorrectly the cables can be damaged 4 Screw M4x10 12 9 Lafre 2C2B FC6 9 4 pcs Refit the process hub 5 Tightening torque 2 6 Nm xx2000001538 Securing the cable package in the tubular Note Action For robots with protection type Cle...

Page 711: ...cabling with cable straps CAUTION Correct cable routing is highly important If the cables are routed and secured incorrectly the cables can be damaged 4 Refitting the covers Note Action For robots with protection type Clean Room 1 Clean the joints that have been opened and wipe the parts free from particles with spirit on a lint free Continues on next page Product manual IRB 1300 711 3HAC070390 00...

Page 712: ... support cover A Housing cover B Lower arm covers C 5 Tightening torque 2 6 Nm xx2000001668 Concluding procedure Note Action For robots with protection type Clean Room 1 Clean and paint the joints that have been opened See Cut the paint or surface on the robot before replacing parts on page 145 Note After all repair work wipe the Clean Room robot free from particles with spirit on a lint free clot...

Page 713: ...eneric term for all calibration methods that aim to move the robot to calibration position Standard calibration A calibration routine that generates a new zero posi tion of the robot Fine calibration A calibration routine that in the first step generates a reference to current zero position of the robot The same calibration routine can later on be used to re calibrate the robot back to the same po...

Page 714: ...racy has the option information printed on its name plate To regain 100 Absolute accuracy perform ance the robot must be recalibrated for abso lute accuracy after repair or maintenance that affects the mechanical structure Brief description of calibration methods Axis Calibration method Axis Calibration is a standard calibration method for calibration of IRB 1300 It is the recommended method in or...

Page 715: ...after replacements that do not include taking apart the robot structure standard calibration is sufficient The Absolute Accuracy option varies according to the robot mounting position This is printed on the robot name plate for each robot The robot must be in the correct mounting position when it is recalibrated for absolute accuracy References Article numbers for the calibration tools are listed ...

Page 716: ...age 719 This will occur when The battery is discharged A resolver error occurs The signal between a resolver and measurement board is interrupted A robot axis is moved with the control system disconnected The revolution counters must also be updated after the robot and controller are connected at the first installation The robot is rebuilt If the robot is rebuilt for example after a crash or when ...

Page 717: ...s section shows the position of the synchronization marks and the synchronization position for each axis Synchronization marks IRB 1300 3 4 5 6 1 2 xx2000000404 Product manual IRB 1300 717 3HAC070390 001 Revision G Copyright 2020 2022 ABB All rights reserved 6 Calibration 6 2 1 Synchronization marks and synchronization position for axes ...

Page 718: ...n gears and so on Positive directions are shown in the graphic below Calibration service routines will handle the calibration movements automatically and these might be different from the positive directions shown below Manual movement directions xx2000000405 718 Product manual IRB 1300 3HAC070390 001 Revision G Copyright 2020 2022 ABB All rights reserved 6 Calibration 6 2 2 Calibration movement d...

Page 719: ...en tap Calibrate 1 Select Calibration from the menu 2 The Mechanical Units page displays a list of available mechanical units Note This step is required only if you are not already in the Mechanical Unit page when you open Calibrate Note The Mechanical Unit page is displayed only if there are more than one mechanical unit available Otherwise the calibration summary page for the available mechanica...

Page 720: ...on counter for the selected axes is updated CAUTION If a revolution counter is incorrectly updated it will cause incorrect manipulator posi tioning which in turn may cause damage or injury Check the synchronization position very carefully after each update See Checking the synchronization position on page 738 10 720 Product manual IRB 1300 3HAC070390 001 Revision G Copyright 2020 2022 ABB All righ...

Page 721: ...ounting hole on the tool flange The Axis Calibration procedure described roughly 1 A removable calibration tool is inserted by the operator into a calibration bushing on the axis chosen for calibration according to instructions on the FlexPendant WARNING Calibrating the robot with Axis Calibration requires special calibration tools from ABB Using other pins in the calibration bushings may cause se...

Page 722: ...ta about the tool installed A benefit with reference calibration is that the current state of the robot is stored and not the state when the robot left the ABB factory The reference value will be named according to tool name date etc Follow the instructions given in the reference calibration routine on the FlexPendant to create reference values When reference calibration is performed the robot is ...

Page 723: ...e downloaded to SafeMove and a new SafeMove calibration has to be done Make sure that the user rights admit to change the safety settings and to synchronize SafeMove How to calibrate a suspended or wall mounted robot The IRB 1300 is fine calibrated floor standing in factory prior to shipping To calibrate a suspended or wall mounted robot reference calibration could be used Reference values for a s...

Page 724: ...gs may cause severe damage to the robot and or personnel Note Article number Equipment etc Delivered as a set of calibration tools Required if Axis Calibration is the valid calib ration method for the robot 3HAC074119 001 Calibration toolbox Ax is Calibration Examining the calibration tool Check prior to usage Before using the calibration tool make sure that the tube insert the plastic protection ...

Page 725: ... a local periodic check system the following measures should be checked Outer diameter within Ø5g5 mm Straightness within 0 005 mm xx1600001142 Outer diameter A Identifying the calibrating tools It is possible to make the calibration tool identifiable with for example an RFID chip The procedure of how to install an RFID chip is described below Note The tool identifier is NOT delivered from ABB it ...

Page 726: ...ust not exceed Ø7 9 mm x 8 0 mm Ø5 9 mm x 8 0 mm or Ø3 9 mm x 8 0 mm depending on calibra tion tool size 1 There is a cavity on one end of the calibration tool in which the RFID chip can be installed 2 Install the RFID chip according to supplier instruc tions Install the chip in flush with the tool end 726 Product manual IRB 1300 3HAC070390 001 Revision G Copyright 2020 2022 ABB All rights reserve...

Page 727: ...on each axis as follows If there is not enough space on an axis to install a fixed calibration pin the axis is equipped with two bushings instead for installation of two calibration tools when calibration is carried out This is shown in the figure For axis 6 there is only one bushing the second calibration tool is installed at the mounting flange of the turning disk xx2000001310 Continues on next ...

Page 728: ... xx2000001312 Continues on next page 728 Product manual IRB 1300 3HAC070390 001 Revision G Copyright 2020 2022 ABB All rights reserved 6 Calibration 6 4 3 Installation locations for the calibration tools Continued ...

Page 729: ...022 O ring on calibration pin Replace if damaged or missing 3HAC061327 011 O ring on calibration pin Used with protection type Clean Room Replace if damaged or missing 3HAC077381 001 Rubber sealing washer with 10 mm protective cover Used with protection type Clean Room Replace if damaged or missing 3HAC075324 001 Rubber sealing washer with 12 mm protective cover Used with protection type Clean Roo...

Page 730: ...damaged or missing 3HAC056253 002 Calibration pin cover 14 mm Replace if damaged or missing 3HAC061327 022 O ring on calibration pin Replace if damaged or missing 3HAC061327 011 O ring on calibration pin Used with protection type Clean Room Replace if damaged or missing 3HAC077381 001 Rubber sealing washer with 10 mm protective cover Used with protection type Clean Room Replace if damaged or missi...

Page 731: ... if any 9 The robot moves to verify that the calibration tool is removed 10 Choose whether to save the calibration data or not Calibration of the robot is not finished until the calibration data is saved as last step of the calibration procedure Preparation prior to calibration The calibration procedure is described in the FlexPendant while conducting it Note Action DANGER While conducting the cal...

Page 732: ...d the RobotWare program needs to be started again Use this procedure to take required action Action Situation Press and hold the three position enabling device and press Play The three position enabling device on the FlexPendant has been released during robot movement Remove the calibration tool if it is installed and restart the calibration procedure from the beginning See Starting the calibratio...

Page 733: ...has been calibrated Replace the cover with new spare part if missing or damaged 2 O ring on calibration pin 3HAC061327 022 O ring on calibration pin 3HAC061327 011 Calibration pin cover 10 mm 3HAC056253 003 Calibration pin cover 14 mm 3HAC056253 002 Rubber sealing washer with 10 mm protective cover 3HAC077381 001 Rubber sealing washer with 12 mm protective cover 3HAC075324 001 Rubber sealing washe...

Page 734: ... not damaged Replace the plug and the sealing with new spare part if missing or damaged 3 Protective plug for 10 mm bushing 3HAC053237 003 Protective plug for 12 mm bushing 3HAC053237 002 734 Product manual IRB 1300 3HAC070390 001 Revision G Copyright 2020 2022 ABB All rights reserved 6 Calibration 6 4 4 Axis Calibration Running the calibration procedure Continued ...

Page 735: ...ration to save reference values for all axes that is to be replaced Make sure that the values are saved in RobotStudio or FTP program The files are located in Active system folder name HOME RefCalibFiles 7 Perform the repair 8 Make sure that the tooling and process equipment are the same as when creating the reference Use Reference calibration to update the system with new calibration offset value...

Page 736: ...ie 96 3 94 2 2 1 degrees 8 Manually jog axis 4 the calculated angle difference 2 1 NOTE The direction shall be the same direction as the direction used when axis 4 was manually jogged to coincide with the verification process In the example 2 1 degrees 9 Make a new manual fine calibration of axis 4 with axis in 2 1 degrees position 10 Check again against the verification position 11 Repeat the man...

Page 737: ...ition program twice Do not change the position of the robot axes after running the program 1 This is detailed in section Synchronization marks and synchronization position for axes on page 717 Adjust the synchronization marks when the calibration is done if necessary 2 Write down the values on a new label and stick it on top of the calibration label 3 The label is located on the base Product manua...

Page 738: ...ectly If they do not update the revolu tion counters 6 Using the jogging window Use this procedure to jog the robot to the synchronization position of all axes Note Action Tap Jog 1 From the Mechanical unit list select a mechanical unit 2 From the Motion mode section select an axis set that need to be jogged 3 For example to jog axis 2 select the axis set Axis 1 3 Follow the screen instruction on ...

Page 739: ...and correctly fitted 2 Replace one thing at a time 3 Do not replace units randomly 4 Make sure that there are no loose screws turnings or other unexpected parts remaining after work has been performed 5 When the work is completed verify that the safety functions are working as intended Keep a track of history Make a historical fault log to keep track of problems over time Consult those working wit...

Page 740: ...ilities between hardware and software options and their configuration The robot recently had a software upgrade Check connections software versions The robot has recently been moved from one site to another an already working robot 740 Product manual IRB 1300 3HAC070390 001 Revision G Copyright 2020 2022 ABB All rights reserved 7 Troubleshooting 7 1 Introduction to troubleshooting Continued ...

Page 741: ...AUTION Allow hot parts to cool down 1 If the oil spill is small this step is sufficient Wipe off the oil or grease see Cleaning the IRB 1300 on page 106 2 Monitor the robot over time to see if new oil or grease occurs Check the gearbox oil level 3 Robots performing certain ex tremely heavy duty work cycles may be fitted with vented oil plugs These are not fitted to normal duty robots but can be pu...

Page 742: ...oise is emitted from a gearbox the following can also apply Overheating Recommended actions The following actions are recommended Information Action CAUTION Allow hot parts to cool down 1 Verify that the service is done according to the maintenance schedule 2 If a bearing is emitting the noise determine which one and make sure that it has suffi cient lubrication 3 If possible disassemble the joint...

Page 743: ... ive Too hot gearbox oil may be caused by Incorrect oil quality or level The robot work cycle runs a specific axis too hard Investigate whether it is possible to program small cooling periods into the application Overpressure created inside gearbox 8 Product manual IRB 1300 743 3HAC070390 001 Revision G Copyright 2020 2022 ABB All rights reserved 7 Troubleshooting 7 3 Mechanical noise or dissonanc...

Page 744: ...nding equipment Possible causes The symptom can be caused by Faulty brake Faulty power supply to the brake Recommended actions The following actions are recommended Information Action Determine which motor s causes the robot to collapse 1 See the circuit diagram Check the brake power supply to the col lapsing motor during the Motors OFF state 2 If found faulty the motor must be replaced as a compl...

Page 745: ...orque or external forces for the joint can also be too high Recommended actions The following actions are recommended Information Action CAUTION Allow hot parts to cool down 1 Verify that the values for payload and arm load are set correctly 2 Verify that the value for ambient temperature setting in the controller is consistent with the actual operating temperature environment 3 The ways could be ...

Page 746: ...This page is intentionally left blank ...

Page 747: ... the country in which the robot and the control unit are installed If the robot or the control unit is partially or completely disposed of the various parts must be grouped together according to their nature which is all iron together and all plastic together and disposed of accordingly These parts must also be disposed of in accordance with the current legislation of the country in which the robo...

Page 748: ...he respective content see table below xx1800000058 Materials used in the product The table specifies some of the materials in the product and their respective use throughout the product Dispose components properly according to local regulations to prevent health or environmental hazards Example application Material Base swing lower arm etc Aluminium Serial measurement board Batteries Lithium Cable...

Page 749: ...l and grease Where possible arrange for oil and grease to be recycled Dispose of via an authorized person contractor in accordance with local regulations Do not dispose of oil and grease near lakes ponds ditches down drains or onto soil Incineration must be carried out under controlled conditions in accordance with local regulations Also note that Spills can form a film on water surfaces causing d...

Page 750: ...attery is exposed to heat for example from a blow torch it will explode Always remove all oil grease in gearboxes If exposed to heat for example from a blow torch the oil grease will catch fire When motors are removed from the robot the robot will collapse if it is not properly supported before the motor is removed 750 Product manual IRB 1300 3HAC070390 001 Revision G Copyright 2020 2022 ABB All r...

Page 751: ...pter includes general information complementing the more specific information in the different procedures in the manual Product manual IRB 1300 751 3HAC070390 001 Revision G Copyright 2020 2022 ABB All rights reserved 9 Reference information 9 1 Introduction ...

Page 752: ...ty standard for industrial environments IEC 61000 6 2 Electromagnetic compatibility EMC Part 6 4 Generic standards Emission standard for industrial environments IEC 61000 6 4 Safety of machinery Safety related parts of control systems Part 1 General principles for design normative reference from ISO 10218 1 ISO 13849 1 2006 Protection of electronic devices from electrostatic phenomena General requ...

Page 753: ... SafeMove safety rated soft axis and space limiting can be used as risk reduction measures in specific applications For details about SafeMove see Application manual Functional safety and SafeMove Product manual IRB 1300 753 3HAC070390 001 Revision G Copyright 2020 2022 ABB All rights reserved 9 Reference information 9 2 Applicable standards Continued ...

Page 754: ...39 37 in 3 28 ft 1 m Length 2 21 lb 1 kg Weight 0 035 ounces 1 g Weight 14 5 psi 100 kPa 1 bar Pressure 0 225 lbf 1 N Force 0 738 lbf ft 1 Nm Moment 0 264 US gal 1 L Volume 754 Product manual IRB 1300 3HAC070390 001 Revision G Copyright 2020 2022 ABB All rights reserved 9 Reference information 9 3 Unit conversion ...

Page 755: ...handling screws treated with Gleitmo protective gloves of nitrile rubber type should be used Generally screws are lubricated with Gleitmo 603 mixed with Geomet 500 or Geomet 702 in proportion 1 3 Geomet thickness varies according to screw dimensions refer to the following Geomet thickness Lubricant Dimension 3 5 μm Gleitmo 603 Geomet 500 M6 M20 any length except M20x60 3 5 μm Gleitmo 603 Geomet 72...

Page 756: ...fied value is 10 Oil lubricated screws with slotted or cross recess head screws The following table specifies the recommended standard tightening torque for oil lubricated screws with slotted or cross recess head screws Note A special torque specified in the repair maintenance or installation procedure overrides the standard torque Oil lubricated screws with allen head screws The following table s...

Page 757: ...ycote 1000 Gleitmo 603 or equivalent with allen head screws Note A special torque specified in the repair maintenance or installation procedure overrides the standard torque Tightening torque Nm Class 12 9 lubricated i Tightening torque Nm Class 10 9 lubricated i Dimension 35 28 M8 70 55 M10 120 96 M12 300 235 M16 550 460 M20 950 790 M24 i Lubricated with Molycote 1000 Gleitmo 603 or equivalent Pr...

Page 758: ...essory when handling components with a weight exceeding 22 kg A wide range of lifting accessories and devices are available for each manipulator model Example Following is an example of a weight specification in a procedure Note Action CAUTION The arm weighs 25 kg All lifting accessories used must be sized accord ingly 758 Product manual IRB 1300 3HAC070390 001 Revision G Copyright 2020 2022 ABB A...

Page 759: ... sum of the standard toolkit and any tools listed in the instruction Contents standard toolkit Rem Tool Qty Ring open end spanner 8 19 mm 1 Socket head cap 2 5 17 mm 1 Torx socket no 20 60 1 Box spanner set 1 Torque wrench 10 100 Nm 1 Torque wrench 75 400 Nm 1 Ratchet head for torque wrench 1 2 1 Hexagon headed screw M10x100 2 Hexagon headed screw M16x90 1 Hex head allen wrench drill bit set M2 M8...

Page 760: ... Includes pump with outlet pipe Oil collecting vessel The capacity of the vessel must be sufficient to take the complete amount of oil Connector for quick coupling with outlet pipe Used for draining and filling oil to axis 1 gearbox Connector specification G3 8 Special toolkit 3HAC076396 001 Includes Axis 1 gearbox assembly cap Axis 1 gear box motor sealing pressfit tool Axis 1 gearbox motor seali...

Page 761: ...ce of lifting accessories is not detailed in the activity procedure but in the instruction delivered with each piece of lifting accessories The instructions delivered with the lifting accessories should be stored for later reference Product manual IRB 1300 761 3HAC070390 001 Revision G Copyright 2020 2022 ABB All rights reserved 9 Reference information 9 8 Lifting accessories and lifting instructi...

Page 762: ...This page is intentionally left blank ...

Page 763: ...but delivered as a separate document for registered users on myABB Business Portal www abb com myABB Tip All documents can be found via myABB Business Portal www abb com myABB Product manual IRB 1300 763 3HAC070390 001 Revision G Copyright 2020 2022 ABB All rights reserved 10 Spare parts 10 1 Spare part lists and illustrations ...

Page 764: ...This page is intentionally left blank ...

Page 765: ...g to 738 scales 717 calibration scales 717 CalibWare 714 carbon dioxide extinguisher 27 changing oil axis 1 130 axis 2 135 cleaning 106 climbing on robot 29 Cold environments 97 connecting the robot and controller cabling 90 copper disposal 748 D damaged bearings 742 dimensions robot 75 direction of axes 718 E environmental information 748 equipment robot 75 ESD damage elimination 50 sensitive equ...

Page 766: ...otor axis 2 replacing 507 motor axis 1 replacing 491 mounting equipment 75 MoveAbsJ instruction 738 N national regulations 26 negative directions axes 718 neodymium disposal 748 noise 742 O oil 29 amount in gearboxes 129 disposal 748 type of oil 129 oil change axis 1 130 axis 2 135 oil leaks 741 operating conditions 39 original spare parts 15 overfilled gearbox 741 P pedestal installed on pedestal...

Page 767: ...17 SMB unit replacing 193 speed adjusting 97 standards 752 ANSI 752 CAN 752 start of robot in cold environments 97 steel disposal 748 storage conditions 39 suspended mounting 71 swing replacing 237 symbols safety 17 synchronization position 719 sync marks 717 system integrator requirements 26 system parameter Gravity Alpha 72 Gravity Beta 71 T technical data robot 37 temperatures operation 39 stor...

Page 768: ......

Page 769: ......
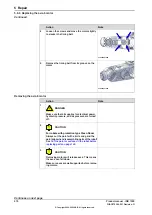
Page 770: ... 47 22 87 2000 ABB Engineering Shanghai Ltd Robotics Discrete Automation No 4528 Kangxin Highway PuDong District SHANGHAI 201319 China Telephone 86 21 6105 6666 ABB Inc Robotics Discrete Automation 1250 Brown Road Auburn Hills MI 48326 USA Telephone 1 248 391 9000 abb com robotics 3HAC070390 001 Rev G en Copyright 2020 2022 ABB All rights reserved Specifications subject to change without notice ...

Reviews: