background image

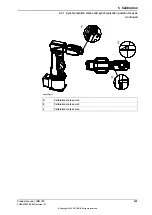
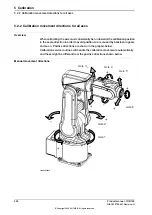
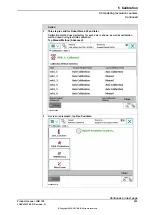
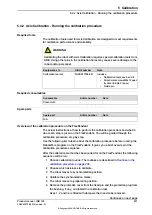
Position of robot axes

The axis chosen for calibration is automatically run by the calibration program to
its calibration position during the calibration procedure.

In order for the axis to be able to be moved to calibration position, or in order for
getting proper access to the calibration bushing, other axes might need to be
jogged to positions different from 0 degrees. Information about which axes are
allowed to be jogged will be given on the FlexPendant. These axes are marked
with

Unrestricted

in the FlexPendant window.

How to calibrate a suspended or wall mounted robot

The IRB 120 is calibrated floor standing in factory, prior to shipping.

To calibrate a suspended or wall mounted robot with the fine calibration routine,
the robot must first be taken down and mounted standing on the floor.

236

Product manual - IRB 120

3HAC035728-001 Revision: N

© Copyright 2009-2017 ABB. All rights reserved.

5 Calibration

5.4.1 Description of Axis Calibration

Continued

Summary of Contents for IRB 120

Page 1: ...ROBOTICS Product manual IRB 120 ...

Page 2: ...Trace back information Workspace R17 2 version a11 Checked in 2017 09 20 Skribenta version 5 1 011 ...

Page 3: ...Product manual IRB 120 3 0 6 IRB 120T 3 0 6 IRC5 Document ID 3HAC035728 001 Revision N Copyright 2009 2017 ABB All rights reserved ...

Page 4: ...BB for losses damages to persons or property fitness for a specific purpose or the like In no event shall ABB be liable for incidental or consequential damages arising from use of this manual and products described herein This manual and parts thereof must not be reproduced or copied without ABB s written permission Keep for future reference Additional copies of this manual may be obtained from AB...

Page 5: ...labels 46 1 4 Safety related instructions 46 1 4 1 DANGER Moving robots are potentially lethal 47 1 4 2 DANGER First test run may cause injury or damage 48 1 4 3 DANGER Make sure that the main power has been switched off 50 1 4 4 WARNING The unit is sensitive to ESD 52 1 4 5 WARNING Safety risks during handling of batteries 53 1 4 6 WARNING Safety risks during work with gearbox lubricants oil or g...

Page 6: ...s 151 4 4 1 Replacing plastic covers 155 4 5 Upper arm 155 4 5 1 Replacing the upper arm 164 4 6 Lower arm 164 4 6 1 Replacing the lower arm 169 4 7 Motors and motors with gearboxes 169 4 7 1 Replacing axis 1 motor with gearbox 190 4 7 2 Replacing axis 2 motor with gearbox 202 4 7 3 Replacing axis 3 motor with gearbox 210 4 7 4 Replacing motor axis 4 with gearbox 211 4 7 5 Replacing motor axis 5 2...

Page 7: ...troduction 252 6 2 Environmental information 253 6 3 Scrapping of robot 255 7 Reference information 255 7 1 Introduction 256 7 2 Applicable standards 257 7 3 Unit conversion 258 7 4 Screw joints 259 7 5 Weight specifications 260 7 6 Standard toolkit 261 7 7 Special tools 262 7 8 Lifting equipment and lifting instructions 263 8 Spare parts 263 8 1 Spare part lists and illustrations 265 9 Circuit di...

Page 8: ...This page is intentionally left blank ...

Page 9: ...ny installation or service work on the robot Contains general safety aspects as well as more specific information on how to avoid personal injuries and damage to the product Safety Required information about lifting and installation of the robot Installation and commis sioning Step by step procedures that describe how to perform mainten ance of the robot Based on a maintenance schedule that may be...

Page 10: ...ns all safety instructions from the product manuals for the manipulators and the controllers Revisions Description Revision First edition This revision includes the following additions and or changes A Section Product documentation M2004 added Section How to read the product manual added Safety chapter Updated safety signal graphics for levels Danger and Warning See section Safety signals in the m...

Page 11: ...updated accordingly See Replacing the upper arm on page 155 Repair chapter Motor axis 4 now delivered as part of the upper arm The section is updated accordingly See Replacing motor axis 4 with gearbox on page 210 Repair chapter Illustration xx0900001009 updated See Replacing motor axis 5 on page 211 Calibration chapter updated See sections Calibrating with manual calibration method on page 242 an...

Page 12: ...arboxes is moved from the manual to a separate lubrication manual see Type of lubrication in gearboxes on page 107 Added data for extended working range of axis 6 see Working range and type of motion on page 60 This revision includes the following additions and or changes G Added information about brake release for other controller variants than IRC5 Compact see Manually releasing the brakes on pa...

Page 13: ...ration on page 225 Information about Absolute Accuracy removed from the robot Food grade lubrication option added Published in release R16 2 The following updates are done in this revision M Information of some attachment screws and washers added Modified specification of attachment screws from M4x8 to M4x10 for fitting the bracket securing the upper arm to the base Published in release R17 2 The ...

Page 14: ...bration Decommissioning Reference information safety standards unit conversions screw joints lists of tools Spare parts list with exploded views or references to separate spare parts lists Circuit diagrams or references to circuit diagrams Technical reference manuals The technical reference manuals describe reference information for robotics products Technical reference manual Lubrication in gearb...

Page 15: ...application Operating manuals The operating manuals describe hands on handling of the products The manuals are aimed at those having first hand operational contact with the product that is production cell operators programmers and troubleshooters The group of manuals includes among others Operating manual Emergency safety information Operating manual General safety information Operating manual Get...

Page 16: ...completed with a reference to the section where the equipment is listed with further information that is article number and dimensions The designation in the procedure for the component or attachment point corresponds to the designation in the referenced list The table below shows an example of a reference to a list of required equipment from a step in a procedure Note Illustration Action Art no i...

Page 17: ... 18 Safety signals and symbols shown in the manual and on the robot warning for different types of dangers are found in Safety signals and symbols on page 38 Specific safety information pointed out in the procedures How to avoid and eliminate the danger is either described directly in the procedure or in specific instructions in the section Safety related instructions on page 46 Product manual IRB...

Page 18: ...s section describes protective stop and emergency stop Protective stop and emergency stop on page 21 This section lists dangers relevant when work ing with the product The dangers are split into different categories safety risks during installation or service risks associated with live electrical parts Safety risks on page 22 This section describes actions which may be taken to remedy or avoid dan...

Page 19: ...low safe access to all areas where intervention is necessary during operation adjustment and maintenance Where it is necessary to perform tasks within the safeguarded space there shall be safe and adequate access to the task locations Users shall not be exposed to hazards including slipping tripping and falling hazards Connection of external safety devices Apart from the built in safety functions ...

Page 20: ...diagrams Product specification for the robot Load limits for tools and workpieces Application manual Functional safety and SafeMove Configuration of safety mod ule requires Functional safety options 20 Product manual IRB 120 3HAC035728 001 Revision N Copyright 2009 2017 ABB All rights reserved 1 Safety 1 2 2 Safety in the robot system Continued ...

Page 21: ...view The protective stops and emergency stops are described in the product manual for the controller Product manual IRB 120 21 3HAC035728 001 Revision N Copyright 2009 2017 ABB All rights reserved 1 Safety 1 2 3 Protective stop and emergency stop ...

Page 22: ...sure that safety instructions are available for the installation in question Those who install or service maintain the robot must have the appropriate training for the equipment in question and in any safety matters associated with it Spare parts and special equipment ABB does not supply spare parts and special equipment which have not been tested and approved by ABB The installation and or use of...

Page 23: ...at energy in the controller Never use the robot as a ladder which means do not climb on the motors or other parts during service work There is a serious risk of slipping because of the high temperature of the motors and oil spills that can occur on the robot There is also a risk of the robot being damaged To be observed by the supplier of the complete system When integrating the robot with externa...

Page 24: ...bles to the measurement sys tem Cabling Description Safety risk CAUTION The cable packages are sensitive to mechan ical damage Handle the cable packages and the connectors with care in order to avoid damage Cable packages are sensitive to mechanical damage Gearboxes and motors Description Safety risk CAUTION Whenever parting mating motor and gearbox the gears may be damaged if excessive force is u...

Page 25: ...le materials are put on hot surfaces Elimination The following instructions describe how to avoid the dangers specified above Information Action Always use your hand at some distance to feel if heat is radiating from the potentially hot component before actually touching it 1 Wait until the potentially hot component has cooled if it is to be removed or handled in any other way 2 Do not put anythin...

Page 26: ...s in the event of a power failure or a disturbance to the controller Unauthorized modifications of the originally delivered robot are prohibited Without the consent of ABB it is forbidden to attach additional parts through welding riveting or drilling of new holes into the castings The strength could be affected CAUTION Ensure that a gripper is prevented from dropping a work piece if such is used ...

Page 27: ...ure must be released in the complete pneumatic or hydraulic systems before starting to repair them Work on hydraulic equipment may only be performed by persons with special knowledge and experience of hydraulics All pipes hoses and connections have to be inspected regularly for leaks and damage Damage must be repaired immediately Splashed oil may cause injury or fire Safe design Gravity may cause ...

Page 28: ...intenance must only be carried out by qualified personnel who are familiar with the entire installation as well as the special risks associated with its different parts Extraordinary risks If the working process is interrupted extra care must be taken due to risks other than those associated with regular operation Such an interruption may have to be rectified manually 28 Product manual IRB 120 3HA...

Page 29: ...re followed All work must be performed by qualified personnel on machine robot system in deadlock in an isolated state disconnected from power supply and protected against reconnection Voltage related risks IRC5 controller A danger of high voltage is associated with for example the following parts Be aware of stored electrical energy DC link Ultracapacitor bank unit in the controller Units such as...

Page 30: ... VAC Voltage related risks tools material handling devices etc Tools material handling devices etc may be live even if the robot system is in the OFF position Power supply cables which are in motion during the working process may be damaged 30 Product manual IRB 120 3HAC035728 001 Revision N Copyright 2009 2017 ABB All rights reserved 1 Safety 1 2 4 6 Risks associated with live electric parts Cont...

Page 31: ...leased at maximum speed Determine the maximum speed from the maximum velocities of the robot axes and from the position at which the robot is working in the work cell see the section Robot motion in the Product specification Also consider the maximum possible impact caused by a breaking or malfunctioning rotating tool or other device fitted to the robot Product manual IRB 120 31 3HAC035728 001 Rev...

Page 32: ...g Note Use a CARBON DIOXIDE CO2 extinguisher in the event of a fire in the robot or controller 32 Product manual IRB 120 3HAC035728 001 Revision N Copyright 2009 2017 ABB All rights reserved 1 Safety 1 2 5 2 Fire extinguishing ...

Page 33: ...s may require using an overhead crane or similar equipment Increased injury Before releasing the brakes make sure that the weight of the arms does not increase the pressure on the trapped person further increasing any injury DANGER When releasing the holding brakes the robot axes may move very quickly and sometimes in unexpected ways Make sure no personnel is near or beneath the robot arm Product ...

Page 34: ... as described below 1 Run each robot axis to a position where the combined weight of the robot arm and any load is maximized maximum static load 2 Switch the motor to the MOTORS OFF 3 Inspect and verify that the axis maintains its position If the robot does not change position as the motors are switched off then the brake function is adequate 34 Product manual IRB 120 3HAC035728 001 Revision N Cop...

Page 35: ...tio or other kinematic system parameters from the FlexPendant or a PC This will affect the safety function Reduced speed 250 mm s Product manual IRB 120 35 3HAC035728 001 Revision N Copyright 2009 2017 ABB All rights reserved 1 Safety 1 2 5 5 Risk of disabling function Reduced speed 250 mm s ...

Page 36: ...manipulator switches to the MOTORS OFF state To ensure safe use of the teach pendant the following must be implemented The enabling device must never be rendered inoperational in any way During programming and testing the enabling device must be released as soon as there is no need for the robot to move Anyone entering the working space of the robot must always hold the teach pendant This is to pr...

Page 37: ...vailable in USA or Canada Pay attention to the rotating axes of the robot Keep away from axes to not get entangled with hair or clothing Also be aware of any danger that may be caused by rotating tools or other devices mounted on the robot or inside the cell Test the motor brake on each axis according to the section Brake testing on page 34 To prevent anyone else from taking control of the robot a...

Page 38: ...occur if the instructions are not followed that can lead to serious injury pos sibly fatal and or great damage to the product It applies to warnings that apply to danger with for example contact with high voltage electrical units explosion or fire risk risk of poisonous gases risk of crushing impact fall from height etc WARNING xx0100000002 Warns for electrical hazards which could result in severe...

Page 39: ...NOTE xx0100000004 Describes where to find additional information or how to do an operation in an easier way TIP xx0100000098 Product manual IRB 120 39 3HAC035728 001 Revision N Copyright 2009 2017 ABB All rights reserved 1 Safety 1 3 1 Safety signals in the manual Continued ...

Page 40: ...glish German and French Symbols on safety labels Description Symbol Warning xx0900000812 Warns that an accident may occur if the instructions are not followed that can lead to serious injury possibly fatal and or great damage to the product It applies to warnings that apply to danger with for example contact with high voltage electrical units explosion or fire risk risk of poisonous gases risk of ...

Page 41: ... Do not disassemble xx0900000815 Disassembling this part can cause injury Extended rotation xx0900000814 This axis has extended rotation working area compared to standard Brake release xx0900000808 Pressing this button will release the brakes This means that the robot arm can fall down Continues on next page Product manual IRB 120 41 3HAC035728 001 Revision N Copyright 2009 2017 ABB All rights res...

Page 42: ...ip over if the bolts are not securely fastened xx1500002402 Crush xx0900000817 Risk of crush injuries Continues on next page 42 Product manual IRB 120 3HAC035728 001 Revision N Copyright 2009 2017 ABB All rights reserved 1 Safety 1 3 2 Safety symbols on product labels Continued ...

Page 43: ...1 1 06 xx1300001087 Moving robot 1 2 3 4 5 6 xx0900000819 The robot can move unexpectedly xx1000001141 1 2 3 4 xx1500002616 Continues on next page Product manual IRB 120 43 3HAC035728 001 Revision N Copyright 2009 2017 ABB All rights reserved 1 Safety 1 3 2 Safety symbols on product labels Continued ...

Page 44: ...0001242 Lifting of robot xx0900000822 Oil xx0900000823 Can be used in combination with prohibition if oil is not allowed Mechanical stop xx0900000824 Continues on next page 44 Product manual IRB 120 3HAC035728 001 Revision N Copyright 2009 2017 ABB All rights reserved 1 Safety 1 3 2 Safety symbols on product labels Continued ...

Page 45: ...that this part is pressurized Usually contains additional text with the pressure level Shut off with handle xx0900000827 Use the power switch on the controller Do not step xx1400002648 Warns that stepping on these parts can cause damage to the parts Product manual IRB 120 45 3HAC035728 001 Revision N Copyright 2009 2017 ABB All rights reserved 1 Safety 1 3 2 Safety symbols on product labels Contin...

Page 46: ...re all emergency stop equipment is cor rectly installed and connected 1 How to use the hold to run function is de scribed in section How to use the hold to run function in the Operating manual IRC5 with FlexPendant Usually the hold to run function is active only in manual full speed mode To in crease safety it is also possible to activate hold to run for manual reduced speed with a system paramete...

Page 47: ...tallation section in the product manual for the robot 2 Verify that any safety equipment installed to secure the robot arm position or restrict the robot arm motion during service activity is removed 3 Verify that the fixture and work piece are well secured if applicable 4 Install all safety equipment properly 5 Make sure all personnel are standing at a safe distance from the robot that is out of ...

Page 48: ...et Controller Note illustration Action xx0600002782 Switch off the main switch on the controller cabinet 1 A Main switch Elimination IRC5 Dual Cabinet Controller Note illustration Action xx0600002783 Switch off the main switch on the Drive Module 1 K Main switch Drive Module A Main switch Control Module Switch off the main switch on the Control Module 2 Continues on next page 48 Product manual IRB...

Page 49: ...model A xx0900000313 Switch off the main power switch on the controller cabinet 1 A Main power switch Disconnect the input power cable from the wall socket 2 Product manual IRB 120 49 3HAC035728 001 Revision N Copyright 2009 2017 ABB All rights reserved 1 Safety 1 4 3 DANGER Make sure that the main power has been switched off Continued ...

Page 50: ... be tested frequently to ensure that they are not damaged and are operating cor rectly Use a wrist strap 1 The mat must be grounded through a current limit ing resistor Use an ESD protective floor mat 2 The mat should provide a controlled discharge of static voltages and must be grounded Use a dissipative table mat 3 Location of wrist strap button The location of the wrist strap button is shown in...

Page 51: ...pact Controller A xx1400001622 Wrist strap button A Product manual IRB 120 51 3HAC035728 001 Revision N Copyright 2009 2017 ABB All rights reserved 1 Safety 1 4 4 WARNING The unit is sensitive to ESD Continued ...

Page 52: ...re may follow depending upon the circumstances Note Appropriate disposal regulations must be observed Elimination Note Action Operating temperatures are listed in Pre install ation procedure on page 56 Do not short circuit recharge puncture incinerate crush immerse force discharge or expose to temperatures above the declared operating temperature range of the product Risk of fire or explosion 1 Us...

Page 53: ...scription Warning Make sure that protective gear like goggles and gloves are al ways worn during this activity Changing and draining gearbox oil or grease may require hand ling hot lubricant heated up to 90 C xx0100000002 Hot oil or grease Make sure that protective gear like goggles and gloves are al ways worn When working with gearbox lub ricant there is a risk of an allergic reaction xx010000000...

Page 54: ...of the gearbox When changing the lubricant the amount refilled may differ from the specified amount depending on how much has previously been drained from the gearbox xx0100000004 Specified amount de pends on drained volume When draining the oil make sure that as much oil as possible is drained from the gearbox The reason for this is to drain as much oil sludge and metal chips as possible from the...

Page 55: ...portant that all safety information is observed There are general safety aspects that must be read through as well as more specific safety information that describes the danger and safety risks when performing the procedures Read the chapter Safety on page17 before performing any installation work Note If the IRB 120 is connected to power always make sure that the robot is connected to protective ...

Page 56: ... the weight of the robot as specified in Weight robot on page 56 5 If the robot is not installed directly it must be stored as described in Storage condi tions robot on page 58 6 Make sure that the expected operating environment of the robot conforms to the specifications as described in Operating conditions robot on page 59 7 Before taking the robot to its installation site make sure that the sit...

Page 57: ...ane Tz The table shows the various forces and torques working on the robot during different kinds of operation Note These forces and torques are extreme values that are rarely encountered during operation The values also never reach their maximum at the same time Floor mounted Max load emergency stop Endurance load in operation Force 515 N 265 N Force xy 265 365 N 265 200 N Force z 400 Nm 195 Nm T...

Page 58: ...5 section Motion Process Mode i The minimum resonance frequency given should be interpreted as the frequency of the robot mass inertia robot assumed stiff when a foundation translational torsional elasticity is added i e the stiffness of the pedestal where the robot is mounted The minimum resonance frequency should not be interpreted as the resonance frequency of the building floor etc For example...

Page 59: ...other machine a warm up phase recommended to be run with the robot Otherwise there is a risk that the robot stops or run with lower performance due to temperature dependent oil and grease viscosity ii For robots with food grade lubrication if environment temperature 35ºC contact ABB for further information Protection classes robot The table shows the available protection types of the robot with th...

Page 60: ...0 Pos 7 Pos 8 Pos 3 Pos 4 Pos 2 Pos 6 Pos 5 Z xx0900000263 Angle degrees Position at wrist center mm Posi tion Axis 3 Axis 2 Z X 0 0 630 mm 302 mm A 77 0 870 mm 0 mm B 70 0 300 mm 169 mm C 77 90 270 mm 580 mm D 77 110 91 mm 545 mm E 110 110 50 mm 440 mm F 70 110 445 mm 67 mm G 77 90 270 mm 580 mm H 77 110 91 mm 545 mm J Continues on next page 60 Product manual IRB 120 3HAC035728 001 Revision N Cop...

Page 61: ...o 110 Arm motion Axis 3 160 to 160 Wrist motion Axis 4 120 to 120 Bend motion Axis 5 400 to 400 default Turn motion Axis 6 242 revolutions to 242 re volutions maximum i i The default working range for axis 6 can be extended by changing parameter values in the software Option 610 1 Independent axis can be used for resetting the revolution counter after the axis has been rotated no need for rewindin...

Page 62: ... the most stable position Do not change the robot position before securing it to the foundation Shipping and transportation position This figure shows the robot in its shipping position and transportation position 20 A xx0900000580 WARNING The robot is likely to be mechanically unstable if not secured to the foundation 62 Product manual IRB 120 3HAC035728 001 Revision N Copyright 2009 2017 ABB All...

Page 63: ...t screws washers For art no and details see chapter Reference information section Special tools on page 261 Lifting tool set Lifting Attach the roundslings as shown in the figure CAUTION Use a thick cloth between round sling and robot where robot surface directly contact with round sling Continues on next page Product manual IRB 120 63 3HAC035728 001 Revision N Copyright 2009 2017 ABB All rights r...

Page 64: ...s used must be sized accordingly 1 CAUTION Attempting to lift the robot in any other pos ition than that recommended may result in the robot tipping over and causing severe damage or injury 2 Continues on next page 64 Product manual IRB 120 3HAC035728 001 Revision N Copyright 2009 2017 ABB All rights reserved 2 Installation and commissioning 2 3 1 Lifting the robot with roundslings Continued ...

Page 65: ... E xx0900000636 Fit the bracket with its attachment screws and washers in order to secure the upper arm to the base 6 Parts A Attachment screws M4x10 qual ity steel 8 8 ELZN 2 pcs B Base C Bracket D Attachment screws M5x12 qual ity 8 8 A2F 2 pcs E Upper arm See the figure in Lifting on page 63 Attach the roundsling 7 Lift the robot with an overhead crane 8 Product manual IRB 120 65 3HAC035728 001 ...

Page 66: ... release unit when the robot is disconnected from the controller but connected to an external power supply at the connector R1 MP using an external voltage supply directly on the motor connector Note On the single controller there is no brake release button The customer or integrator is responsible to ensure that it in case of emergency is possible to release the brakes to move the manipulator axe...

Page 67: ...ler Use this procedure to release the holding brakes using the internal brake release unit in the controller cabinet Note Action See the figure in Brake release button at the front of IRC5 Compact controller on page 67 The brake release button is located on the front of the IRC5 Compact controller Note The single brake release button is used to release the brakes on all axes 1 Continues on next pa...

Page 68: ... as the button is released 3 Using the brake release unit with an external power supply Use this procedure to release the holding brakes when the robot is not connected to the controller Note Action Note Do not interchange the 24V and 0V pins If they are mixed up damage can be caused to the brake release unit and to the system board 1 Continues on next page 68 Product manual IRB 120 3HAC035728 001...

Page 69: ...o connector R1 MP A 0V to pin 12 B 24V to pin 13 CAUTION The holding brakes are released to all axes when power is connected to the pins 3 Product manual IRB 120 69 3HAC035728 001 Revision N Copyright 2009 2017 ABB All rights reserved 2 Installation and commissioning 2 3 2 Manually releasing the brakes Continued ...

Page 70: ...0 018 6 59 0 H8 81 81 75 75 75 59 A B E E xx0900000162 Holes for attachment screws 4 pcs A Holes for pins 2 pcs B Specification attachment screws and pins The table specifies the type of securing screws and washers to be used to secure the robot directly to the foundation It also specifies the type of pins to be used M10x25 Suitable screws 4 pcs Quantity 8 8 A3F Quality 10 mm Suitable washer 2 pcs...

Page 71: ... the robot to its installation site 5 2 pcs D6x20 Fit two pins to the holes in the base 6 ISO 2338 6 m6x30 A1 Make sure the robot base is cor rectly fitted onto the pins Guide the robot gently using the attachment screws while lowering it into its mounting posi tion 7 Screws M10x25 quality 8 8 A3F Fit the securing screws and washers in the attach ment holes of the base 8 Tightening torque Tighten ...

Page 72: ...gned and fitted not to damage the robot and or its parts Note Never drill a hole in the robot without first consulting ABB Maximum loads The table shows the maximum permitted loads for any extra equipment fitted in the holes intended for this purpose See figure in Fitting equipment on base and upper arm on page 73 Max load B upper arm Max load A base on each side Robot 0 3 kg 0 5 kg IRB 120 Contin...

Page 73: ...87 D C xx0900000203 Load area base max load 0 5 kg on each side A Load area upper arm max load 0 3 kg B Max 172 mm C Max radius 75 mm D NOTE Fitting holes at the base of the robot are placed on each side Continues on next page Product manual IRB 120 73 3HAC035728 001 Revision N Copyright 2009 2017 ABB All rights reserved 2 Installation and commissioning 2 3 4 Fitting equipment on robot Continued ...

Page 74: ...for the mounting flange F F 0 0 2 2 0 H 7 0 6 4 0 4X 90 4xM5 8 5 H7 0 0 012 7 4 5 3 1 5 F F 0 25 0 04 xx0900000261 74 Product manual IRB 120 3HAC035728 001 Revision N Copyright 2009 2017 ABB All rights reserved 2 Installation and commissioning 2 3 4 Fitting equipment on robot Continued ...

Page 75: ...eptable vibrations and deflections so that optimum performance can be achieved Note The allowed mounting positions are described in the product specification for the robot The requirements on the foundation are described in Requirements foundation on page 58 The x direction in the base coordinate system If the robot is wall mounted or mounted in a tilted position it is important that the x directi...

Page 76: ... Alpha must be redefined The value of Gravity Alpha should then be π 2 3 141593 2 The Gravity Alpha is a positive rotation direction around the x axis in the base coordinate system The value is set in radians Note The system parameter Gravity Alpha is not supported for all robot types It is not supported for IRB 140 IRB 1410 IRB 1600ID IRB 2400 IRB 4400 IRB 6400R IRB 6400 except for IRB 6400 200 2...

Page 77: ... position 0 000000 Default 0 Floor mounted 1 570796 90 Wall mounting 3 141593 180 Suspended mounting Examples of mounting angles tilted around the Y axis Gravity Beta xx1000000126 Floor mounted Pos 1 Mounting angle 45 Tilted Pos 2 Mounting angle 90 Wall Pos 3 Mounting angle 180 Suspended Pos 4 Continues on next page Product manual IRB 120 77 3HAC035728 001 Revision N Copyright 2009 2017 ABB All ri...

Page 78: ... IRC5 software The value of the system parameters that define the mounting angle must be redefined when changing the mounting angle of the robot The parameters belong to the type Robot in the topic Motion How to calculate a new value is detailed in Mounting angles and values on page77 Continues on next page 78 Product manual IRB 120 3HAC035728 001 Revision N Copyright 2009 2017 ABB All rights rese...

Page 79: ...parameters are redefined in the Configuration Editor in RobotStudio or on the FlexPendant Product manual IRB 120 79 3HAC035728 001 Revision N Copyright 2009 2017 ABB All rights reserved 2 Installation and commissioning 2 3 5 Setting the system parameters for a suspended or tilted robot Continued ...

Page 80: ...erences Load diagrams permitted extra loads equipment and their positions are specified in the product specification The loads must also be defined in the software as detailed in Operating manual IRC5 with FlexPendant Stopping time and braking distances The performance of the motor brake depends on if there are any loads attached to the robot For more information see product specification for the ...

Page 81: ...The working range of the following axes may be restricted This section describes how to install hardware that restricts the working range Note Adjustments must also be made in the robot configuration software system parameters References to relevant manuals are included in the installation procedures Product manual IRB 120 81 3HAC035728 001 Revision N Copyright 2009 2017 ABB All rights reserved 2 ...

Page 82: ...02 Mechanical stop axis 1 base A Mechanical stop axis 1 swing plate B xx0900000583 Mechanical stop axis 2 swing housing A Mechanical stops axis 2 upper arm B Continues on next page 82 Product manual IRB 120 3HAC035728 001 Revision N Copyright 2009 2017 ABB All rights reserved 2 Installation and commissioning 2 4 2 Mechanically restricting the working range ...

Page 83: ... lower arm A Mechanical stops axis 2 lower arm B Product manual IRB 120 83 3HAC035728 001 Revision N Copyright 2009 2017 ABB All rights reserved 2 Installation and commissioning 2 4 2 Mechanically restricting the working range Continued ...

Page 84: ...ements are fulfilled Air cleanliness Class 5 according to ISO 14644 1 when operated at a velocity of 50 Air cleanliness Class 4 according to ISO 14644 1 when operated at a velocity of 100 Classification of airborne molecular contamination Outgassing amount Parameter Classifica tion in ac cordance to ISO 14644 8 Norm based on 1m2and 1s g Total detec ted ng Performed test Temp C Test dura tion s Are...

Page 85: ...bles on page85 Robot cables The robot cable is included in the standard delivery of the robot They are completely pre manufactured and ready to plug in Connection point robot Connection point cabinet Description Cable sub category R1 MP XS1 Transfers drive power from the drive units in the control cabinet to the robot motors Robot cable power R1 SMB XS2 Transfers encoder data from and power supply...

Page 86: ... times the cable diameter for static floor cables A B xx1600002016 Diameter A Diameter x10 B 86 Product manual IRB 120 3HAC035728 001 Revision N Copyright 2009 2017 ABB All rights reserved 2 Installation and commissioning 2 6 1 Robot cabling and connection points Continued ...

Page 87: ... Robot 3HAC037038 001 Connector set R1 CP CS Customer connector Connectors upper arm housing Art no Description Position 3HAC023624 002 UTOW01210SH05 socket connector 10p flange mounted Robot 3HAC037070 001 Connector set R3 CP CS Customer connector Air connector Art no Description Position 4xM5 Robot 3HAC032049 001 SMC KJS04 M5 air connector Customer cable Continues on next page Product manual IRB...

Page 88: ... signal R1 CP CS A Inner house diameter 4 mm 4 Max 5 bar Air B Customer connections upper arm housing Customer connections upper arm housing B A xx0900000640 Value Number Description Connection Pos 49 V 500 mA 10 Customer power signal R3 CP CS A Inner house diameter 4 mm 4 Max 5 bar Air B 88 Product manual IRB 120 3HAC035728 001 Revision N Copyright 2009 2017 ABB All rights reserved 2 Installation...

Page 89: ... the robot with its normal program but with reduced speed 1 Adjusting the speed and acceleration during warm up Depending on how cold the environment is and what program is being used the speed might need to be ramped up until reached maximum The table shows examples of how to adjust the speed Speed velocity AccSet Work cycles v100 100 mm s 20 20 3 Work cycles v400 400 mm s 40 40 5 Work cycles v60...

Page 90: ...This page is intentionally left blank ...

Page 91: ...t sections and divided according to the maintenance activity Safety information Observe all safety information before conducting any service work There are general safety aspects that must be read through as well as more specific safety information that describes the danger and safety risks when performing the procedures Read the chapter Safety on page 17 before performing any service work Note If...

Page 92: ...ting time specified in operating hours More frequent running means more frequent maintenance activities SIS specified by the robot s SIS Service Information System A typical value is given for a typical work cycle but the value will differ depending on how hard each part is run The SIS used in M2004 is further described in the Operating manual Service Information System 92 Product manual IRB 120 3...

Page 93: ... Inspection Inspecting plastic covers on page 105 Regularly i Plastic covers Inspection Inspecting mechanical stops on page 96 Regularly i Mechanical stop pins Inspection Replacing the battery pack on page 109 36 months or battery low alert iii Battery pack measurement system of type RMU101 or RMU102 3 pole battery contact Replacement Replacing the battery pack on page 109 Battery low alert iv Bat...

Page 94: ... Battery charge low is displayed when remaining backup capacity robot powered off is less than 2 months The typical lifetime of a new battery is 36 months if the robot is powered off 2 days week or 18 months if the robot is powered off 16 h day The lifetime can be extended with a battery shutdown service routine See Operating manual IRC5 with FlexPendant for instructions 94 Product manual IRB 120 ...

Page 95: ...d if the spare part needs to be replaced These are specified in the replacement procedure Inspection robot cabling Use this procedure to inspect the robot cabling Note Action DANGER Turn off all electric power supply to the robot hydraulic pressure supply to the robot air pressure supply to the robot Before entering the robot working area 1 Visually inspect the control cabling between the robot an...

Page 96: ... and 3 are located as shown in the figures Axis 1 xx1000000002 Mechanical stop axis 1 base A Mechanical stop axis 1 swing plate B Continues on next page 96 Product manual IRB 120 3HAC035728 001 Revision N Copyright 2009 2017 ABB All rights reserved 3 Maintenance 3 3 2 Inspecting mechanical stops ...

Page 97: ... 3 upper arm B Axis 3 xx1000000003 Mechanical stop axis 3 lower arm A Mechanical stops axis 2 lower arm B Continues on next page Product manual IRB 120 97 3HAC035728 001 Revision N Copyright 2009 2017 ABB All rights reserved 3 Maintenance 3 3 2 Inspecting mechanical stops Continued ...

Page 98: ...These are specified in the replacement procedure Inspecting mechanical stops Use this procedure to inspect mechanical stops on axes 1 2 and 3 Information Action DANGER Turn off all electric power supply hydraulic pressure supply air pressure supply to the robot before entering the robot working area 1 See the figures in Location of mechanical stops on page 96 Inspect the mechanical stops 2 Replace...

Page 99: ... 1 swing plate B xx0900000582 Damper axis 3 A Dampers axis 2 B Required equipment Note Art no Equipment The content is defined in the section Standard toolkit on page 260 Standard toolkit Continues on next page Product manual IRB 120 99 3HAC035728 001 Revision N Copyright 2009 2017 ABB All rights reserved 3 Maintenance 3 3 3 Inspecting dampers ...

Page 100: ...gure in Location of dampers on page 99 Check all dampers for damage such as cracks existing impressions larger than 1 mm 2 Check all attachment screws for deformation 3 If any damage is detected the damper must be replaced with a new one 4 100 Product manual IRB 120 3HAC035728 001 Revision N Copyright 2009 2017 ABB All rights reserved 3 Maintenance 3 3 3 Inspecting dampers Continued ...

Page 101: ... robot on page 118 Location of timing belts The timing belts are located as shown in the figures Axis 3 xx0900000610 Timing belt axis 3 A Timing belt pulley 2 pcs B Lower arm cover C Continues on next page Product manual IRB 120 101 3HAC035728 001 Revision N Copyright 2009 2017 ABB All rights reserved 3 Maintenance 3 3 4 Inspecting timing belts ...

Page 102: ...uired if the spare part needs to be replaced These are specified in the replacement procedure Timing belt tension The table describes the timing belt tension Timing belt tension Axis New belt F 18 19 7N Axis 3 Used belt F 12 5 14 3N New belt F 7 6 8 4N Axis 5 Used belt F 5 3 6 1N Continues on next page 102 Product manual IRB 120 3HAC035728 001 Revision N Copyright 2009 2017 ABB All rights reserved...

Page 103: ...ure supply to the robot before entering the robot working area 1 xx1300002286 xx1300002287 Gain access to each timing belt by removing the cover 2 Check the timing belts for damage or wear 3 Continues on next page Product manual IRB 120 103 3HAC035728 001 Revision N Copyright 2009 2017 ABB All rights reserved 3 Maintenance 3 3 4 Inspecting timing belts Continued ...

Page 104: ...be replaced 5 Axis 3 Check each belt for tension 6 New belt F 18 19 7N If the belt tension is not correct adjust it Used belt F 12 5 14 3N Axis 5 New belt F 7 6 8 4N Used belt F 5 3 6 1N 104 Product manual IRB 120 3HAC035728 001 Revision N Copyright 2009 2017 ABB All rights reserved 3 Maintenance 3 3 4 Inspecting timing belts Continued ...

Page 105: ...page 118 Location of plastic covers Plastic covers are located as shown in the figure xx0900000607 Lower arm cover 2 pcs A Wrist side cover 2 pcs B Wrist support C Housing cover D Tilt cover E Continues on next page Product manual IRB 120 105 3HAC035728 001 Revision N Copyright 2009 2017 ABB All rights reserved 3 Maintenance 3 3 5 Inspecting plastic covers ...

Page 106: ...c power hydraulic and pneumatic pressure supplies to the robot 1 Check the plastic covers for cracks other kind of damage 2 Replace the plastic cover if cracks or damage is detected 3 106 Product manual IRB 120 3HAC035728 001 Revision N Copyright 2009 2017 ABB All rights reserved 3 Maintenance 3 3 5 Inspecting plastic covers Continued ...

Page 107: ...eased twice a year The revision of the manual published on the Documentation DVD will contain the latest updates when the Documentation DVD is released Before starting any inspection maintenance or changing activities of lubrication always contact the local ABB Service organization for more information For ABB personnel Always check ABB Library for the latest revision of the manual Technical refer...

Page 108: ...E Gearbox axis 6 F Equipment Note Equipment Includes pump with outlet pipe Oil dispenser Use the suggested dispenser or a similar one Orion OriCan article number 22590 pneumatic Nipple for quick connect fitting with o ring 108 Product manual IRB 120 3HAC035728 001 Revision N Copyright 2009 2017 ABB All rights reserved 3 Maintenance 3 4 1 Type of lubrication in gearboxes Continued ...

Page 109: ...ARNING See instructions for batteries WARNING Safety risks during handling of batteries on page 52 Location of the battery pack The location of the battery pack is inside the base cover as shown in the figure A B C xx0900000588 Cable strap A Battery pack B Base cover C Continues on next page Product manual IRB 120 109 3HAC035728 001 Revision N Copyright 2009 2017 ABB All rights reserved 3 Maintena...

Page 110: ...in the figure in Location of the battery pack on page 109 Remove the base cover from the robot by re moving its attachment screws 3 Disconnect the battery cable from the Encoder Interface Board 4 Cut the cable strap 5 Remove the battery pack 6 Refitting the battery pack Use this procedure to refit the battery pack Information Action Clean Room robots clean the joints that have been opened See Repl...

Page 111: ...n the ro bot on page 118 Note After all repair work wipe the robot free from particles with spirit on a lint free cloth 5 Update the revolution counters 6 Product manual IRB 120 111 3HAC035728 001 Revision N Copyright 2009 2017 ABB All rights reserved 3 Maintenance 3 4 2 Replacing the battery pack Continued ...

Page 112: ...shorten the life of the robot Always check that all protective covers are fitted to the robot before cleaning Never Never use compressed air to clean the robot Never use solvents that are not approved by ABB to clean the robot Never remove any covers or other protective devices before cleaning the robot Cleaning methods These following table defines what cleaning methods are allowed for ABB manipu...

Page 113: ...er cleaning Cables Movable cables need to be able to move freely Remove waste material such as sand dust and chips if it prevents cable movement Clean the cables if they have a crusty surface for example from dry release agents Product manual IRB 120 113 3HAC035728 001 Revision N Copyright 2009 2017 ABB All rights reserved 3 Maintenance 3 5 1 Cleaning the IRB 120 Continued ...

Page 114: ...This page is intentionally left blank ...

Page 115: ... perform a specific repair activity are listed in the respective procedures The details of equipment are also available in different lists in the chapter Reference information on page 255 Safety information There are general safety information and specific safety information The specific safety information describes the danger and safety risks while performing specific steps in a procedure Make su...

Page 116: ...tc Note Action Check the seal to ensure that The seal is of the correct type provided with cutting edge There is no damage to the sealing edge feel with a fingernail 1 Inspect the sealing surface before mounting If scratches or damage are found the seal must be replaced since it may result in future leakage 2 Article number is specified in Equipment on page116 Lubricate the seal with grease just b...

Page 117: ...nly when fastening the flange joint 4 O rings The following procedure describes how to fit o rings Note Action Ensure that the correct o ring size is used 1 Defective o rings including damaged or deformed o rings may not be used Check the o ring for surface defects burrs shape accuracy or deformation 2 Defective o rings may not be used Check the o ring grooves 3 The grooves must be geometrically c...

Page 118: ...nt Standard Foundry Plus ABB Orange Removing Description Action xx0900000121 Cut the paint with a knife in the joint between the part that will be removed and the struc ture to avoid that the paint cracks CAUTION Be careful not to damage the plastic covers when cutting CAUTION Seal glue is filled in the gap between lower arm cover and lower arm axis 3 timing belt side The glue should be removed an...

Page 119: ...oduct data sheet in the paint repair kit for Foundry Prime 6 3HAC036639 001 Use Touch up paint Clean Room white to paint the joint Note Always read the instruction in the product data sheet in the paint repair kit for Clean Room 7 Note After all repair work wipe the robot free from particles with spirit on a lint free cloth Product manual IRB 120 119 3HAC035728 001 Revision N Copyright 2009 2017 A...

Page 120: ... arm on page 128 4 the base Removing the cable harness in the base on page 130 Note It is necessary to perform the removal in the order as listed above CAUTION Always read the section General procedures before doing any repair work Replacing parts on the robot on page 118 Location of the cable harness The cable harness is located as shown in the figure xx0900000905 Motor axis 6 A Motor axis 5 B Co...

Page 121: ...ble grease Mobil FM222 Used for lubrication of cable con tact areas for robots with food grade lubrication Cable grease for food grade lubrication Removing the cable harness in the wrist Information Action Jog axis 1 to 90 position 1 xx1300001598 Unscrew two attachment screws securing the swing housing to the base not possible to reach with axis 1 in 0 position 2 Jog axis 1 to 0 position axis 2 to...

Page 122: ...om robot See Replacing parts on the robot on page 118 5 xx1400002899 Remove the wrist side covers on both sides 6 Parts Wrist side covers 2 pcs Attachment screws 6 pcs xx1400002900 Remove the tilt cover 7 Parts Attachment screws 4 pcs Tilt cover Continues on next page 122 Product manual IRB 120 3HAC035728 001 Revision N Copyright 2009 2017 ABB All rights reserved 4 Repair 4 3 1 Removing the cable ...

Page 123: ...w B Clamp Disconnect customer contact R2 CP CS 9 xx0900000888 Remove the connector support at axis 5 10 Parts A Attachment screws 2 pcs B Connector support Continues on next page Product manual IRB 120 123 3HAC035728 001 Revision N Copyright 2009 2017 ABB All rights reserved 4 Repair 4 3 1 Removing the cable harness Continued ...

Page 124: ...p at motor axis 6 12 Parts A Attachment screw B Clamp Disconnect connectors R2 MP5 and R2 ME5 motor axis 5 R2 MP6 and R2 ME6 motor axis 6 13 Gently pull the cables from motor axis 5 and motor axis 6 out of the wrist housing 14 Continues on next page 124 Product manual IRB 120 3HAC035728 001 Revision N Copyright 2009 2017 ABB All rights reserved 4 Repair 4 3 1 Removing the cable harness Continued ...

Page 125: ... A Attachment screws 3 pcs B Wrist housing plastic C Axis 5 shall be in 90 position xx1400002901 Unscrew the attachment screws securing motor axis 5 16 Parts Attachment screws and washers 2 pcs xx0900001019 Tilt the motor axis 5 to be able to remove the timing belt 17 Continues on next page Product manual IRB 120 125 3HAC035728 001 Revision N Copyright 2009 2017 ABB All rights reserved 4 Repair 4 ...

Page 126: ...f a Clean Room robot See Replacing parts on the robot on page 118 1 xx0900001018 Unscrew the two attachment screws secur ing the cable harness in the bracket Leave the bracket fastened in the housing 2 Parts A Attachment screws 4 pcs B Cable bracket C Axis 5 shall be in 90 position Continues on next page 126 Product manual IRB 120 3HAC035728 001 Revision N Copyright 2009 2017 ABB All rights reserv...

Page 127: ...s out of the wrist housing to axis 4 4 xx0900001023 Cut cable ties at cable bracket A 5 Parts A Cable bracket B Cable bracket Disconnect connectors R2 MP4 R2 ME4 6 Continues on next page Product manual IRB 120 127 3HAC035728 001 Revision N Copyright 2009 2017 ABB All rights reserved 4 Repair 4 3 1 Removing the cable harness Continued ...

Page 128: ...int with a knife and grind the paint edge when disassembling parts of a Clean Room robot See Replacing parts on the robot on page 118 1 xx0900000848 Remove the lower arm cover 2 Cut cable ties for motor axis 3 cables 3 Pull the cable harness out through the upper arm housing to axis 3 4 Continues on next page 128 Product manual IRB 120 3HAC035728 001 Revision N Copyright 2009 2017 ABB All rights r...

Page 129: ...attachment screws between swing housing and base 7 Carefully lift the robot and put it down close to the base of the robot CAUTION Do not stretch the cable harness 8 Cut cable ties at motor axis 2 9 Disconnect connectors R2 MP2 R2 ME2 10 Continues on next page Product manual IRB 120 129 3HAC035728 001 Revision N Copyright 2009 2017 ABB All rights reserved 4 Repair 4 3 1 Removing the cable harness ...

Page 130: ...1 If the cable harness is being reused Take a picture of the bracket from the wrist mounted on the harness Place a cable tie close to the bracket Cut old cable ties 2 Remove the bracket from the wrist on the cable harness 3 Tighten the screw after removal of bracket 4 Guide the cable harness and pull it carefully in below motor in axis 2 5 Tip Take a picture of cable harness placement in the swing...

Page 131: ... 2 pcs D Cable ties 4 pcs C D E F A B xx0900000842 Base cover A Plate B Encoder Interface Board EIB board C Bracket D Battery pack E Cable tie F Remove the base cover from the robot by removing its attachment screws 8 Continues on next page Product manual IRB 120 131 3HAC035728 001 Revision N Copyright 2009 2017 ABB All rights reserved 4 Repair 4 3 1 Removing the cable harness Continued ...

Page 132: ...board R1 ME4 6 J4 R1 ME1 3 J3 R2 EIB 13 Remove the EIB board ELECTROSTATIC DISCHARGE ESD Put the board in an ESD protective bag 14 Cut cable tie 15 Disconnect connectors R2 MP1 R2 ME1 16 Disconnect earth connection 17 xx0900000884 Unscrew the attachment screws securing the cable harness to the cable holder 18 Parts A Swing plate B Cable holder C Attachment screws 2 pcs D Cable ties 4 pcs Continues...

Page 133: ...ipment Use caution when handling cable harness 19 Carefully push and pull the complete cable harness past motor axis 1 20 Product manual IRB 120 133 3HAC035728 001 Revision N Copyright 2009 2017 ABB All rights reserved 4 Repair 4 3 1 Removing the cable harness Continued ...

Page 134: ...e cable harness in the wrist on page 142 Note It is necessary to perform the refitting in the order as listed above CAUTION Always read the section General procedures befor doing any repair work Replacing parts on the robot on page 118 Location of the cable harness The cable harness is located as shown in the figure xx0900000905 Motor axis 6 A Motor axis 5 B Motor axis 4 C Cable harness D Motor ax...

Page 135: ...wear exists and also on the plastic parts of the robot Refitting the cable harness in the base Use this procedure to refit the cable harness in the base Information Action Clean Room robots clean the joints that have been opened See Replacing parts on the robot on page 118 1 Check that the cable harness and its parts are clean and without damages 2 The picture will be good help when assem bling th...

Page 136: ... the cable harness to the cable holder with the attachment screws 7 Parts A Swing plate B Cable holder C Attachment screws 2 pcs D Cable ties 4 pcs Carefully push and pull the cable harness out from the frame CAUTION Cable harness and hoses are sensitive equipment Use caution when handling cable harness 8 Put some cable grease on the cable harness including air hoses 9 Continues on next page 136 P...

Page 137: ...it the PE cable 15 Attachment screw 4 pcs M3x8 Refit the EIB board Note Use ESD protective equipment 16 Connect board R1 ME4 6 J4 R1 ME1 3 J3 R2 EIB 17 Connect battery cables 18 Attachment screw 4 pcs M3x8 Refit the battery plate 19 Attachment screw 4 pcs M3x8 Refit the EIB plate CAUTION Cables are sensitive equipment Use caution when handling cables 20 Continues on next page Product manual IRB 12...

Page 138: ...pened See Replacing parts on the robot on page 118 1 Place the cable harness in the holder on the swing plate Put cable R2 MP2 towards back Put cable R2 ME2 towards front 2 Attachment screw M3x8 2 pcs Tighten screws in bracket 3 Secure air hoses on the swing plate with cable ties 4 Secure the cable harness on the swing plate with cable ties 5 xx1500000003 Put cable ties on the motor connections to...

Page 139: ...00000001 Refit the cable bracket on the cable harness Use the picture to localize the correct posi tion 10 M3x8 2 pcs Fasten the bracket at axis 3 motor 11 Remove the cable ties on the motor connect ors at axis 2 motor 12 Reconnect connectors R2 MP3 R2 ME3 13 Place the connector cables by the motor and fasten the connectors with cable ties around the motor 14 Continues on next page Product manual ...

Page 140: ...or cables with cable ties on the cable bracket 17 Tightening torque 1 Nm A B xx0900000879 Fit the cable bracket to the lower arm plate 18 Parts A Cable bracket B Attachment screws 2 pcs Pull the cable harness through the upper arm housing 19 Verify that the cable harness is not twisted 20 Continues on next page 140 Product manual IRB 120 3HAC035728 001 Revision N Copyright 2009 2017 ABB All rights...

Page 141: ...he joints that have been opened See Replacing parts on the robot on page 118 1 Reconnect connectors R2 MP4 R2 ME4 2 Fasten motor cables with a cable tie 3 Tightening torque 1 Nm xx0900001023 Fasten the cable harness with cable ties on the cable bracket Adjust the lenght on the cable harness so the motor cables reaches its connectors 4 Parts A Cable bracket B Cable bracket Push the cable harness in...

Page 142: ...formation Action Clean Room robots clean the joints that have been opened See Replacing parts on the robot on page 118 1 Reconnect air hoses Put them flat to make room for the motor 2 Reconnect customer contact R2 CS 3 Place the motor in axis 5 4 Refit the timing belt 5 M5x16 2 pcs and washers Fasten the motor just enough to still be able to move the motor 6 Tip Use a tension scale to have the cor...

Page 143: ...MP5 R2 ME5 10 Put the cables around the motor 11 Tightening torque 1 Nm xx0900000888 Refit connector support plastic 12 Parts A Attachment screws M3x8 2 pcs B Connector support plastic Fasten cables to axis 6 in the connector support 13 Continues on next page Product manual IRB 120 143 3HAC035728 001 Revision N Copyright 2009 2017 ABB All rights reserved 4 Repair 4 3 2 Refitting the cable harness ...

Page 144: ...ecuring the clamp at motor axis 5 CAUTION Make sure that the cables run loose from the circular edge into motor axis 6 15 Parts A Attachment screw B Clamp Reconnect connectors R2 MP6 R2 ME6 16 Continues on next page 144 Product manual IRB 120 3HAC035728 001 Revision N Copyright 2009 2017 ABB All rights reserved 4 Repair 4 3 2 Refitting the cable harness Continued ...

Page 145: ...tor cover 18 Parts A Attachment screw M3x8 1 pcs B Connector cover C Axis 5 shall be in 90 position Put cable grease on the cable harness in the wrist 19 Clean all the covers if they are dirty 20 Put cable grease inside the covers 21 Continues on next page Product manual IRB 120 145 3HAC035728 001 Revision N Copyright 2009 2017 ABB All rights reserved 4 Repair 4 3 2 Refitting the cable harness Con...

Page 146: ...e cable harness and sleeve in lower arm 26 Tightening torque 1 Nm Refit the lower arm cover at axis 4 27 Attachment screw M3x8 4 pcs Connect the robot to the power source DANGER Make sure all safety requirements are met when performing the first test run These are further detailed in the section DANGER First test run may cause injury or damage on page 47 28 Jog the robot to 90 in axis 1 29 Fasten ...

Page 147: ...a lint free cloth 31 See chapter Calibration Recalibrate the robot 32 DANGER Make sure all safety requirements are met when performing the first test run These are further detailed in the section DANGER First test run may cause injury or damage on page 47 33 Product manual IRB 120 147 3HAC035728 001 Revision N Copyright 2009 2017 ABB All rights reserved 4 Repair 4 3 2 Refitting the cable harness C...

Page 148: ...ble strap F Required equipment Note Equipment The content is defined in the section Standard toolkit on page 260 Standard tools These procedures include references to the tools required Other tools and procedures may be required See references to these procedures in the step by step instructions below Continues on next page 148 Product manual IRB 120 3HAC035728 001 Revision N Copyright 2009 2017 A...

Page 149: ...board 5 Disconnect the battery cable 6 See the figure in Location of the Encoder Interface board on page 148 Remove the bracket where the battery is fitted 7 Disconnect connectors R1 ME1 3 R1 ME4 6 R2 EIB 8 See the figure in Location of the Encoder Interface board on page 148 Remove the EIB board 9 Refitting the EIB board Use this procedure to refit the EIB board Information Action Clean Room robo...

Page 150: ...ion of the Encoder Interface board on page 148 Tightening torque 4 Nm Refit the base cover 8 See the figure in Location of the Encoder Interface board on page 148 Clean Room robots seal and paint the joints that have been opened See Replacing parts on the robot on page 118 Note After all repair work wipe the robot free from particles with spirit on a lint free cloth 9 See chapter Calibration on pa...

Page 151: ...lastic covers on the robot CAUTION Always read the section General procedures before doing any repair work Replacing parts on the robot on page 118 Continues on next page Product manual IRB 120 151 3HAC035728 001 Revision N Copyright 2009 2017 ABB All rights reserved 4 Repair 4 4 1 Replacing plastic covers ...

Page 152: ...in the section Standard toolkit on page 260 Standard tools These procedures include references to the tools required Other tools and procedures may be re quired See references to these procedures in the step by step instructions below Continues on next page 152 Product manual IRB 120 3HAC035728 001 Revision N Copyright 2009 2017 ABB All rights reserved 4 Repair 4 4 1 Replacing plastic covers Conti...

Page 153: ...n Room robot See Replacing parts on the robot on page 118 2 Remove the attachment screws securing the plastic cover 3 Remove the plastic cover 4 If the cover shall be reused keep it clean and put in a safe place 5 Refitting plastic covers Use this procedure to refit the plastic covers Information Action Clean Room robots clean the joints that have been opened See Replacing parts on the robot on pa...

Page 154: ...l and paint the joints that have been opened See Replacing parts on the robot on page 118 Note After all repair work wipe the robot free from particles with spirit on a lint free cloth 5 154 Product manual IRB 120 3HAC035728 001 Revision N Copyright 2009 2017 ABB All rights reserved 4 Repair 4 4 1 Replacing plastic covers Continued ...

Page 155: ...ures befor doing any repair work Replacing parts on the robot on page 118 Location of upper arm The upper and lower arms are located as shown in the figure xx0900000924 Upper arm complete with wrist A Continues on next page Product manual IRB 120 155 3HAC035728 001 Revision N Copyright 2009 2017 ABB All rights reserved 4 Repair 4 5 1 Replacing the upper arm ...

Page 156: ... of Loctite Loctite 7063 Loctite 574 Removing the upper arm Use this procedure to remove the upper arm Information Action Move axis 5 to a 90 position 1 DANGER Turn off all electric power hydraulic and pneumatic pressure supplies to the robot 2 CAUTION Always cut the paint with a knife and grind the paint edge when disassembling parts of a Clean Room robot See Replacing parts on the robot on page ...

Page 157: ...e harness in the wrist 6 Pull the cable harness out of the wrist housing 7 A B C xx0900000900 Remove the wrist housing plastic 8 Parts A Attachment screws 3 pcs B Wrist housing plastic C Axis 5 shall be in 90 position See section Removing the cable harness on page 120 Remove the cable harness in the upper arm housing 9 Continues on next page Product manual IRB 120 157 3HAC035728 001 Revision N Cop...

Page 158: ...Cable bracket xx0900000848 Remove the lower arm covers on both sides of the robot 11 See section Removing the cable harness on page 120 Remove the cable harness in the lower arm 12 Continues on next page 158 Product manual IRB 120 3HAC035728 001 Revision N Copyright 2009 2017 ABB All rights reserved 4 Repair 4 5 1 Replacing the upper arm Continued ...

Page 159: ...upper arm 17 Refitting the upper arm Use this procedure to refit the upper arm Information Action Clean Room robots clean the joints that have been opened See Replacing parts on the robot on page 118 1 Check that All assembly surfaces are clean and without damages 2 See Replacing the upper arm on page155 Required equipment on page 156 Remove old residues of Loctite from the assembly surfaces on ge...

Page 160: ...he upper arm housing 6 Tightening torque 4 Nm xx0900000851 Refit the lower arm plate 7 Parts A Cable harness B Lower arm plate C Motor cover D Attachment screws M4x16 q12 9 and washers 4 4 pcs E Holes for attachment screws 4 pcs F Cable guide See section Refitting the cable harness on page 134 Secure the cable harness to the lower arm plate 8 Continues on next page 160 Product manual IRB 120 3HAC0...

Page 161: ... upper arm housing 10 Tightening torque 1 Nm xx0900001023 Refit the two cable brackets on either side of motor axis 4 11 Parts A Cable bracket B Cable bracket Push the cable harness into the wrist 12 Continues on next page Product manual IRB 120 161 3HAC035728 001 Revision N Copyright 2009 2017 ABB All rights reserved 4 Repair 4 5 1 Replacing the upper arm Continued ...

Page 162: ... Parts Attachment screws 3 pcs B Wrist housing plastic C Axis 5 shall be in 90 position See section Replacing motor axis 5 on page211 Refit motor axis 5 16 Clean Room robots seal and paint the joints that have been opened See Replacing parts on the robot on page 118 Note After all repair work wipe the robot free from particles with spirit on a lint free cloth 17 Continues on next page 162 Product ...

Page 163: ...y requirements are met when performing the first test run These are further detailed in the section DANGER First test run may cause injury or damage on page 47 19 Product manual IRB 120 163 3HAC035728 001 Revision N Copyright 2009 2017 ABB All rights reserved 4 Repair 4 5 1 Replacing the upper arm Continued ...

Page 164: ... as shown in the figure xx1100000961 Required equipment Note Equipment The content is defined in the section Standard toolkit on page 260 Standard toolkit These procedures include references to the tools required Other tools and procedures may be required See references to these procedures in the step by step instructions below for example Loctite 574 Flange sealant Continues on next page 164 Prod...

Page 165: ...n page 118 2 xx0900000848 Remove the lower arm covers on both sides of the robot 3 See section Removing the cable harness in the wrist on page 121 Remove the cable harness in the lower arm 4 Unscrew the attachment screws securing the lower and upper arms and separate the two 5 Unscrew the attachment screws securing the motor cover to the lower arm plate 6 Continues on next page Product manual IRB ...

Page 166: ...that have been opened See Replacing parts on the robot on page 118 1 Check that all assembly surfaces are clean and without damages 2 See Replacing the lower arm on page164 Required equipment on page 164 Remove old residues of Loctite from the assembly surfaces on gearbox axis 2 and lower arm using Loctite 7063 3 Apply flange sealant on the assembly sur faces on axis 2 gearbox and lower arm 4 xx17...

Page 167: ...and apply Loctite 243 on this screw 7 Tightening torque 4 Nm Refit the motor cover 8 See section Replacing axis 3 motor with gear box on page 202 Refit axis 3 motor 9 Tightening torque 2 Nm Secure the upper and lower arms with the attachment screws 16 pcs 10 See section Refitting the cable harness on page 134 Refit the cable harness in the lower arm 11 Continues on next page Product manual IRB 120...

Page 168: ...rom particles with spirit on a lint free cloth 13 See chapter Calibration on page 225 Recalibrate the robot 14 DANGER Make sure all safety requirements are met when performing the first test run These are further detailed in the section DANGER First test run may cause injury or damage on page 47 15 168 Product manual IRB 120 3HAC035728 001 Revision N Copyright 2009 2017 ABB All rights reserved 4 R...

Page 169: ...rbox as one unit For further information please contact ABB CAUTION Always read the section General procedures before doing any repair work Replacing parts on the robot on page 118 Location of axis 1 motor with gearbox The axis 1 motor with gearbox is located as shown in the figure A xx0900000871 Axis 1 motor with gearbox A Continues on next page Product manual IRB 120 169 3HAC035728 001 Revision ...

Page 170: ... tools and procedures may be required See references to these procedures in the step by step instructions below Amount 2 ml Flange sealant for example Loctite 574 Shell Alvania Grease WR2 Cable grease Mobil FM222 Used for lubrication of cable contact areas for robots with food grade lubrication Cable grease for food grade lubrication Loctite 243 Continues on next page 170 Product manual IRB 120 3H...

Page 171: ...rocedures The cable harness will still be fitted or partly fitted during the procedures 2 The two most back screws that secure the swing house are difficult to reach with axis 1 in calibration position Therefore jog axis 1 to be able to reach those screws 3 Jog axis 1 to 90 position 4 xx1300001598 Remove the two attachment screws secur ing the swing housing to the base Not possible to reach with a...

Page 172: ...pplies to the robot 7 CAUTION Always cut the paint with a knife and grind the paint edge when disassembling parts of a Clean Room robot See Replacing parts on the robot on page 118 8 xx1300001124 Remove the lower arm cover on the side of the lower arm plate 9 Continues on next page 172 Product manual IRB 120 3HAC035728 001 Revision N Copyright 2009 2017 ABB All rights reserved 4 Repair 4 7 1 Repla...

Page 173: ...crews 2 pcs B Remove the cable bracket from the lower arm 2 Cut cable ties at motor axis 2 3 Disconnect connectors R2 MP2 R2 ME2 4 xx1300001604 Remove the remaining attachment screws securing the swing housing 5 If needed use two screws to press the swing housing out 6 Continues on next page Product manual IRB 120 173 3HAC035728 001 Revision N Copyright 2009 2017 ABB All rights reserved 4 Repair 4...

Page 174: ... box in a suitable size made of a material that will not damage the robot in any way Some plastic in the bottom of the box makes a good bed for the robot to rest on Carefully lift the upper arm lower arm and swing housing and put it down close to the base of the robot as far as the still connec ted cable harness permit CAUTION Do not stretch the cable harness 10 Continues on next page 174 Product ...

Page 175: ...e process 12 Removal step 3 Base Information Action CAUTION Always cut the paint with a knife and grind the paint edge when disassembling parts of a Clean Room robot See Replacing parts on the robot on page 118 1 A B xx0900000829 Base cover A Attachment screws 4 pcs B Remove the base cover 2 Continues on next page Product manual IRB 120 175 3HAC035728 001 Revision N Copyright 2009 2017 ABB All rig...

Page 176: ...t screws holding cable bracket with connectors 5 Cut the cable ties connecting the axis 1 motor cables to the base 6 Disconnect the axis 1 motor cables 7 Removal step 4 Axis 1 motor with gearbox Information Action CAUTION Always cut the paint with a knife and grind the paint edge when disassembling parts of a Clean Room robot See Replacing parts on the robot on page 118 1 Continues on next page 17...

Page 177: ...t the swing plate up and put it close to the rest of the removed arm system of the robot Use the protrude holes to force the swing plate loose CAUTION Do not damage the cable harness 4 CAUTION Protect the gearbox from dust and or foreign particles 5 Remove screw from swing plate centre 6 Continues on next page Product manual IRB 120 177 3HAC035728 001 Revision N Copyright 2009 2017 ABB All rights ...

Page 178: ...e to the rest of the removed parts of the robot CAUTION Do not damage the cable harness in the process 8 xx0900001054 Attachment screws 12 pcs A Remove the attachment screws securing the axis 1 motor with gearbox 9 Continues on next page 178 Product manual IRB 120 3HAC035728 001 Revision N Copyright 2009 2017 ABB All rights reserved 4 Repair 4 7 1 Replacing axis 1 motor with gearbox Continued ...

Page 179: ... 1 Axis 1 motor with gearbox Information Action Wipe the contact surfaces between motor flange and base clean from old residues of Loctite and other contamination 1 Make sure that all assembly surfaces are clean from old residues of Loctite and other contamination and are without dam ages motor and gearbox are clean and without damages Clean Room robots clean the joints that have been opened See R...

Page 180: ...s 1 motor and carefully push the motor cables through the recess in the bottom of the base 6 Before fitting the axis 1 motor with gearbox find the position for the attachment screws where the motor cables reaches out as long as possible into the base With motor and gearbox fitted and motorcables out of the hole remove the cable ties 7 Continues on next page 180 Product manual IRB 120 3HAC035728 00...

Page 181: ...uide over the cable harness and fit it in the base CAUTION Make sure not to damage the cable pack age xx1300001608 9 Tightening torque 2 Nm Secure the cable guide with its attachment screws 10 Apply cable grease on the inside surfaces of the cable guide 11 Continues on next page Product manual IRB 120 181 3HAC035728 001 Revision N Copyright 2009 2017 ABB All rights reserved 4 Repair 4 7 1 Replacin...

Page 182: ...00835 Area where to apply Loctite 574 A Apply flange sealant Loctite 574 on the assembly surfaces on swing plate and gear 4 xx1300001125 Apply a thin layer of cable grease on the plastic surface of the part of the cable guide fitted on the swing plate 5 Apply cable grease on cables and hoses before running the package in through the cable guide 6 Continues on next page 182 Product manual IRB 120 3...

Page 183: ...ful not to damage the cable harness 7 xx1700000769 Refit the screw in the air release hole on the swing plate and apply Loctite 243 on this screw 8 Connect connectors R2 MP1 R2 ME1 9 Tip To facilitate assembly of cable ties loosen the screws holding the plate a little bit 10 Continues on next page Product manual IRB 120 183 3HAC035728 001 Revision N Copyright 2009 2017 ABB All rights reserved 4 Re...

Page 184: ... to connect the battery cable Secure the bracket with battery if it has been removed 14 Make sure the earth cable is connected and undamaged 15 xx0900000836 Use caution and push in the plate with the EIB board and battery into the base Note Make sure that the cables are placed cor rectly and that no cables are damaged 16 Parts A Plate B Attachment screws M3x8 q12 8 4 pcs Tightening torque 2 Nm Sec...

Page 185: ...lacing parts on the robot on page 118 1 Lift swing house and armsystem upper and lower arms and hold the parts in an angle in order to be able to fit the cable holder on the swing plate Tip The easiest and most safe way to do this is with two persons working together Person 1 holding the armsystem in an angle Person 2 fitting the cable holder 2 Continues on next page Product manual IRB 120 185 3HA...

Page 186: ...ion cables with cable ties to ease pulling the cables through the base 5 Use caution and push the rest of the cables into the swing house 6 Wipe clean the contact surfaces between swing plate and swing house from old residues of Loctite and other contamination 7 Use caution and move the swing house over the cable harness and put it into fitting pos ition 8 Continues on next page 186 Product manual...

Page 187: ... been opened See Replacing parts on the robot on page 118 Note After all repair work wipe the robot free from particles with spirit on a lint free cloth 1 Connect connectors R2 MP2 R2 ME2 2 Arrange the axis 2 motor cables so that they will not be damaged 3 Secure the motor cables around the axis 2 motor with a cable tie 4 Continues on next page Product manual IRB 120 187 3HAC035728 001 Revision N ...

Page 188: ...000879 Cable bracket A Attachment screws M3x8 2 pcs B Fit the cable bracket on the lower arm plate 6 Lubricant the inside of the lower arm cover with cable grease 7 Continues on next page 188 Product manual IRB 120 3HAC035728 001 Revision N Copyright 2009 2017 ABB All rights reserved 4 Repair 4 7 1 Replacing axis 1 motor with gearbox Continued ...

Page 189: ...der to be able to reach the remaining two attachment screws securing the swing house 12 See chapter Calibration on page 225 Recalibrate the robot 13 DANGER Make sure all safety requirements are met when performing the first test run These are further detailed in the section DANGER First test run may cause injury or damage on page 47 14 Product manual IRB 120 189 3HAC035728 001 Revision N Copyright...

Page 190: ...ace gearbox axis 2 please contact ABB CAUTION Always read the section General procedures before doing any repair work Replacing parts on the robot on page 118 Location of motor axis 2 with gearbox Axis 2 motor with gearbox is located as shown in the figure A B C xx0900000847 Cable harness A Motor axis 3 B Motor axis 2 with gearbox C Continues on next page 190 Product manual IRB 120 3HAC035728 001 ...

Page 191: ...ocedures in the step by step instructions below For removing residues of Loctite Loctite 7063 Amount 2 ml Loctite 574 Removing axis 2 motor with gearbox Use this procedure to remove axis 2 motor with gearbox CAUTION Use extreme caution performing these procedures The cable harness will still be fitted or be partly fitted during the procedures Information Action Jog the robot to calibration positio...

Page 192: ...arts of a Clean Room robot See Replacing parts on the robot on page 118 3 xx0900000848 Remove the lower arm covers on both sides of the lower arm 4 A xx0900000850 Disconnect connectors R2 MP3 R2 ME3 5 Parts A Connectors Continues on next page 192 Product manual IRB 120 3HAC035728 001 Revision N Copyright 2009 2017 ABB All rights reserved 4 Repair 4 7 2 Replacing axis 2 motor with gearbox Continued...

Page 193: ... the lower arm 6 Parts A Cable bracket B Attachment screws 2 pcs xx0900000857 Remove both cable guides 7 Parts A Attachment screws 2 2 pcs B Cable guides 2 pcs Continues on next page Product manual IRB 120 193 3HAC035728 001 Revision N Copyright 2009 2017 ABB All rights reserved 4 Repair 4 7 2 Replacing axis 2 motor with gearbox Continued ...

Page 194: ...ible without causing damage and put the lower arm plate in an angle 9 Parts A Cable harness B Lower arm plate C Motor cover D Attachment screws 4 pcs E Holes for attachment screws 4 pcs F Cable guide Continues on next page 194 Product manual IRB 120 3HAC035728 001 Revision N Copyright 2009 2017 ABB All rights reserved 4 Repair 4 7 2 Replacing axis 2 motor with gearbox Continued ...

Page 195: ...le design 13 Remove screw from swing plate Use caution and put the lower and upper arms beside the swing housing and base making sure not to damage the cable har ness Tip Place the armsystem on some plastic or in a box with soft edges The armsystem must be placed in a way that it will not be able to move or be moved 14 Disconnect connectors R2 MP2 R2 ME2 15 Continues on next page Product manual IR...

Page 196: ... robots clean the joints that have been opened See Replacing parts on the robot on page 118 1 Tip Use Loctite 7063 Superclean Before refitting make sure that all assembly surfaces are clean and without damages motor and gearbox are clean and without damages 2 xx0900001050 Remove the two screws with nuts securing motor axis 2 with gearbox while being transported 3 Parts A Screws with nuts used duri...

Page 197: ...earbox 8 xx1300001120 Place the axis 2 motor with gearbox in the swing housing CAUTION In order not to damage any parts hold the two parts in a firm grip when refitting the motor with gearbox 9 Tightening torque 4 Nm xx1300001122 Secure the axis 2 motor with gearbox to the swing housing with its attachment screws 10 Attachment screws M4x20 q12 9 12 pcs Continues on next page Product manual IRB 120...

Page 198: ...e lower arm with the remaining attachment screws Tighten all screws 12 Attachment screws M4x25 q12 9 and washers 16 16 pcs xx1500000113 If the robot has an air release hole Add Loctite 243 and refit the screw in the air re lease hole on the lower arm housing 13 Continues on next page 198 Product manual IRB 120 3HAC035728 001 Revision N Copyright 2009 2017 ABB All rights reserved 4 Repair 4 7 2 Rep...

Page 199: ...re the motor cables around the axis 2 motor with cable ties Note Put the tie on the side in order to make the lower arm cover fit well 16 Tightening torque 1 Nm xx0900000857 Refit the two cable guides 17 Parts A Attachment screws M3x8 2 pcs B Cable guides 2 pcs Continues on next page Product manual IRB 120 199 3HAC035728 001 Revision N Copyright 2009 2017 ABB All rights reserved 4 Repair 4 7 2 Rep...

Page 200: ...et on the lower arm 19 Parts A Cable bracket B Attachment screws M3x8 2 pcs DANGER Check that the cable harness is intact and connected correctly on all axes 20 Continues on next page 200 Product manual IRB 120 3HAC035728 001 Revision N Copyright 2009 2017 ABB All rights reserved 4 Repair 4 7 2 Replacing axis 2 motor with gearbox Continued ...

Page 201: ...rticles with spirit on a lint free cloth 22 See chapter Calibration on page 225 Recalibrate the robot 23 DANGER Make sure all safety requirements are met when performing the first test run These are further detailed in the section DANGER First test run may cause injury or damage on page 47 24 Product manual IRB 120 201 3HAC035728 001 Revision N Copyright 2009 2017 ABB All rights reserved 4 Repair ...

Page 202: ...e section General procedures before doing any repair work Replacing parts on the robot on page 118 Location of axis 3 motor The axis 3 motor is located as shown in the figure A B C xx0900000847 Cable harness A Motor axis 3 B Motor axis 2 C Continues on next page 202 Product manual IRB 120 3HAC035728 001 Revision N Copyright 2009 2017 ABB All rights reserved 4 Repair 4 7 3 Replacing axis 3 motor wi...

Page 203: ... motor Information Action Secure the arm system before removing motor axis 3 1 DANGER Turn off all electric power hydraulic and pneumatic pressure supplies to the robot 2 CAUTION Always cut the paint with a knife and grind the paint edge when disassembling parts of a Clean Room robot See Replacing parts on the robot on page 118 3 xx0900000848 Remove the lower arm covers on both sides of the of the...

Page 204: ...Cable straps 2 pcs A xx0900000850 Disconnect connectors R2 MP3 R2 ME3 6 Parts A Connectors R2 MP3 and R2 ME3 Continues on next page 204 Product manual IRB 120 3HAC035728 001 Revision N Copyright 2009 2017 ABB All rights reserved 4 Repair 4 7 3 Replacing axis 3 motor with gearbox Continued ...

Page 205: ...timing belt from the pulleys on the motor axis 10 Parts A Timing belt B Pulleys 2 pcs Remove the motor 11 Refitting axis 3 motor Use this procedure to refit axis 3 motor Information Action Clean Room robots clean the joints that have been opened See Replacing parts on the robot on page 118 1 Continues on next page Product manual IRB 120 205 3HAC035728 001 Revision N Copyright 2009 2017 ABB All rig...

Page 206: ...ll be able to move the motor 5 New belt F 18 19 7N Move the motor to a position where a good timing belt tension is reached Tip Use a handheld spring balance to measure the timing belt tension xx1400002560 6 Used belt F 12 5 14 3N Note Do not strech the timing belt too much Tightening torque 4 Nm Secure the axis 3 motor with its attachment screws and washers 7 Continues on next page 206 Product ma...

Page 207: ...rm plate C Motor cover D Attachment screws 4 pcs E Holes for attachment screws 4 pcs F Cable guide Reconnect connectors R2 MP3 R2 ME3 9 Continues on next page Product manual IRB 120 207 3HAC035728 001 Revision N Copyright 2009 2017 ABB All rights reserved 4 Repair 4 7 3 Replacing axis 3 motor with gearbox Continued ...

Page 208: ... Attachment screws 2 pcs xx0900000849 Secure the connectors with cable ties Note Put the strap tie on the side in order to make the lower arm cover fit well 11 Parts A Cable ties 2 pcs Continues on next page 208 Product manual IRB 120 3HAC035728 001 Revision N Copyright 2009 2017 ABB All rights reserved 4 Repair 4 7 3 Replacing axis 3 motor with gearbox Continued ...

Page 209: ...rticles with spirit on a lint free cloth 13 See chapter Calibration on page 225 Recalibrate the robot 14 DANGER Make sure all safety requirements are met when performing the first test run These are further detailed in the section DANGER First test run may cause injury or damage on page 47 15 Product manual IRB 120 209 3HAC035728 001 Revision N Copyright 2009 2017 ABB All rights reserved 4 Repair ...

Page 210: ...lace the complete upper arm is described in section Replacing the upper arm on page 155 Location of motor axis 4 with gearbox Motor axis 4 with gearbox is located as shown in the figure xx0900000785 210 Product manual IRB 120 3HAC035728 001 Revision N Copyright 2009 2017 ABB All rights reserved 4 Repair 4 7 4 Replacing motor axis 4 with gearbox ...

Page 211: ... shown in the figure xx0900000890 Required equipment Note Equipment The content is defined in the section Standard toolkit on page 260 Standard toolkit These procedures include references to the tools required Other tools and procedures may be required See references to these procedures in the step by step instructions below Continues on next page Product manual IRB 120 211 3HAC035728 001 Revision...

Page 212: ...dge when disassembling parts of a Clean Room robot See Replacing parts on the robot on page 118 2 xx0900000886 Remove the wrist side covers on both sides of the wrist 3 Parts A Wrist side covers 2 pcs xx0900000887 Loosen the attachment screw securing the clamp 4 Parts A Attachment screw B Clamp Continues on next page 212 Product manual IRB 120 3HAC035728 001 Revision N Copyright 2009 2017 ABB All ...

Page 213: ...he cable straps 6 Parts A Cable straps 2 pcs Disconnect connectors for motor axis 5 R2 MP5 R2 ME5 7 xx1100000960 Unscrew the attachment screws securing motor axis 5 8 Continues on next page Product manual IRB 120 213 3HAC035728 001 Revision N Copyright 2009 2017 ABB All rights reserved 4 Repair 4 7 5 Replacing motor axis 5 Continued ...

Page 214: ...ned See Replacing parts on the robot on page 118 1 Check that all assembly surfaces are clean and without damages the motor is clean and undamaged 2 Place the motor in the wrist housing 3 Reconnect connectors R2 MP5 R2 ME5 4 xx0900000611 Refit the timing belt on the pulleys 5 Parts A Wrist side cover B Pulley 2 pcs C Timing belt Continues on next page 214 Product manual IRB 120 3HAC035728 001 Revi...

Page 215: ...belt F 5 3 6 1N Tightening torque 4 Nm Secure motor axis 5 with its attachment screws and washers 8 Tightening torque 1 Nm xx0900000888 Refit the connector support 9 Parts A Attachment screws 2 pcs B Connector support Tightening torque 1 Nm xx0900000887 Refit the clamp with its attachment screw 10 Parts A Attachment screw B Clamp Continues on next page Product manual IRB 120 215 3HAC035728 001 Rev...

Page 216: ...page 118 Note After all repair work wipe the robot free from particles with spirit on a lint free cloth 13 See chapter Calibration on page 225 Recalibrate the robot 14 DANGER Make sure all safety requirements are met when performing the first test run These are further detailed in the section DANGER First test run may cause injury or damage on page 47 15 216 Product manual IRB 120 3HAC035728 001 R...

Page 217: ...is 6 is a part of the upper arm when ordered as a spare part For more information how to replace motor axis 6 please contact ABB Location of motor axis 6 Motor axis 6 is located as shown in the figure A B xx0900000910 Motor axis 6 A Gearbox axis 6 B Product manual IRB 120 217 3HAC035728 001 Revision N Copyright 2009 2017 ABB All rights reserved 4 Repair 4 7 6 Replacing motor axis 6 ...

Page 218: ...vered as a part of motor axis 1 For information how to replace motor with gearbox axis 1 see section Replacing axis 1 motor with gearbox on page 169 218 Product manual IRB 120 3HAC035728 001 Revision N Copyright 2009 2017 ABB All rights reserved 4 Repair 4 8 1 Replacing gearbox axis 1 ...

Page 219: ...s a part of motor axis 2 For information how to replace motor with gearbox axis 2 see section Replacing axis 2 motor with gearbox on page 190 Product manual IRB 120 219 3HAC035728 001 Revision N Copyright 2009 2017 ABB All rights reserved 4 Repair 4 8 2 Replacing gearbox axis 2 ...

Page 220: ...mation how to replace gearbox axis 3 please contact ABB Location of gearbox axis 3 Gearbox axis 3 is located as shown in the figure xx0900001040 Gearbox axis 3 A Lower arm B 220 Product manual IRB 120 3HAC035728 001 Revision N Copyright 2009 2017 ABB All rights reserved 4 Repair 4 8 3 Replacing gearbox axis 3 ...

Page 221: ...he upper arm How to replace the upper arm see Replacing the upper arm on page 155 For more information how to replace gearbox axis 4 please contact ABB Product manual IRB 120 221 3HAC035728 001 Revision N Copyright 2009 2017 ABB All rights reserved 4 Repair 4 8 4 Replacing gearbox axis 4 ...

Page 222: ...Replacing the upper arm on page 155 For more information how to replace gearbox axis 5 please contact ABB Location of gearbox axis 5 Gearbox axis 5 is located as shown in the figure xx0900001041 Gearbox axis 5 A 222 Product manual IRB 120 3HAC035728 001 Revision N Copyright 2009 2017 ABB All rights reserved 4 Repair 4 8 5 Replacing gearbox axis 5 ...

Page 223: ...ing the upper arm on page 155 For more information how to replace gearbox axis 6 please contact ABB Location of gearbox axis 6 Gearbox axis 6 is located as shown in the figure A B xx0900000910 Motor axis 6 A Gearbox axis 6 B Product manual IRB 120 223 3HAC035728 001 Revision N Copyright 2009 2017 ABB All rights reserved 4 Repair 4 8 6 Replacing gearbox axis 6 ...

Page 224: ...This page is intentionally left blank ...

Page 225: ...bot that is used for calibration of the robot Calibration position A generic term for all calibration methods that aim to move the robot to calibration position Standard calibration A calibration routine that generates a new zero posi tion of the robot Fine calibration A calibration routine that in the first step generates a reference to current zero position of the robot The same calibration rout...

Page 226: ... Axis Calibration is a standard calibration method for calibration of IRB 120 and is the most accurate method for the standard calibration It is the recommended method in order to achieve proper performance The following routines are available for the Axis Calibration method Fine calibration Update revolution counters The calibration equipment for Axis Calibration is delivered as a toolkit An intr...

Page 227: ...ost If the revolution counter memory is lost the counters must be updated See Updating revolution counters on page 231 This will occur when The battery is discharged A resolver error occurs The signal between a resolver and measurement board is interrupted A robot axis is moved with the control system disconnected The revolution counters must also be updated after the robot and controller are conn...

Page 228: ...nization position for each axis Synchronization marks IRB 120 The illustrations show the synchronization marks on IRB 120 xx0900000574 Calibration mark axis 1 A Calibration mark axis 2 B Calibration mark axis 3 C Continues on next page 228 Product manual IRB 120 3HAC035728 001 Revision N Copyright 2009 2017 ABB All rights reserved 5 Calibration 5 2 1 Synchronization marks and synchronization posit...

Page 229: ... Calibration marks axis 5 E Calibration marks axis 6 F Product manual IRB 120 229 3HAC035728 001 Revision N Copyright 2009 2017 ABB All rights reserved 5 Calibration 5 2 1 Synchronization marks and synchronization position for axes Continued ...

Page 230: ...itive directions are shown in the graphic below Calibration service routines will handle the calibration movements automatically and these might be different from the positive directions shown below Manual movement directions Axis 1 Axis 2 Axis 3 Axis 4 Axis 5 Axis 6 xx0900000262 230 Product manual IRB 120 3HAC035728 001 Revision N Copyright 2009 2017 ABB All rights reserved 5 Calibration 5 2 2 Ca...

Page 231: ...resulting in an incorrect manipulator calibration Make sure the axes are positioned according to the correct calibration values not only according to the synchronization marks The correct values are found on a label located either on the lower arm underneath the flange plate on the base or on the frame At delivery the manipulator is in the correct position do NOT rotate axis 4 or 6 at power up bef...

Page 232: ... ABB menu tap Calibration xx1500000942 1 All mechanical units connected to the system are shown with their calibration status 2 Tap the mechanical unit in question xx1500000943 Continues on next page 232 Product manual IRB 120 3HAC035728 001 Revision N Copyright 2009 2017 ABB All rights reserved 5 Calibration 5 3 Updating revolution counters Continued ...

Page 233: ...s calibration method used during last field calibration Tap Manual Method Advanced xx1500000944 A screen is displayed tap Rev Counters en0400000771 4 Continues on next page Product manual IRB 120 233 3HAC035728 001 Revision N Copyright 2009 2017 ABB All rights reserved 5 Calibration 5 3 Updating revolution counters Continued ...

Page 234: ...he updating operation cannot be undone Tap Update to proceed with updating the revolution counters Tap Cancel to cancel updating the revolution counters Tapping Update updates the selected revolution counters and removes the tick from the list of axes 7 CAUTION If a revolution counter is incorrectly updated it will cause incorrect manipulator posi tioning which in turn may cause damage or injury C...

Page 235: ... calibration During the calibration procedure RobotWare moves the robot axis chosen for calibration so that the calibration tools get into contact RobotWare records values of the axis position and repeats the coming in contact procedure several times to get an exact value of the axis position WARNING Risk of pinching The contact force for large robots can be up to 150 kg Keep a safe distance to th...

Page 236: ...mation about which axes are allowed to be jogged will be given on the FlexPendant These axes are marked with Unrestricted in the FlexPendant window How to calibrate a suspended or wall mounted robot The IRB 120 is calibrated floor standing in factory prior to shipping To calibrate a suspended or wall mounted robot with the fine calibration routine the robot must first be taken down and mounted sta...

Page 237: ...n on the FlexPendant You will be guided through the calibration procedure step by step Use the following list to learn about the calibration procedure before running the RobotWare program on the FlexPendant It gives you a brief overview of the calibration procedure sequence After the calibration method has been called for on the FlexPendant the following sequence will be run 1 Choose calibration r...

Page 238: ...te Action DANGER While conducting the calibration the robot needs to be connected to power Make sure that the robots working area is empty as the robot can make unpredictable movements 1 CAUTION For robots with protection type Clean Room Always cut the paint with a knife and grind the paint edge when disassembling parts of the robot See Replacing parts on the robot on page 118 2 Use a clean cloth ...

Page 239: ...ion xx1500000942 1 All mechanical units connected to the system are shown with their calibration status 2 Tap the mechanical unit in question xx1500000943 Continues on next page Product manual IRB 120 239 3HAC035728 001 Revision N Copyright 2009 2017 ABB All rights reserved 5 Calibration 5 4 2 Axis Calibration Running the calibration procedure Continued ...

Page 240: ...required action Action Situation Press and hold the three position enabling device and press Play The three position enabling device on the FlexPendant has been released during robot movement Remove the calibration tool if it is installed and restart the calibration procedure from the beginning See Starting the calibration procedure on page 239 The RobotWare program is terminated with PP to Main I...

Page 241: ... axis 6 2 Parts A Attachment screws 4 pcs B Calibration tool C Guide pin Product manual IRB 120 241 3HAC035728 001 Revision N Copyright 2009 2017 ABB All rights reserved 5 Calibration 5 4 2 Axis Calibration Running the calibration procedure Continued ...

Page 242: ...hows the position of the calibration pins on axes 1 6 A B 1 2 3 4 5 6 C D E F xx0900000627 Calibration axis 1 Rotate axis 1 170 2 1 Calibration pins axis 1 A Calibration axis 2 Rotate axis 2 115 1 2 Calibration pins axis 2 B Calibration axis 3 Rotate axis 3 75 8 3 Calibration pins axis 3 C Calibration axis 4 Rotate axis 4 174 7 4 Calibration pins axis 4 D Calibration axis 5 6 Rotate axis 5 90 and ...

Page 243: ...ocation of calibration pins on page 242 Remove all dampers from the calibration pins 2 B C A xx1000000005 Fit the calibration tool on axis 6 3 Parts A Attachment screws 4 pcs B Calibration tool C Guide pin How to release the brakes see section Manually releasing the brakes on page 66 Release the brakes 4 See the figure in Location of calibration pins on page 242 Rotate axes 4 5 and 6 manually unti...

Page 244: ...Turn off all electric power hydraulic and pneu matic pressure supplies to the robot 1 See the figure in Location of calibration pins on page 242 Remove the dampers from the calibration pins 2 See section Manually releasing the brakes on page 66 Release the brakes 3 See figure in Location of calibration pins on page 242 Rotate axis 1 manually until the two calibration pins are in contact with each ...

Page 245: ...bration is done use the FlexPendant to jog each axis to zero degree 7 See section Synchronization marks and synchronization position for axes on page 228 The synchronisation marks on axis 2 shall now be matched 8 Choose Update Revolution counters from the Calib menu 9 Choose Axis 2 on the FlexPendant and update the revoultion counters 10 Calibration of axis 3 separately Use this procedure when cal...

Page 246: ...ll electric power hydraulic and pneu matic pressure supplies to the robot 1 See section Manually releasing the brakes on page 66 Release the brakes 2 See the figure 4 in Location of calibration pins on page 242 Rotate axis 4 manually until the two calibration pins are in contact with each other 3 Choose fine calibration from Calib menu 4 Choose Calibrate on the the FlexPendant 5 After calibration ...

Page 247: ...and 6 manually until the calibra tion pin on the wrist and the fork of the tool are in contact with each other 4 Choose fine calibration from Calib menu 5 Choose Calibrate on the the FlexPendant 6 After calibration is done use the FlexPendant to jog each axis to zero degree 7 See section Synchronization marks and synchronization position for axes on page 228 The synchronisation marks on axes 5 and...

Page 248: ...gram twice Do not change the position of the robot axes after running the program 1 This is detailed in section Synchronization marks and synchronization position for axes on page 228 Adjust the synchronization marks when the calibration is done if necessary 2 Write down the values on a new label and stick it on top of the calibration label 3 xx Remove any calibration equipment from the robot 4 24...

Page 249: ... page 228 and Updating revolution counters on page 231 Check that the synchronization marks for the axes align correctly If they do not update the revolu tion counters 6 Using the jogging window Use this procedure to jog the robot to the synchronization position of all axes Note Action On the ABB menu tap Jogging 1 Tap Motion mode to select group of axes to jog 2 Tap to select the axis to jog axis...

Page 250: ...This page is intentionally left blank ...

Page 251: ... the country in which the robot and the control unit are installed If the robot or the control unit is partially or completely disposed of the various parts must be grouped together according to their nature which is all iron together and all plastic together and disposed of accordingly These parts must also be disposed of in accordance with the current legislation of the country in which the robo...

Page 252: ...bber Gearboxes Oil grease Structure Aluminium Oil and grease Where possible arrange for oil and grease to be recycled Dispose of via an authorized person contractor in accordance with local regulations Do not dispose of oil and grease near lakes ponds ditches down drains or onto soil Incineration must be carried out under controlled conditions in accordance with local regulations Also note that Sp...

Page 253: ...t If a battery is exposed to heat for example from a blow torch it will explode Always remove all oil grease in gearboxes If exposed to heat for example from a blow torch the oil grease will catch fire When motors are removed from the robot the robot will collapse if it is not properly supported before the motor is removed Product manual IRB 120 253 3HAC035728 001 Revision N Copyright 2009 2017 AB...

Page 254: ...This page is intentionally left blank ...

Page 255: ...apter includes general information complementing the more specific information in the different procedures in the manual Product manual IRB 120 255 3HAC035728 001 Revision N Copyright 2009 2017 ABB All rights reserved 7 Reference information 7 1 Introduction ...

Page 256: ...SO 14644 1 2015i Ergonomics of the thermal environment Part 1 EN ISO 13732 1 2008 EMC Generic emission EN 61000 6 4 2007 A1 2011 IEC 61000 6 4 2006 A1 2010 option 129 1 EMC Generic immunity EN 61000 6 2 2005 IEC 61000 6 2 2005 Arc welding equipment Part 1 Welding power sources EN IEC 60974 1 2012ii Arc welding equipment Part 10 EMC requirements EN IEC 60974 10 2014ii Safety of machinery Electrical...

Page 257: ...39 37 in 3 28 ft 1 m Length 2 21 lb 1 kg Weight 0 035 ounces 1 g Weight 14 5 psi 100 kPa 1 bar Pressure 0 225 lbf 1 N Force 0 738 lbf ft 1 Nm Moment 0 264 US gal 1 L Volume Product manual IRB 120 257 3HAC035728 001 Revision N Copyright 2009 2017 ABB All rights reserved 7 Reference information 7 3 Unit conversion ...

Page 258: ... a special surface treatment to reduce the friction when tightening the screw joint Screws treated with Gleitmo may be reused 3 4 times before the coating disappears After this the screw must be discarded and replaced with a new one When handling screws treated with Gleitmo protective gloves of nitrile rubber type should be used Screws lubricated in other ways Screws lubricated with Molycote 1000 ...

Page 259: ...ssory when handling components with a weight exceeding 22 kg A wide range of lifting accessories and devices are available for each manipulator model Example Following is an example of a weight specification in a procedure Note Action CAUTION The robot weighs 25 kg All lifting accessories used must be sized accord ingly Product manual IRB 120 259 3HAC035728 001 Revision N Copyright 2009 2017 ABB A...

Page 260: ...he following table This way the tools required are the sum of the standard toolkit and any tools listed in the instruction Contents standard toolkit Tool Qty Socket head cap 2 5 17 mm 1 Torque wrench 0 5 10 Nm 1 Small screwdriver 1 Plastic mallet 1 Ratchet head for torque wrench 1 2 1 Socket head cap no 2 5 socket 1 2 bit L 110 mm 1 Small cutting plier 1 T handle with ball head 1 260 Product manua...

Page 261: ... and 6 Attachment screws M5x12 qual ity Steel 8 8 A2F 4 pcs Guide pin 3HAC037305 001 Calibration tool set Lifting tool set The following table specifies the lifting tool set needed when lifting the complete robot Note Art no Description Includes Bracket Attachment screws wrist M5x12 quality steel 8 8 A2F 2 pcs Spring washers conical wrist 5 3x11x1 2 quality Steel mZn12c 2 pcs Attachment screws DIN...

Page 262: ...ifting equipment is not detailed in the activity procedure but in the instruction delivered with each piece of lifting equipment This implies that the instructions delivered with the lifting equipment should be stored for later reference 262 Product manual IRB 120 3HAC035728 001 Revision N Copyright 2009 2017 ABB All rights reserved 7 Reference information 7 8 Lifting equipment and lifting instruc...

Page 263: ... parts and exploded views are not included in the manual but delivered as a separate document on the documentation DVD Product manual IRB 120 263 3HAC035728 001 Revision N Copyright 2009 2017 ABB All rights reserved 8 Spare parts 8 1 Spare part lists and illustrations ...

Page 264: ...This page is intentionally left blank ...

Page 265: ...uit diagram IRB 260 3HAC028647 009 Circuit diagram IRB 360 3HAC036446 005 Circuit diagram IRB 460 3HAC025691 001 Circuit diagram IRB 660 3HAC025691 001 Circuit diagram IRB 760 3HAC046307 003 Circuit diagram IRB 1200 3HAC2800 3 Circuit diagram IRB 1410 3HAC021351 003 Circuit diagram IRB 1600 1660 3HAC039498 007 Circuit diagram IRB 1520 3HAC6670 3 Circuit diagram IRB 2400 3HAC029570 007 Circuit diag...

Page 266: ...744 001 3HAC025744 001 Circuit diagram IRB 6660 3HAC029940 001 3HAC043446 005 Circuit diagram IRB 6700 3HAC13347 1 Circuit diagram IRB 7600 3HAC025744 001 3HAC050778 003 Circuit diagram IRB 14000 3HAC056159 002 Circuit diagram IRB 910SC 266 Product manual IRB 120 3HAC035728 001 Revision N Copyright 2009 2017 ABB All rights reserved 9 Circuit diagrams 9 1 Circuit diagrams Continued ...

Page 267: ...s 38 direction of axes 230 E enabling device 36 environmental information 252 ESD damage elimination 50 sensitive equipment 50 wrist strap connection point 50 F fence dimensions 31 fire extinguishing 32 FlexPendant jogging to calibration position 249 MoveAbsJ instruction 249 updating revolution counters 232 foundation requirements 58 G gearboxes location of 108 Gravity Alpha 76 Gravity Beta 76 gre...

Page 268: ... run 47 working range 37 wrist strap 50 safety risk electric parts 29 hot parts 25 hydraulic system 27 installation 22 oil change 53 operational disturbance 28 pneumatic system 27 service work 22 tools 26 voltage 29 work pieces 26 safety signals in manual 38 safety standards 256 safety zones 23 scales on robot 228 screw joints 258 securing robot 70 signals safety 38 special tools 261 speed adjusti...

Page 269: ...Z zero position checking 249 Product manual IRB 120 269 3HAC035728 001 Revision N Copyright 2009 2017 ABB All rights reserved Index ...

Page 270: ......

Page 271: ......
Page 272: ...40 BRYNE Norway Box 265 N 4349 BRYNE Norway Telephone 47 22 87 2000 ABB Engineering Shanghai Ltd Robotics and Motion No 4528 Kangxin Highway PuDong District SHANGHAI 201319 China Telephone 86 21 6105 6666 ABB Inc Robotics and Motion 1250 Brown Road Auburn Hills MI 48326 USA Telephone 1 248 391 9000 www abb com robotics 3HAC035728 001 Rev N en ...

Reviews: