AAON F1-060 Installation, Operation & Maintenance Manual Download Page 18


18 

ECM Driven Fan 

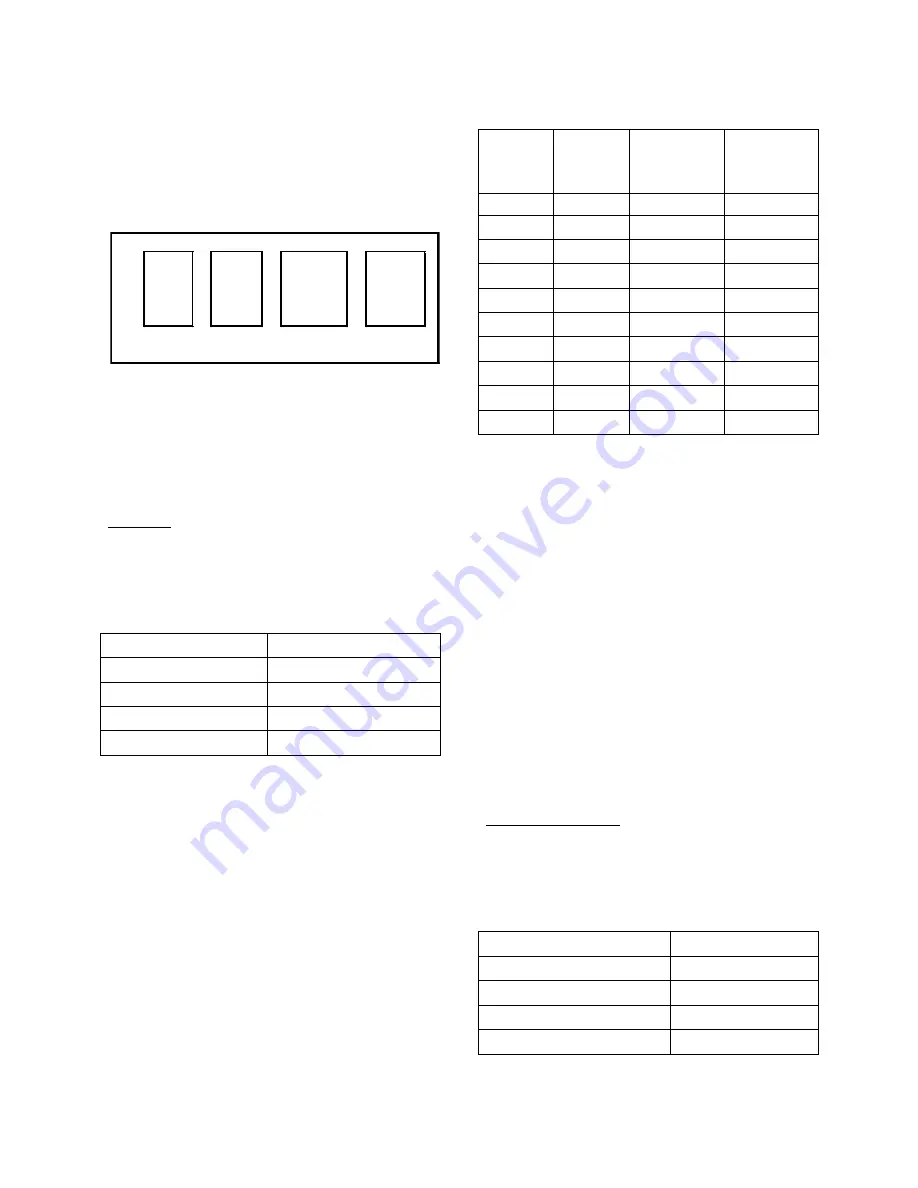
The Electrically Commutated Motor (ECM) 
has  selectable  fan  speeds  as  determined  by 
the  configuration  of  four  pins  as  shown  in 
FIGURE 2.  


Figure 2 - Example Configuration of ECM 

Fan Taps  

 
Adjust  the  taps  as  desired  for  cooling, 
dehumidification,  and  heating  according  to 
the following instructions. 
 
Cooling: 
Units  are  preprogrammed  from  the  factory 
for a rated airflow rate of 400 cfm per ton as 
shown in Table 3. 
 

Table 3 - Factory Preset Air Flow 

Model 

Preset cfm 

F1-060 

2000 

F1-048 

1600 

F1-036 

1200 

F1-024 

800 

* Maximum total static is 2.25” w.g. 
 
The 

high

 speed for cooling may be selected 

by  setting  the  COOL  and  ADJUST  fan 
speed  taps  (shown  in  Figure  2).  The  setting 
combinations are shown in Table 4.   
 
Note:  On  the  ADJUST  tap,  both  of  the  ‘1’ 
selections  have  the  same  effect  on  motor 
speed. 


Table 4 - Cooling Fan Speed Tap Settings 

F1-060/  F1-036/ 

COOL  

Tap 

ADJUST 

Tap 

F1-048 

F1-024 

(cfm) 

(cfm) 

2000 

1200 

2000 

1200 

1840 

1150 

1700 

1020 

1700 

1020 

1600 

1000 

1380 

920 

1360 

850 

1200 

800 

1020 

680 

 
A  signal  from  the  thermostat,  showing  a 
need  for  dehumidification,  will  cause  the 
unit  to  slow  the  fan  speed  in  order  to  allow 
the  air  moving  across  the  coil  to  get  colder 
thereby  better  dehumidifying  the  air.  Fist 
stage  dehumidification  has  a  low  fan  speed 
of  67%  of  the  selected  max  speed.  Second 
stage  dehumidification  has  a  fan  speed  of 
45% of the selected max speed. NOTE: The 
Modulating Hot  Gas  Reheat  option must be 
selected  to  have  a  second  stage  of 
dehumidification. 
 
In  this  comfort  cooling  application  of  the 
ECM fan motor, heat  and cool taps, A & D 
have the same effect on motor speed. 
 
Humidity Control: 
Adjust the DELAY tap for humidity control 
that  is  suitable  for  the  climate  according  to 
Table 5.  
 

Table 5 - Climate Settings 

CLIMATE 

DELAY Tap 

Humid 

Sub-humid/Dry 

Semi-Arid 

Arid/Hyper-Arid 


A

----

A

-  -

1

-  -

A

----

B

-  -

B

-  -

+

-  -

B

-  -

C

-  -

C

-  -

-

----

C

-  -

D

-  -

D

----

1

-  -

D

-  -

HEAT

COOL

ADJUST

DELAY

Summary of Contents for F1-060

Page 1: ...inity of this or any other appliance WARNING WARNING QUALIFIED INSTALLER Improper installation adjustment alteration service or maintenance can cause property damage personal injury or loss of life Installation and service must be performed by a trained qualified installer A copy of this IOM should be kept with the unit WARNING These instructions are addressed primarily to the installer however us...

Page 2: ...ng and Handling the Unit 16 Sealing 16 Cooling Equipment 16 Heating Equipment 16 Field Wiring MCA and MOP 17 Heat Pump 17 ECM Driven Fan 18 Reheat Coil Refrigerant Piping 19 Condensate Drain Piping 20 Electrical 21 Thermostat 22 Filters 22 Charging Refrigerant 22 Evaporator Coil 24 Startup 26 General 26 Check Out 26 Procedures 26 Electric Heat Section Procedures 27 Refrigerant Cooling Section Proc...

Page 3: ...eating 29 Filters 29 Replacement Parts 30 AAON Longview Product Support 30 Refrigerant Piping Diagrams 32 Thermostat Installation and Wiring 40 F1 Series Startup Form 50 Maintenance Log 53 Literature Change History 54 R58420 Rev B 171016 ACP 29902 ...

Page 4: ...ng Unit with Optional Accumulator 34 Figure 7 Modulating Hot Gas Reheat Piping Diagram with Air Handling Unit below Condensing Unit with Optional Accumulator 35 Figure 8 Heat Pump Piping Diagram with Indoor Unit above Outdoor Unit 36 Figure 9 Heat Pump Piping Diagram with Outdoor Unit above Indoor Unit 37 Figure 10 Heat Pump Piping Diagram with Modulating Hot Gas Reheat and Indoor Unit above Outdo...

Page 5: ...ould result in dangerous operation serious injury death or property damage Before servicing disconnect all electrical power to the unit More than one disconnect may be provided When servicing controls label all wires prior to disconnecting Reconnect wires correctly Verify proper operation after servicing Secure all doors with key lock or nut and bolt WARNING Electric shock hazard Before servicing ...

Page 6: ...ING UNIT HANDLING To prevent injury or death lifting equipment capacity shall exceed unit weight by an adequate safety factor Always test lift unit not more than 24 inches high to verify proper center of gravity lift point to avoid unit damage injury or death WARNING ROTATING COMPONENTS Unit contains fans with moving parts that can cause serious injury Do not open door containing fans until the po...

Page 7: ... inhibitor in the cleaning solution CAUTION CAUTION Do not use oxygen acetylene or air in place of refrigerant and dry nitrogen for leak testing A violent explosion may result causing injury or death WARNING Always use a pressure regulator valves and gauges to control incoming pressures when pressure testing a system Excessive pressure may cause line ruptures equipment damage or an explosion which...

Page 8: ...model you have purchased 4 READ THE ENTIRE INSTALLATION OPERATION AND MAINTENANCE MANUAL OTHER IMPORTANT SAFETY PRECAUTIONS ARE PROVIDED THROUGHOUT THIS MANUAL 5 Keep this manual and all literature safeguarded near or on the unit PVC Polyvinyl Chloride and CPVC Chlorinated Polyvinyl Chloride are vulnerable to attack by certain chemicals Polyolester POE oils used with R 410A and other refrigerants ...

Page 9: ... B 10 kW C 15 kW D 20 kW E 25 kW G Hot Water Heating FEATURE 1 MOTORS A ECM 1 2 hp B ECM 3 4 hp C ECM 1 0 hp FEATURE 2 FILTERS 0 Standard 1 FEATURE 3 CONTROLS 0 Standard Terminal Block FEATURE 4 BLANK 0 Standard FEATURE 5 REFRIGERATION 0 Standard Split System Air Conditioner C Split System Heat Pump D Split System Air Conditioner Modulating Hot Gas Reheat F Split System Heat Pump Modulating Hot Ga...

Page 10: ... conform to the ICC standards of the International Mechanical Code the International Building Code Installation of Air Conditioning and Ventilating Systems Standard NFPA 90A and local building plumbing and waste water codes All appliances must be electrically grounded in accordance with local codes or in the absence of local codes the current National Electric Code ANSI NFPA 70 or the current Cana...

Page 11: ... shipped units Do the following upon receipt 1 Assure that freight carrier is in compliance with Bill of Lading instructions 2 Inspect delivery before signing Bill of Lading If damage is found or items are missing 1 Note on Bill of Lading immediately 2 Call carrier immediately to file a freight claim and to schedule an inspection 3 Photograph damage if possible Do not under any circumstances conne...

Page 12: ...to coils coil and drain stub outs or other parts protruding beyond the extents of the unit casing Always handle the unit by its exterior casing and never by any of the protruding parts Before Installation Carefully read all instructions for the installation prior to installing unit Make sure each step or procedure is understood and any special considerations are taken into account before starting ...

Page 13: ...l cause excessive liquid to return to the compressor As the liquid concentration builds up oil is washed out of the compressor leaving it starved for lubrication The compressor life will be seriously shortened by reduced lubrication and the pumping of excessive amounts of liquid oil and refrigerant Note Low Ambient Operation Air cooled DX units without a low ambient option such as condenser fan cy...

Page 14: ...unit Service and Installation Clearance Before setting the air handling unit into place caution must be taken to provide clearance for unit panels that must be accessible for periodic service These areas contain the controls safety devices refrigerant piping shut off valves and filter access F1 series air handling units require a minimum of 36 inches of service clearance on the access panel side o...

Page 15: ... from the bottom throughout the lift Suspend the air handling unit as shown in the following Figure 1 An auxiliary drain pan that covers the entire unit would be required for above ceiling installations The air handling unit must be installed level and care should be taken to prevent damage to the cabinet Other installation provisions may be necessary according to job specifications and local code...

Page 16: ...o air handling unit Charge unit with R 410A refrigerant to the recommended superheat sub cooling in the Charging Refrigerant section of this manual Make sure air handling unit thermal expansion valve bulb is mounted with good thermal contact on the suction line on a horizontal section close to the evaporator but outside the cabinet in the 4 or 8 o clock position and well insulated Lines should be ...

Page 17: ... is the maximum allowable circuit breaker size that will properly disconnect power to the equipment under anticipated fault conditions In the following tables locate the kW of the heater to be field installed and then choose the corresponding MCA and MOP values to correctly size the wire gauge s and circuit breaker s respectively Table 1 Electric Heat Minimum Circuit Ampacity 230V 208V Line 1 Line...

Page 18: ... F1 060 F1 036 COOL Tap ADJUST Tap F1 048 F1 024 cfm cfm 2000 1200 A 1 2000 1200 D 1 1840 1150 B 1700 1020 A 1700 1020 D 1600 1000 B 1 1380 920 C 1360 850 B 1200 800 C 1 1020 680 C A signal from the thermostat showing a need for dehumidification will cause the unit to slow the fan speed in order to allow the air moving across the coil to get colder thereby better dehumidifying the air Fist stage d...

Page 19: ...shipped already installed on the leaving air section of the air handling unit A liquid receiver is shipped loose with the unit for field installation See matching condensing unit installation operation maintenance manual to determine acceptable refrigerant line size 1 Run a hot gas line from the outdoor unit and connect it to the inlet of the stub out on the reheat coil a For vertical up flow unit...

Page 20: ...e reheat supply air temperature setpoint is correctly set on the control board This temperature should be set to the desired space temperature when the unit is in cooling mode If that temperature is unknown at the time of installation set the setpoint to 72 F The reheat system provides for neutral neither hot nor cold air to the space so that the unit can dehumidify the air without over cooling or...

Page 21: ...any air conditioning equipment even when they have a built in slope to the drain will have moisture present and will require periodic cleaning to prevent any build up of algae or bacteria Cleaning of the drain pans will also prevent any possible plugging of the drain lines and overflow of the pan itself Some means to clean out the P trap should be provided Only qualified personnel should clean dra...

Page 22: ...entative of the charge than evaporator superheat but both measurements must be taken Before Charging The unit being charged must be at or near full load conditions before adjusting the charge Units equipped with hot gas reheat must have the hot gas reheat valves closed to get the proper charge Units equipped with hot gas reheat must be charged with the hot gas valve closed while the unit is in coo...

Page 23: ...rom the measured suction line temperature in Step 1 to determine the evaporator superheat 5 Compare calculated superheat to TABLE 7 for the appropriate unit type and options Adjusting Sub cooling and Superheat Temperatures The system is overcharged if 1 the sub cooling temperature is too high and 2 the evaporator is fully loaded low loads on the evaporator result in increased sub cooling and 3 the...

Page 24: ...ittings and other pipes in the sections Evaporator Coil The indoor coil is pressurized The copper caps must be punctured to permit a gradual escape of the pressure prior to unsweating those caps Immediately couple the tubing to the indoor unit to avoid exposing the coils to moisture A properly sized filter drier is furnished in the condenser When making solder connections make sure dry nitrogen fl...

Page 25: ... 96 8 57 161 0 84 249 8 111 369 1 138 526 6 31 98 8 58 163 8 85 253 7 112 374 2 139 533 3 32 100 9 59 166 7 86 257 5 113 379 4 140 540 1 33 102 9 60 169 6 87 261 4 114 384 6 141 547 0 34 105 0 61 172 5 88 265 4 115 389 9 142 553 9 35 107 1 62 175 4 89 269 4 116 395 2 143 560 9 36 109 2 63 178 4 90 273 5 117 400 5 144 567 9 37 111 4 64 181 5 91 277 6 118 405 9 145 575 1 38 113 6 65 184 5 92 281 7 1...

Page 26: ...s 3 Clean out any debris that may be present 4 Check wheel alignment and tightness of fan drives 5 Check bearing locking collars if provided and fan wheel set screws for tightness 6 Turn fan wheels to assure free rotation 7 Ensure electrical supply matches the unit nameplate 8 Ensure condensate lines are correctly connected 9 Check local codes for any special provisions 10 Replace and or close all...

Page 27: ...ion Check all equipment ductwork and piping to verify that all work is complete and equipment is properly installed and mounted Improperly installed equipment or ductwork can affect readings 2 Perform condensing unit start up checks in addition to these air handling unit checks according to the unit manufacturer s instructions 3 Ensure that there is no construction debris in the unit 4 Check the u...

Page 28: ...pulate temperatures pressures or flow rates as all systems have unique operating characteristics and improper balancing can result in undesirable noises and operation Controls A variety of controls and electrical accessories may be provided with the equipment Identify the controls on each unit by consulting appropriate submittal or order documents and operate according to the control manufacturer ...

Page 29: ...thermostat to the OFF position Turn the electrical power to the unit to the OFF position at the disconnect switch Check set screw for tightness Coils Coils should be inspected and cleaned annually to ensure there is no obstruction to airflow Dirty evaporator coils will eventually freeze up and often result in a time consuming and expensive service call Clean filters will help to prevent dirt from ...

Page 30: ...03 Gum Springs Road Longview TX 75602 Ph 903 236 4403 Fax 903 236 4463 www aaon com Note Before calling technician should have model and serial number of the unit available for the service department to help answer questions regarding the unit General Piping from the condensing unit to the air handling unit is the responsibility of the installing contractor Use only clean type ACR copper tubing th...

Page 31: ...31 ...

Page 32: ...32 Refrigerant Piping Diagrams Figure 4 Modulating Hot Gas Reheat Piping Diagram with Air Handling Unit above Condensing Unit ...

Page 33: ...33 Figure 5 Modulating Hot Gas Reheat Piping Diagram with Air Handling Unit below Condensing Unit ...

Page 34: ...34 Figure 6 Modulating Hot Gas Reheat Piping Diagram with Air Handling Unit above Condensing Unit with Optional Accumulator ...

Page 35: ...35 Figure 7 Modulating Hot Gas Reheat Piping Diagram with Air Handling Unit below Condensing Unit with Optional Accumulator ...

Page 36: ...36 Figure 8 Heat Pump Piping Diagram with Indoor Unit above Outdoor Unit ...

Page 37: ...37 Figure 9 Heat Pump Piping Diagram with Outdoor Unit above Indoor Unit ...

Page 38: ...38 Figure 10 Heat Pump Piping Diagram with Modulating Hot Gas Reheat and Indoor Unit above Outdoor Unit ...

Page 39: ...39 Figure 11 Heat Pump Piping with Modulating Hot Gas Reheat and Outdoor Unit above Indoor Unit ...

Page 40: ...40 Thermostat Installation and Wiring Figure 12 2 Stage Cooling with Electric Heat ...

Page 41: ...41 Figure 13 2 Stage Cooling with Heat Pump and Electric Heat ...

Page 42: ...42 Figure 14 2 Stage Cooling and Electric Heat with Hot Gas Reheat and Humidistat ...

Page 43: ...43 Figure 15 Main Control Board for Units Equipped with Modulating Hot Gas Reheat ...

Page 44: ...44 Figure 16 Field Wiring Connections for an F1 Series Air Handling Unit Electric heating connections are made at LVTB3 ...

Page 45: ...45 Figure 17 5kW Electric Heat ...

Page 46: ...46 Figure 18 10 kW Electric Heat ...

Page 47: ...47 Figure 19 15 kW Electric Heat ...

Page 48: ...48 Figure 20 20 kW Electric Heat ...

Page 49: ...49 Figure 21 25 kW Electric Heat ...

Page 50: ...Yes No 2 Is the unit level Yes No 3 Are the unit clearances adequate for service and operation Yes No 4 Do all access doors open freely and are the handles operational Yes No 5 Have all shipping braces been removed Yes No 6 Have all electrical connections been tested for tightness Yes No 7 Does the electrical service correspond to the unit nameplate Yes No 8 On 208 230V units has transformer tap b...

Page 51: ...at Discharge N A N A Suction N A Liquid N A Refrigeration System 1 Reduced Capacity Cooling Mode Pressure Saturated Temperature Line Temperature Sub cooling Superheat Discharge N A N A Suction N A Liquid N A Refrigeration System 1 Full Capacity Heating Mode Heat Pump Only Pressure Saturated Temperature Line Temperature Sub cooling Superheat Discharge N A N A Suction N A Liquid N A Refrigeration Sy...

Page 52: ...h fluid Yes No 3 Has air been bled from the heat exchangers and piping Yes No 4 Is the glycol the proper type and concentration N A if water Yes No 5 Is there a minimum load of 50 of the design load Yes No 6 Has the water piping been insulated Yes No 7 What is the freeze point of the glycol N A if water ______________________________ Air Cooled Condenser Alignment Check Rotation Nameplate Amps____...

Page 53: ...ocument any service repair or adjustments AAON Service and Warranty Departments are available to advise and provide phone help for proper operation and replacement parts The responsibility for proper startup maintenance and servicing of the equipment falls to the owner and qualified licensed technician Entry Date Action Taken Name Tel ...

Page 54: ... number description June 2010 Revision of the IOM adding PVC and CPVC piping Caution April 2012 Update of the IOM adding the electronic startup form adding the index of tables and figures and updating the table of contents November 2015 Added Figure 3 TXV Bulb Position August 2016 Removed the section on refrigerant line sizing See condensing unit products for this information October 2017 Updated ...

Page 55: ...55 ...

Page 56: ... It is the intent of AAON to provide accurate and current product information However in the interest of product improvement AAON reserves the right to change pricing specifications and or design of its product without notice obligation or liability Copyright AAON all rights reserved throughout the world AAON and AAONAIRE are registered trademarks of AAON Inc Tulsa OK ...

Reviews: